How to Make Cyanotype Prints on Fabric
As soon as the sun gets strong and the plants are in their glory I think about using the sun to print! It’s a prefect reason to get outdoors and get creative ideas flowing. I’m so pleased to introduce how to make Cyanotype prints on Fabric with you!

What is Cyanotype?
Cyanotype is a process that utilizes UV (sunlight) to create prints. It is a photographic method that quite inexpensively creates a cyan blue print. Variations in the technique can allow many creative solutions. It was invented in 1842 by Sir John Herschel. It involves a couple chemicals; potassium ferricyanide & ammonium ferric citrate. If you would like to learn the chemical theory you can read here.
I am excited to use this process as I am passionate about using dyeing in my creative use of fabric. I do also have very vivid memories of the days in the darkroom developing my own black & white photographs & prints.
What do you need to Cyanotype on Fabric?
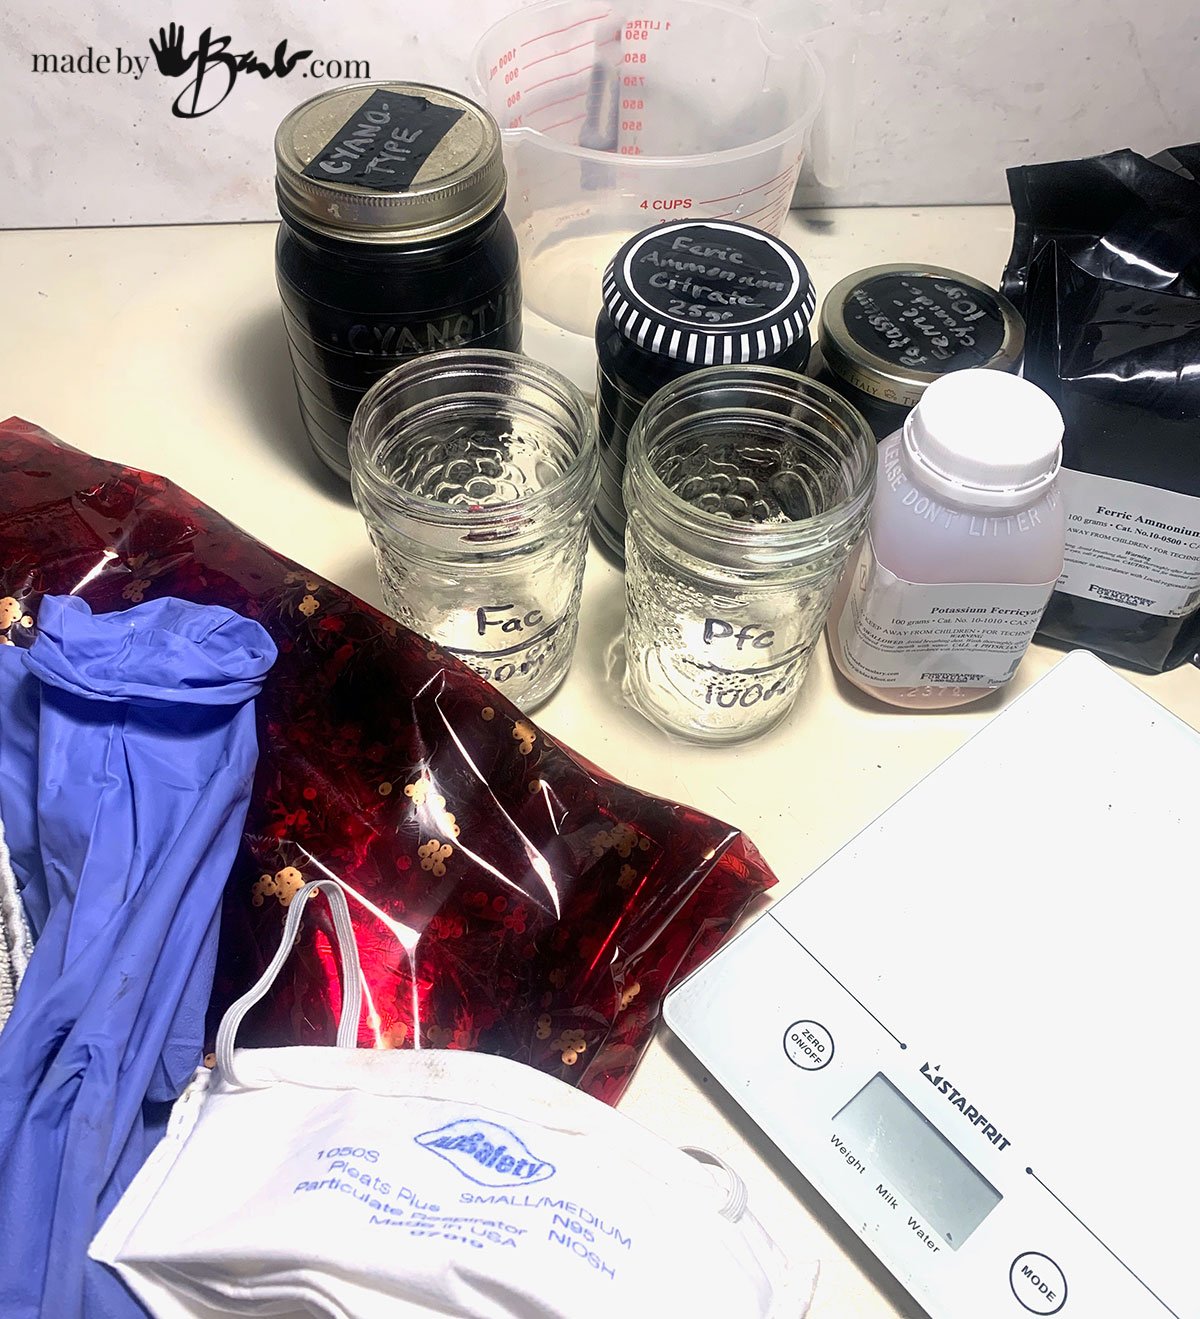
There are two chemical compounds required to create the cyanotype solution, Potassium Ferricyanide, and Ferric Ammonium Citrate. I bought a bit larger quantity from a photo-supply store but you can get convenient kits as well. There are options to buy pre-treated cyanotype fabrics and papers as well.
The basic recipe of cyanotype chemicals is 10g of Potassium Ferricyanide mixed with water to make up to 100ml. Measure 25g of Ferric Ammonium Citrate and add water to bring it up to 100 ml as well. Mix these two solutions together and keep in a dark container. The solutions should be well dissolved and it is also recommended to sit for a bit for assurance.

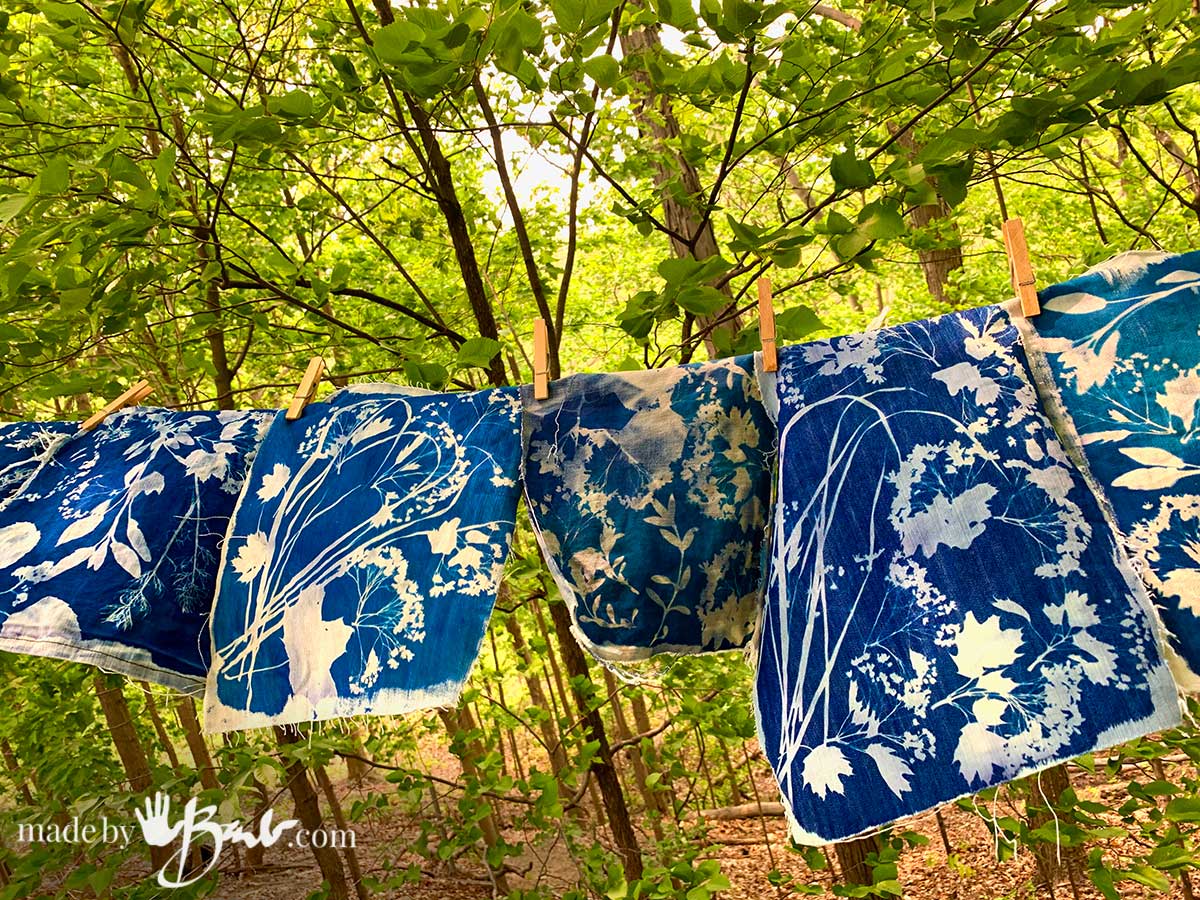
The fabric should a natural fibre like cotton, linen, hemp, silk, rayon etc. Make sure it is clean and scoured. I am using up some of my stash of denim, bleached and light.
Stay safe and use gloves and a good mask while measuring the powders. Prepare your work surfaces in case of spillage. You will. need a scale to measure the chemicals
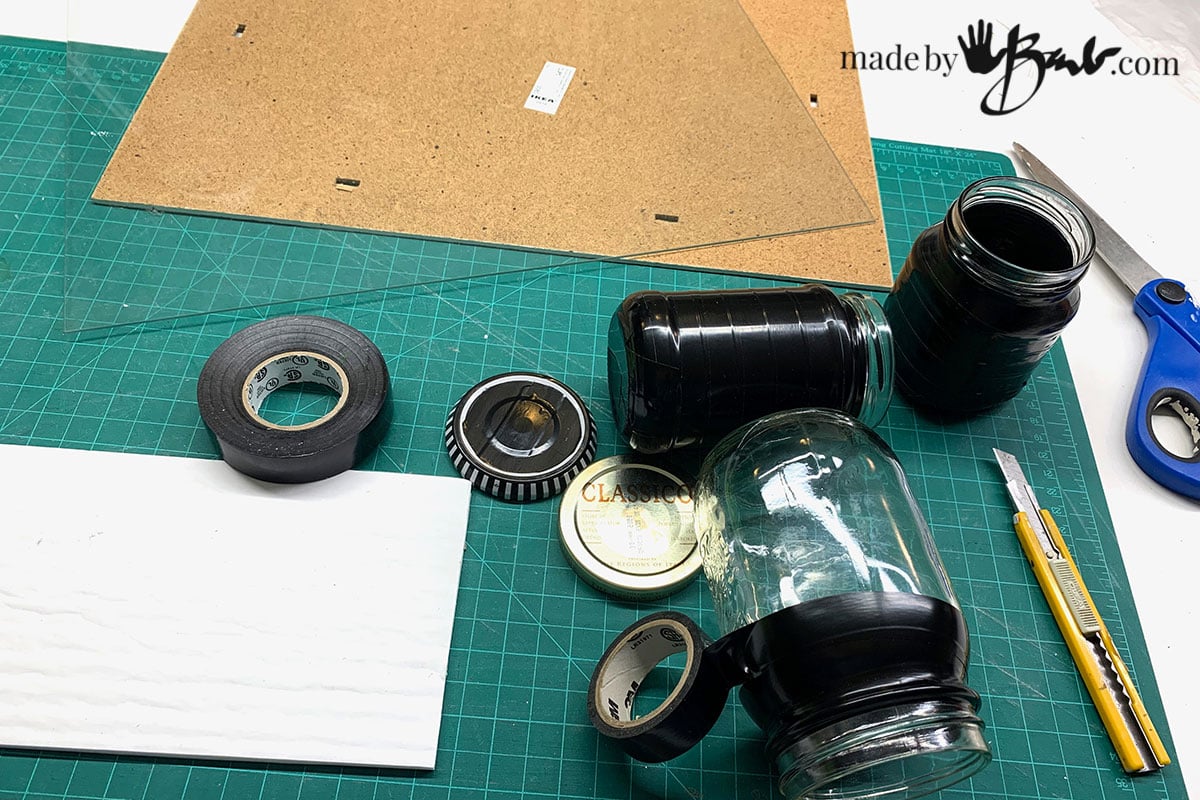
Prepare a vessel to hold the chemicals once mixed. Since the mixed solution is light sensitive it needs to be stored in a dark bottle. You can wrap a jar with black electrical tape if need be.

How to make the Cyanotype Solution:
Since the solution is light sensitive I covered my light with some red cellophane. I recall that was what we similarly had in the darkroom for photography. The LED and Incandescant bulbs we have do emit a bit of UV rays to I was extra cautious. I also covered the window.
Measure out 10 Grams of Potassium Ferricyanide into a jar and add enough water to bring to 100ml volume. Mix carefully.
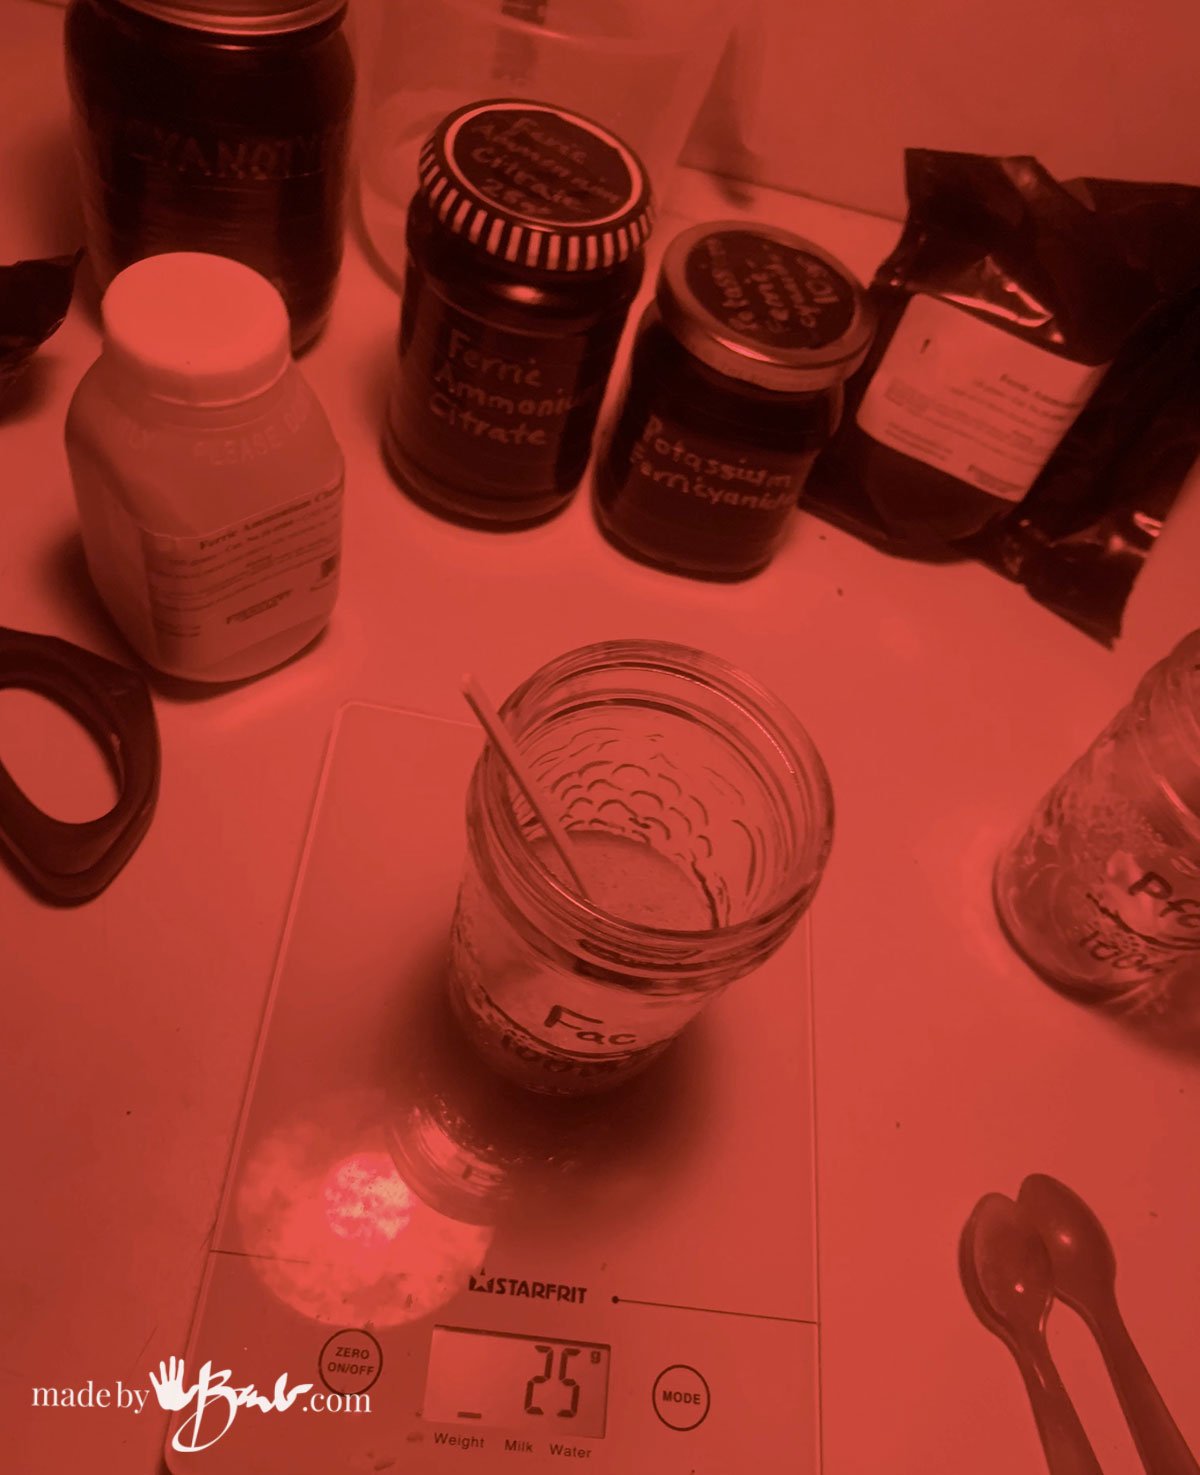
Measure out 25 Grams of Ferric Ammonium Citrate into a jar and add enough water to bring to 100ml volume. Mix carefully.
Combine the two solutions and allow time to fully dissolve. Use once dissolved or keep in dark til ready for use.
Preparing Your Fabric:
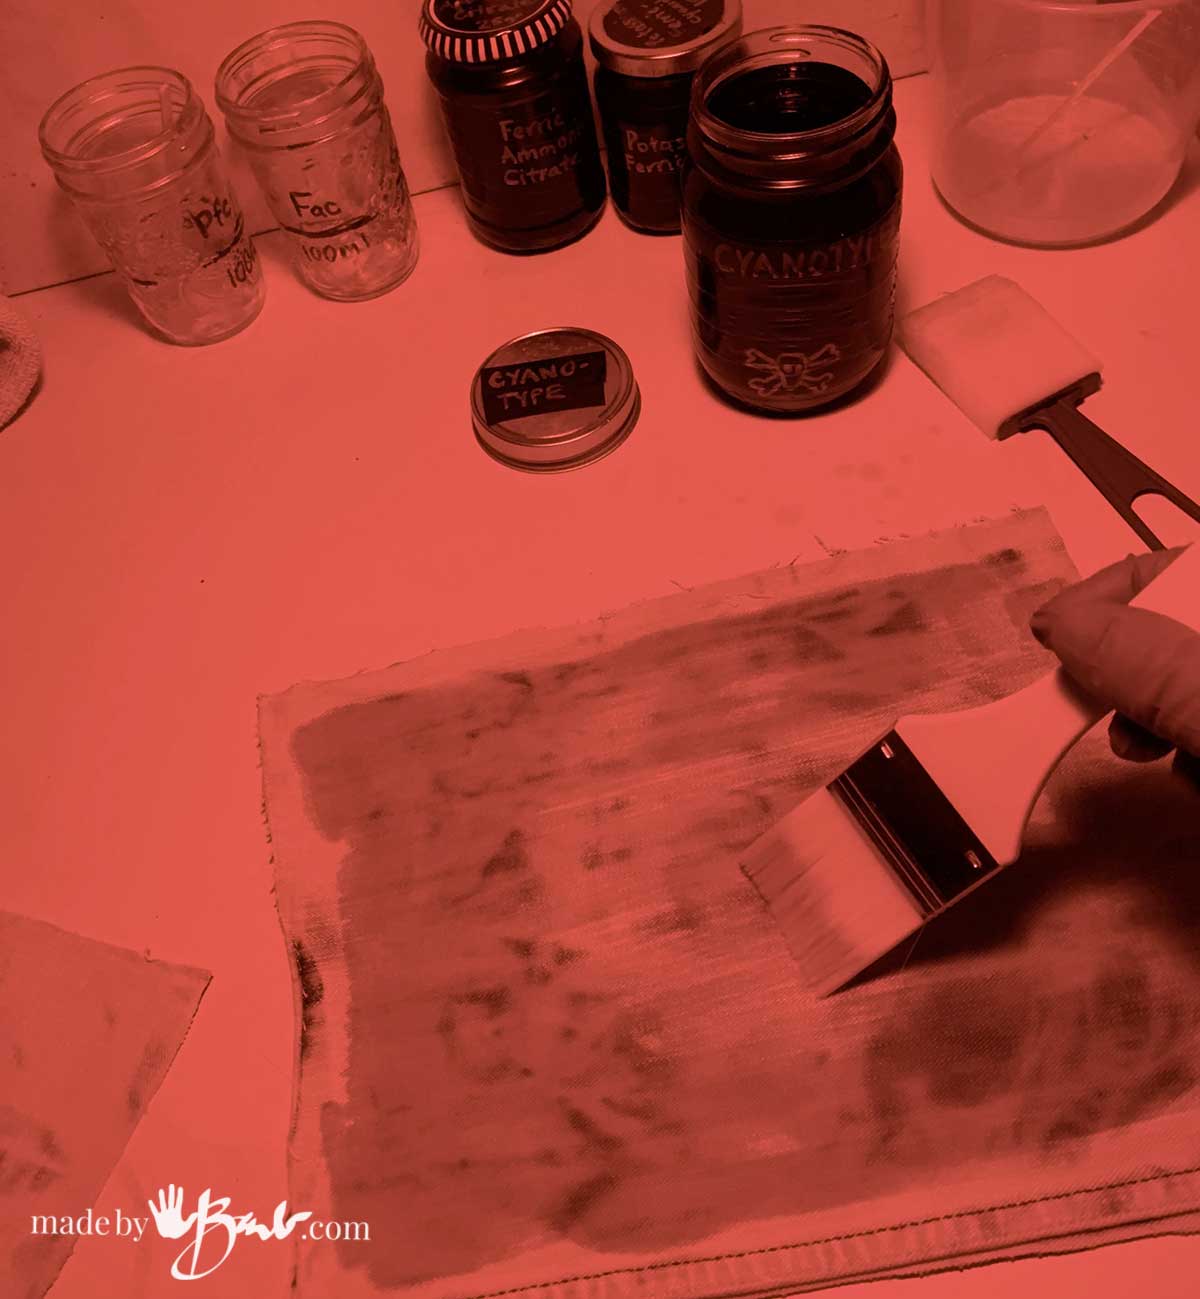
Once your solution is ready it is only a matter of applying to the fabric (paper is the same process). Choose a brush or foam brush that does not drip too much and is soft enough to spread the thin solution. This part of the process also happens in low light or dark.
You can expose the wet fabric with designs to the sun right away or let it dry. I opted for letting it dry in a dark closet so that there was less chance of contamination.
What to Use for Cyanotype Designs:
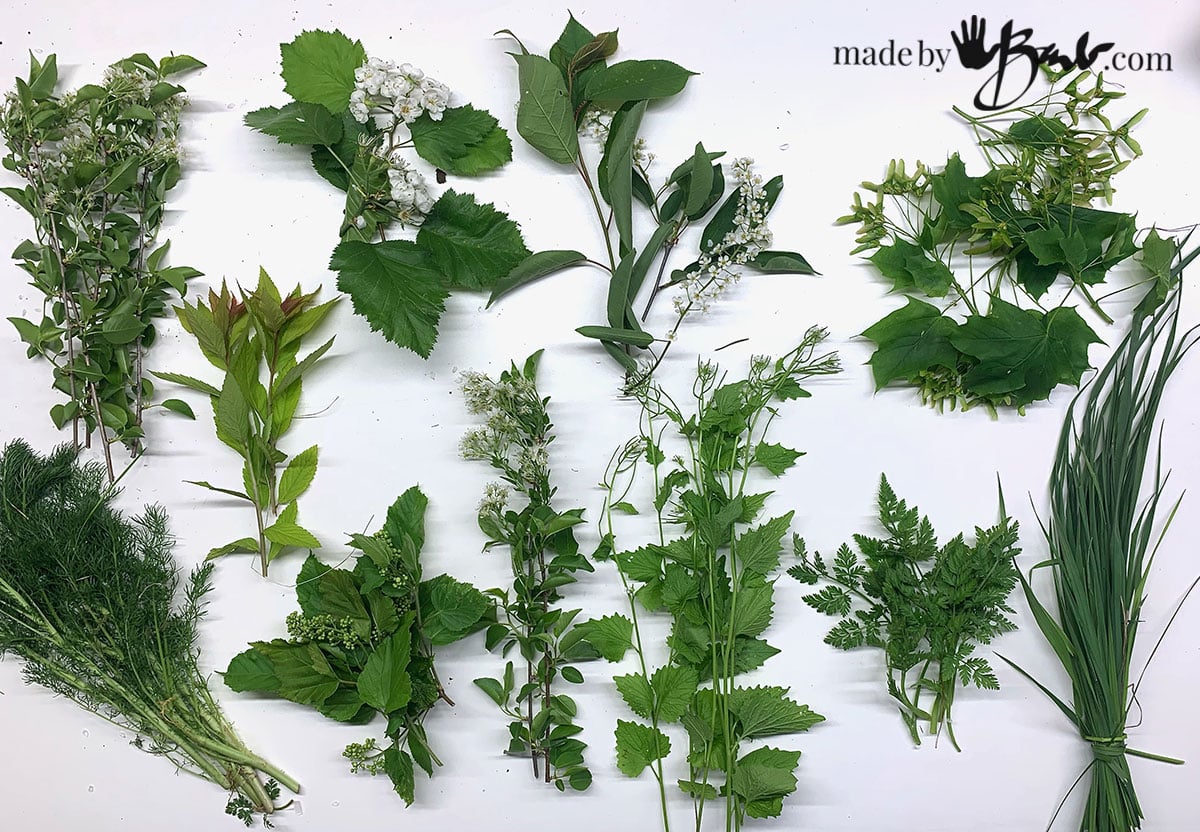
Well, this is really only some suggestions as there are so many possibilities of what to use for a cyanotype print. Some of the easiest things are botanical plants, leaves and flowers. The uniqueness of the print comes from the choice of material. Light can pass through a variety of objects to make creative prints. Things like fabric, lace, thread, can also create a detailed print due to their nature. I am planning on digging out some old negative films as well (stay tuned). This opens up a lot of possibilities for printmakers and artists who do not want to draw.

Any roadside ditch can have amazing specimens if you are looking for botanical things. Look at the lovely lines from some old weeds! You have endless options of how to lay out your designs.
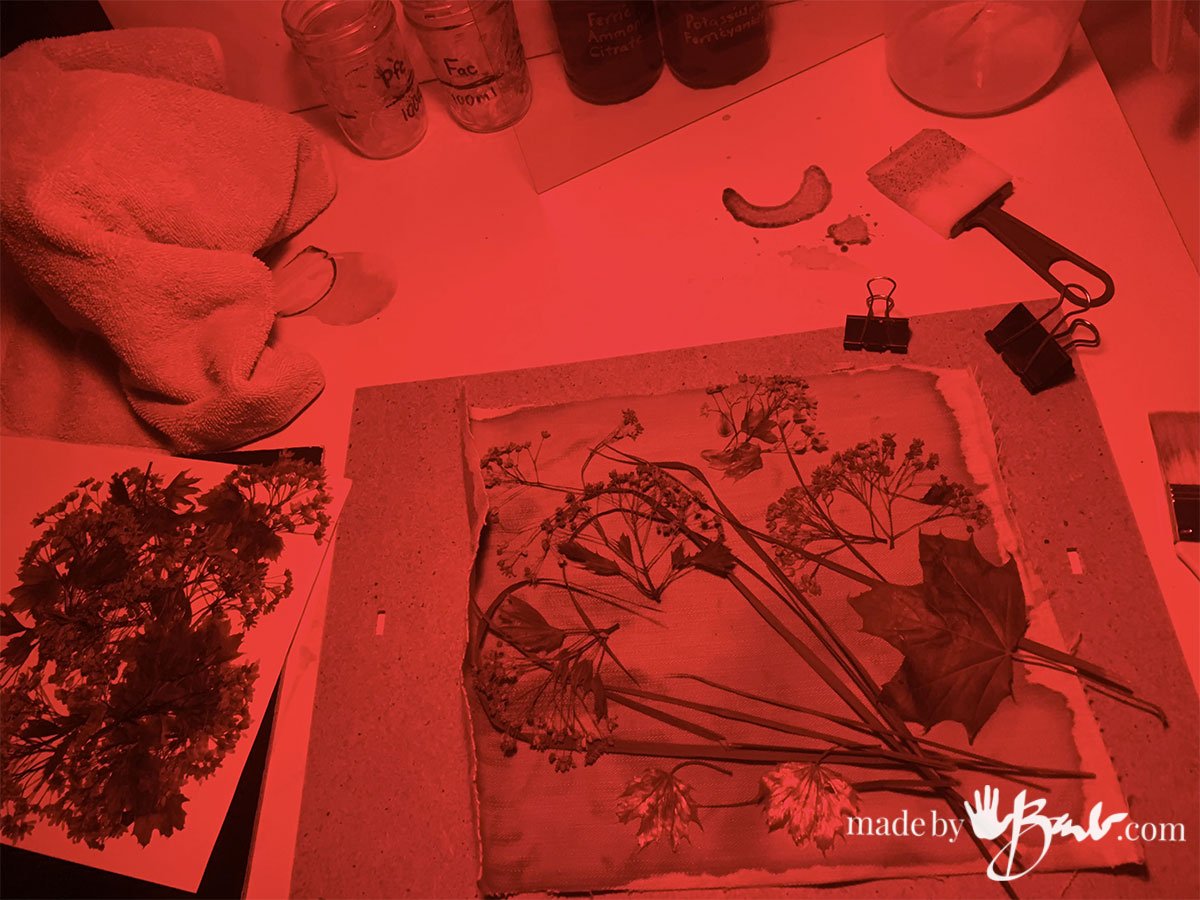
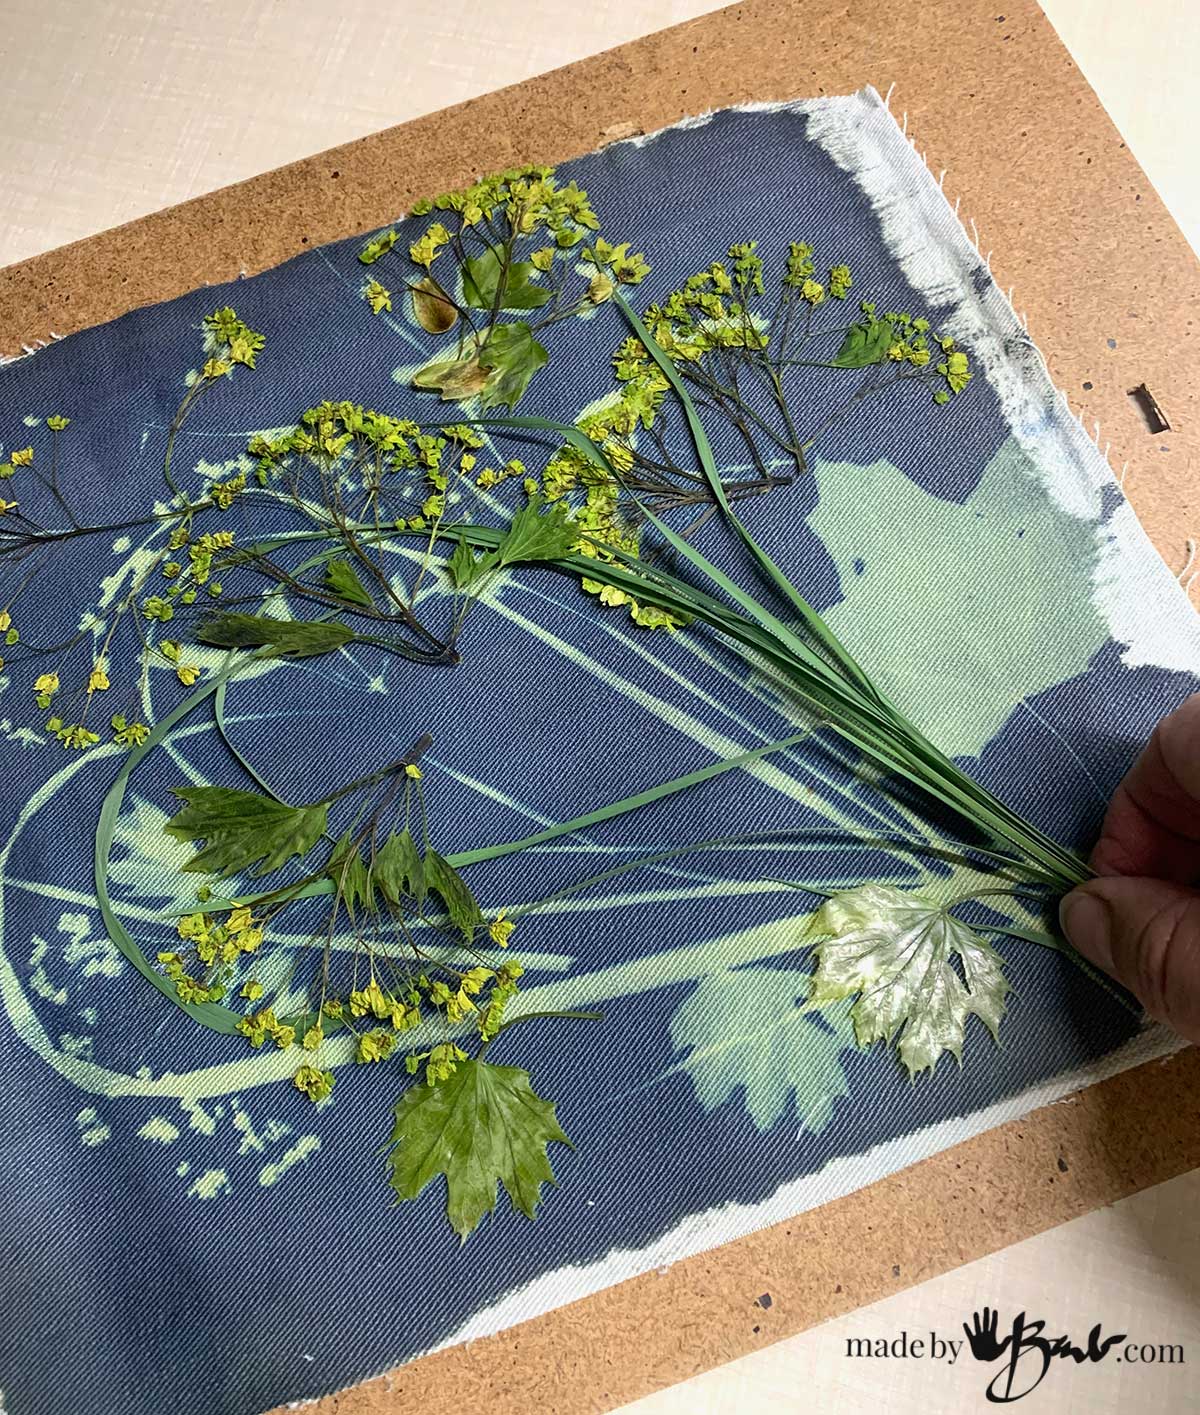
Prepare Your Cyanotype design:
Since the fabric is now UV light-sensitive you should work under low light conditions to place objects & arrange your designs. The key to getting clear crisp prints is the amount of contact the objects have with the fabric. Ideally they are flat and pressed down to allow no light to sneak underneath. I love the way small blossoms (even maple tree flowers) give detailed shapes. Experiment with adding whatever elements tell your story. This is perfect for media artists!
To keep everything in place it works well to cover with something like a sheet of glass or plexi-glass. Anything that will allow the light to pass can work. Binder clips will make sure it stays in place.

How to Expose your Cyanotype:
My preference to expose these is to use the direct sunlight on a bright sunny day. To make it easier to transport my boards I place them in a double garbage bag until ready to put on the table outdoors. You will notice the yellow-green colour in almost no time it will be darker blue.
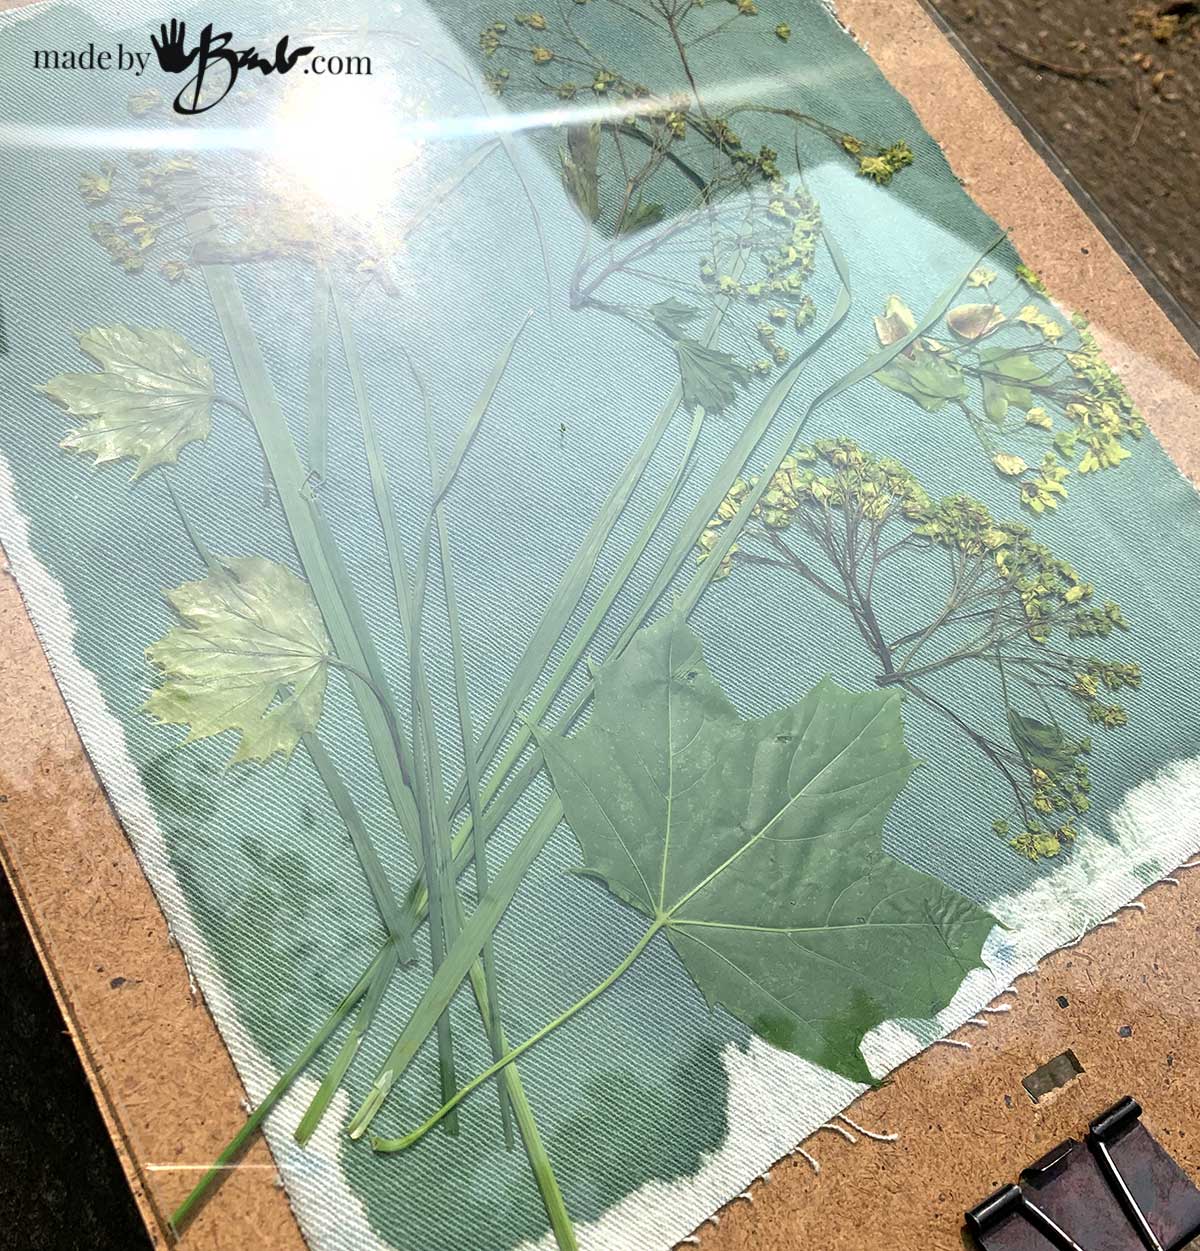
The exposing happens quickly and I found that 5 minutes on a cloudless day was enough here in Canada in May. You could make yourself a test piece with a cardboard strip that gets moved every few minutes to assess exposure time differences. Myself, I work more like an artist than scientist…
(NEW) I have now also added a way to print indoors with a LED UV Light. This makes it so convenient and allows me to print whenever I like. See how to Make an Easy Indoor Exposure Light for Cyanotype Printing
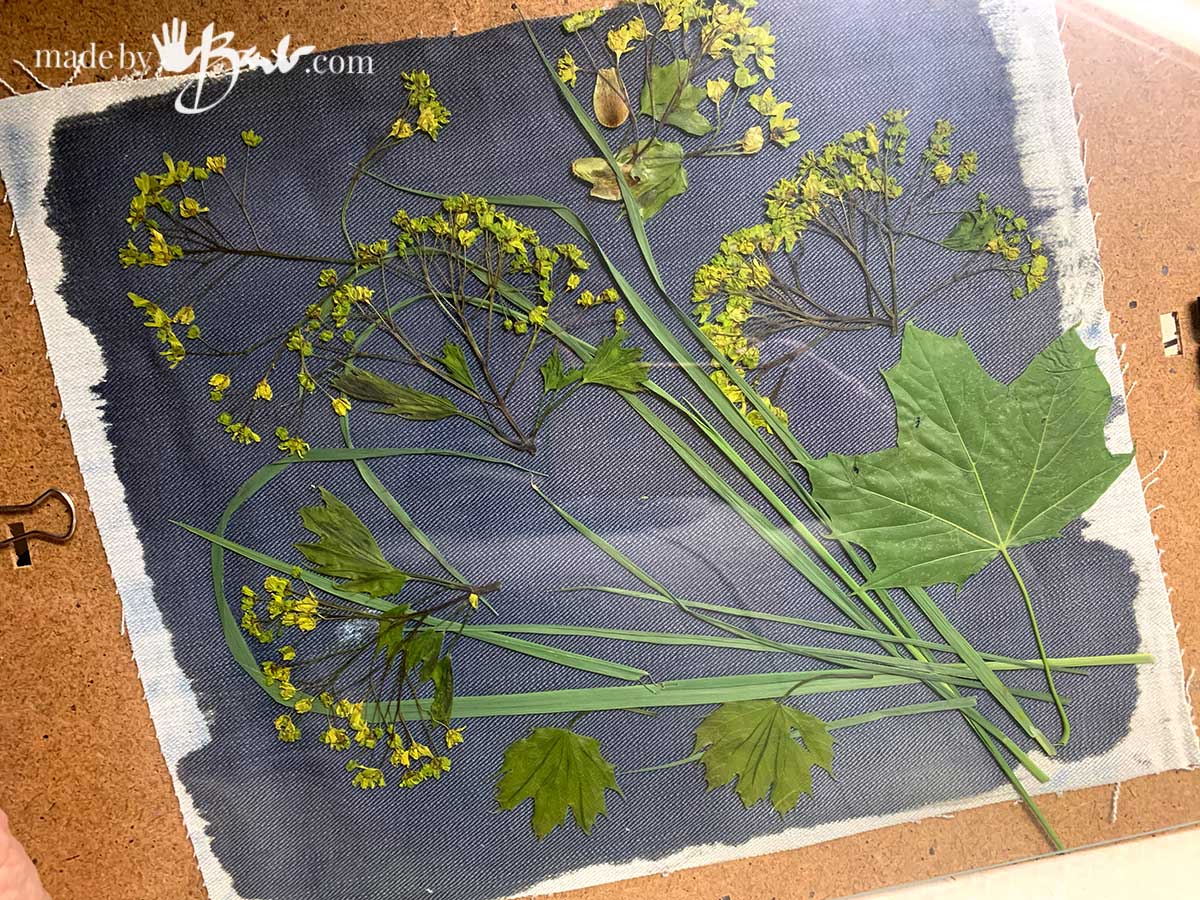
These are already exposed enough. If you over expose the light may start to pass through the specimens and the prints will become less. ‘But there is no right or wrong as that may create extra interest.
When ready take the board indoors and quickly move to rinsing since the parts of the print under the objects could still be exposed.
How to make Cyanotype Prints on Fabric
Equipment
- Dark bottle/Vessel - (to store light sensitive solution)
- Dust Mask
- Rubber Gloves
- Stir sticks
- Accurate scale
- Paint brushes/foam brushes
- Measuring cup
- Fabric - (natural fibres like cotton, silk, hemp, linen, rayon, viscose, bamboo)
- Board - (to place fabric on)
- Transparent Plastic or Glass Sheet
- Binder Clips
Ingredients
- 10 grams Potassium Ferricyanide
- 25 grams Ferric Ammonium Citrate
- Water
Instructions
- Prepare a space to work that is dimly lit to avoid UV light (mostly from sun but also small amounts from light bulbs) Protect the surface.
- Collect the supplies and tools
- Measure 10g of Potassium Ferricyanide and add enough water to make 100ml. Mix gently.
- Measure 25g of Ferric Ammonium Citrate and add water to bring it up to 100 ml as well. Mix gently.
- Mix both solutions together in a light-proof vessel. Allow time to fully dissolve.
- Prepare fabric (make sure it's very clean)
- Apply the Cyanotype solution onto the desired area of the fabric with a brush or foam roller. Be careful of drips.
- Allow to dry in a dark place
- Place the fabric on a board for ease of transporting. Place Objects or botanical items in your chosen design. Be aware of how much the items are in contact with the fabric surface for clear prints
- Place a clear sheet of plastic or glass over flat items to keep in place. Protect the piece from sun exposure (may place in a dark bag) until ready to expose.
- Take your board outside on a bright sunny day to expose to the UV rays. The time will depend on a few factors such as UV level. You will see the colour of the fabric turn from yellowish green to darker blue quickly. 5 minutes on a bright day was enough for mine but tests could be performed.
- Once exposed bring inside to quickly take off objects and rinse before further exposure. Rinse until water shows no yellow colour rinsing out.
- If a darker blue is desired a small capful of hydrogen peroxide can be added to final rinse.
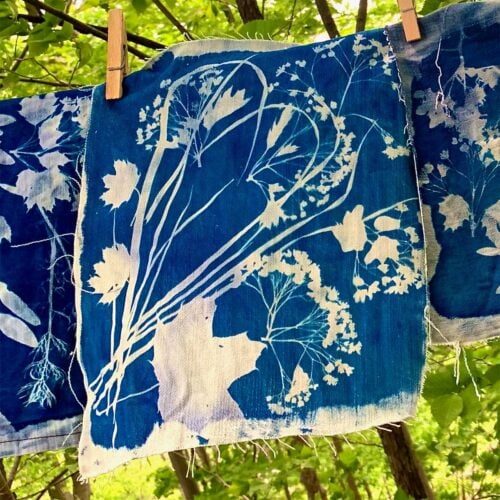
- Dry in a area out of direct sunlight.
- Fabrics can be washed gently in cool water with phosphate free detergent, no use of alkaline chemicals. Iron with press cloth and dry iron. Enjoy!
It is magic when you remove the objects and see the details! Perhaps I can find some variegated leaves for more details. Another good thing is that these objects can be used again. If you dry them they can be used over and over….

Washing the Prints:
The sun-exposed fabric now needs to be rinsed of all the chemical that did not expose. That is why you will see a yellow rinse water. Keep rinsing in the sink until only clear water comes out.
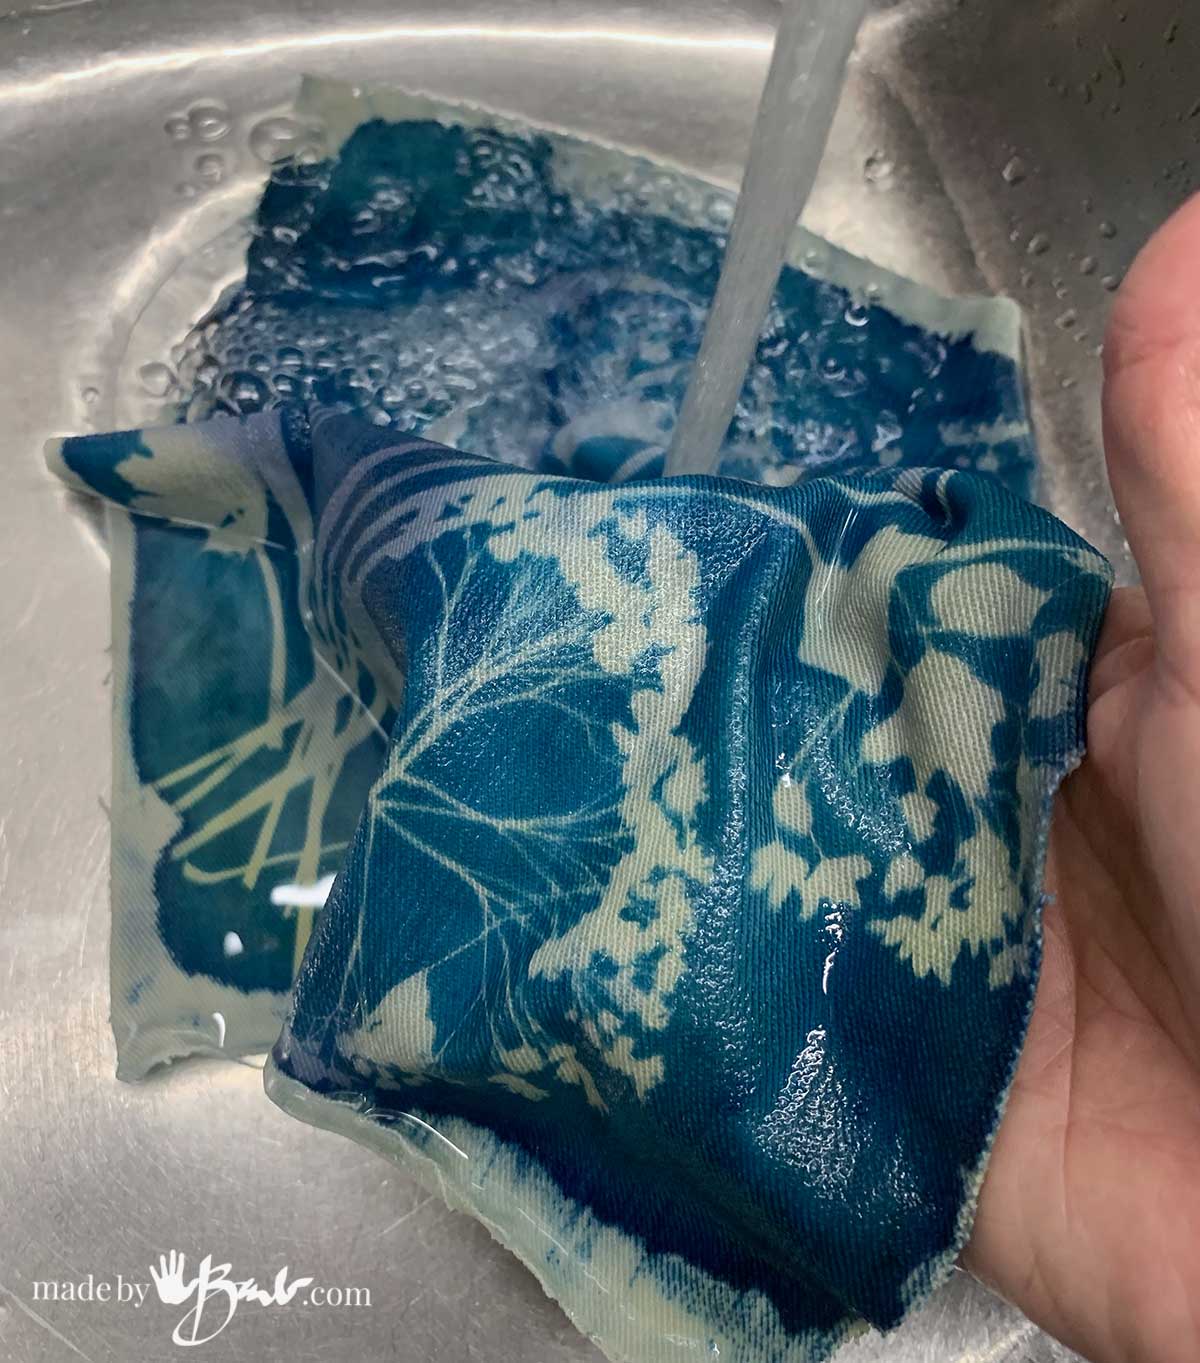
Even more details show up after you rinse out the extra chemical. Is it not amazing what the power of the sun is?!

The colour of the cyan is beautiful. In the printmaking world this method of using objects is called a photogram.
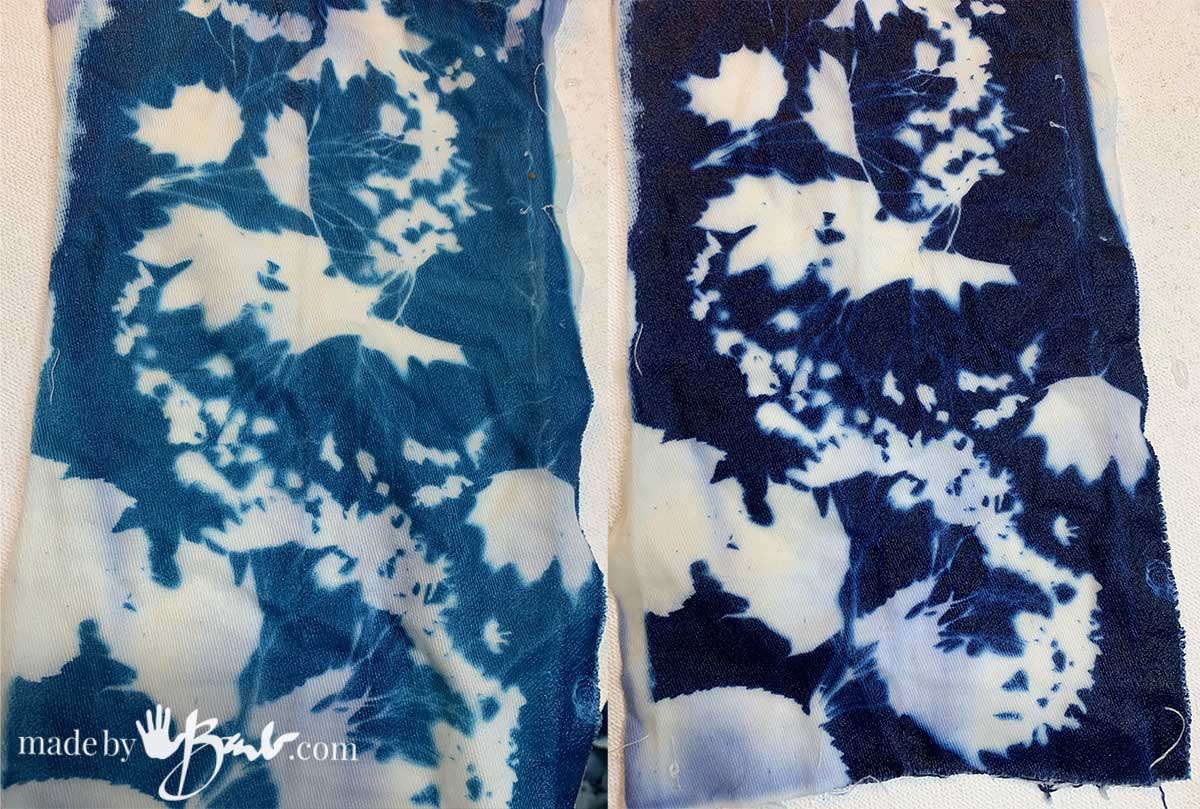
Darkening the Print;
The print will darken as it oxidizes more or you can add a capful of hydrogen [peroxide into the rinse water to expedite it. See above for colour difference.
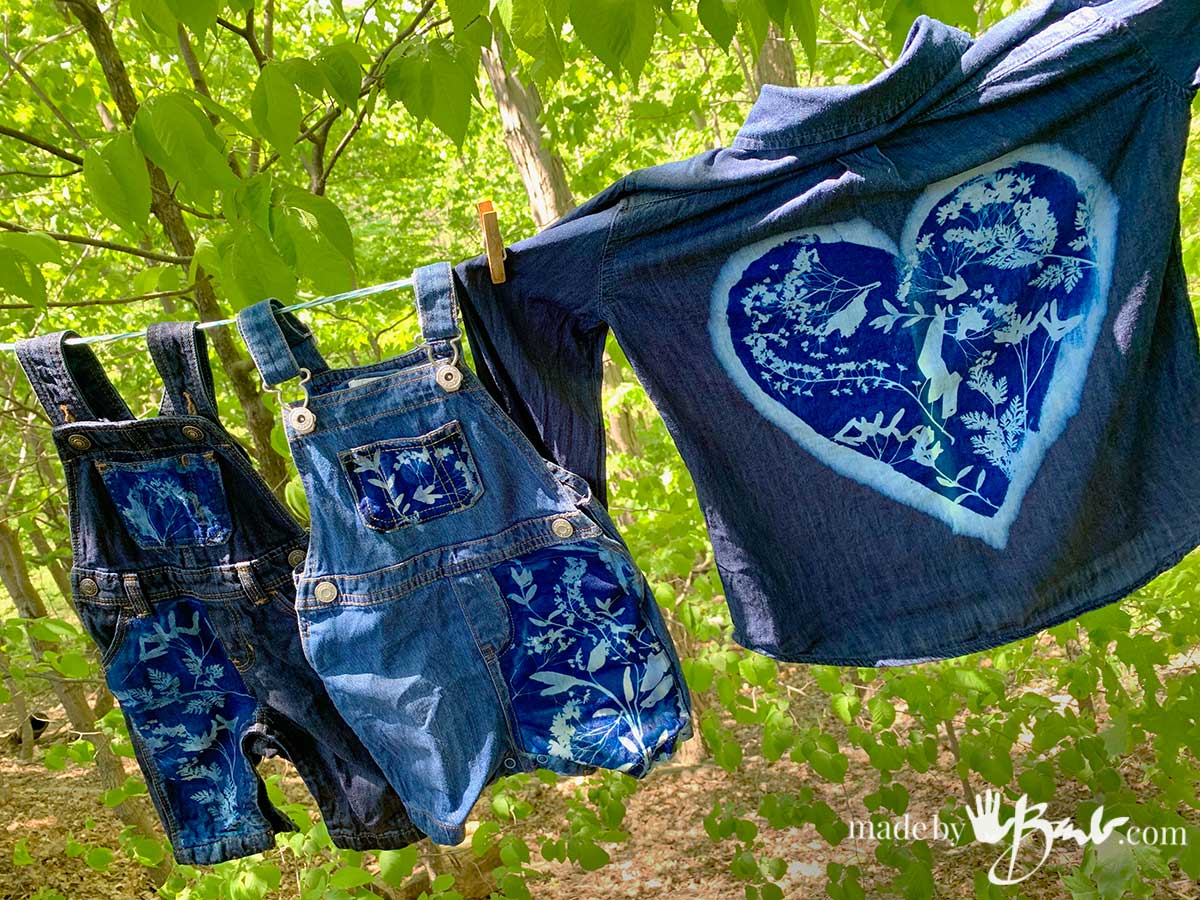
As you know I love blue & white; shibori and also ice dyeing. This ‘ups’ my game and there’s more challenges I want to put this through. I immerse myself in all aspects when I learn something new. ‘And I love that I can use up some of those old jeans…
Caring for you Cyanotypes:
These are washable however phosphates and alkaline environments are not recommended. Most detergents are now phosphate free but testing is recommended. Washing should be done in cold water and use a pressing cloth with a dry iron if needed. Hang to dry and keep out of long exposure to direct sunlight.
If you want something different than a blue print you can ‘Tone’ the finished print for a variety of outcomes. Check this new post: How to: Tone Cyanotypes with natural Tannins
These prints are indeed beautiful Barb. I do wonder about the chemicals. What is a safe way to dispose them?
Thanks
The only disposing is the rinsing of the non-exposed parts of the print. Jacquard (maker of kits) : Cyanotype is non-toxic and does not present any significant health risk or danger. That said, care should always be taken to avoid ingestion, inhalation and contact with skin when handling the cyanotype chemicals and fabrics. It is not poisonous, but it is an irritant so it can itch if it splashes on your skin in concentration. It will also irritate your eyes, so keep it out of those as well. Compared to regular photographic chemicals it is much less toxic. Thanks for the concern
This really held my interest. I really don’t need a new craft but this is to exciting not to try. Thanks for the post.
Yup, it excited me too! And it aligns with my style to be somewhat nature inspired! Just wait until I bring some more fibre arts into the mix…
Do you remove the covering glass/acrylic once you’ve placed the board in the sun? You didn’t say. I had thought that uv rays don’t pass thru glass which is why you can’t get a suntan indoors through a window. Love your work!
-Eileen
Oh, I will edit that, but yes, it holds the objects tight to the surface during exposure. I think suntan indoors does not work since we don’t get enough of the uv. When we got new windows they said the improved glass had a filter so that furniture would not get sun bleached as it did in the past. It UV does go though the glass or plastic no problem, very quickly! I’ll be doin a bunch more, as I like to make it even more unique…
You must be psychic. I’ve begun playing with cyanotypes over the last few months, but using mainly watercolour papers as the substrate. Lots of fun.
I’ve made a few back pockets of jeans … each worked great. Seems I have kept many old jeans …. from my now deceased dad and 2 brothers. May try using some of the lighter ones or bleach some to play more with the denim.
Have you tried the ‘wet cyanotype’ process? I highly recommend you give it a go too. Quilt guru Sue Reno has lots of info on her blog, for both fabrics and papers. Cyanograms don’t always need to be blue and white.
The chemical solution even works on rocks! Instead of using a plate of glass to ensure good contact, I’ve used tightly applied plastic wrap – placed over the botanicals and then twisted in the back secured with some tape. Keeps things nice and tight. Some UV spray varnish coating after rinsing helps enable outdoor use.
With Nordic ancestry I have always preferred the clouds and temps of fall and winter days …. now I find myself celebrating our sunny and clear days here in Vancouver, BC.
Keep having fun.
Ok, so I also remembered that I still have quite a stash of good watercolour paper from my illustration commissions that will get a go soon. ‘And yes, the wet-method of course too! I’m never quite happy enough with the conventional methods! Thanks for the info. ‘And I was on the shores of the lake this morning and could not go home without a few stones 🪨. Onward and upward!
Wonderful! Loved this post, will try it out.
Thank you,
Neeti
I love the look of this fabric. Is it only blue? Or can one add a fabric dye color to the mixture for other colors, like yellow to get green?? I would imagine if you can it would have to be up against the blue each time. Like red and blue should do Violet. What do you recommend??
Well, thats quite a question! I had to dive deep… and yes; cyanotype have ways of becoming other colours! Sounds like a fun chemistry/photography experiment. I’m going to have to learn how. At first look it seems to combine some of my knowledge from Eco printing .Cyanotype prints react to tannins in natural dye! Oh, as they say; ‘down the rabbit hole’ I go.
I love the partial dyed pants on your last image. Do you first bleach the pockets and how much?
Oh thanks. That was a bit of a teaser before I finish that post for cyanotype printing on clothing (done soon). Yes, pre-bleached as light as possible.
Hi Barb! Fabulous work, and thank you for the detailed instructions. I have tried cyanotype on jeans a few times, but I am finding that my prints are bleeding onto areas of fabric that were not initially sensitized/had cyanotype mixture applied. I am rinsing in water with dilute hydrogen peroxide, so the prints is coming out a rich, deep, dark blue, but there is a light blue faded color around the perimeter… Can you help me troubleshoot? Am I not rinsing enough? Any advice is greatly appreciated!
Yes, I think I’ve had the same thing happen. I noticed some light blue on areas where I had the clothes pins when hanging to dry so I rinsed again. Do you use a machine to spin out the water? I find that that does help. It’s a wonderful art form isn’t it?!
Barb, what type of paint do you recommend to add to the Cyanotype on denim?
So, you are wanting to add different colours? It may depend on the fabric as some will bleed more than others when painting on. I have used Dye-Na-Flow quite successfully. Maybe you’d like to try the Sun-Printing with it as other colours can be used.
How did I miss this in your first go round? I am an eco and ice dyer, but I will have to try this as I love blue. I’m learning to be a weaver, and it is clear to me that I am drawn to saori style weaving. I think this will fit right into clothing. I only hope I live long enough to do all the things I want to.
I understand that completely! Fibre arts, dyeing and eco printing can fulfill a whole life of making. I sometimes have to tell myself to slow down, as I tend to run when an idea’s in my head!