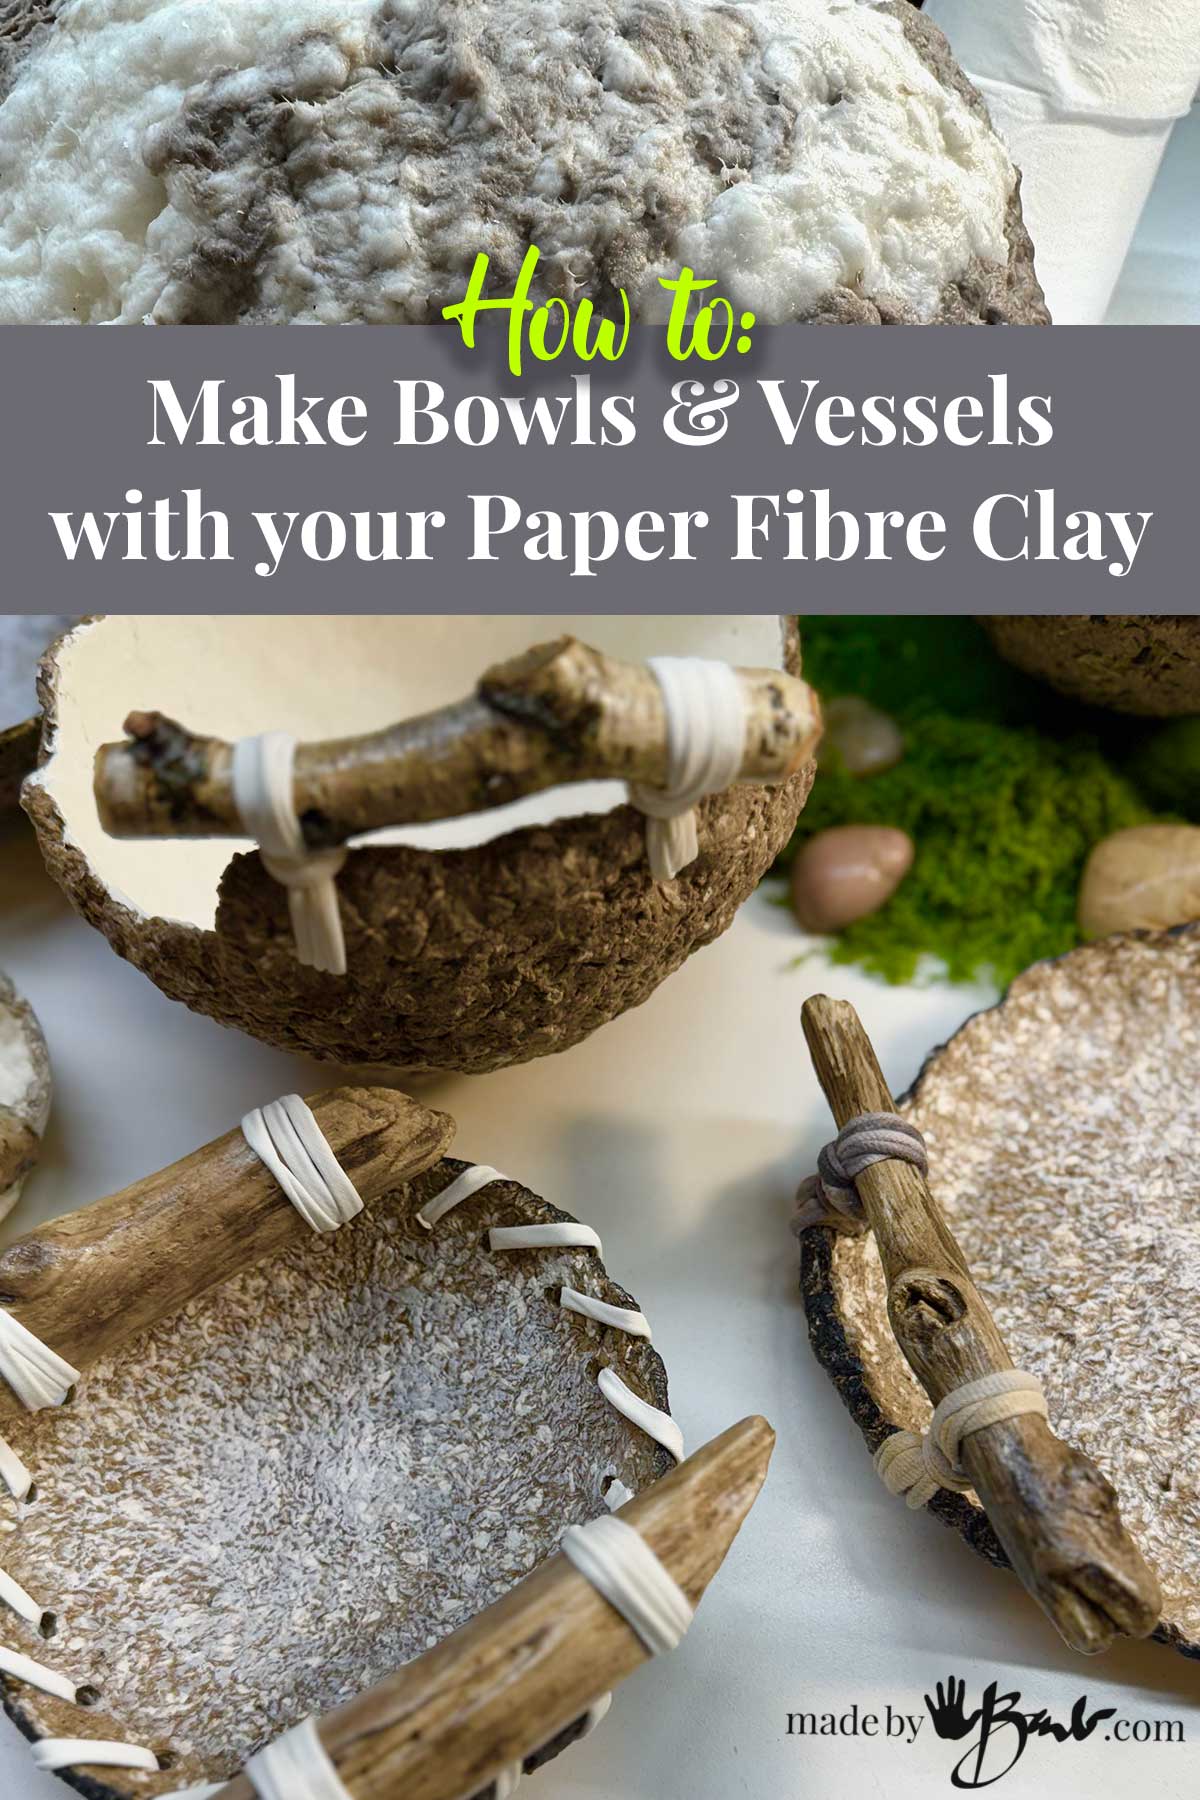
How to make Bowls & Vessels with your Paper Fibre Clay
There’s something magical about combining humble materials—paper pulp, water, and weather-worn wood—into a piece that looks like it came straight from an artisan gallery. These Sculpted paper fibre bowls are a perfect blend of rustic charm and eco-friendly crafting. They’re lightweight, durable, and endlessly customizable.
Nature meets texture in a beautifully functional art piece.
In this tutorial, I’ll walk you through the process, from preparing the pulp to attaching that perfect piece of driftwood.
Materials You’ll Need
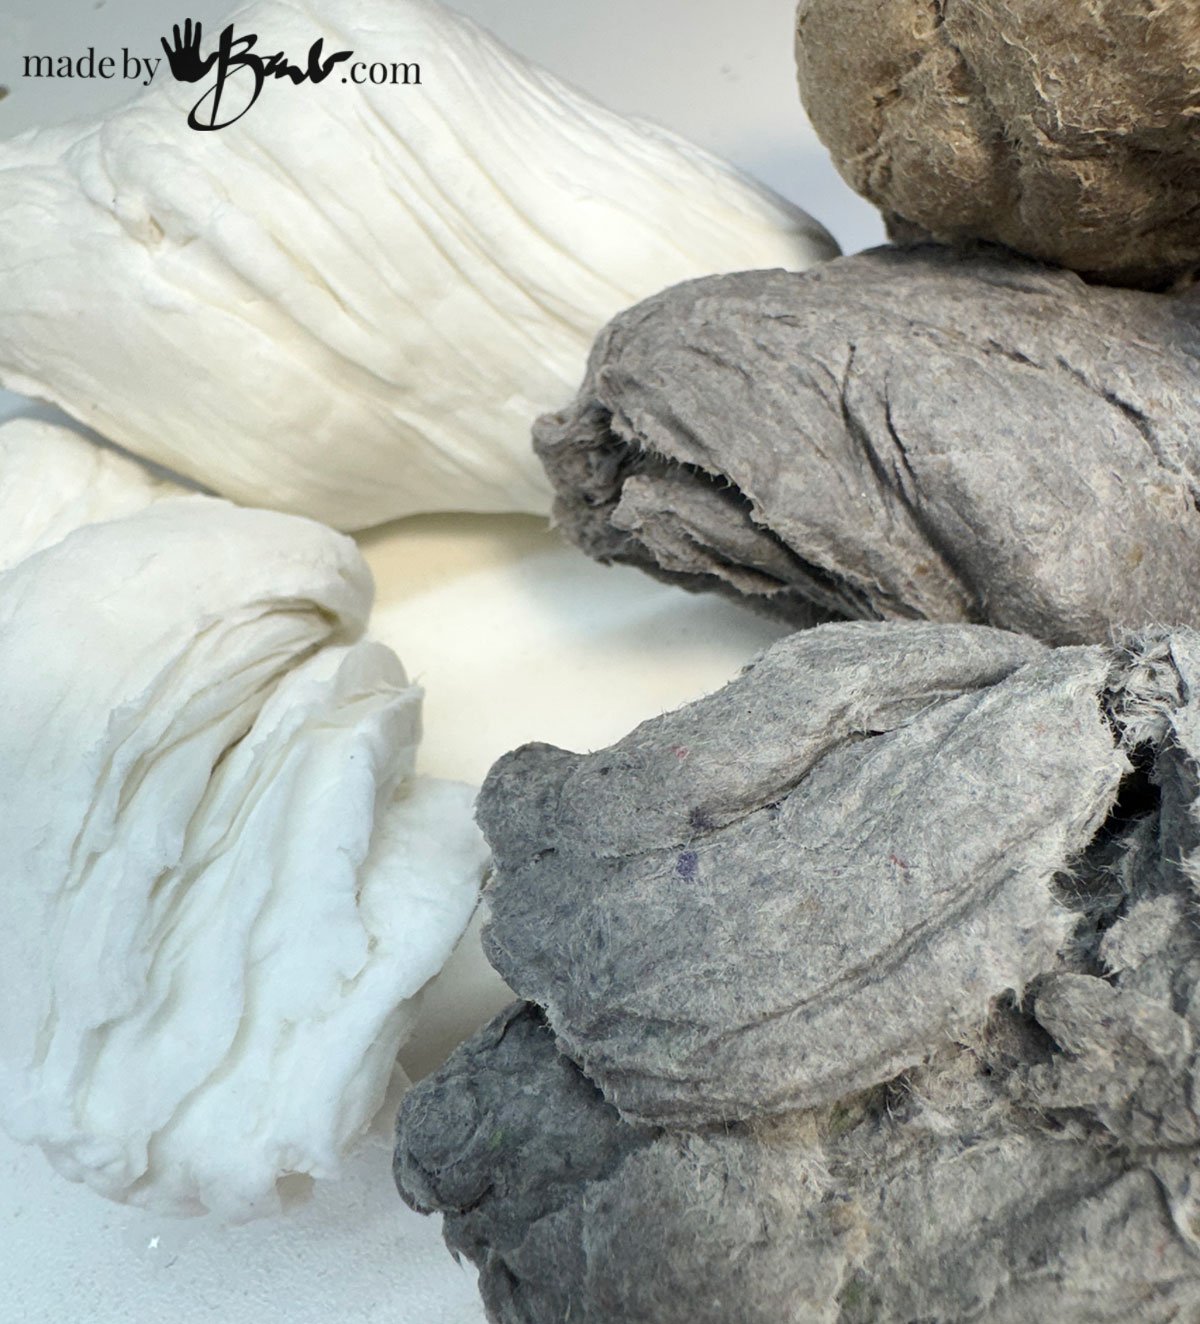
- Recycled paper (newspaper, egg cartons, or scrap office paper)
- Large bucket or basin
- Blender (dedicated to crafts)
- Water
- Homemade Glue
- Mold, ball or bowl form (sturdy plastic or metal bowl)
- Plastic wrap or cling film
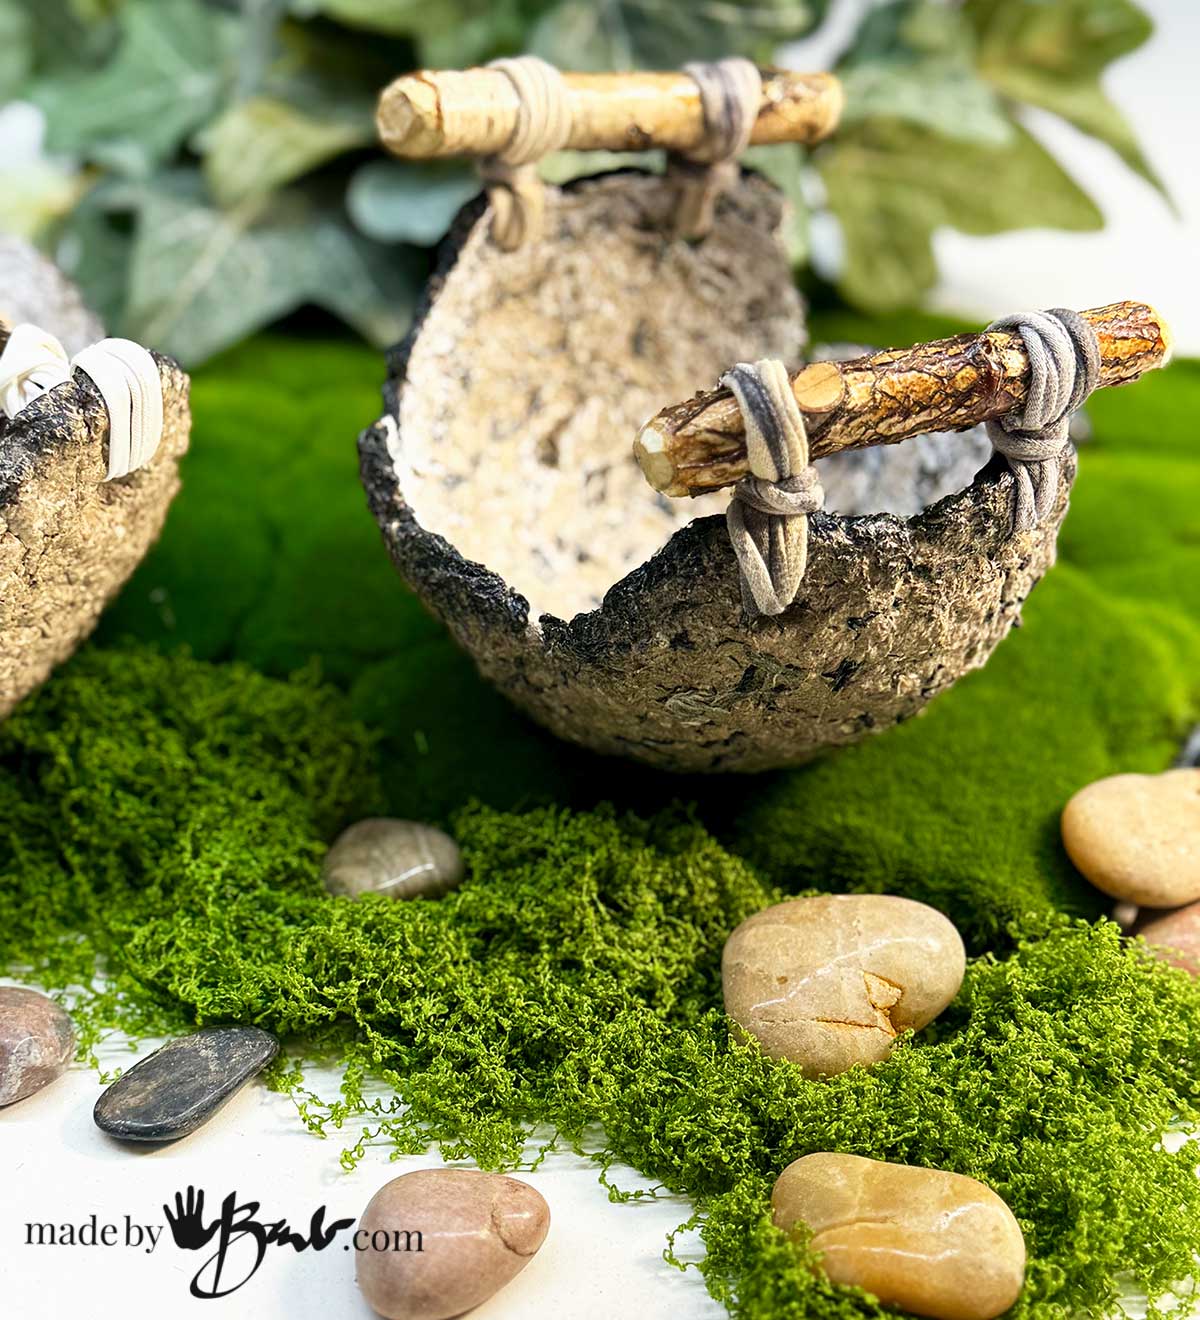
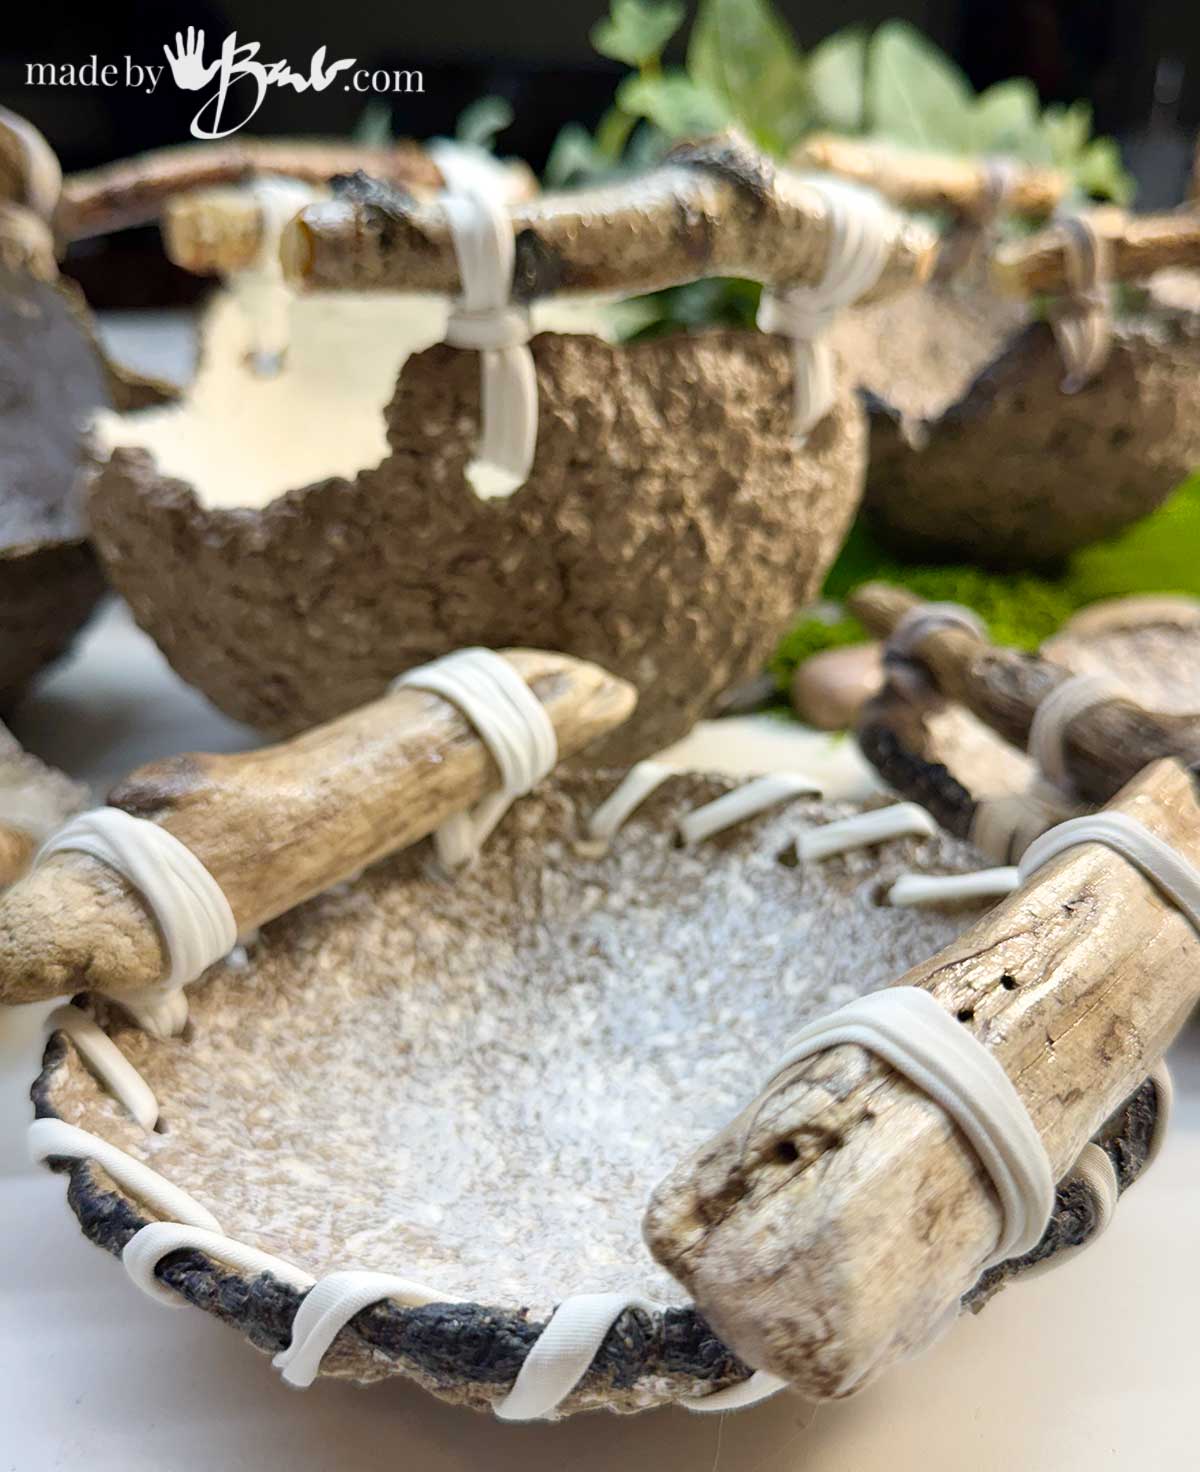
- Driftwood Handles
- Optional Small drill or awl (for handle holes)
- Strong twine, leather cord, lacing or wire
Step 1: Make the Paper Fibre Pulp
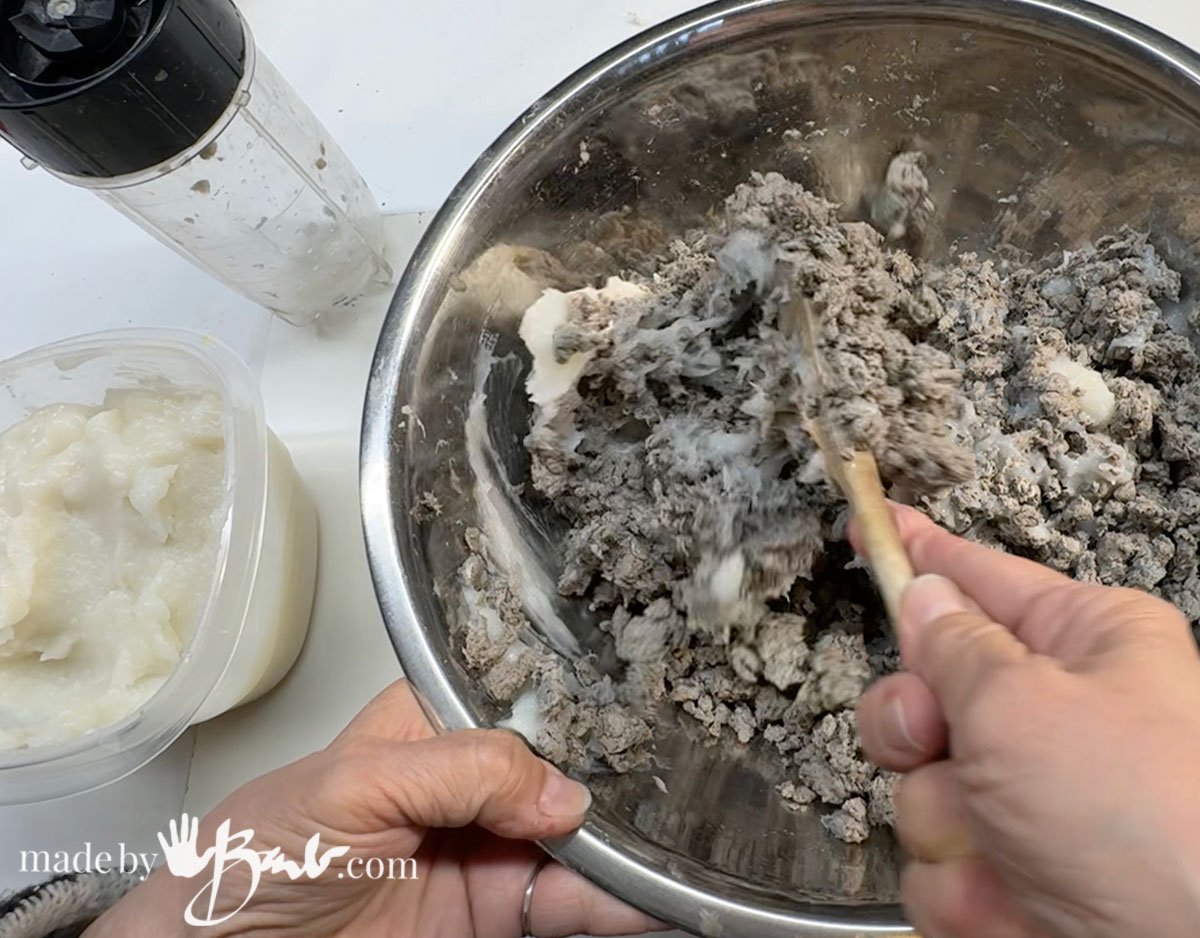
Step 2: Strengthen with Binder
Mix your pulp with my Homemade Glue—about 1-2 parts glue to 5 parts pulp—to help it hold together and dry harder. (You can also add a bit of acrylic medium for water resistance if the bowl will be decorative only).
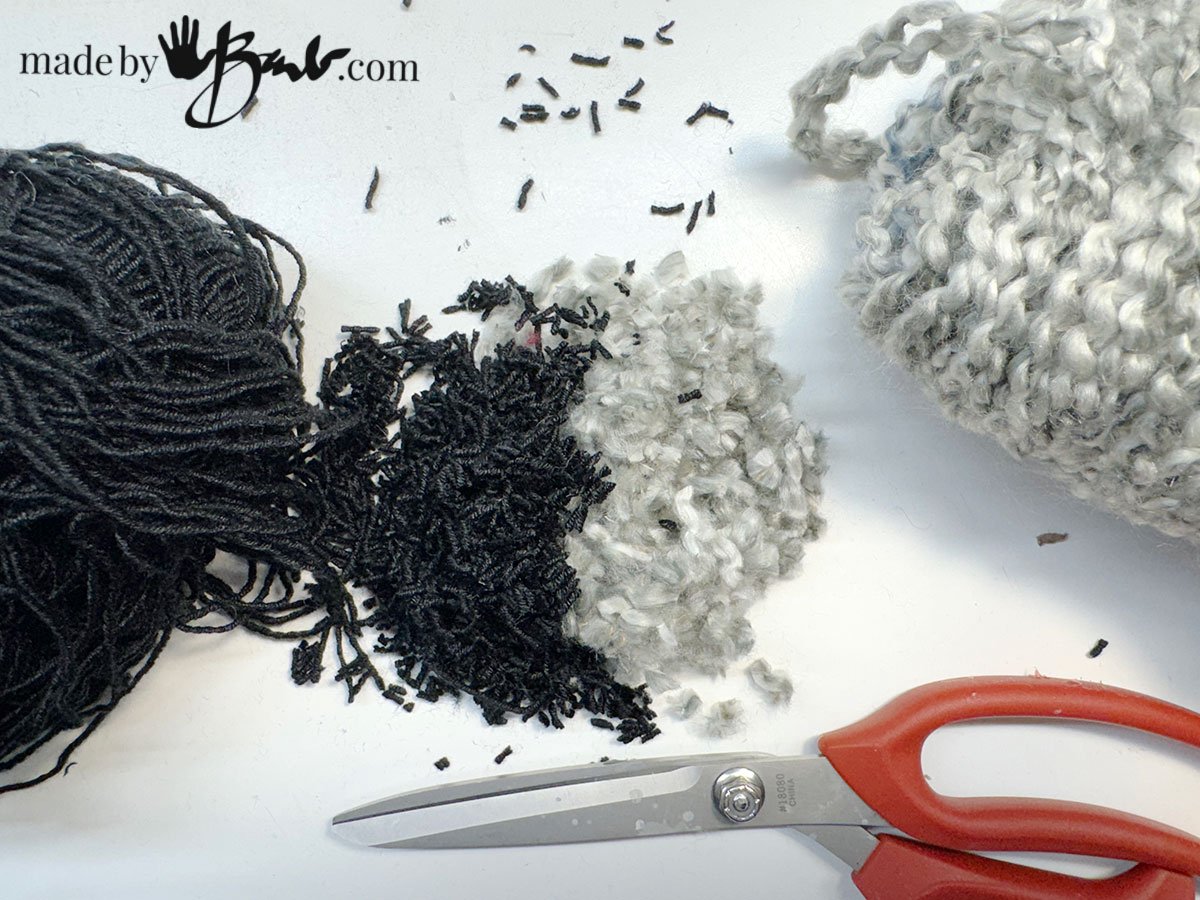
The many options of various papers also creates different colours of paper clay. Be creative, mix in other fibrous things like yarn or colour paper.
Step 3: Shaping Your Bowl (see video)
- Cover your mold with plastic wrap or fabric to prevent sticking. You can work on the outside or inside of your master form (like a ball, bowl, tray, etc)
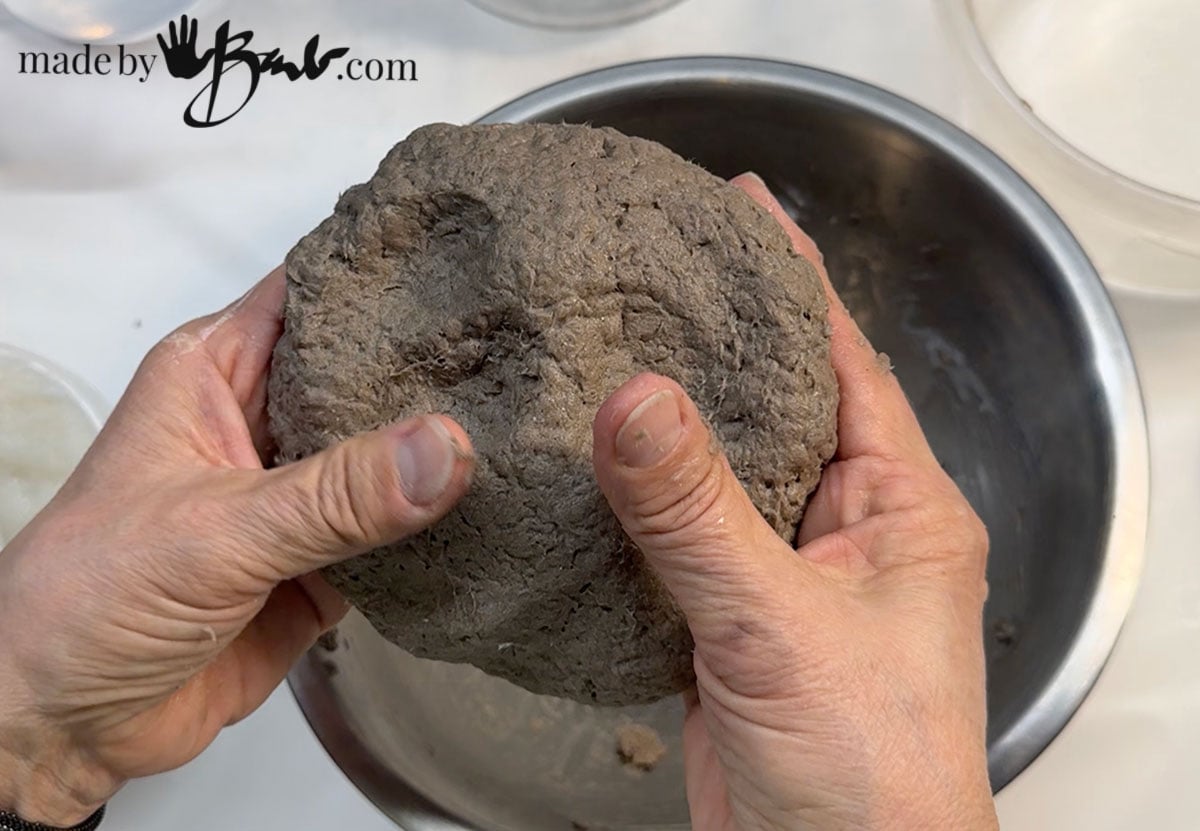
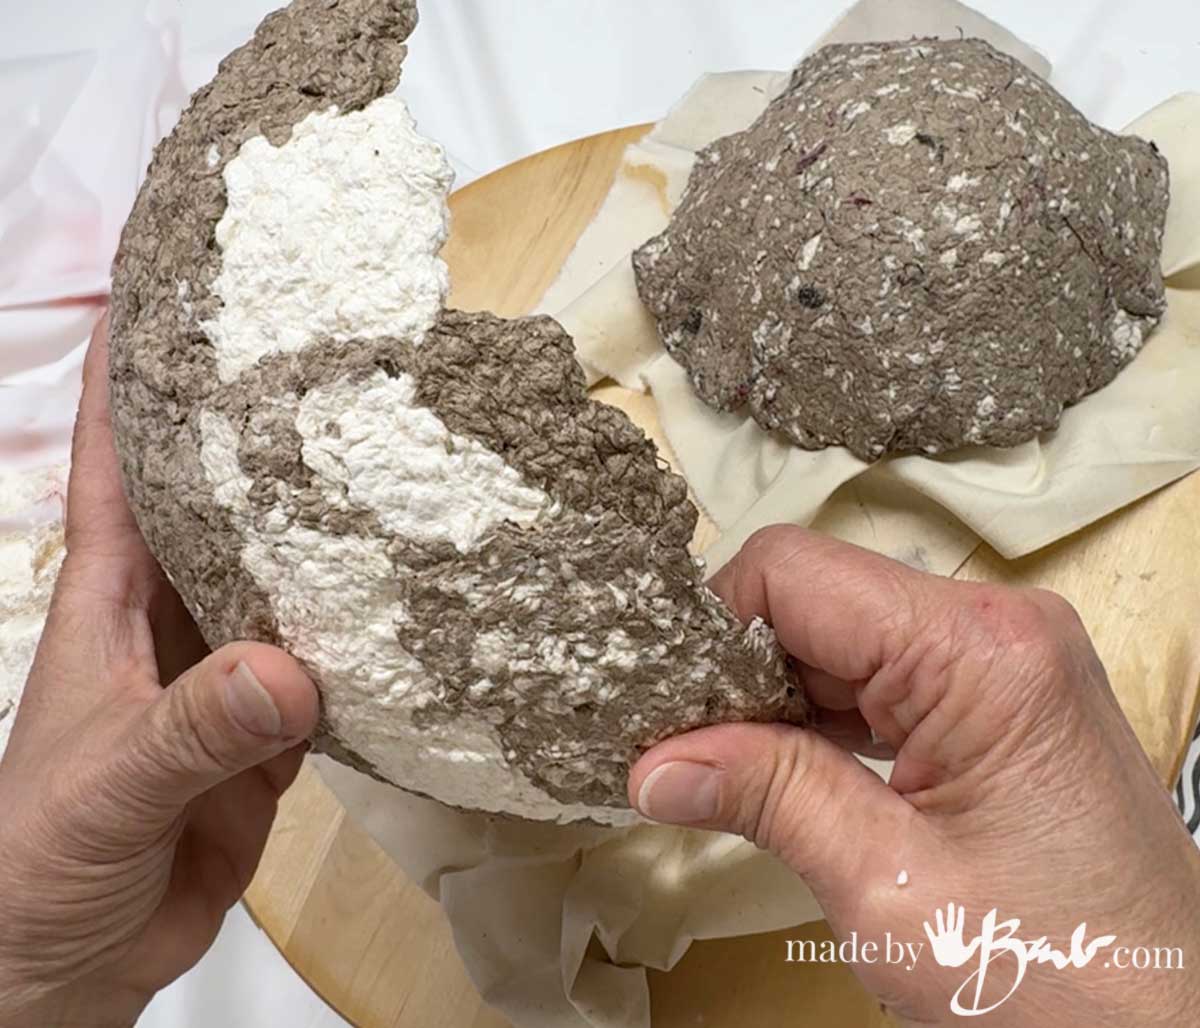
- Press the pulp firmly over the surface, aiming for an even thickness of about ¼–½ inch depending on the density of your clay. Generally this will harden to be very strong so you can experiment with even thinner walls.
- Smooth the surface with wet hands or a damp sponge.
- For added texture, you can press in lace, fabric, or textured mats, then peel them away after drying.

This paper clay has more texture than the Paper Maché Clay since it is only paper and glue. Embrace that characteristic as it makes these vessels look very rustic like natural stone.

You can also add another layer of clay once the outer one is dry. In my experience I do not see any shrinkage or cracking as the fibres are probably interlocking as they dry. This also makes these bowls very strong and able to take dropping without damage.
Step 4: Drying
Let the bowl dry slowly in a warm, airy spot. This can take 2–3 days. To speed things up, you can place it near a fan or in an oven at the lowest setting with the door slightly open (keep a close eye to avoid scorching).

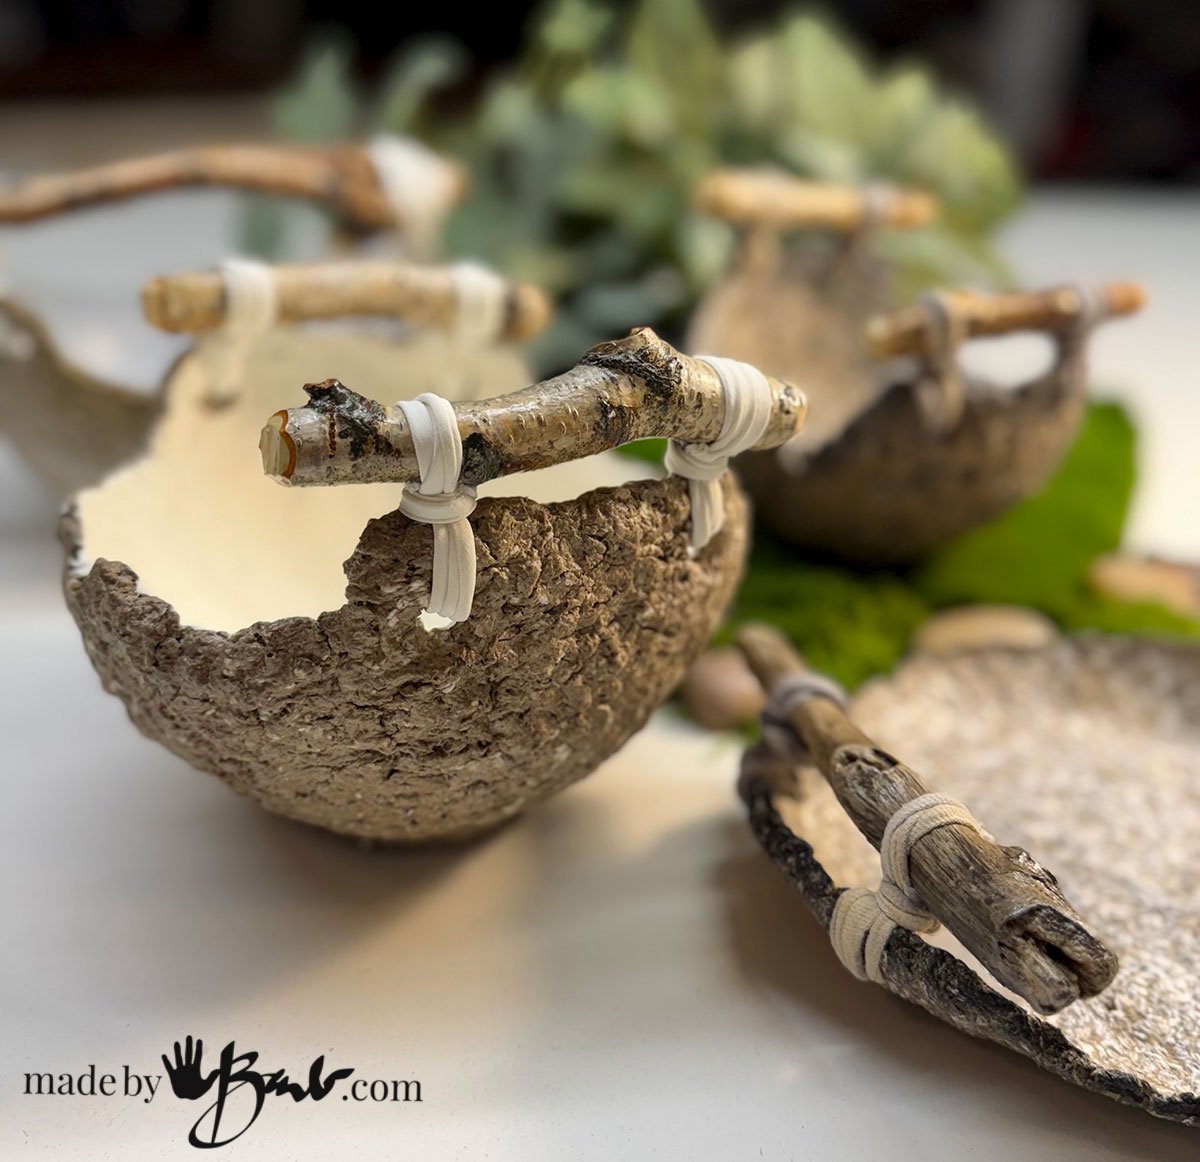
Step 5: Preparing for the Driftwood Handles
Collect and make your own handles with found driftwood or branches, often at no cost at all.
- Pre-plan where you would like to make holes for attaching any handles. It can be drilled with a wood drill bit or Dremel once dry.
- Choose driftwood or other branches with an organic curve or knotty shape for character.
- Clean the wood and let it dry completely.
- If needed, sand off sharp edges and seal with a matte wood sealer to preserve the natural look.

Step 6: Finishing Touches
- Paint or tint the paper pulp with acrylic paint, natural dyes, or even tea/coffee washes for earthy tones. Dry-brushing and colour accents work well with the texture finish
- Apply a matte sealer (acrylic medium or varnish) to protect the surface from any water damage.
- Whitewash with diluted white acrylic paint for a ceramic-like look.
- Earthy stain using brewed tea or coffee for a natural patina.
- Matte sealer to keep the organic paper texture visible.
- Burnished edges by lightly sanding for a weathered, worn look.

Why This Project Works So Well
- Eco-friendly: Uses recycled paper and found driftwood.
- Customizable: Every bowl will have its own shape, texture, and character.
- Almost no Cost way to Sculpt: Very budget friendly for a high-end look.
- Tactile & decorative: Works as a centerpiece, storage bowl for dry items, or purely as art.
Each Bowl is unique, much like nature!

These bowls bring a similar joy to me as taking a stroll on the beach… the wonder and beauty of what nature has created and the fact that imperfection is beauty. There is an uncanny emotional connection I have for this beach…
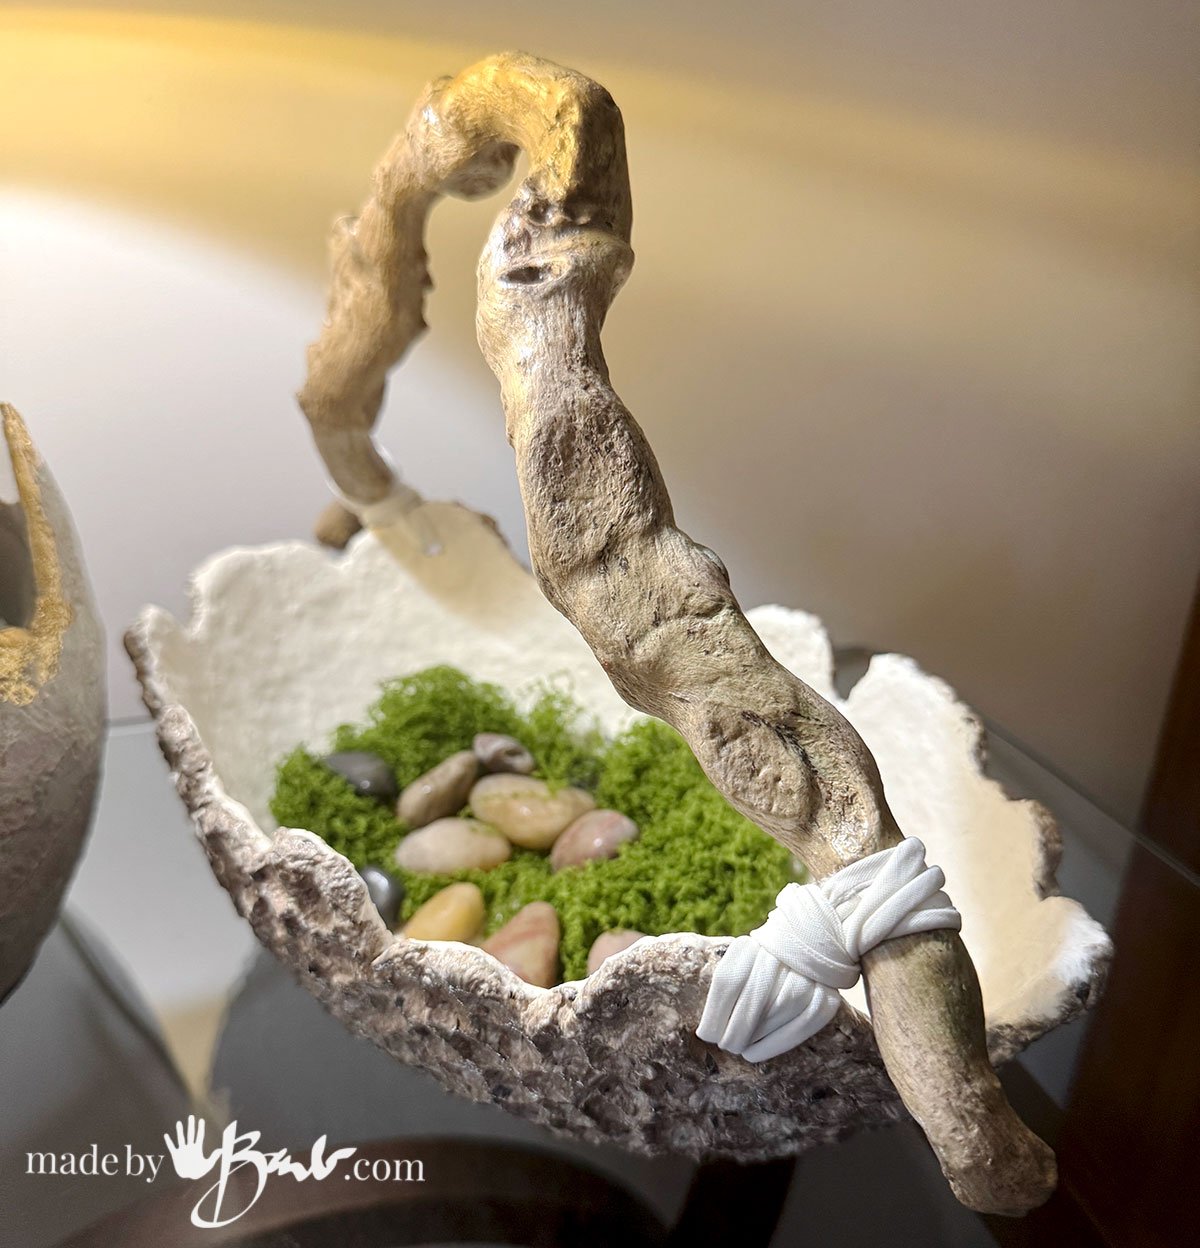
We can not always be as amazing as nature, many years and forces are needed to make this magic happen! This piece of knurly driftwood root is probably many years old, there were even some rocks imbedded in the wood as it grew.
Once you start to understand all the kinds of fibres (trees are also a fibre called cellulose) that can be used there’s no limit to the creative outcomes!
I hope I’ve spurred some ideas and perhaps introduced you to some alternate forms of beauty from the conventional mass produced types. Thank you for joining me!
Love how very clever you are:)
Thank you! I love artistic challenges!
This looks such an exciting thing to do – I must fit in having a go and thanks so much for sharing. Su (from Lincolnshire, Uk)
I love the idea of not wasting and being able to create such rustic sculptures! If only I had more hours in the day!