Make a Sewn & Needle Felted Drawing from a Photo
I have fond memories of college drawing class, especially when we drew on a mid-tone paper. This quick project uses that technique and a perfect way to get your drawing on the fabric.
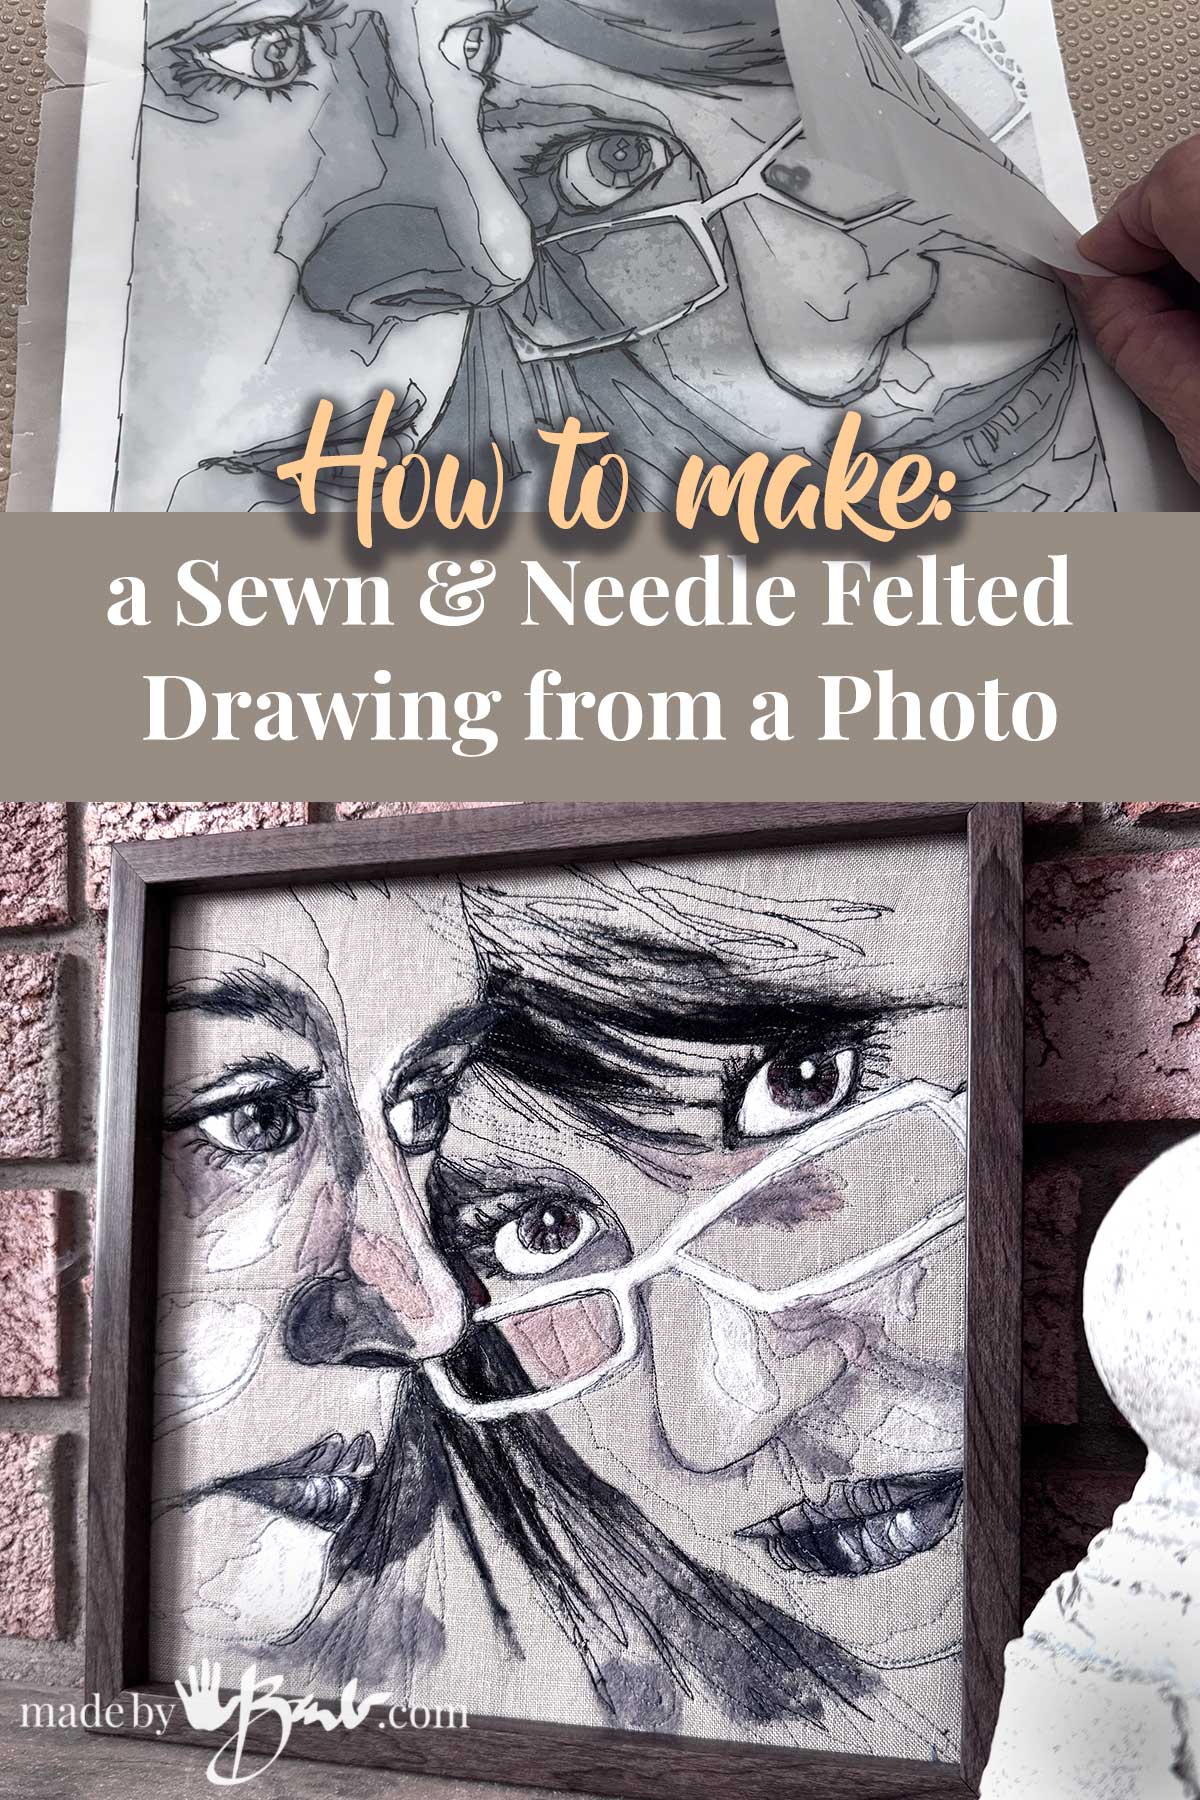
There’s just something wonderful about art that also combines the love of fibre and sewing! Like an expressive line drawing with some shading, but in a unique style.
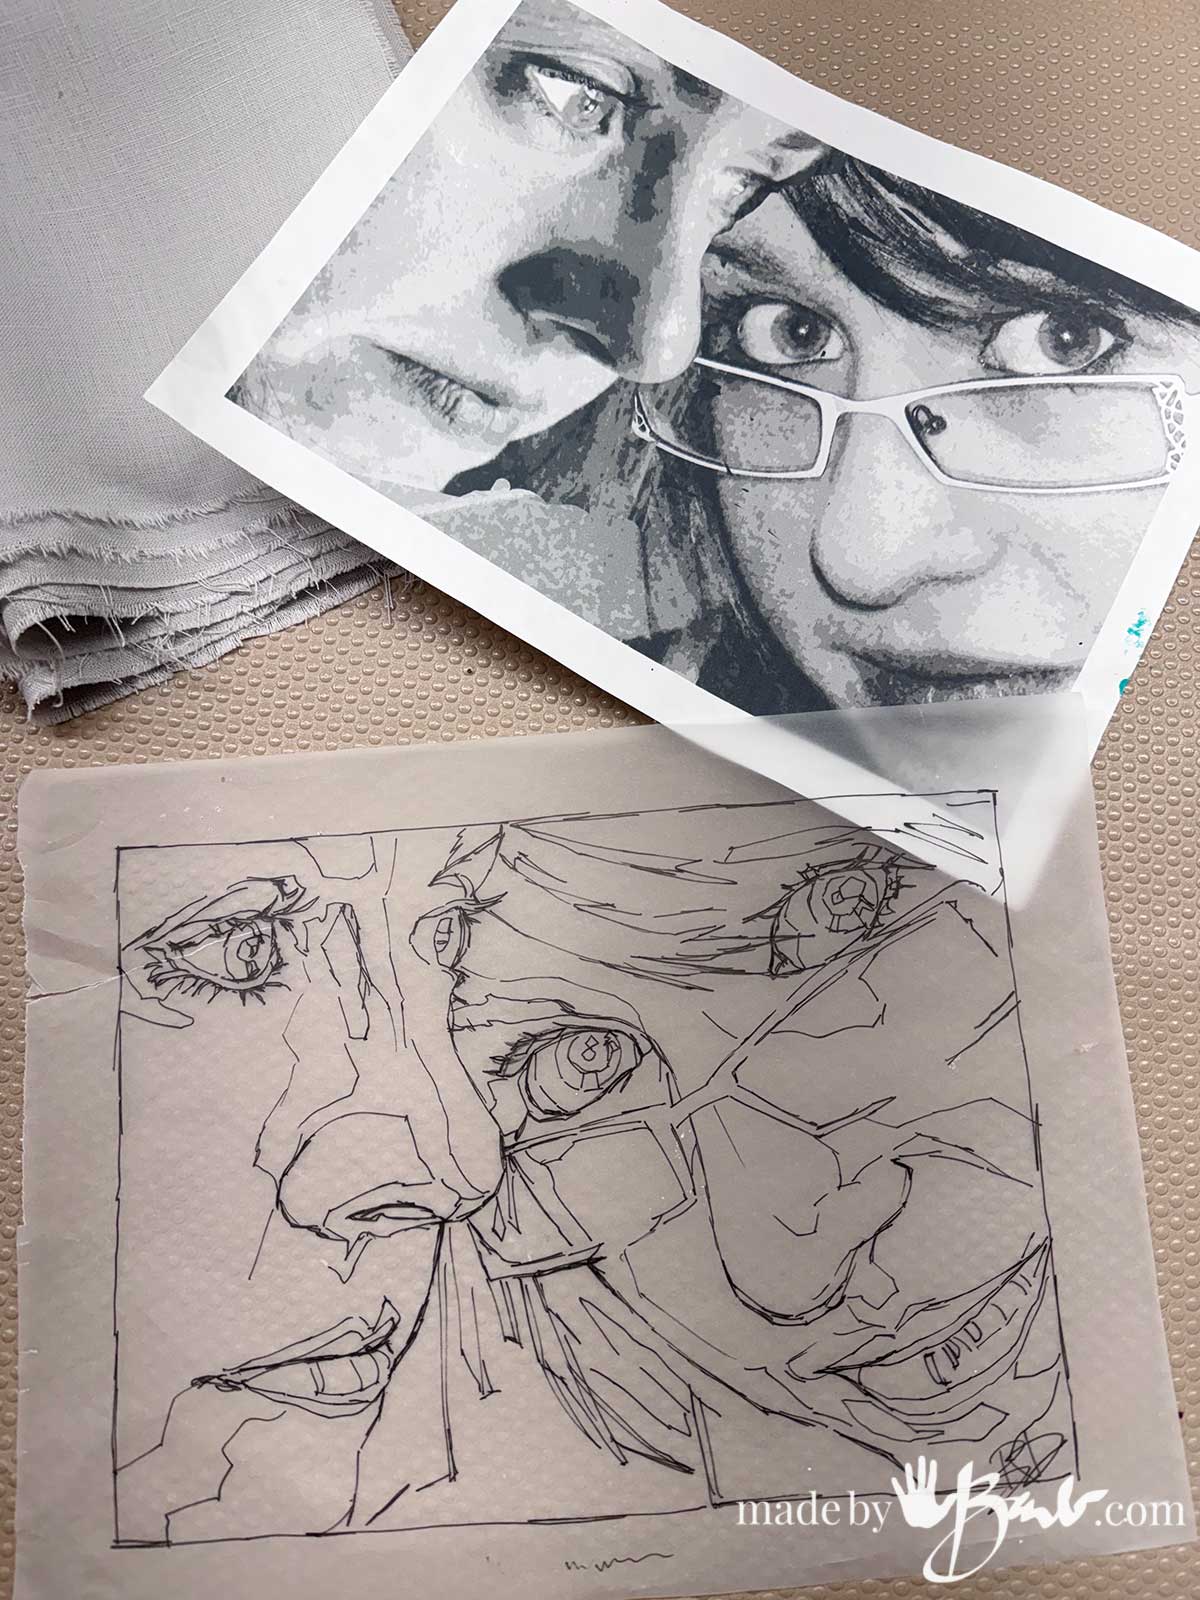
How to Choose your image
The photo I am using is a fave of mine because it has nice defined areas of value (light and dark) and also great eyes. The image that you pick should have light, middle and dark areas so that you can show form. Many photo editing programs can adjust the image. I decided to keep it simple here as I am working with a pretty monochromatic colour scheme of neutrals and greys.
Creating Your Outlines:
I know there may be some debate here but sometimes ‘tracing’ is acceptable. I took the picture myself so it is my image. Many artists use technology nowadays to get an exact rendition of their chosen image, sometimes even projecting onto a canvas.
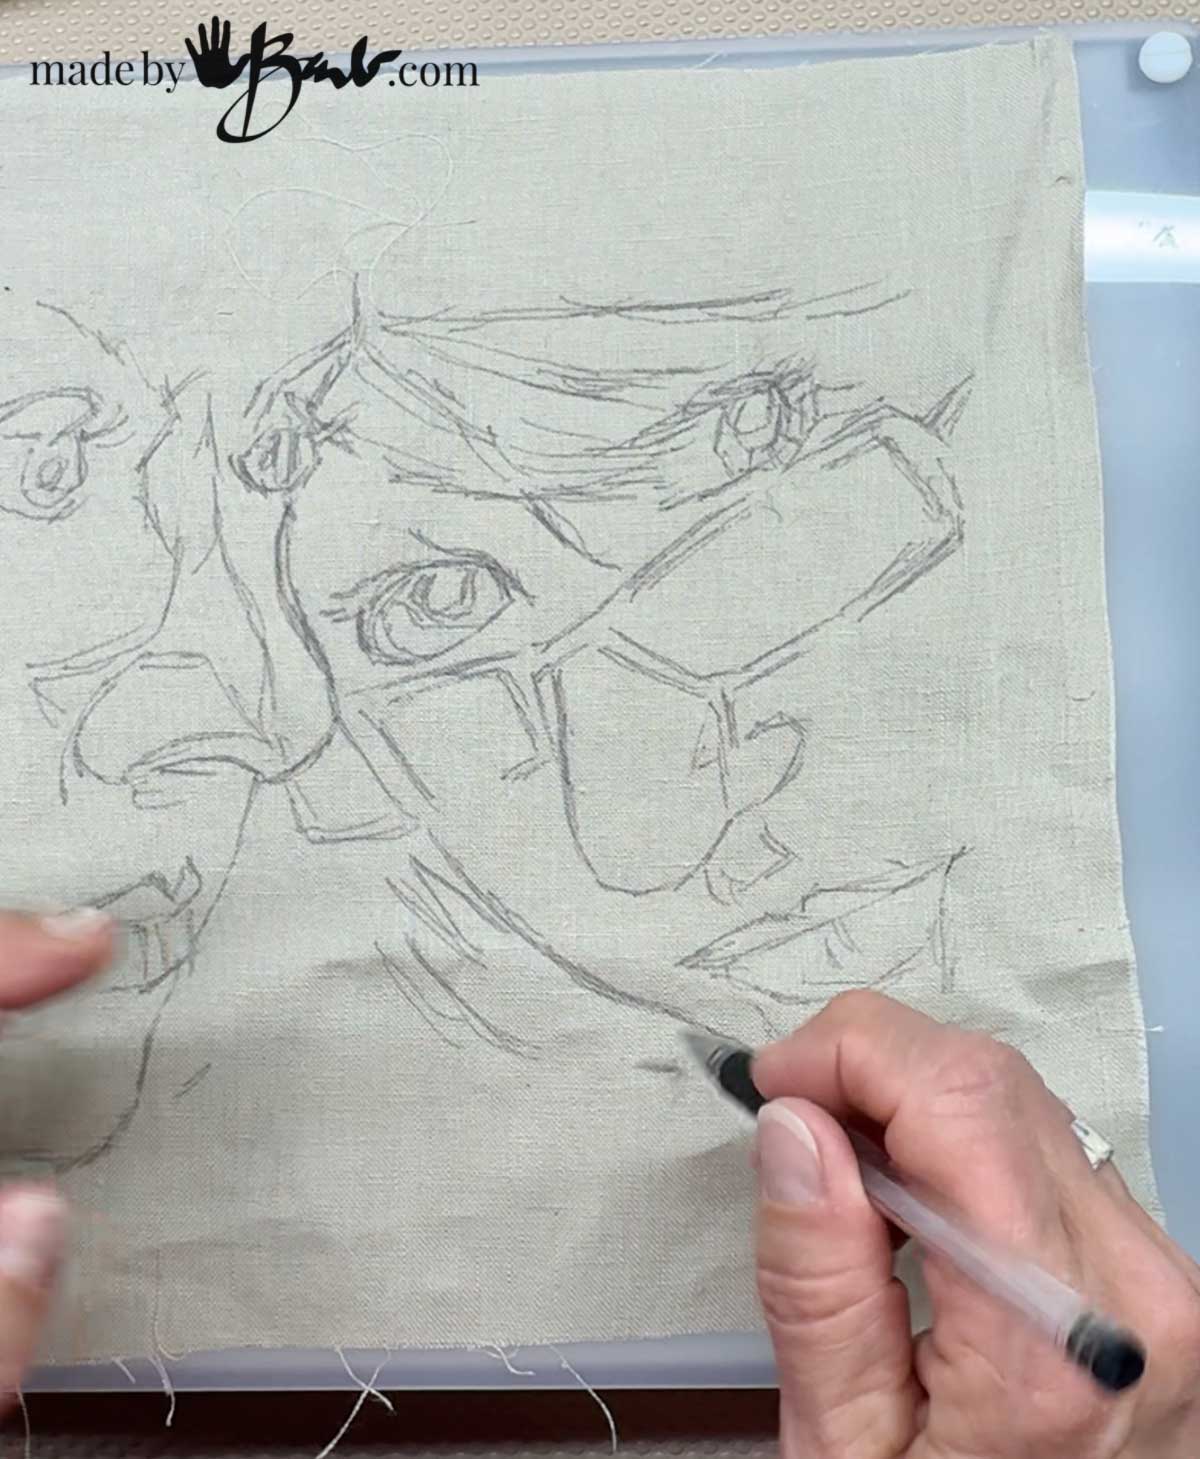
Since I am making a portrait here I really wanted it to reflect the image so I chose to trace. The grid method can also work but takes much longer. Other subject matter may not be as critical to be so exact.
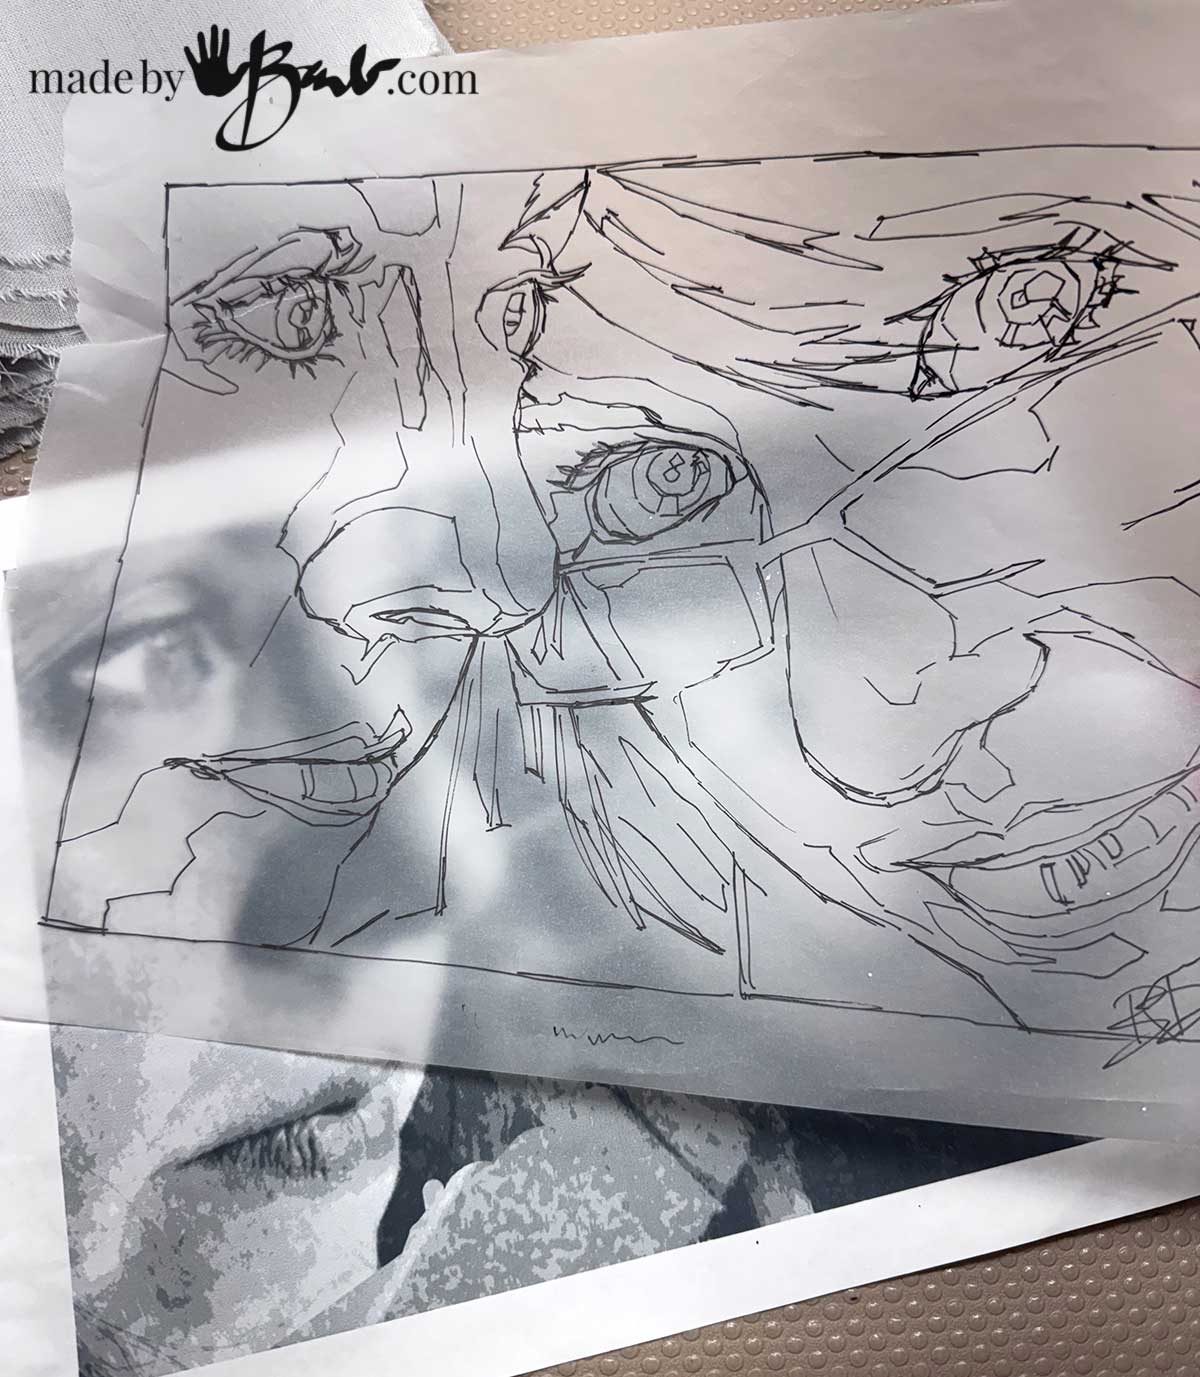
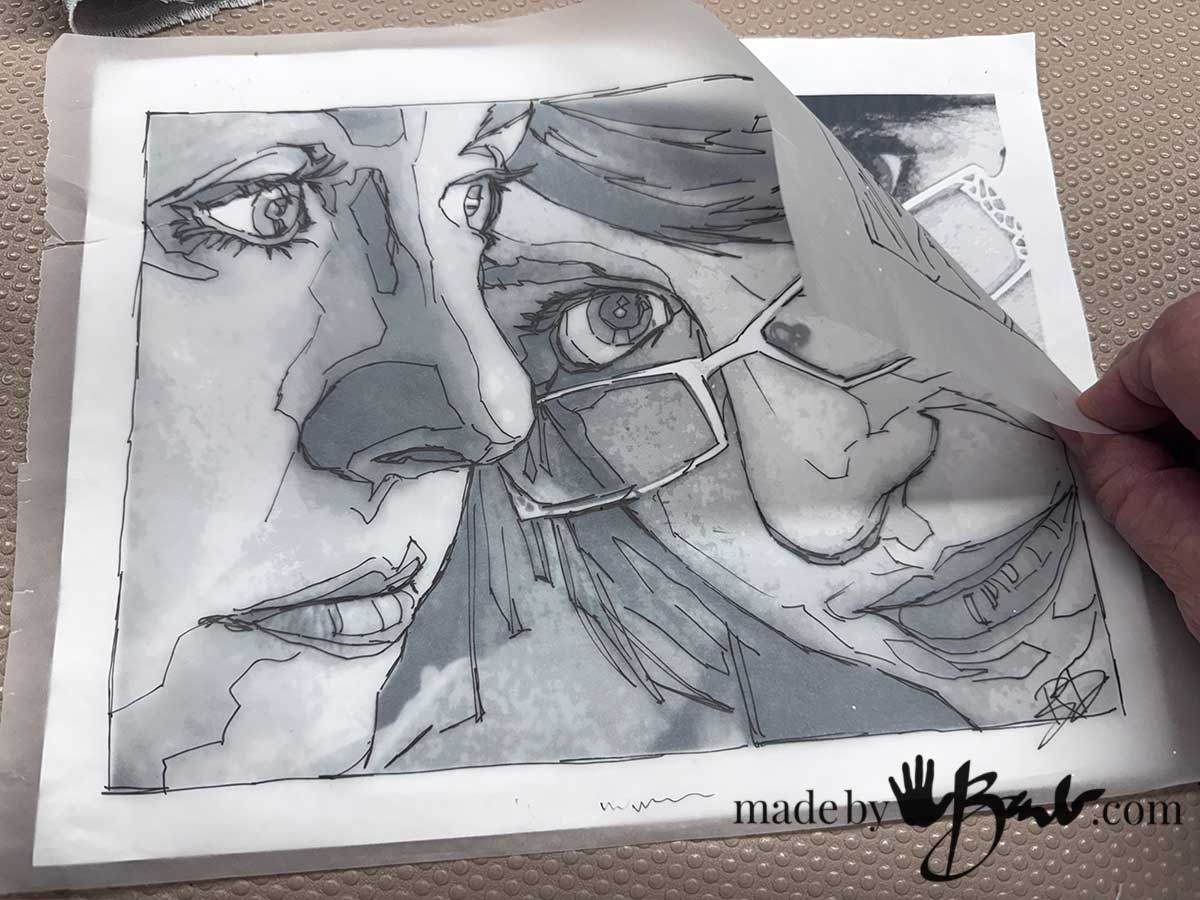
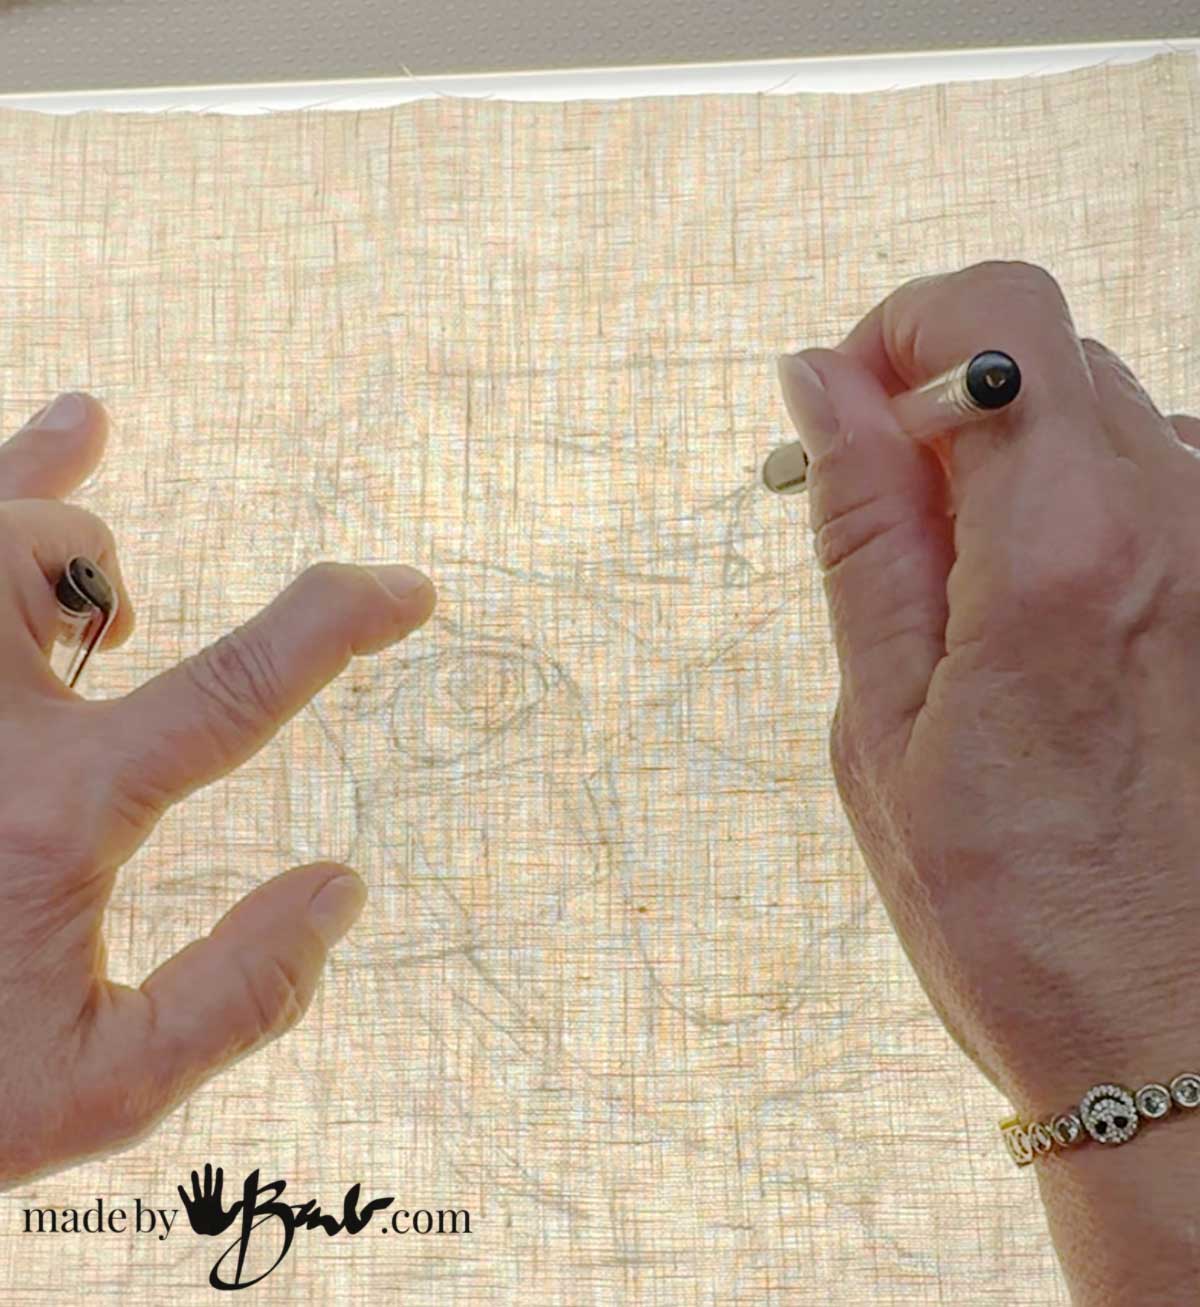
Either use a light-box or tracing paper (preferred) to be able to see your image through to trace. You could also use software to trace as with an Apple Pencil and Procreate. Make a separate layer for the line drawing, similar to the tracing paper. You can then use a print or your tracing to transfer to the fabric.
With a black marker or pencil (if you want to be able to erase) draw around edges and areas of value. This will be a rough type drawing so keep it simple. If you Posterize the image before printing the areas of value are already chosen for you. You can also use this to create a simplified version of your image broken into areas of value (light and dark)
What Fabric Works well:
Since I am mimicking the drawing on mid tone paper I chose a light grey linen fabric. Linen is very strong so it stands up well to needle felting. I also chose this for the reason that I can see through it with the light-box. If you do not have a light box you can use a tablet with bright white screen or even a window (just tape to hold in place)
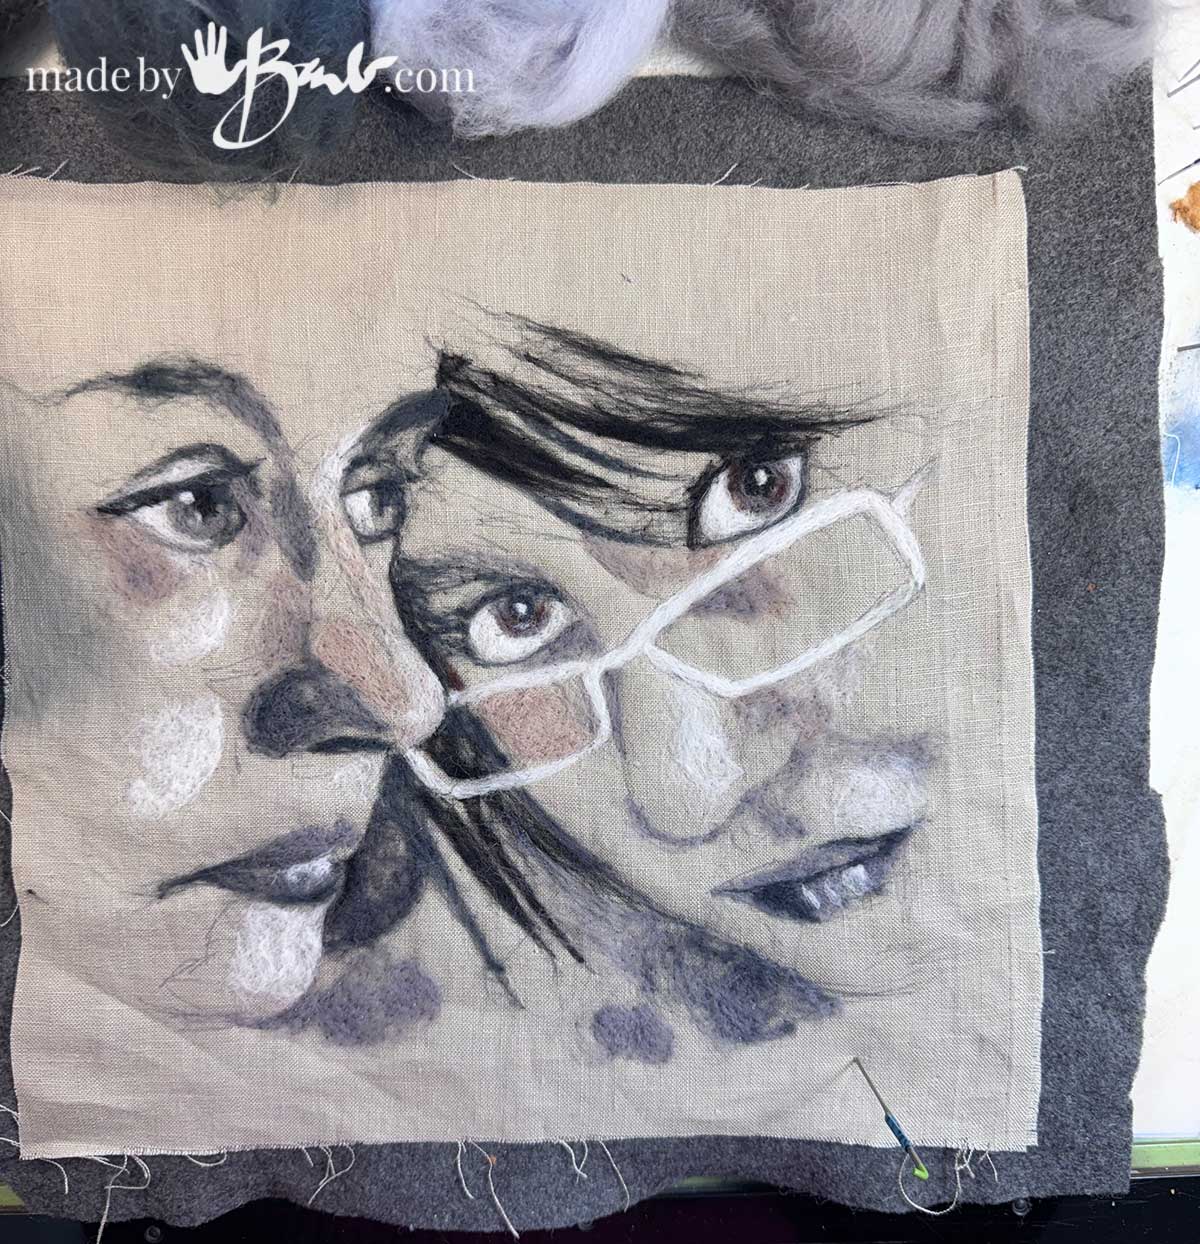
To give some extra thickness I added a layer of felt under the linen to make the sewing step easier. My FME works well when the fabric is not too thin.
The Special drawing pen:
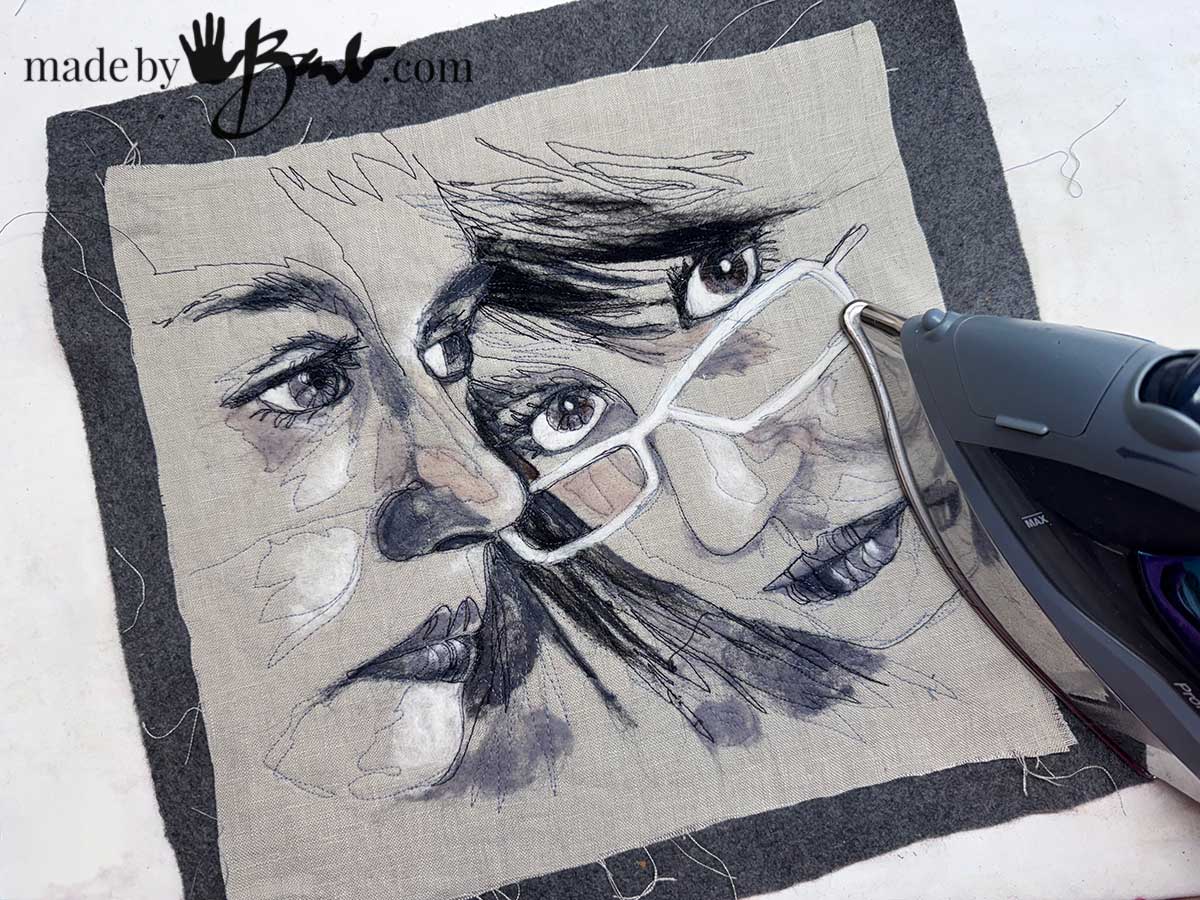
Since the final image will not be completely covered with wool felting the lines should be able to disappear. For that reason I use an erasable pen; it allows heat of an iron to make the drawing disappear after the sewing. It really helps when planning any kind of drawing on fabric!
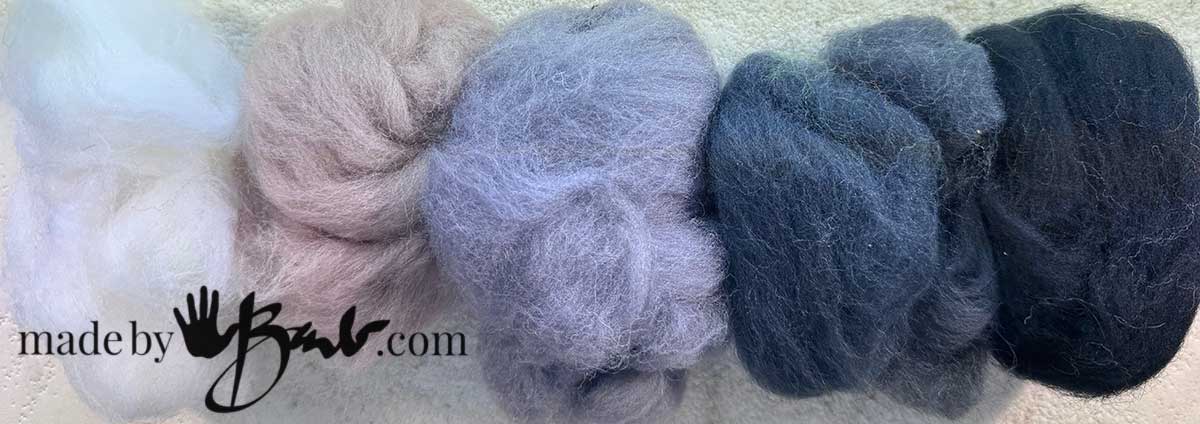
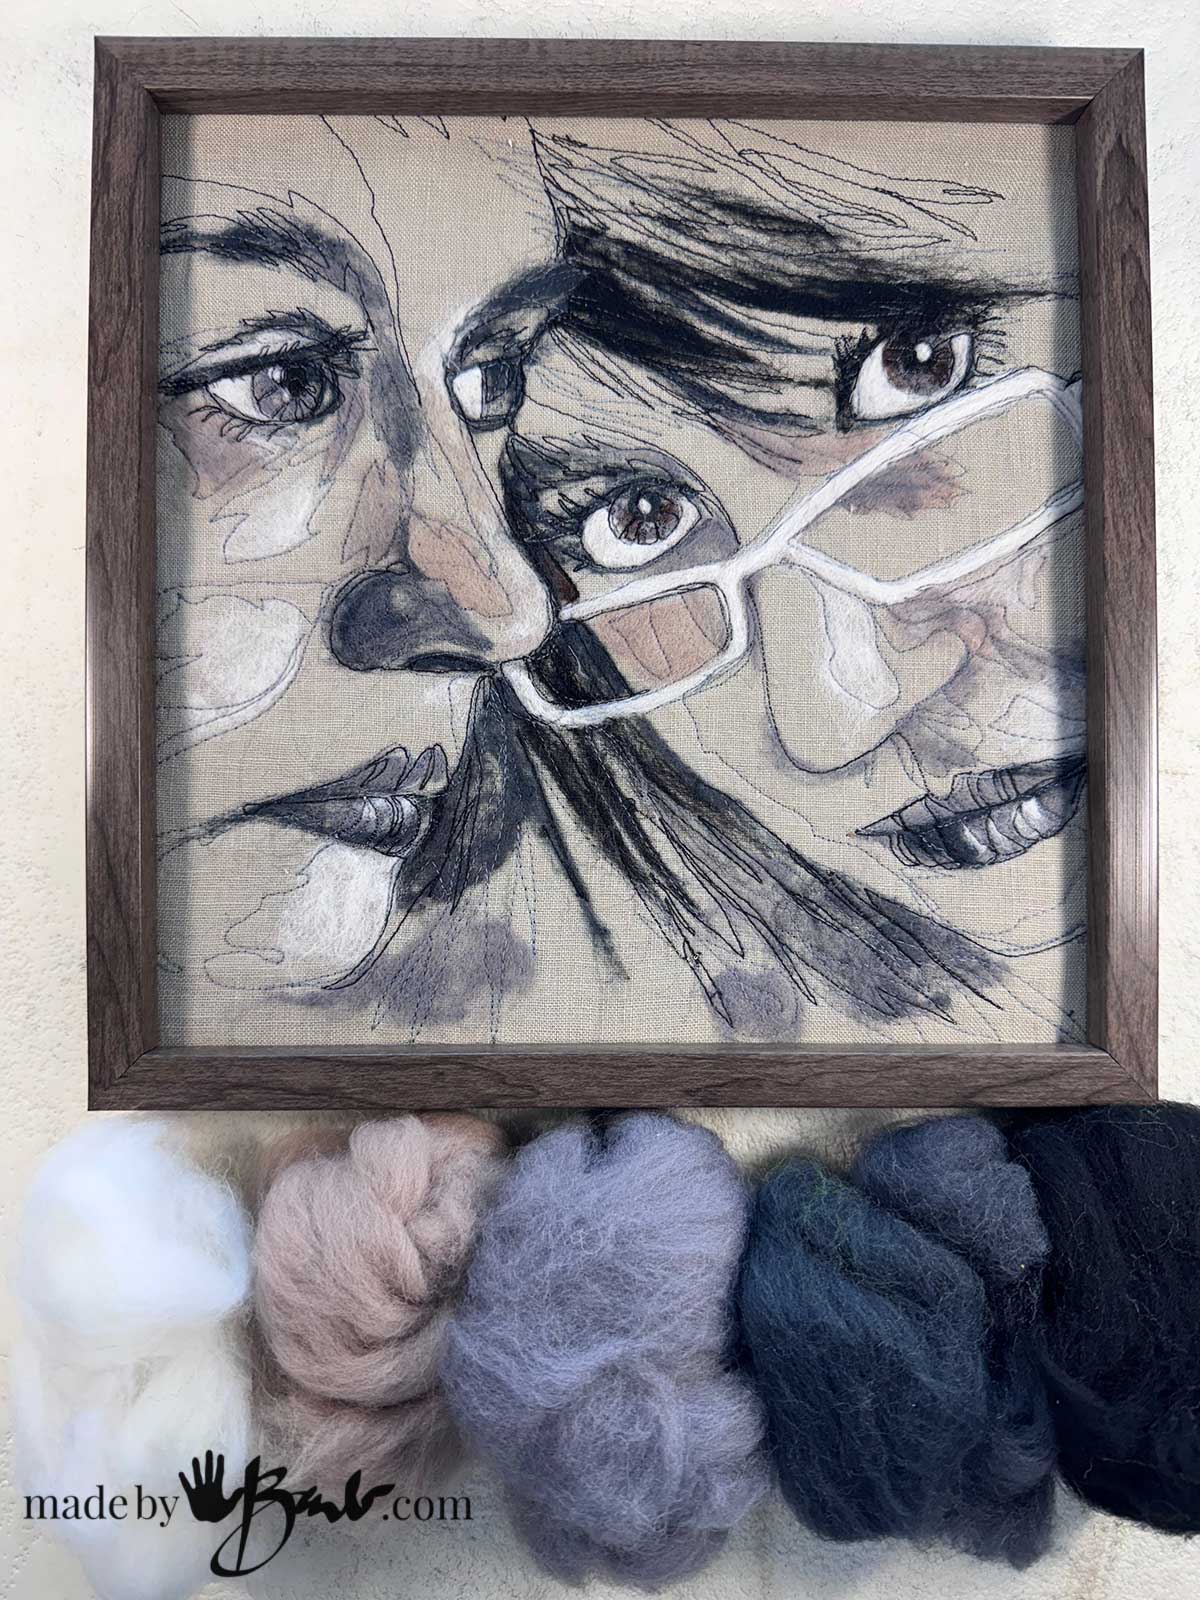
The Wool Colours:
I used these 5 colours of Wool roving. It is a fine Merino but I can fluff/tangle it up before using or keep the strands long for wispy areas.
Feel free to adjust whatever colours you like as long as you have light, midtone and dark. The great thing about this technique is that it is somewhat foolproof since the extra step of Free-Motion-Embroidery adds the outlines.
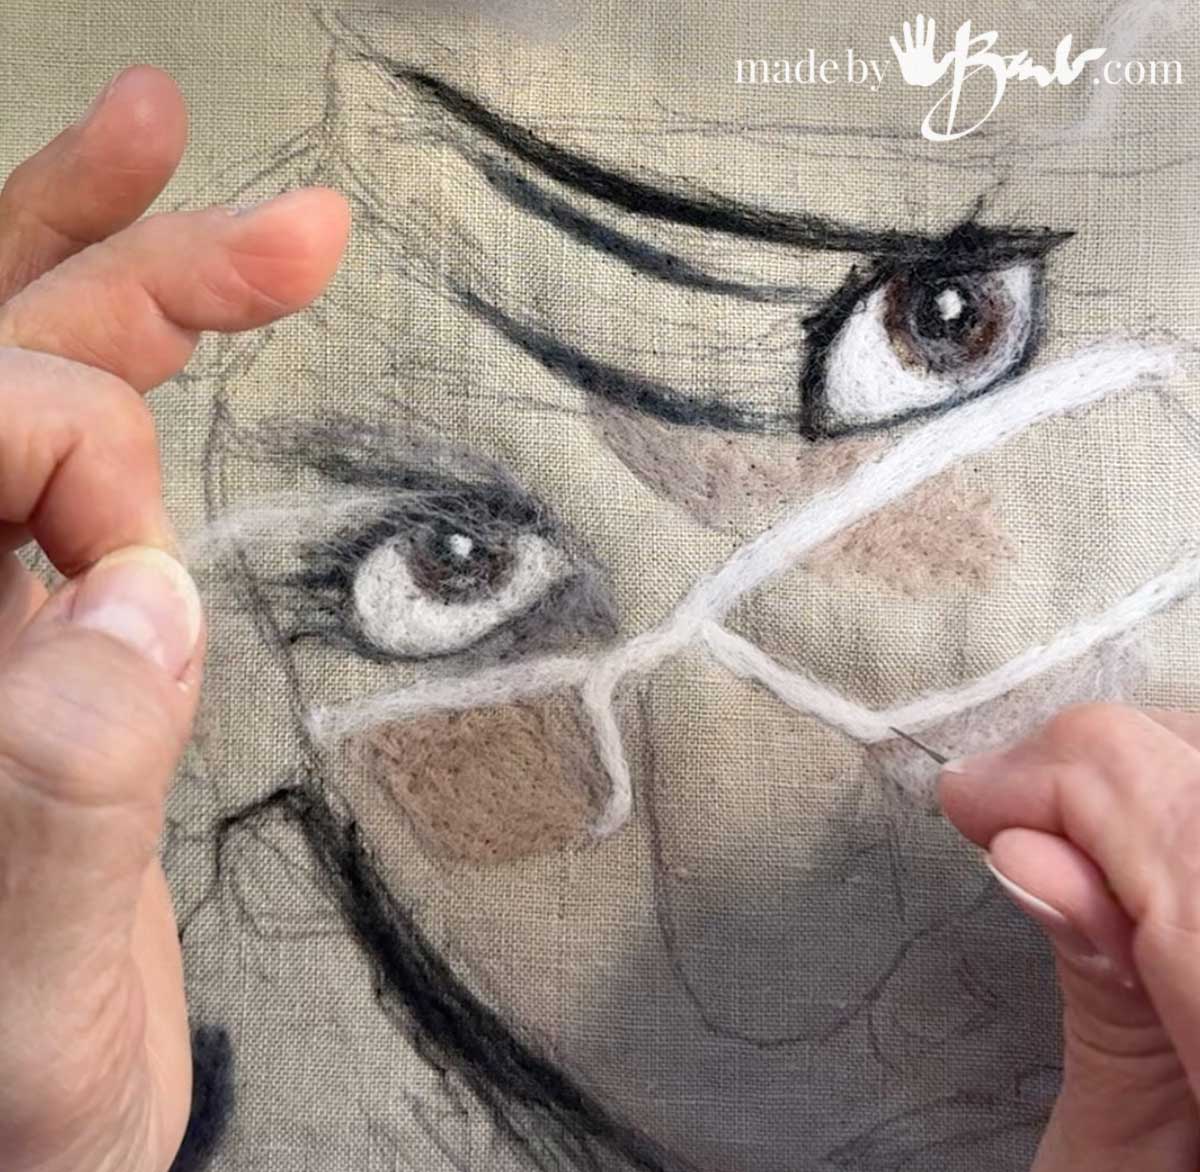
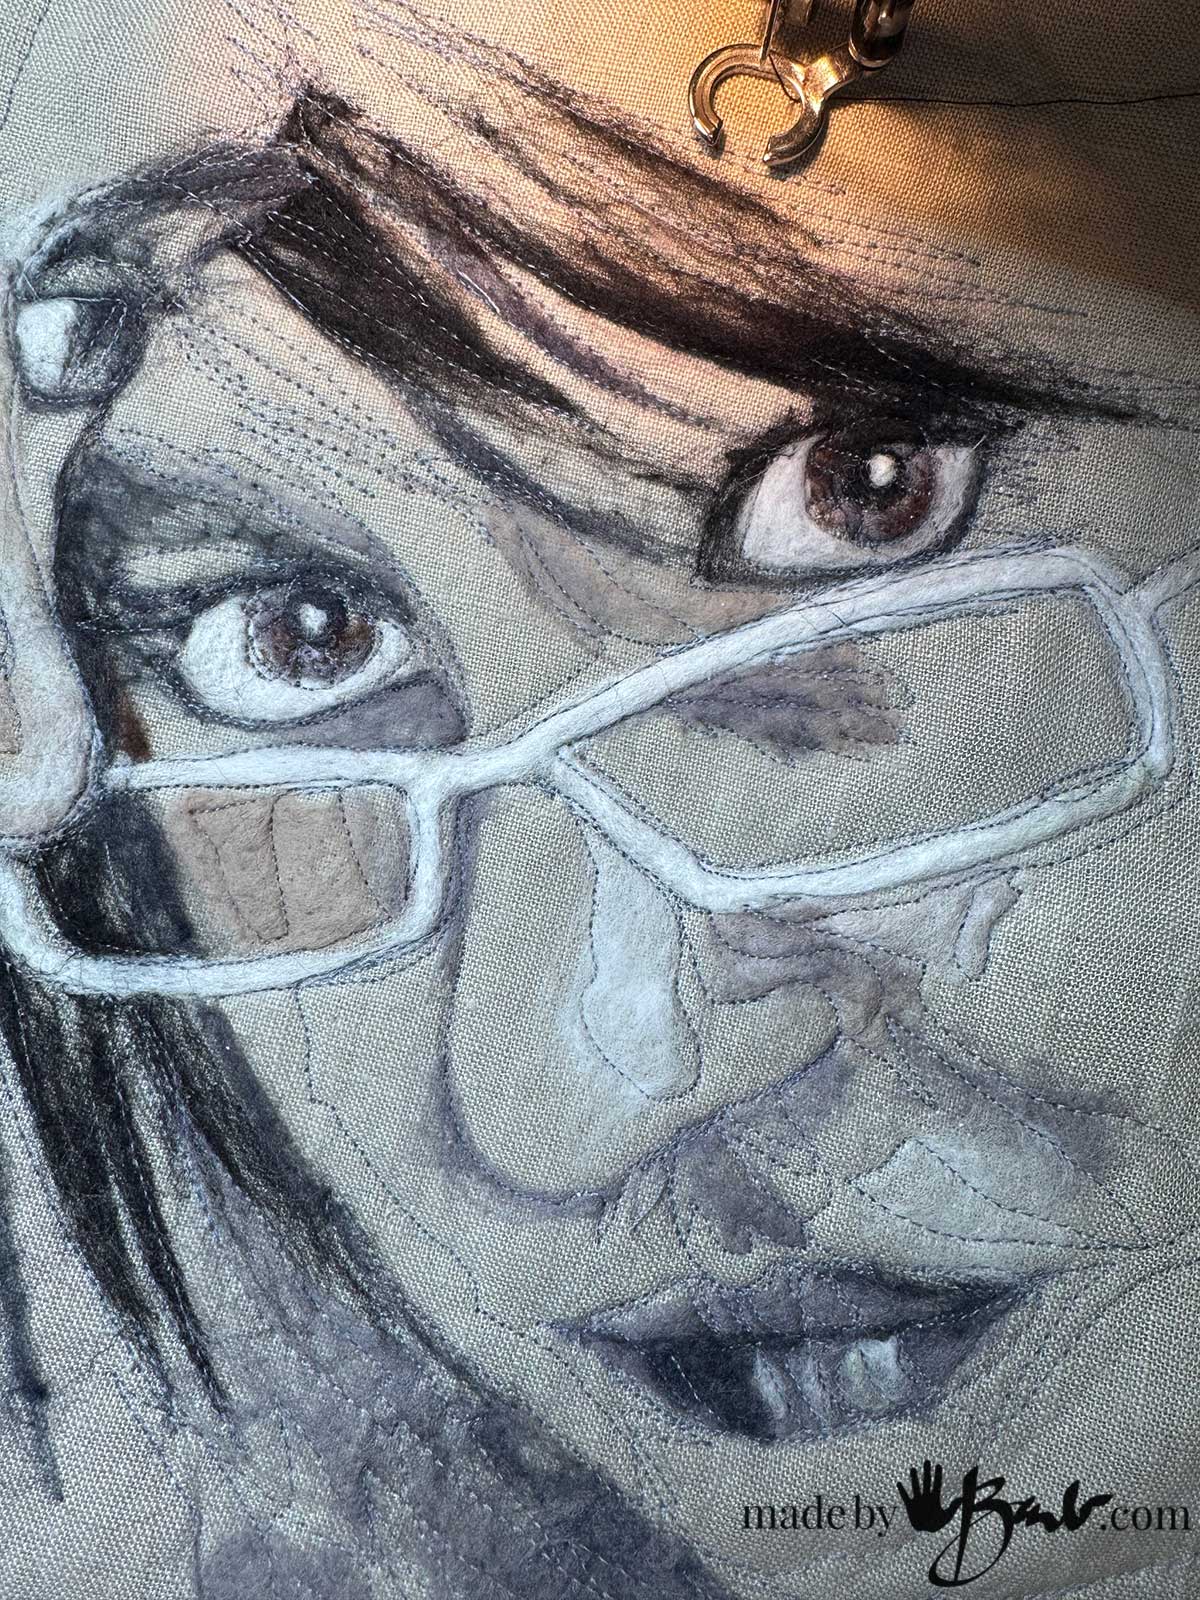
Felting the Tones:
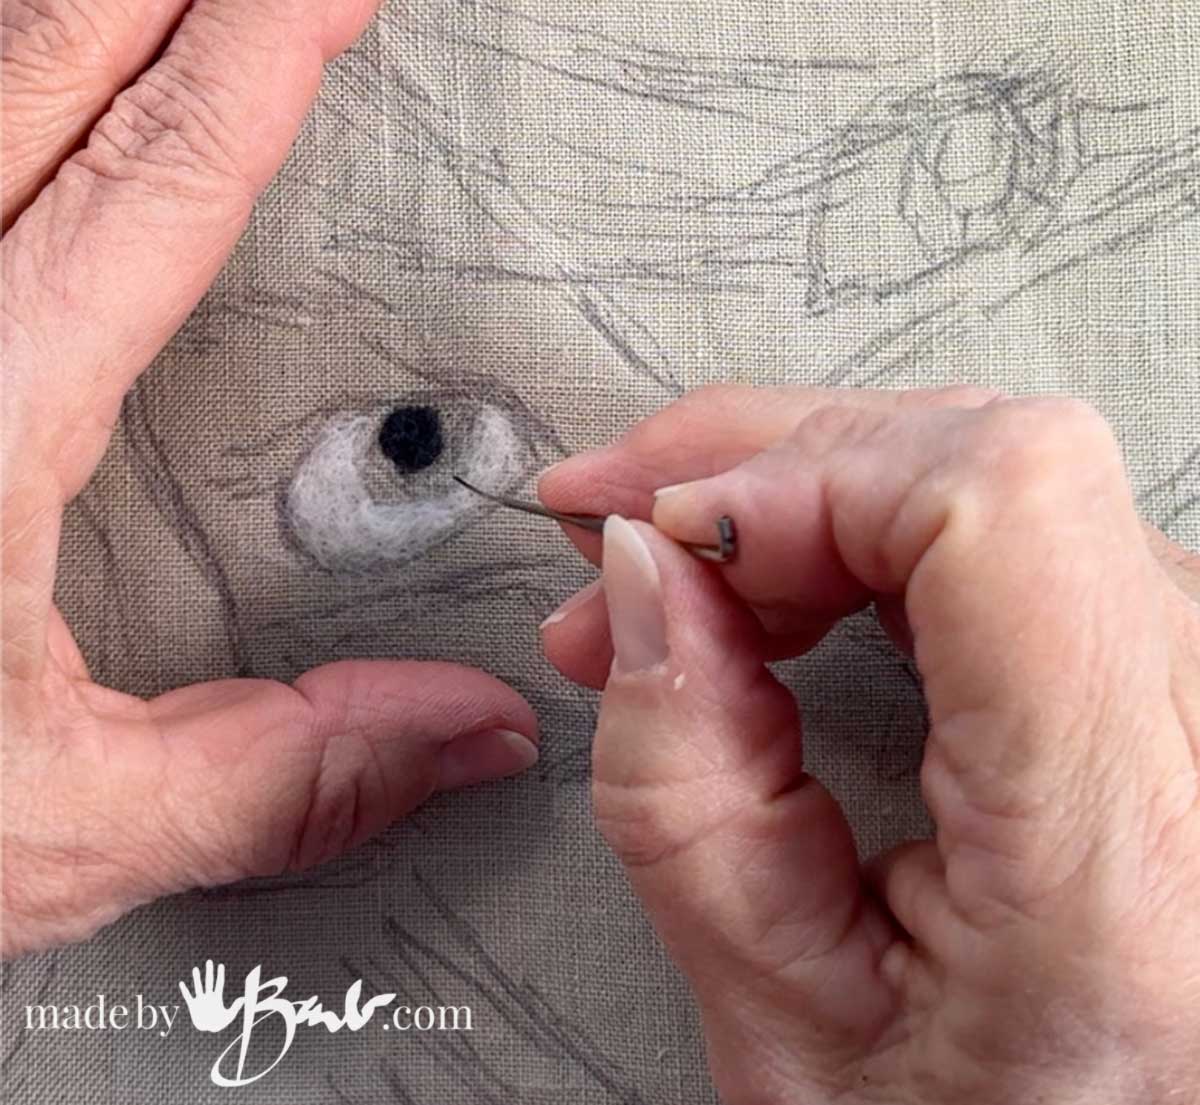
My intention is to make this art look like a sketch, simplified into a few spots of value. Obviously a face needs some great eyes – and they are such fun to felt as well!
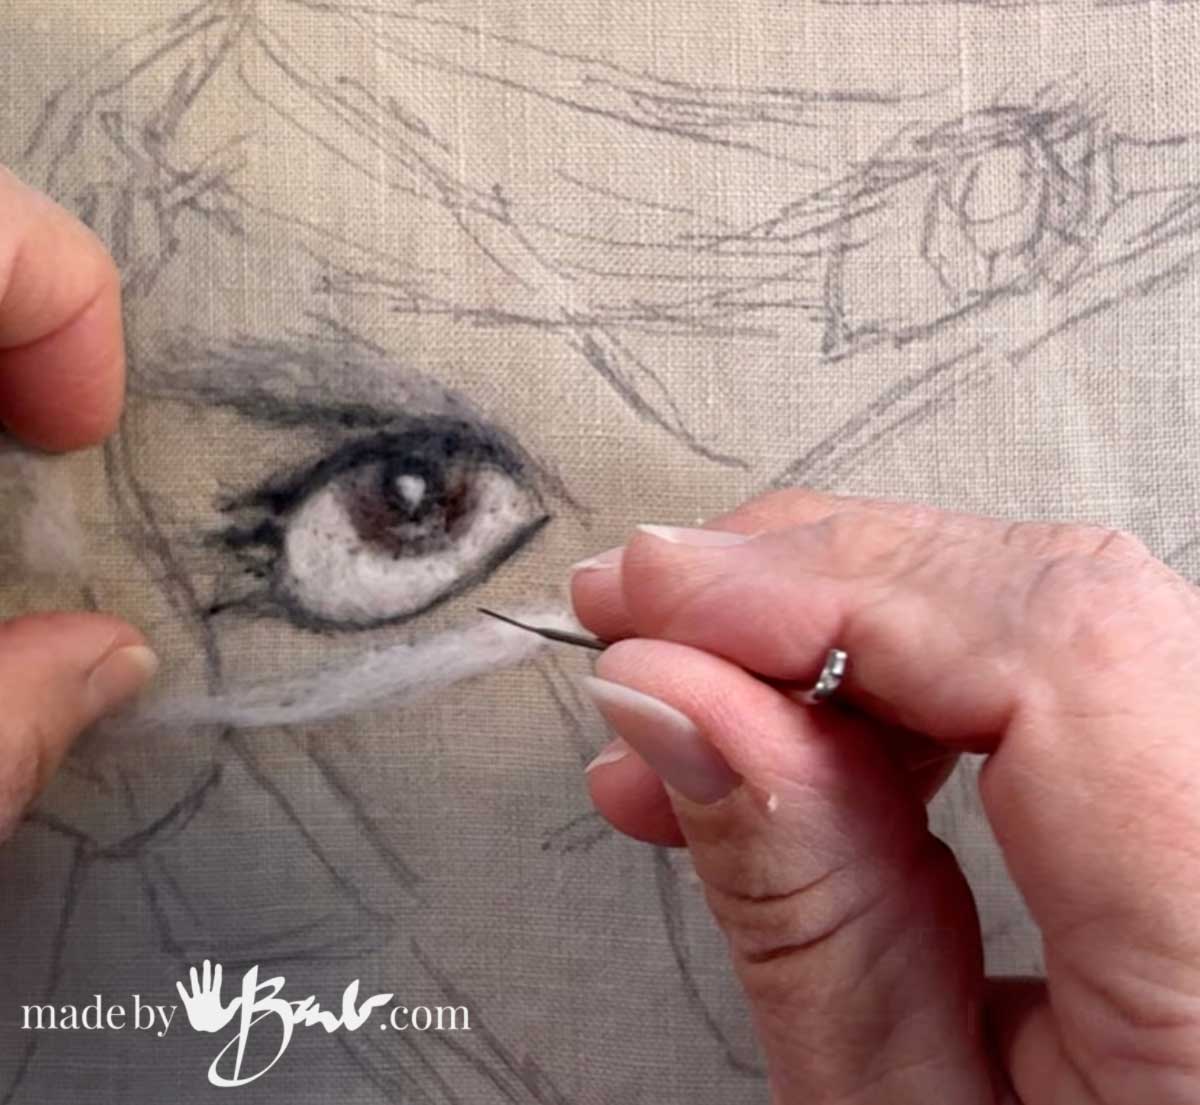
Make sure to add that highlight in the eye to give it life! Doesn’t the wispy nature of the wool fibres look like charcoal sketching?! I love the way it comes together without having to fill a large white background.
Choose the spots of value carefully. Squint at the original image to see what the major areas are.
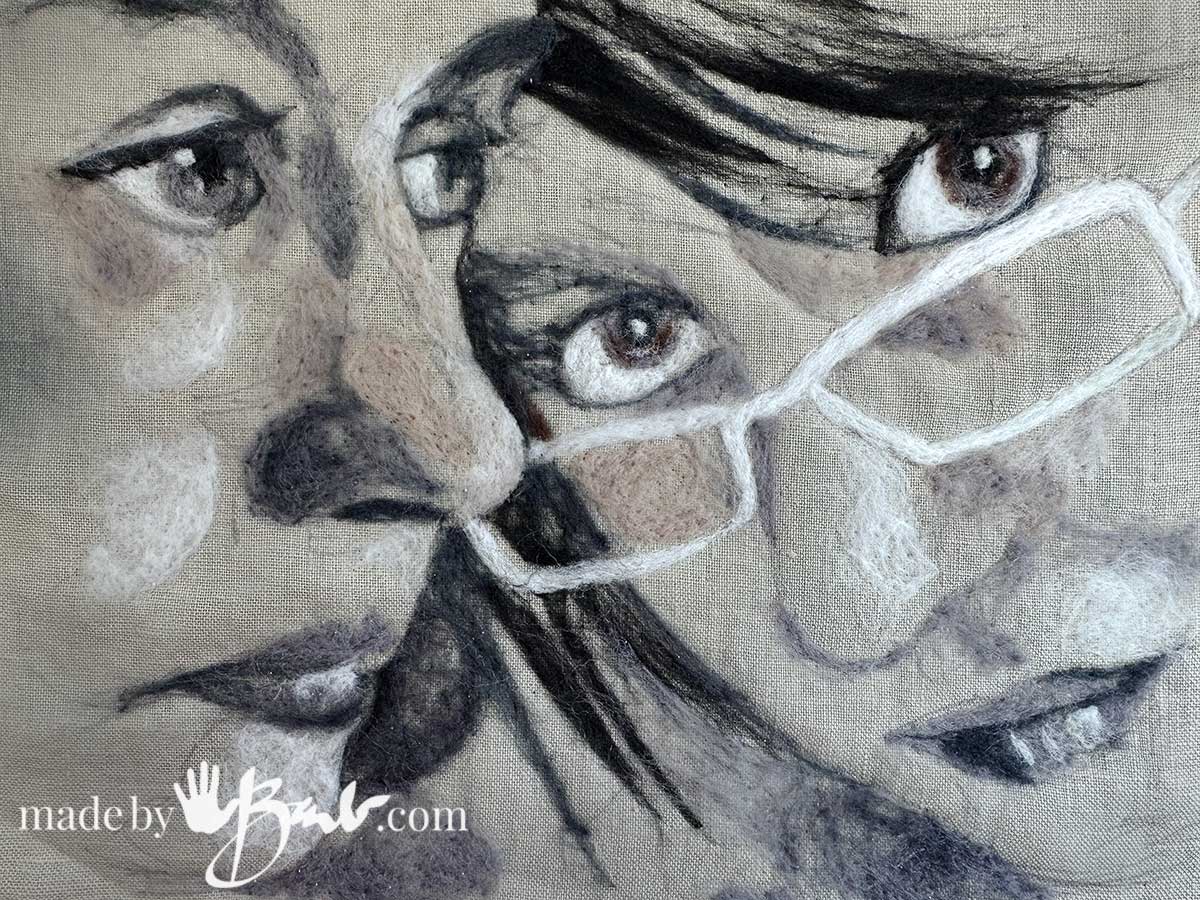
This layer is only with the wool value areas, so I know the sewing will add just another dimension, even though it looks pretty goos already! ‘How amazing it is to have a good drawing to start with!
Don’t worry if there are any lines showing as they will disappear later!
The Fun part; FME
If you have not tried free motion embroidery yet, this could be a good start… Basic adjustments will allow you to set your machine so you can move freely under the moving needle. Lower the feed dogs and install a mending/embroidery foot for your type of sewing machine. (almost all machines can do it)
I started sewing with a grey thread so the contrast was not too strong. The sewn lines aren’t perfect but that is the charm of this type of ‘drawing’. Zoom around and pretend you are doodling and drawing around the shapes. I had my tracing nearby to glance at as well.
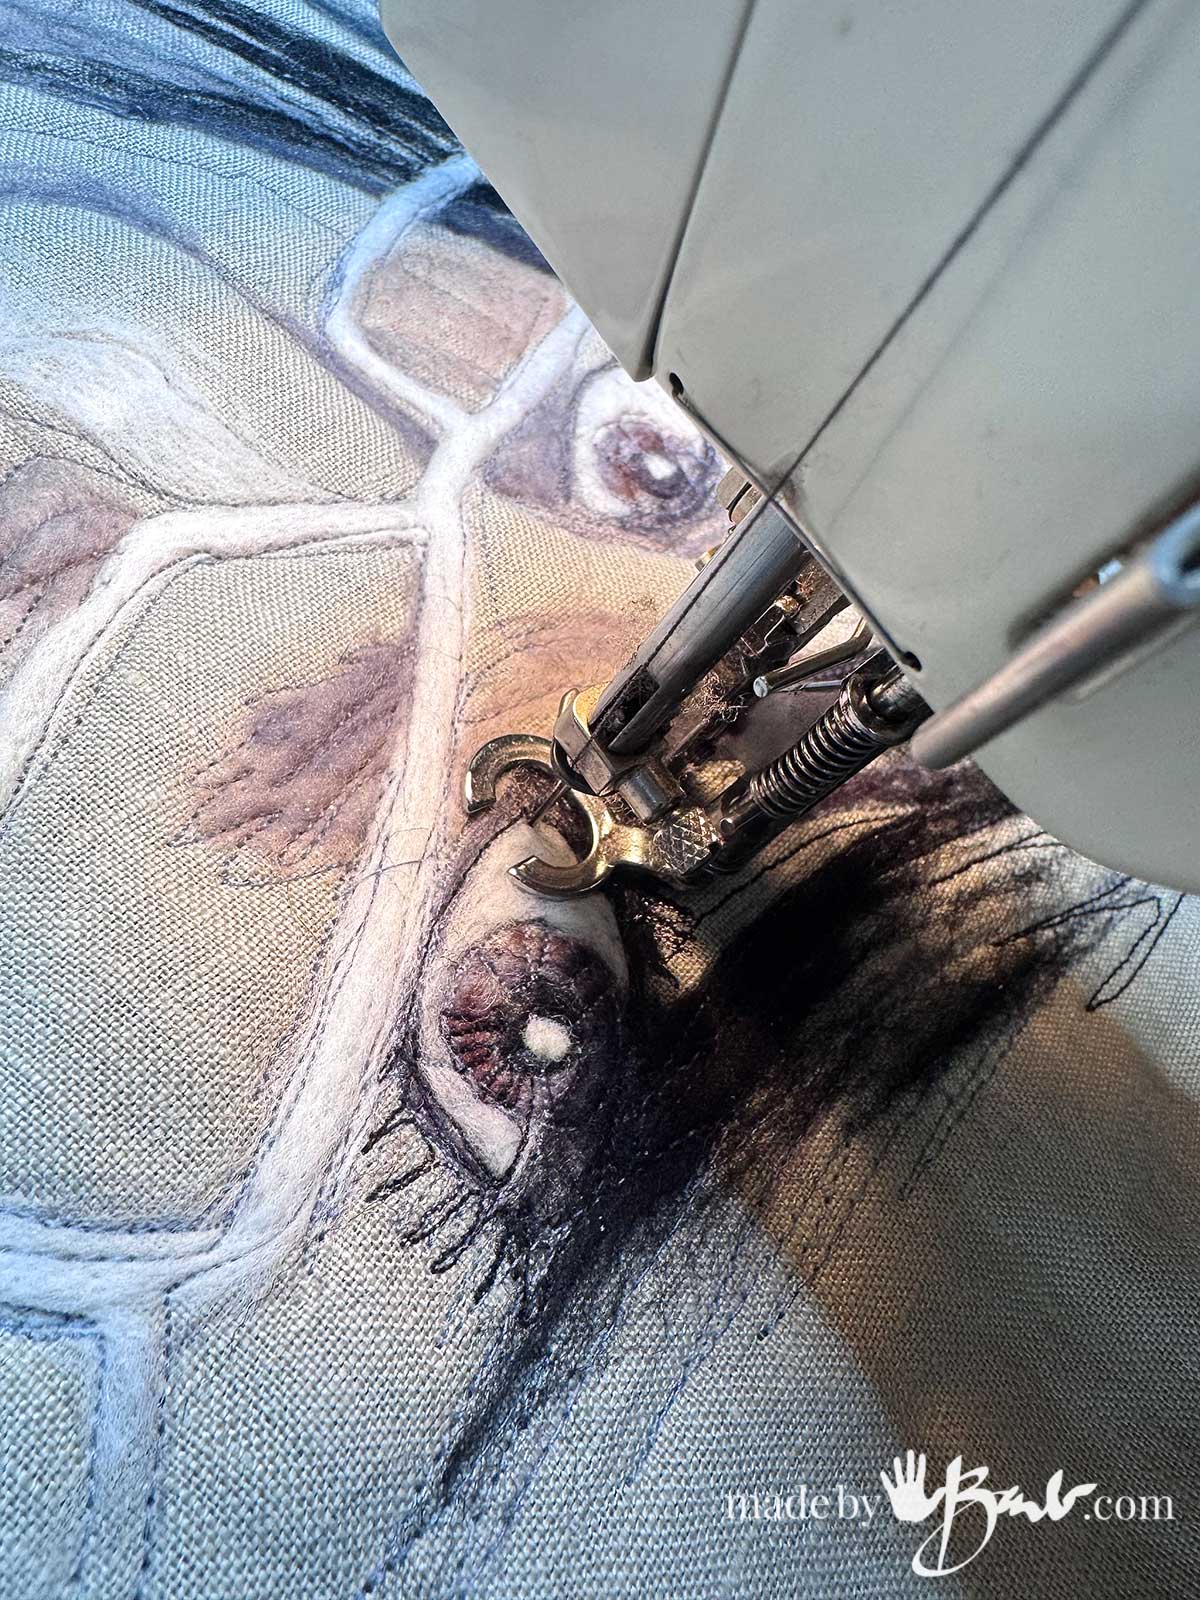
Follow around edges and value shapes, it can can look quite interesting! After the grey thread I switched to black for the definition of the eyes and lips. I it is much like driving… ‘pedal to the floor’ and places to go!
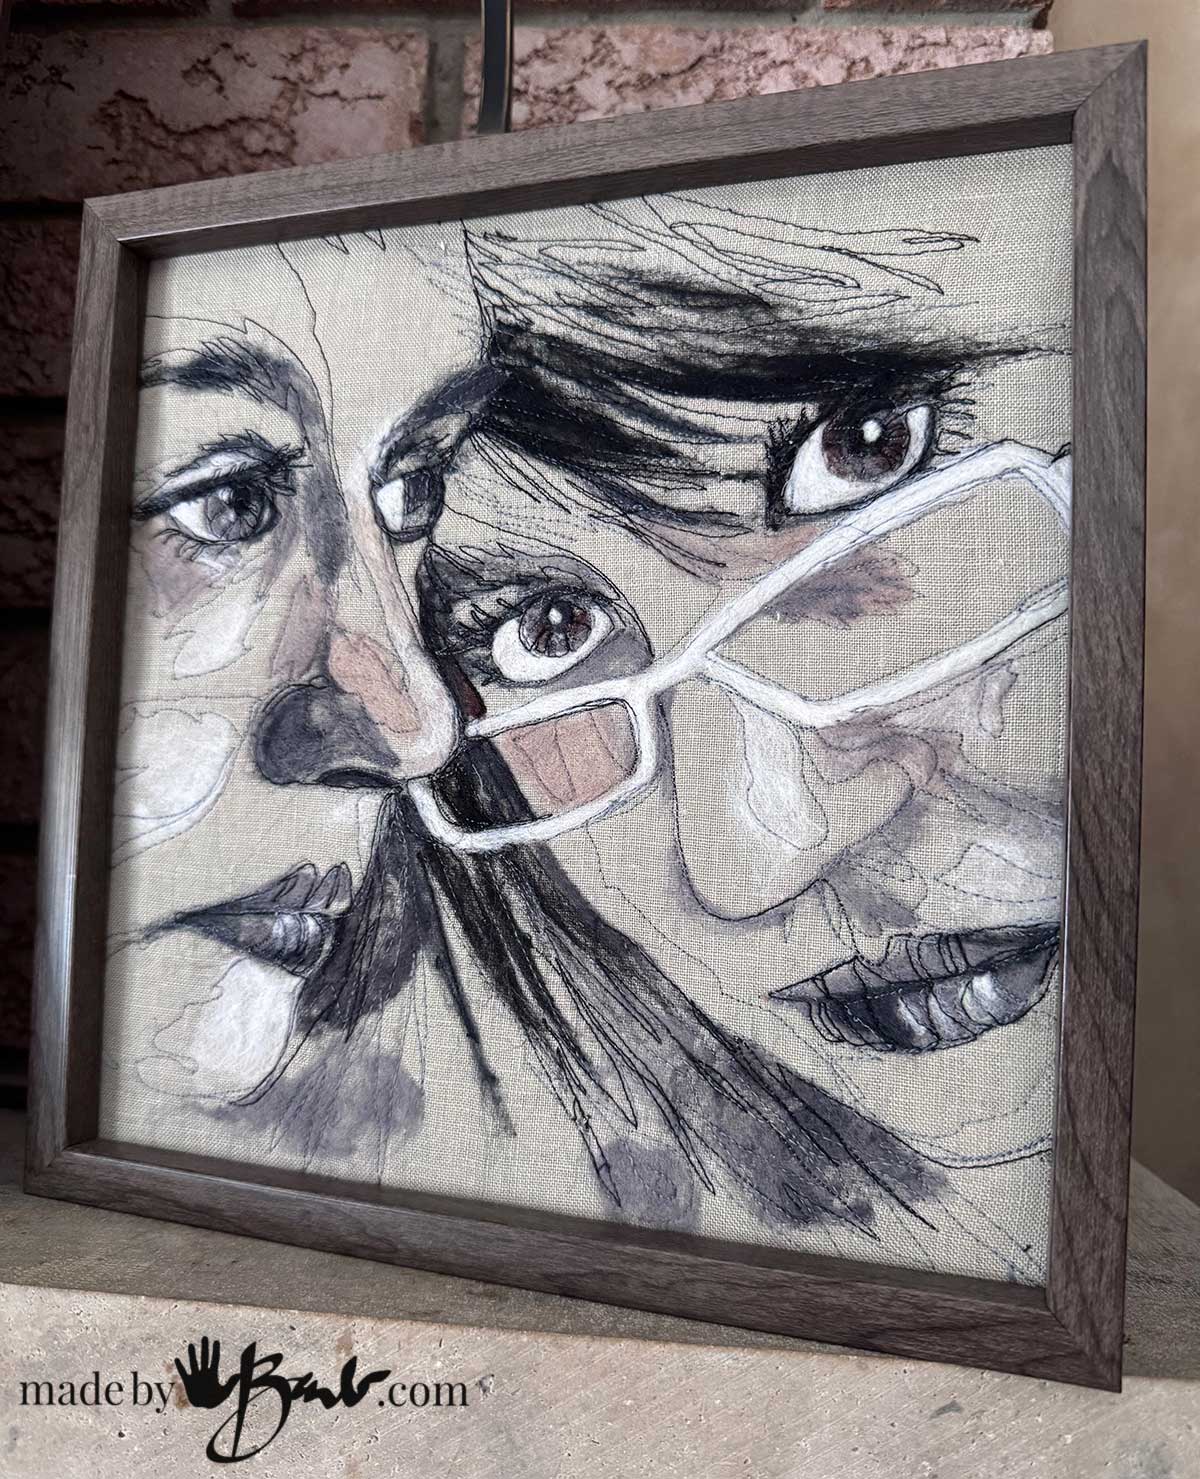
Ready to Frame:
I ironed the finished piece. The layer of felt helps give the sewing some extra slightly quilted dimension. To easily frame it I pressed the backer board into the frame as a pressure fit stretching the fabric against the side of the frame, trimming to secure. It is almost like using an embroidery hoop. ‘How novel! Glass is not needed in my opinion.
When translating any image you can usually use just a few values to get a good representation. That’s how comic artists work as well since it is not super photo-realism. Not every piece of art needs to be so realistic.
I’m happy how easily this came together and especially how simple it is to transfer the image onto the fabric; such a gamechanger!

Next time you look at a nice photo perhaps you can whip up one of these!
People will ask how did you drew that face with the sewing machine. For more Free-Motion-Embroidery projects see here.