Metallic Cast Leaf Planter
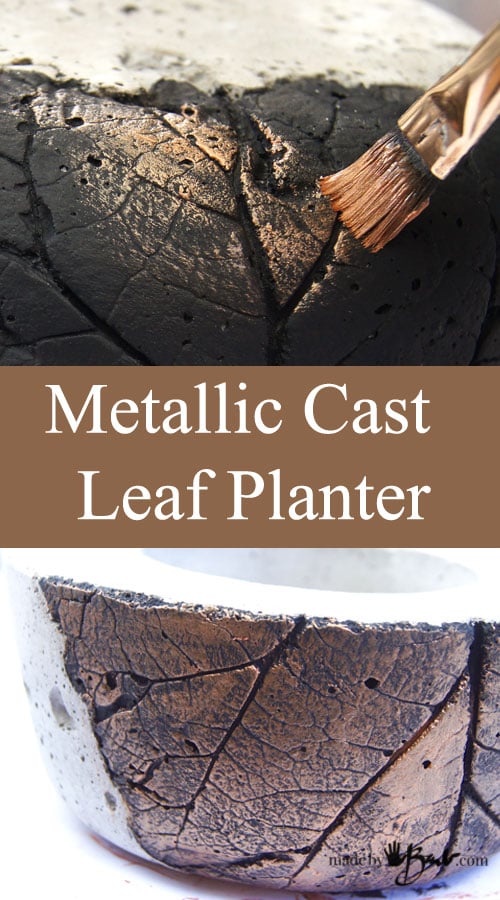
As we know; one thing always leads to another… As is true here with this marriage of concrete bowl casting and relief casting. Don’t worry, it’s also super easy. You can use any kind of foliage that has a defined vein pattern or texture. Let mother nature do the work for you. Add some metallic paint for some bling and you have a perfect accent for the garden!
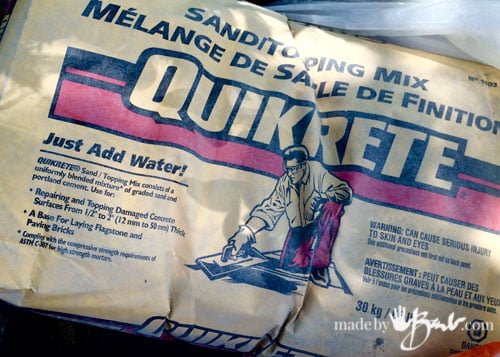
As with my other stepping stones and bowls, this uses my favourite mix, Quikrete. I’m not the only one loving it as it was out of stock the other day!
The Materials:
Along with the concrete mix and water, you will need some containers as your molds. I like my plastic ‘tupperware’ type and disposable yogurt ones. If they have a bit of flex, then it’s easier to get the concrete out of the bowl afterwards. I have not needed any release agent since these are quite smooth plastic, however you can use vaseline or cooking spray if you like. I like to use rhubarb leaves, but have used the large thistle weed leaves that are found readily at the side of the road as well.
Cut and lay the leaves in the sides of the bowl as flat as possible, veins toward the inside.
The Pouring:
Mix the concrete until well incorporated and not too wet. If it is a large bowl you may want to add some fibers for reinforcement.
Smooth the concrete out along sides, making sure not to disturb the leaves against the wall. I keep the texture of the concrete a bit on the drier side so that it doesn’t become too wet as it is vibrated. It should hold some shape, but be pliable without crumbling.
Fill with concrete keeping in mind that there is the centre mold container. Wriggle it into the center mold and tap to let air bubbles rise. As you see here the concrete becomes smoother and seems more liquid since the water rises. The more you tap, the better, almost like burping a baby. Tap tap tap… Put some rocks or water in the middle container to keep it weighed down.
Let is sit, out of the sun til hardened, at least 12 hours. It pops out and the leaf will pull off quite easily, and the veins in the leaf may need a bit some aid of toothpicks to pull out the deep ones. There are some lovely textures that the leaf produces. If you would like you can sand the top edges of the rim (as I did here)…or not.
The finishing:
Good job! Time to paint!
To give the impression of a metal leaf, give the leaf section a coat of black acrylic paint. Any type of acrylic will work but there is paint specially made for outdoor applications.
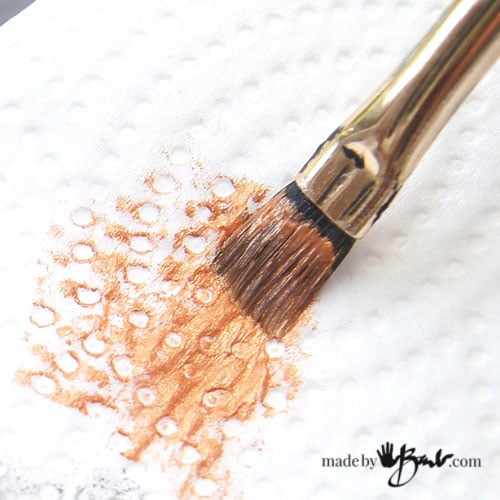
Now, here comes the magic! I used a copper acrylic paint from Liquitex, which is quite metallic to accent the leaf. The procedure for highlighting is to use the dry-brush method. Get a bit of paint on the brush and rub off most on a paper towel or rag.
It will now only apply a bit of paint to only the ‘tops’ of the texture. It is really an easy method to accentuate any texture. You are now an artist! (really)
Looks impressive right?! Just a bit of dry-brushing, and voila! Think of the possibilities?! For extra protection you can clear coat with acrylic matt or gloss medium for exterior use if using outdoors.


So far this is my favourite … perfect time of year for finding huge leaves now too … So many textural ideas going through my head now … hmmm … then gilding the lily – so pretty!
Can I just say what a relief to find someone who essentially knows what theyre talking about on the net. You undoubtedly know the way to bring an problem to light and make it important. Far more people today need to read this and comprehend this side of the story. I cant think youre not extra favorite mainly because you definitely have the gift.
Oh yes, I hate it when I see that same stuff over and over. I do spend extra time perfecting the post instead of just trying to make many. If there is not enough info I think tutorials don’t encourage any making. Thanks for commentimg
whoah this blog is fantastic i really like studying your posts. Stay up the good paintings! You know, a lot of people are searching around for this info, you could help them greatly.
I just subscribed to your mailing list and can’t wait to make this and almost everything else you teach.
Oh, aren’t you kind! Yes, I am anxious for spring to try some new concrete projects that are tossing in my mind. I bet you like the spook
Hi Barb,
Thank you for pointing me in the direction of your blog, these concrete DIY’s are amazing! Especially this one, what an awesome idea and adds something different to the normal concrete planters you see. Plus I’m a massive fan of painting things in metallic haha!
In your reply to my comment on Pretty Handy Girl, you talked about sealing the concrete. Is there somewhere that you detail how to do this? Have I completely missed it? If not, how would you go about it? Your comment made me think more seriously about sealing it instead of letting the concrete suck out mouisture.
Thank you for your help! 🙂
Emma: I happy you’ve come to visit! And I am on a bit of a metallic kick too! So far I have not tested the sealing of the inside except with the eggs which I just used regular acrylic medium. I find that RapidSet Cementall is a quite dense concrete and I didn’t want them leaking as they were roly-poly on the table.
I have had the intention of researching as I think some of the commercial sealers may have a lot of chemicals that would get into the plant soil. My succulent planted ones have been doing fine since last summer I just need to remember to water. T least I won’t be drowning them! One idea I had to keep it natural was beeswax, as that would be natural and a water repellant. Check back often or subscribe (I only post quality projects.. and won’t fill your inbox)
For the metallic cast leaf planter do you use quikrete concrete mix or sand topping mix? I love this idea!
I use the Quikrete brand Sand Topping mix, as it has no large stones in it. It is meant to be used at a thin level as well. Check out all the other concrete as well…
I love this beautiful idea and have a question. You state to use quikrete concrete and your picture shows quikrete sand topping mix (which I discovered contains concrete ) . Just so I do this correctly , which one should be used? Thanks
The mix to use is the Quikrete (just a brand name) Sand Topping mix. A regular concrete mix has gravel in it. I have read how some people just strain out the gravel, but I like just buying the right mix. Good luck!
Help…I greased both the pot and the mold but cannot get the concrete to release…any ideas?
Oh no! I have had some containers that were not that flexible or sloped sides and they have been quite challenging to get the concrete out! It is easier if it isn’t pourdd to the top edge so that it can be inverted and pushed on. It is plastic? I have always found the flex the ‘mold’ container has the better to work it out. I have can to ‘sacrifice’ the odd plastic one… I am still not convinced about the greasing for concrete. Lately I have been skipping it since I have been using the flexible silicone molds that I make. Let me know how it goes…
For future reference…someone suggested using a heat gun to release the mold. It worked! One more question…is there any way to disguise air bubbles after the mold has dried?
Interesting fact. Sometimes the heat gun may melt the mold though. As for disguising the bubbles; you could mix a thinner concrete and wipe it into the bubbles, and wipe off the other parts with a wet rag. If they are large maybe a small knife can ‘spackle’ them full of concrete. Just dampen the dried concrete first. I have painted another layer of portland cement on some things like my ‘Spook‘
Hello Barb,
I have been following you for a while now. I love your ideas and tutorials You and they are Great! ! I’m working on the step spook at moment. Can you recommend a Good gloss concrete sealer?
Thank You Barb andkeep being Awesome
Sandy
New Zealand 🙂
Thanks for the kind words! I am sorry but I don’t use sealers. I’d ask the home improvement store for one that works for side walks etc.
Hey Barbmaker, Thanks for the tutorial. It’s useful.