DIY Boot Protectant – Testing 4 Recipes on Shearling
Don’t you just LOVE your shearling boots?! It’s like wearing a soft furry cloud on your feet. Sheepskin is unique as it gives your Ugg’s a suede-like leather outside and a furry inside. But don’t you hate it when they start to look really sad and worn, and not able to fight the elements of rain and snow? So I’ve tested a few beeswax based recipes that are heat-set on shearling similar to waxed suede and tin-cloth. Rescue your beloved (old) Shearling Boots or Ugg’s from the trash heap…
The Elements:
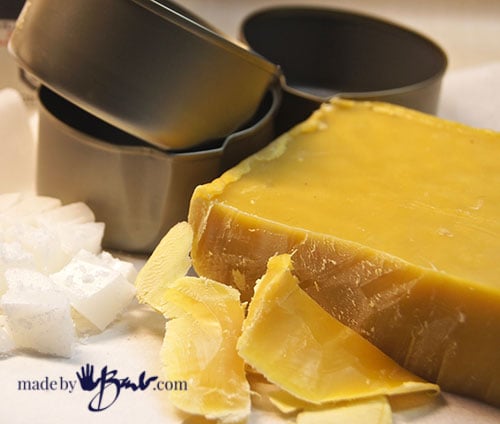
Oh yes, I just love beeswax. It has awesome water repelling qualities and a fairly high melting point of about 62 °C. Having used beeswax in my body products like lotion bars and lip balm I know how difficult it is to ‘wash’ off the utensils afterward (that’s why I use disposable tin cans that I have bent a spout into). It really wants to stay put; perfect to fight water. And that is why it has been historically used to waterproof clothing, shoes, boots, leather, bags etc. However since beeswax is quite hard it needs some help to be more workable and spreadable; so I’ve added a solvent and an oil to help.
Paraffin has also found a place alongside the beeswax since it is a softer wax. Yes, I know it is not as natural. But there are usually some trade-offs that have to be made for effectiveness. Vegetable oils have been known to eventually go rancid and hasten rot. That is why they are not even suggested to be used for cutting boards. Mineral Spirits (petroleum derived solvent) or turpentine ( a solvent derived from the resin of live trees like pine) will ‘thin’ the beeswax. I would like to explore the use of D-limonene as the terpene… never enough time! Boiled linseed oil is a flaxseed oil that has added hardeners, otherwise it takes weeks to harden. It is common in oil painting and furniture finishing, as it retains some flexibility when cured.
I am testing these 4 Recipes:
Recipe #1
- 2 parts Beeswax
- 1 part Mineral Spirits or turpentine** (I used my artist painting solvent)
Recipe #2
- 2 parts Beeswax
- 1 part Boiled Linseed Oil* (I used this, or find it at the local hardware store)
- 1 part Mineral Spirits or turpentine** (I used my artist painting solvent)
Recipe #3
- 1 part Beeswax
- 1 part Paraffin wax
Recipe #4
- 2 parts Beeswax
- 1 part Boiled Linseed Oil (I used this, or find it at the local hardware store)
The Method:
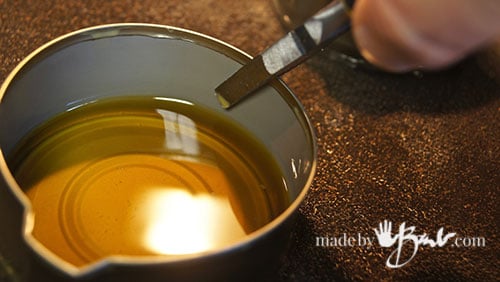
Since beeswax melts at a higher temperature start with it. Use a double-boiler method and pay careful attention as it and paraffin are quite flammable. Heat the water to slight simmer, till wax is melted.
Hint: I use pliers to lift the cans from the water bath. It is difficult to measure the wax pieces so I measure after the melt. Use a small vessel of some (disposable) type. The cool oil/solvent will slightly harden some of the wax when added but it will melt again easily. Do not heat the oil or solvent, let the heat of the water remelt it all together. Use caution and under well ventilated conditions. I used such small amounts that I did not find any odour (I did use the odourless solvent). CAUTION: any rags soaked with Boiled Linseed oil need to be disposed of properly as they may spontaneously combust. Seal in air tight can or soak heavily with water. Left over BLO should be left to air dry before disposing rather than pouring down drain.
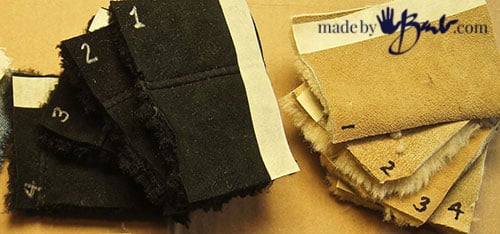
To test I have used scraps of black and tan shearling left over from my slipper making.
I taped off a section to be able to compare the look against the finished ‘waxing’
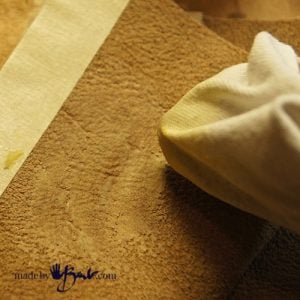
Recipe #1 yields a somewhat soft spreadable wax. Rub it into the shearling well, even a soft brush will work. Don’t worry about excess on the surface as heat will set it in. Your intention is get a good coverage.
Recipe #2 & #4 both yielded a bar that easily popped out of the container. They glide over the surface quite easily like a hard lotion bar. These would be similar to Otter wax. If you have sensitivity please wear gloves.
Recipe #3 is ridiculously hard! It is all waxes and perhaps needed more of the soft wax like paraffin. I pried it out of the container to be able to rub it on. It could be heated to be brushed on but that seemed too laborious.
The 4 tests have been applied, note the roughness of #3!
Use a hairdryer set on high to ‘melt’ the waxes into the surface. You will see it get shiny and then disappear as it sinks into the skin. Theory is; you can apply numerous times and heat set to get it quite impregnated with wax. It will however get stiffer. They all feel quite nice, and not greasy. #1 & #3 feel the ‘driest’.
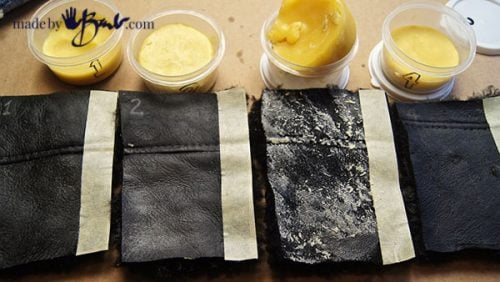
I have also tested the black shearling. Untreated samples here.
Recipe #1 being rubbed into the surface.
Recipe # 2 & #4 Bars being applied. You can leave extra in the seam areas.
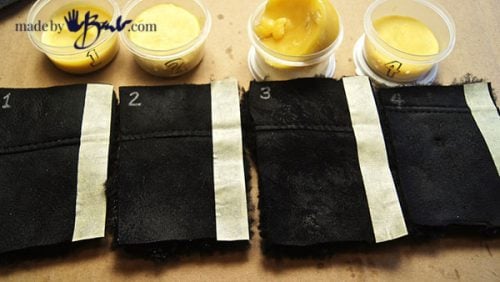
Each test applied, again the #3 is very rough.
After the heating to absorb the waxes they pretty well all look the same. It sinks in quite well.
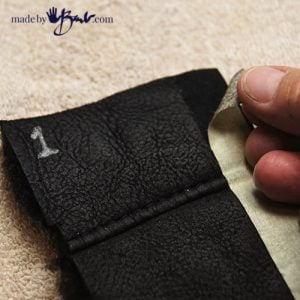
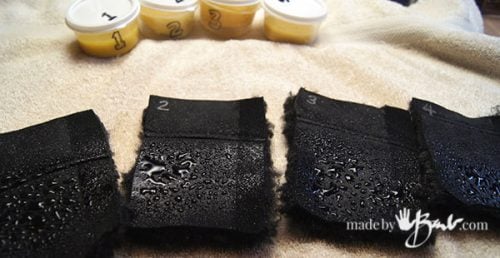
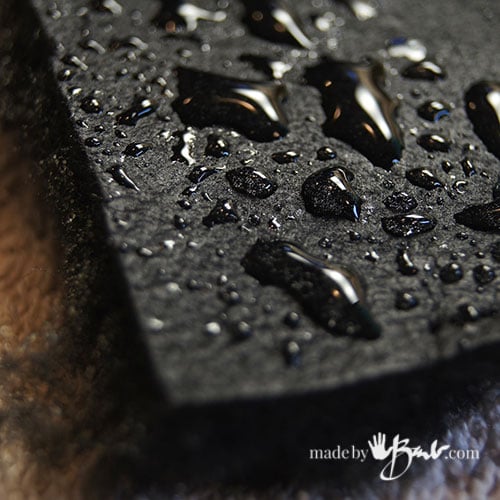
The first test of water spraying. They all behave quite similarly. #3 eventually absorbs the water as the waxing had too many small areas that did not get treatment due to the sparsity of the spreading.
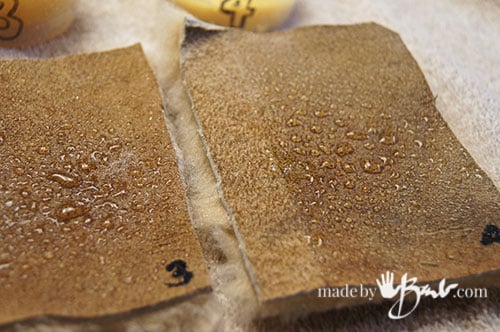
Water testing the tan shearling shows very similar repelling on #1 & #2. You do see however how much darker the colour turned from the treatment.
The repelling on #3 & #4 are similar to start as well. Slowly the water makes it way around on #3 and finds it’s way in.
Conclusion:
All 4 recipes do quite a similar job. Differences include ease of application and feel of final product. The bars #2 & #4 are easy to apply as is #1 as a paste. Since #1 has no oil it produces the most un-oily dry-to-touch finish. (if you don’t want a greasy end result) #2 & #4 both have a somewhat oily finish but it does ‘dry’ more(cure actually) over the next day or so.Recipe #3 was too difficult to apply at this ratio. The final look can vary according to original shearling colour and the amount applied, as well it can affect the amount of repellency. It is quite a personal preference.
I really can’t imagine having greasiness on the boots so I opted for the Recipe #1. (no Boiled Linseed Oil). The heat-setting makes the recipes soak into the pores of the shearling skin so it is not sitting on the surface. If the there is excess ‘wax’ it will possibly show some white wax cracking in the creases especially if it is #1 or #3 since there is no oil. Boiled linseed oil cures but does remain flexible. (who said there was going to be a simple answer?!)
My (old) beloved Ugg’s!:
(And yes, I did give them a wash and thoroughly, very thoroughly, dried them) If you never wear them outdoors, no need to waterproof them…
I opted for recipe #1 since I like the dry, non-greasy finish. Rub-a-dub-dub! Get a bit of work out, use a soft brush as well.
Looks scary! (oh no! my poor boots!) But don’t worry, skip ahead if need be…
Seams are likely areas that will leak so add extra there, old toothbrush helps to scrub it in.
Once well covered, get the blowdryer (or if you are brave; the heat gun) and melt the coating into the skin. You will see the ‘shininess’ dissipate.
Yes, it does look different! But not a ‘bad’ different! It now looks ‘leathery’ rather than sad suede-like.
I used 2 ounces of beeswax & 1 ounce of boiled Linseed Oil. It did not take a lot, as some is left over.
Here goes! The water test! Beading quite nicely!! Happy-happy.
Hmmm, thoughts of what else can I use this on? (or even the other recipes) It would work similarly on suede boots/shoes. Even canvas in the form of bags or clothing. Do be aware that since this is still wax based, any constant rubbing may release some wax onto other surfaces… (ie car seats) So choose wisely. But for my beloved boots, they stay on the ground and needed the help.
Quite amazing isn’t it?! And to think those little bees had a big part in this! Happy waterproofing! (if you are not sure of results, test your’s in an inconspicuous area prior to application, just saying…)










I have a favourite waxed canvas purse that needs a little fixing up – maybe #1 might work on it.
Yes, you are right. I think #1 would be the least oily for your application. The porosity of canvas is quite amazing. I played around with some of the recipes on denim and it completely sunk in after heat setting and was pretty undetectable, ie it takes a lot of wax. Some do just melt the wax and brush on. I had intended to test the fabric version separately since it behaves so differently. I imagine Shibori-dyed-waxed-canvas… oh-la-la!
Great article. I was googling beeswax and linseed oil as a leather wax, since I’d already made some up as a timber finish and had also just purchased some uggs that I wanted to treat with it. You’ve answered all my questions, thanks! Good method!
I made a recipe I found on YouTube just like #2. It does the job but was a bit difficult to apply to large canvas items. I am really glad to see your #1, I use local beeswax from a friend here in town and plan to make some for Christmas presents using recipe #1. I have used my other recipe on wood as well and works ok but I think #1 will be a lot easier to apply. Thank You !!
Hi Barb
I enjoyed reading about your test.
One product that has been used for a long time as a leather water proofer is “Sno-Seal”, now made by ‘Atsko’. It’s basically Atsko’s version of your, recipe #1.
In the technical information section of their website, under “application tips” they state:
Solvents evaporate toward a source of heat. So if Sno-Seal is applied and then heated, most of the solvent evaporates toward the hair dryer leaving the wax on top of the leather. On preheated boots, the solvent evaporates into the warm leather drawing the wax in with it.
It might be worth a try – with recipe #1 – to heat the leather first, then rub on the wax to see if that would yield a less leathery surface. (a greater proportion of the wax is absorbed below the surface.
Oh thanks for sharing that! When I think about it, it makes sense. I’m quite fascinated as this could play a factor in other things as well.
The best iv used is bees wax, pine pitch, mink oil and coconut oil
Thank you so much for the wonderful study and great advice! I had Sno-Seal on hand which (according to google) is 35% beeswax and 65% mineral spirits. I didn’t really know how to get it onto my Uggs, but your experiments were great! I ended up simmering the Sno-Seal jar until it melted, then wiped the melted wax on with pieces of an old T-shirt. I liked your idea of a toothbrush a TON and I used that to really get into all the small nooks and crannies. I am very happy with how the Uggs look afterward, sort of like leather! Thank you again for this wonderful article!
So happy to help! Once you retire them you can make slippers!