The One Woman Garden Makeover
It’s that time of year for us here in Canada. The ‘May 24’ is our mark to get planting! Last year at this time I took on a complete overhaul of a front property for someone very special. However, I am not ‘wonder-woman’, nor do I have any labourers so it needed to be quite manageable without compromising style. We all want BIG effect for LITTLE work, don’t we?! Well… check out how ‘I’ managed it all by myself; ‘The One Woman Garden Makeover’ without even having to dig!


This is the way the property came; basically the way most people design. Small straight borders, dull design and monster tree. It did have some really ‘showy’ hydrangeas though so there are some elements to keep which helps the budget.

The Plan:
I always tell my students; have a plan. The artist in me likes to be able to visualize things first. Draw out a plan, use graph paper and you can draw one to scale. (make each square represent a measurement and you can easily map it out)
Big lawns are overrated in my opinion; as they require so much watering, weeding, grub control etc. Less lawn = less fretting.

Design has a few elements that you should think about; line, shape, space, colour, texture and pattern. I remember those from my days at art college! It really does apply to any type of design whether the front yard or a an oil painting.
Line: I wanted a nice flow and curve to connect the garden beds into one and carry the ‘eye’ along. Think bigger rather than smaller! Plants grow and you’d rather be enjoying it than mowing the lawn so give it space. To give you a good way to see it lay the hose out to the shape. Keep kicking/nudging it till it is a nice smooth shape and check it out from all angles. Don’t worry, there won’t be any big digging… I promise.

It always looks worse before it looks better! The blue spruce is nice if it would stay small, but it won’t! It will eventually get so wide at the bottom and then the bill to chop will be huge. Soooo, for now it will get a nice trimming and open up the space but it’s days are numbered. The grass is a bit stressed but that can change with a bit of TLC as well.
Trimming:
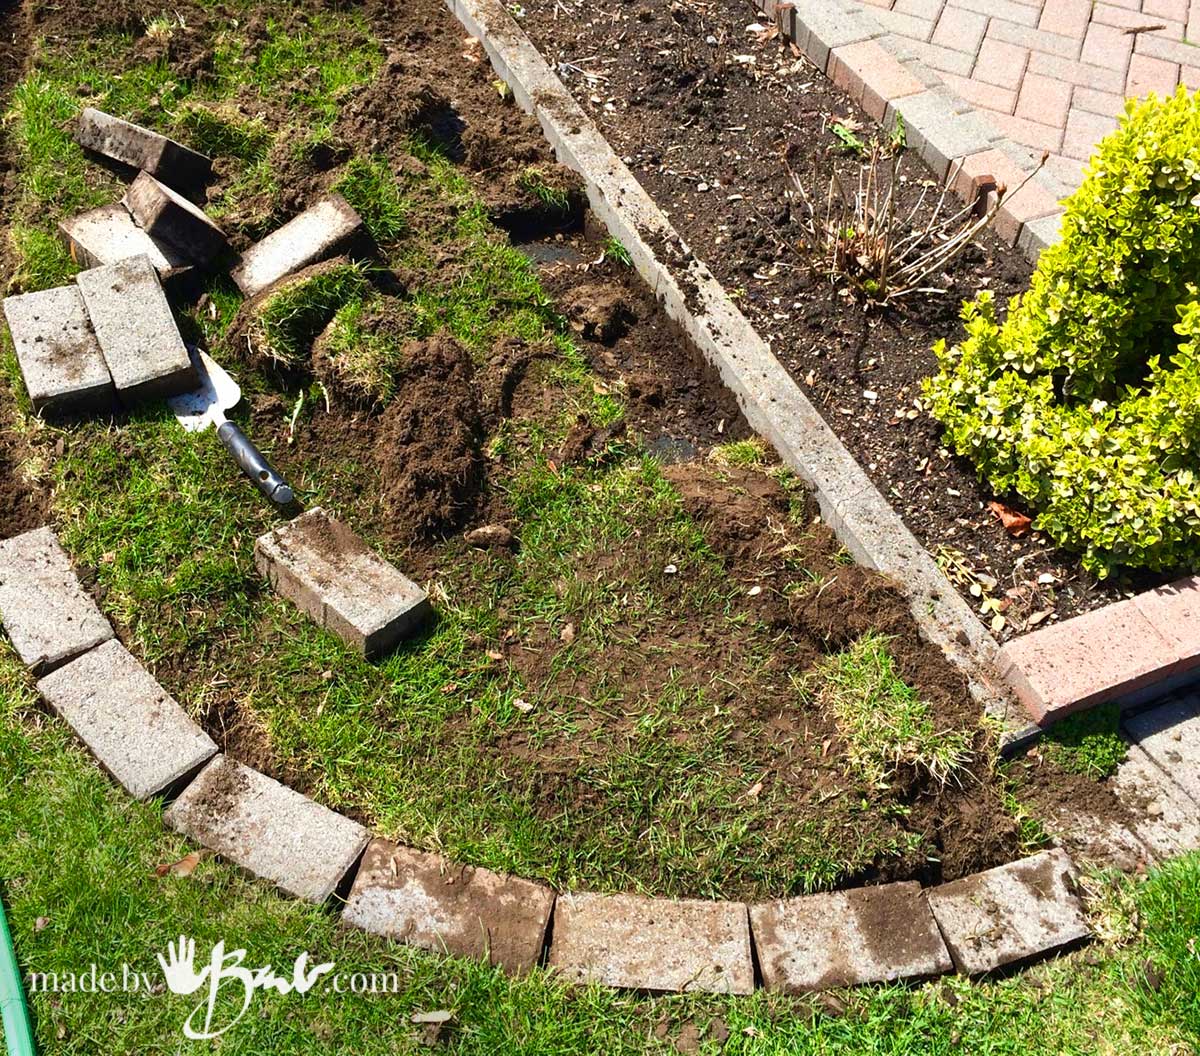
Once you are happy with your overall shape it’s time to give it some edging. I like a good crisp line to the garden edges! Get the knee pads on and start to set in your material for edges. I HATE the black plastic stuff, and prefer the individual stones. They are forgiving of you ever need to ‘fix’ one and they stay put quite well. Set them in to about the level of the grass soil. I have not seen any difference whether set with screenings or just well cut into the soil. Now’s your chance to sit on the lawn and take it the garden smell… Follow your hose-line and curve gradually even with straight stones. They make a nice pattern as well.

Materials:
Keeping things on a manageable small scale has me buying-by-the-bag and using only a car. I will enhance the soil somewhat with top soil and add a ground cover of cedar mulch. Mulch is a saving grace as it keeps weeds down, requires less watering and provides a great backdrop. Well, no need to go to the gym this week!

Since there may be some perennials coming up and the hydrangeas along the side I did not need too many new plants. Let me say; I LOVE my hostas! They give great colour and texture with the many varieties available! Every year I have some at home that need dividing so I chop off a piece when I see the tiny points coming up. Cheap and cheerful.

Such a nice curving line! Luckily there were way too many pavers to use as edging. Don’t worry about the grass sections in the gardens, I have a solution that does not need digging.
The Cover:
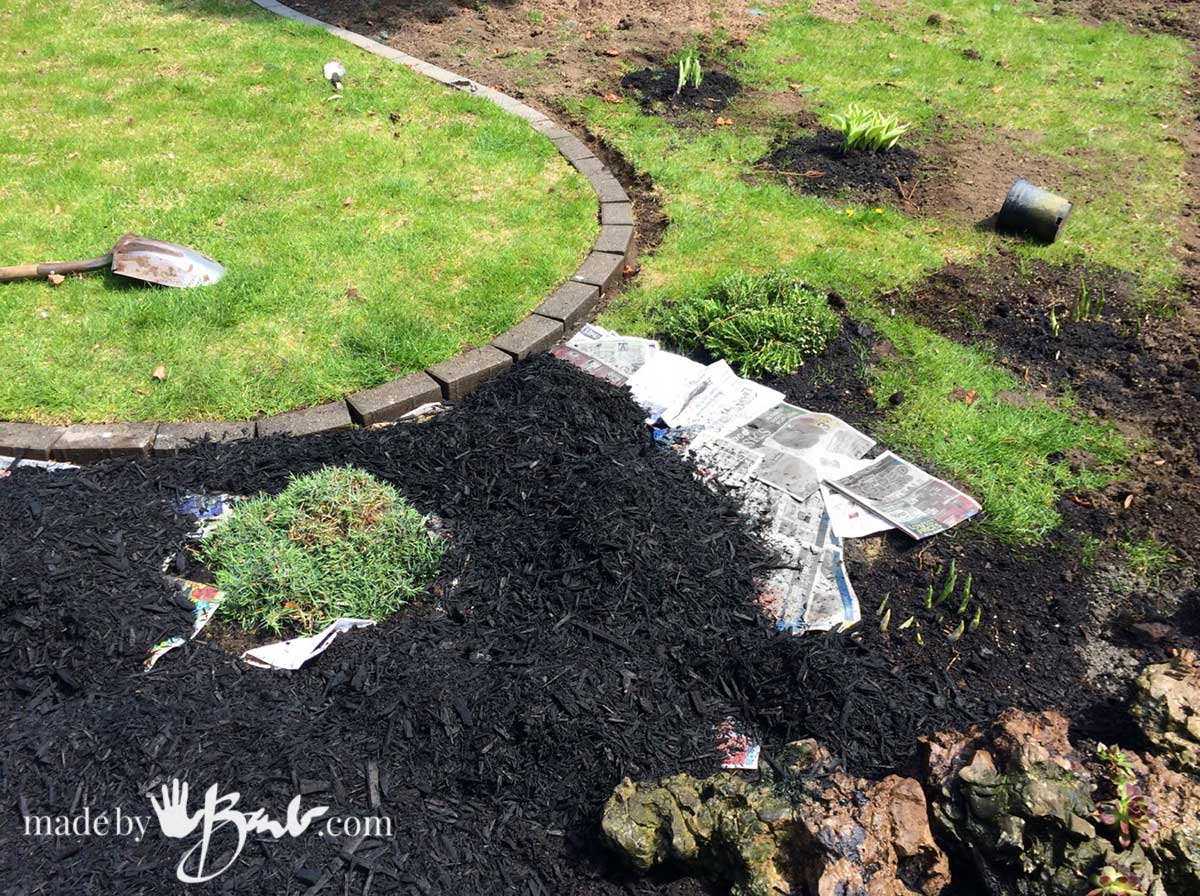
I dug in the new plant additions like the hostas and some other sniped perennials from home. To finish the garden and kill the grass within it I cover it well with layers of newspaper. Yes, really!!! It does work quite well. It was windy so I needed to wet it down to make a good contact to the ground. I’d say approximately about 6 sheets thick. Don’t leave any gaps.
Cover well with mulch to weight it down before it dries and flies away.

Sounds ridiculous I know, but it works so well. I am sure the neighbours were wondering what heck the crazy lady was doing!?

Quite a transformation already! Keep the paper weighted down with the mulch and by stomping on it and watering. Grass is sometimes a bit stubborn.

Some fertilizing/feeding the grass to make it happy really makes a big difference. May brings the vivid green colours and everything comes alive!

Pink creeping phlox and euonymus will bring colour each year.

Other elements:
I’m not a ‘pink flamingo’ type of gal, but I do like some additional elements in a garden. (obviously since I LOVE concrete)
To add some stepping stones, you guessed it; make some! They blend so well with the natural element and also provide some texture.

This easy method of making an address stone has fooled so many people! ‘How did you carve that stone?!’ Haha, I didn’t…

Ok, yes there was a bit of grumbling when hauling the bags of soil and mulch, but it was quite doable in a week. And yes, those muscles will be happy again…
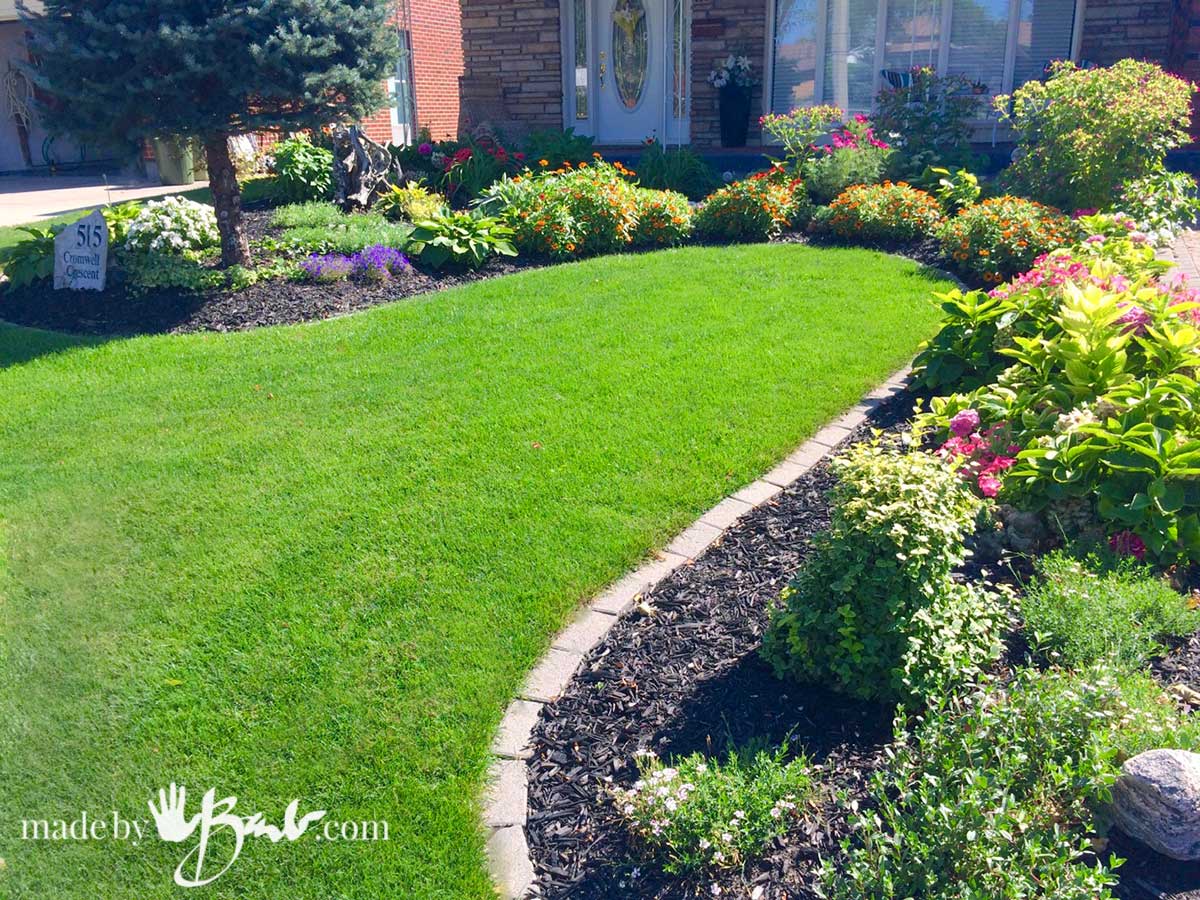
A couple months later and it was thriving quite well. It required minimal stooping to pick out the odd weed or determined grass but on a whole (yippee) it worked so well! When adding some annuals for colour plant in multiples for a pattern, 3 is a great number!

It was such a transformation that it won a Trillium award for landscaping that we have in our city. Notice the texture as well as colour that each plant brings.
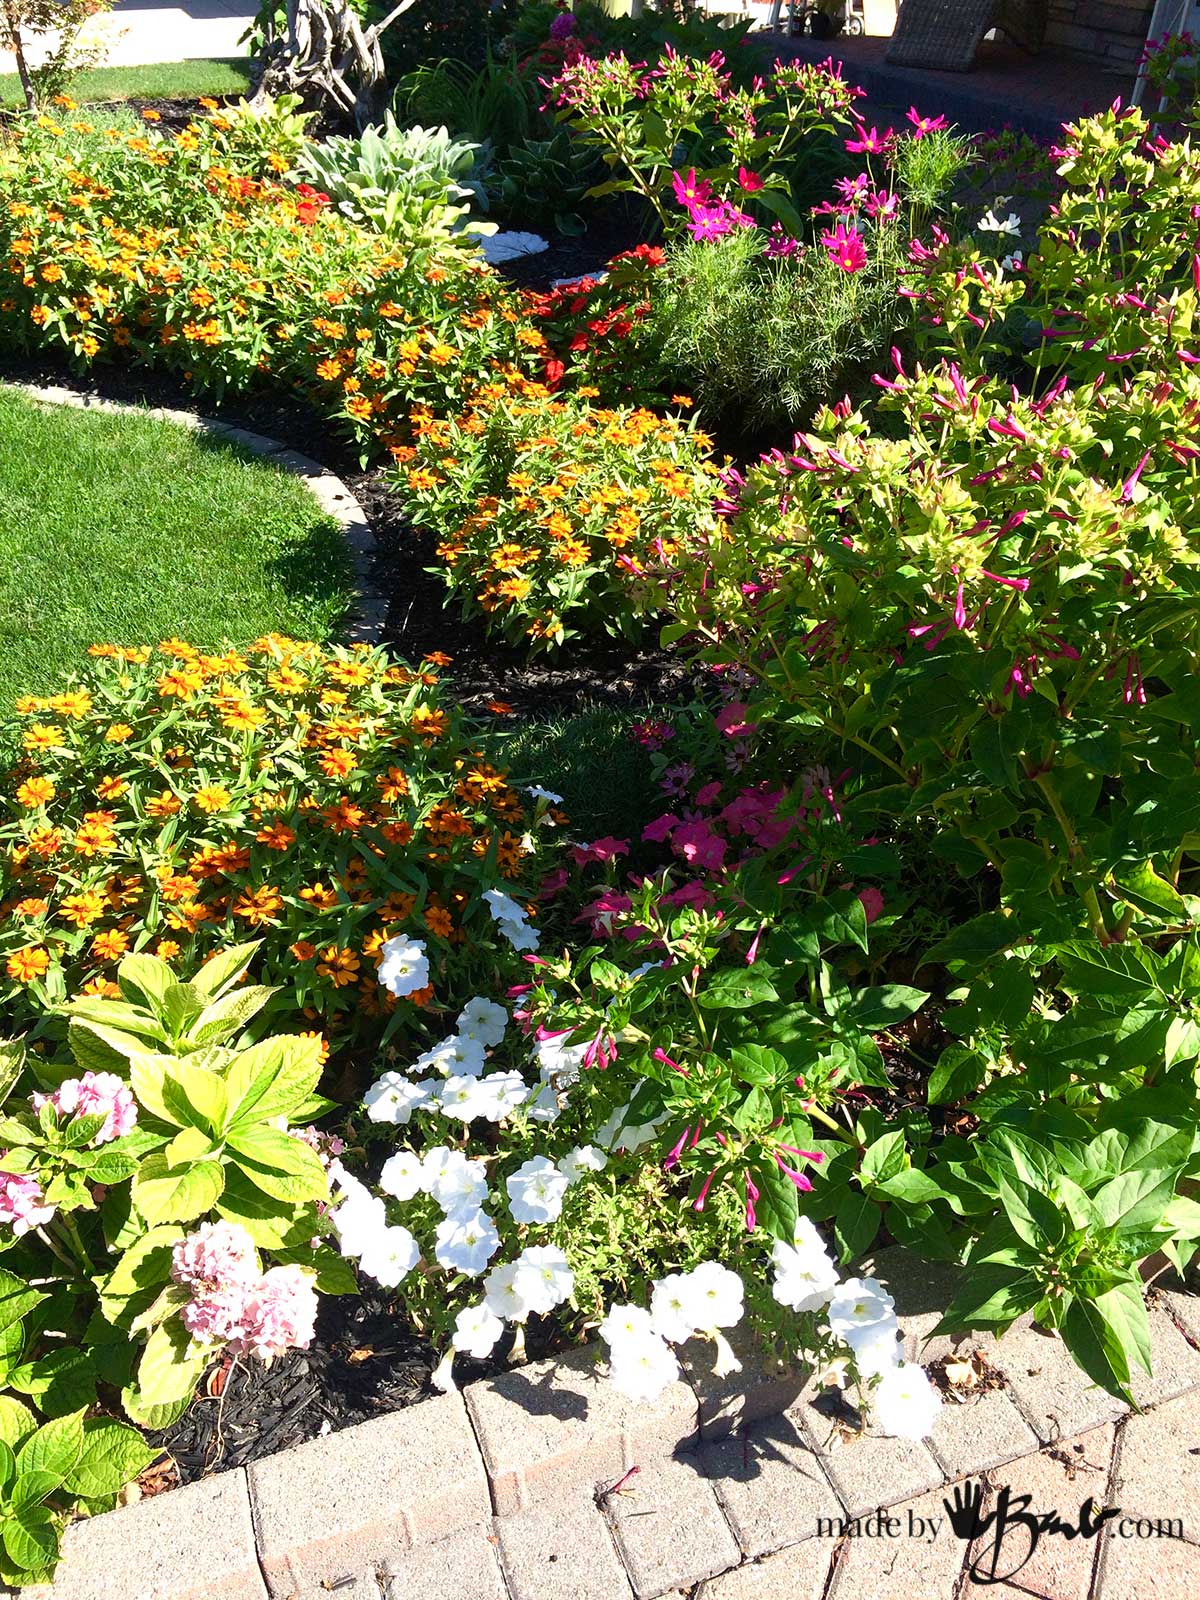
Everything has grown full and seems quite happy!

Enjoy your spring/summer! Take time to smell the ‘whatever’ is growing in your space, large or small. If you are thinking of designing your own, this may help: ‘How to Make an Award Winning Garden Design’
I just found your website/pinterest and love what you did and thank you for the instructions. I love the hose idea. I live in Texas so what type of grass? with the heatwave last summer down here even my st. augustine died in big patches.
TIA
Julie
Oh, sorry, I am in Canada! I would talk to experts in your climate for suggestions. I also like the idea of some types of ground cover as long as you consider simple shapes and design.
Hi, I love what you have done with your front garden. Hope you are enjoying it. I live in Perth Australia and our summers are harsh but I love my garden and keep it as green and growing through the summer as possible. We have water restrictions during the hot months only able to use our Retic twice a week. Not enough to keep the garden alive so I handwater each evening. Gives me a chance to enjoy the garden and see what needs doing.❤️
Sounds lovely. We are pretty well worlds apart! It is -15ªC here today… I’m dreaming of some green! Oh, say hi to all the Koala’s and eucalyptus for me! I am envious of that for my eco printing Enjoy…
Hi. How did you place your brick border? Dud you put stone and sand or did you just dig them in?
Beautifully done. You’re a champ!!!
When I did that garden I only dug them in (held well for all those years). If they needed some extra fill I used some soil. Use a mallet to help pound them in place well. I did also lay a flagstone patio and used stone screening (small gravel type) but I would not say that stayed flat any better, just easier to spread and adjust to level. In my experience digging the border into undisturbed ground helps keep it stable.
It’s nice to see other women are DIY outside landscaping on their own. I feel I’m the only one that does this. It’s hard work, but very gratifying. I feel hard outside work is very therapeutic. It’s nice to hear all the compliments, and to say, “I did it myself!”
🙂
Thanks! I always tend to think it’s not that difficult. Often, after a hard day of work I wonder what I was thinking… But that happens in so many of the things I do; mid-project fatigue. But I have learned now I need to ‘push’ through that! ‘Glad you also do it! Perfect therapy, no gym needed.
Stunning! How did you make the stone?
That is another project It fools everyone…
Love the land scaping, WOW, Would i love to have you in Lancaster Ohio. I have 16 flower gardens in my yard. Your flower garden makes mine look sick. Really!! Would you mind telling me the names of some of the plants you planted in your garden. It is ABSOLUTELY BEAUTIFUL. THANK YOU in advance.
Thanks so much! I do like perennials! I especially love hostas, and ground covers like ivy and periwinkle. The hydrangeas came with the property and there’s some more flowering perennials. The back part has the Tiger lilies that do give height. I just like to make sure the plants (mounds) keep in shape and do not get all entangled. It makes for a ‘cleaner’ organized design.
You did an amazing job and made it look easy! Now I am inspired.🤣. I live in Minnesota and don’t have a green thumb in my body but my mother did. So I might just need to search more for it. I am still figuring out what plants come back each year and what ones dont. 😆I am considering doing a similar design but at a smaller scale because of budget and my yard is pretty big. What plants did you use and what plants do you recommend?
Thanks again for your help and inspiration.
I love hostas! I also like creeping Phlox. You may want to consider how much sun and your soil (dry or not) Just keep the shapes and sizes of plants in mind. I like to save money buy having perennials, and they can also be split!
INSPIRING! Thanks!!
A garden is a process! It is ever evolving and changing with the seasons. It is alive and rewards you as well. Enjoy it and give yourself credit as it evolves. Most of all – enjoy nature.
I just love this garden! Years ago I had a neighbor who declared that nature abhors a straight line and this garden proves she was right!
Thanks so much! Big, nice flowing curves…!
Loved you garden and hope I can do half as well in my own!
Best of luck! I am planning a Garden Tips post soon so stay tuned. ‘And remember gardens are a process, always transforming!