
DIY Concrete Face Garden Sculpture – Part #1

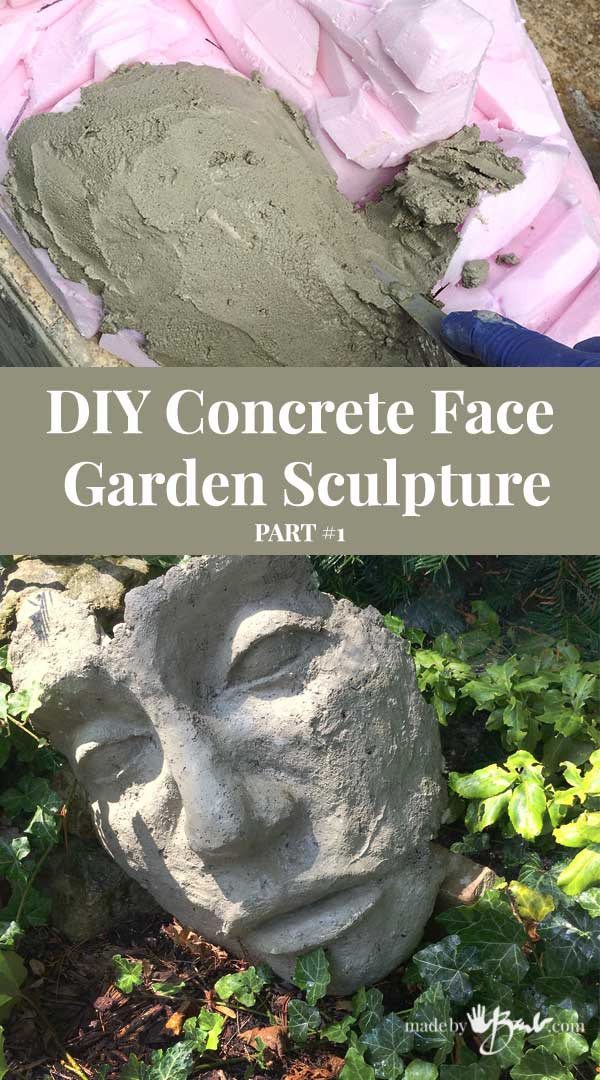
My garden is my paradise, so I love to add some sculpture to it. This project is a personal endeavour that has been brewing in my mind for a while. Contrary to what you make think, sculpting is not as difficult as you may think if you give yourself a chance. I’ll provide you with a few key points to keep in mind and then you too can also add ‘sculptor’ to your resumé and make your own DIY Concrete Face Garden Sculpture.
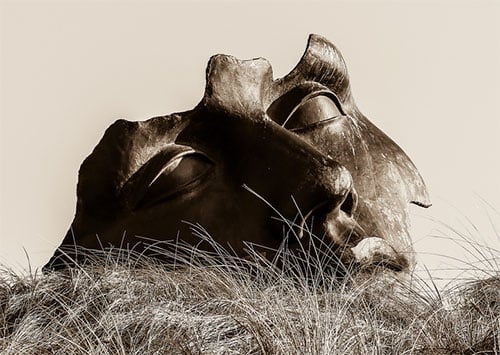
I fell in love with the huge faces by Igor Mitoraj! They are not complete, somewhat flat and can be placed just about anywhere. It’s a great idea as it does not need to be so perfect or so complete.

Step #1: Make a plan
As I usually do, I make some sketches to keep track of those many visions in my mind’s eye. This was not going to be a vessel or planter so it was really quite easy… Since it is a mask shape (halloween has many masks right now) you could possibly find one to make this project even simpler

Some memories of college crept back into my mind, drawing the planes of the face and basic proportions. You can always make an interpretation; be your own Picasso!
- Notice that the face is 5 ‘eyes’ wide.
- the nose ends about 1/2 way from eyes to the chin.
- the lips are about 1/3 from nose to chin.
- Take note of side view as well for comparison of depth

Step #2; Create a Substructure
To give myself a starting structure that is light and sturdy, easy to manipulate (no heavy duty tools) I used styrofoam. I used that type meant for home insulation and comes in large sheets as I find it cuts cleaner than the white type used in packaging.

Plan the basic proportions on the styrofoam sheet. It cuts easily with a large exacto knife and glues quite well with a lower temperature glue gun. It was quite fun cutting and gluing, adding layers to also create the height of the facial features.
I wanted this DIY Concrete Face Garden Sculpture to be larger than life-size for maximum effect. Mine is about twice life-size; about 14″ wide by 18″ tall.

Cut and glue and cut and glue, slowly getting more details. The face is symmetrical, and can be broken into planes. Think of the flat planes first and then add the smaller details.

Check the depth of the nose and lips, use pictures as reference. Look in the mirror. It is quite an exploratory exercise.
Take a break and look at again with ‘fresh’ eyes to see what you may have not noticed before.
Step #3; Add the ‘Skin’
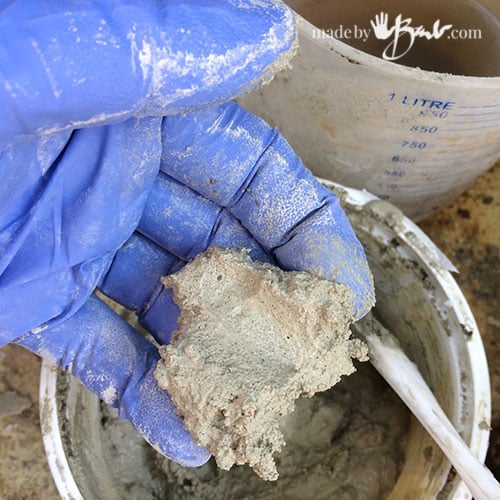
Once I had the rough ‘face’, I needed to decide how this was going to go further… My plan was to be able to make a mold of the final sculpture, so I needed something that would harden without baking (styrofoam melts). Well, air dry clay recipes did not make me feel confident that they would be quite workable. So, I fell back to my usual, RapidSet concrete.
A true sculptor would argue with me, as it is a medium that does not allow subtractive work. But it sets quick, can be manipulated and is darn hard when done. So it was fine for me…
Mix up small amounts of the RapidSet Cementall (or similar quick setting cement) so that it does not set before you can use it up. It should be of a stiffer consistency that allows it to stay put. After about half a minute it will be a soft pliable ‘icing-like’ consistency.
If you need to continue and it has dried somewhat make sure to wet it (spray bottle works well) before adding wet concrete to it.

This was like putting the ‘skin’ on since the basics were already done. Smooth it on, use the gloved hands, trowel, palette knife, plastic utensils, popsicle sticks, whatever you can scrounge up.
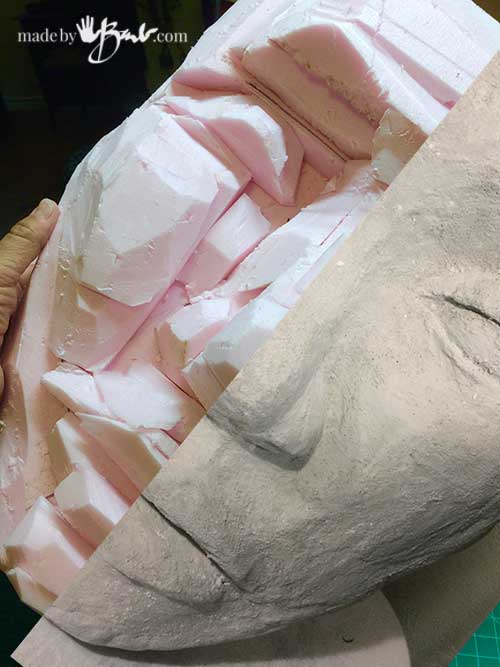
It is just a matter of filling in the features. I was not that concerned that it was super smooth as I like the look of aged and pitted concrete as then it looks more like an ancient deteriorating sculpture of an old master artist… If you need some reference, grab a simple cheap Halloween mask to look at, all artists use reference materials.

Those are some big lips! It was also easier to sculpt since it was so large.

Eye lids, simple open eyes, remember eye balls are round…

There are so many different noses out there! Pointy, squared, up-turned… whatever you like.

Use an old brush to get rid of any crumbles or brush on a thin layer to even out roughness.

Whew, the face is sculpted! It will still be light and the concrete holds quite tight to the styrofoam. You could keep it like this, however I did not want the bulk of the back so I will take it to the next level.
This will become the ‘master’ for the mold that I will make. See this post to watch how to make the silicone mold.

ahhh – stay tuned … I wondered if the styro was coming off … great size for the garden while still being manageable! woOt!
It took me a while to figure out how it was all going to work. While I am at it MORE ideas come to mind… I never keep up!
can’t figure out how to find a large face mold, do you sell them?
Sorry I don’t since it would really allow too much reproduction of my art. You could look into face masks or sculpt your own as I did. Happy making
I’ve noticed that the dollar store has started selling the full styrofoam heads and that might be something you could use
Yes, possibly. There are any possibilities. Mine is about 2X life size. You can make a unique sculpture using the styrofoam head & then making a mold of it. Good luck.
I absolutely love your creations, could you use plastic wrap on the staeafome?
Yes, concrete does not stick to plastic. I made a mold from my first face so I could make more!
I’m a mom of two a Nana to 3 sweet boys. I have seen your face sculpture on Pinterest a few times. I’m happy I was scanning through paper mache. And your personal instructions with this photo. And information about you the artist. To be blessed with a talent is wonderful. I would like to try to make one when I have some free time..
Thank you so much for sharing this💗
Tenalee
I believe everyone has some talent, just sometimes a bit harder to accept and find it! Being a ‘Nana’ is already a talent! Happy making!
C’est magnifique un jour prochain je m’y essaierai, vous pouvez être fière de vous, chapeau l’artiste
Merci beaucoup! Bonne chance!
This is just fabulous! Thank you so very much for sharing your ideas and techniques. As soon as possible I will be having one of these in my little bit of heaven. I think this will be the catalyst I needed to get back at it.
I’d love to see it when you do… Always glad that I’ve inspired some creativity!
Hi Barb, I love this sculpture. I have a beautiful huge face pot where I put a plant in it. I would like to make another one to have a pair.
Do you think I can make it thick enough to make a pot out of the one I have. It is a nice project for me at this time of confinement.
thanks for what you share with us.
I’m not quite picturing it in my mind. There are a few factors to consider… You can use the ‘contact’ to email me.
FANTASTIC!!! Barb, your concrete face sculpture is amazing! And even your styrofoam face “skeleton” is a work of art :-). Looking forward to seeing more soon. Wonderful garden creation!
What a beautiful face! You are amazing!!!! Can’t wait to see phase II
Wow, I can’t wait to see part 2!
‘Just about done… Who needs sleep anyways?!
Love it!
Always happy to inspire…
Amazing!! Now you have really got me thinking…………thinking about cats sculptures. Knowing the styrofoam secret is the most important thing. Thank you so much.
Er — this is just the mold? I want to try something like this. (I have neither talent not creativity, but want to make an Ankor Wat-type face to mount on my backyard stone fireplace tower.)
I had to look that up. If you can find a decorative one, you could use it to make a mold. If not, you could make a master out of polymer clay; it is easy to work with and you can bake it in your oven (it does not dry and you could take your time). It could remain pretty flat with details. I made the bunnies that way. It is almost halloween, maybe there is a plastic mask somewhere that you could pour concrete into. There are some crazy masks nowadays…
Sorry to keep pestering — I just want to make one sculpture (bas-relief face, maybe 3 feet tall), so don’t need a mold if that is for multiple ones. The (lovely) “master for the mold” you show — is the idea that it is a bit thin, and hence flimsy, and hence should only be used as a mold? Or could I make something like that, following your instructions, and then mou that?
I tend to like the idea of being able to make more, and with this idea I wanted to be able to change the outside shape of the face each time. However, if you want just one, you could follow as I did. You could just sculpt one. In that case though, perhaps you’d like to be able to pull out/off the back structure so you are just left with concrete. If your rough less detailed, just really a sturdy base form, maybe you could cover it in plastic to allow pulling off. If there are no undercuts then it should come off. You would just have to be aware of the thickness to make sure it is adequate. Rapidset Cementall sets so quickly that you can get it done fast, a good thing sometimes and sometimes not so… I think the base is just a great way to have all the proportions and basics already figured out. Let me know how it goes! Good luck
Done well. It can be done by filling the structure from inside.
Thanks, they have even looked quite amazing in the snow!
Thanks Barb, I enjoyed your tutorial on concrete mask. I’m working on my now. I sent you some money to keep you sharing😁
Always appreciated! I’m sure you will love it when it’s done!
I read how you did the face but would like to see pic of it could u send to me
The second part is here