
DIY Concrete Face Garden Sculpture – Part #1

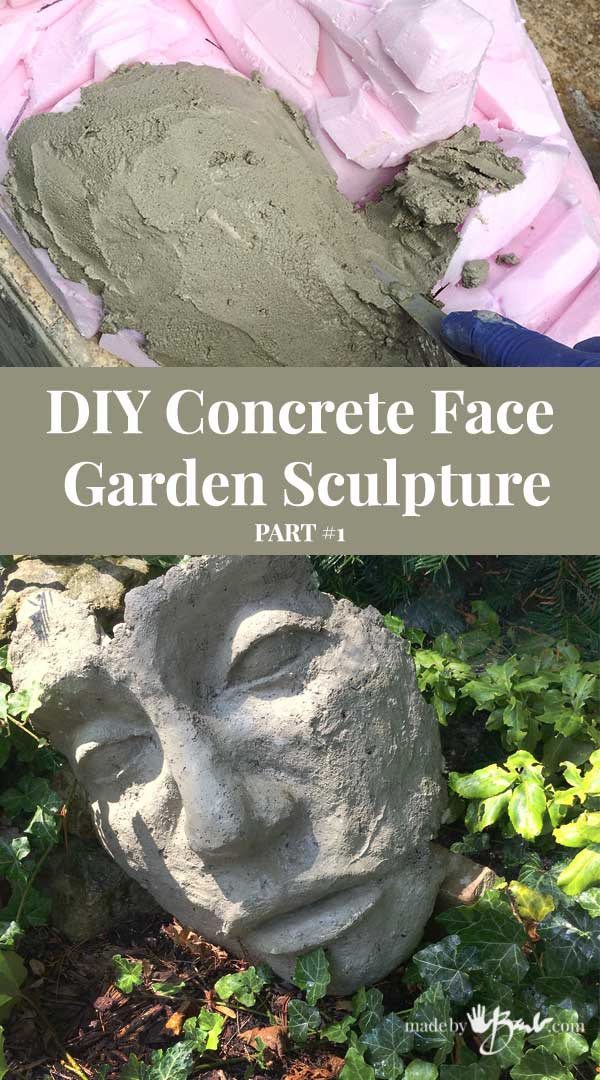
My garden is my paradise, so I love to add some sculpture to it. This project is a personal endeavour that has been brewing in my mind for a while. Contrary to what you make think, sculpting is not as difficult as you may think if you give yourself a chance. I’ll provide you with a few key points to keep in mind and then you too can also add ‘sculptor’ to your resumé and make your own DIY Concrete Face Garden Sculpture.

I fell in love with the huge faces by Igor Mitoraj! They are not complete, somewhat flat and can be placed just about anywhere. It’s a great idea as it does not need to be so perfect or so complete.

Step #1: Make a plan
As I usually do, I make some sketches to keep track of those many visions in my mind’s eye. This was not going to be a vessel or planter so it was really quite easy… Since it is a mask shape (halloween has many masks right now) you could possibly find one to make this project even simpler

Some memories of college crept back into my mind, drawing the planes of the face and basic proportions. You can always make an interpretation; be your own Picasso!
- Notice that the face is 5 ‘eyes’ wide.
- the nose ends about 1/2 way from eyes to the chin.
- the lips are about 1/3 from nose to chin.
- Take note of side view as well for comparison of depth

Step #2; Create a Substructure
To give myself a starting structure that is light and sturdy, easy to manipulate (no heavy duty tools) I used styrofoam. I used that type meant for home insulation and comes in large sheets as I find it cuts cleaner than the white type used in packaging.

Plan the basic proportions on the styrofoam sheet. It cuts easily with a large exacto knife and glues quite well with a lower temperature glue gun. It was quite fun cutting and gluing, adding layers to also create the height of the facial features.
I wanted this DIY Concrete Face Garden Sculpture to be larger than life-size for maximum effect. Mine is about twice life-size; about 14″ wide by 18″ tall.

Cut and glue and cut and glue, slowly getting more details. The face is symmetrical, and can be broken into planes. Think of the flat planes first and then add the smaller details.

Check the depth of the nose and lips, use pictures as reference. Look in the mirror. It is quite an exploratory exercise.
Take a break and look at again with ‘fresh’ eyes to see what you may have not noticed before.
Step #3; Add the ‘Skin’
Once I had the rough ‘face’, I needed to decide how this was going to go further… My plan was to be able to make a mold of the final sculpture, so I needed something that would harden without baking (styrofoam melts). Well, air dry clay recipes did not make me feel confident that they would be quite workable. So, I fell back to my usual, RapidSet concrete.
A true sculptor would argue with me, as it is a medium that does not allow subtractive work. But it sets quick, can be manipulated and is darn hard when done. So it was fine for me…
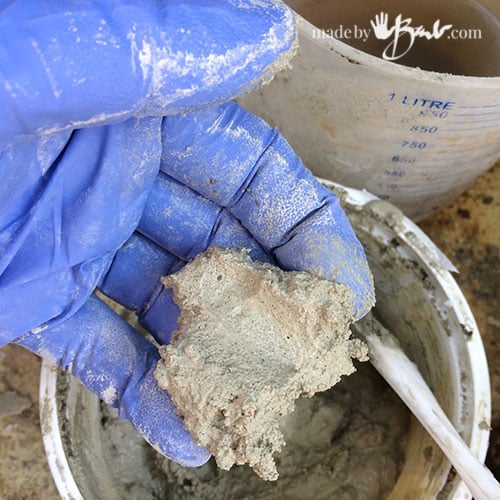
Mix up small amounts of the RapidSet Cementall (or similar quick setting cement) so that it does not set before you can use it up. It should be of a stiffer consistency that allows it to stay put. After about half a minute it will be a soft pliable ‘icing-like’ consistency.
If you need to continue and it has dried somewhat make sure to wet it (spray bottle works well) before adding wet concrete to it.

This was like putting the ‘skin’ on since the basics were already done. Smooth it on, use the gloved hands, trowel, palette knife, plastic utensils, popsicle sticks, whatever you can scrounge up.
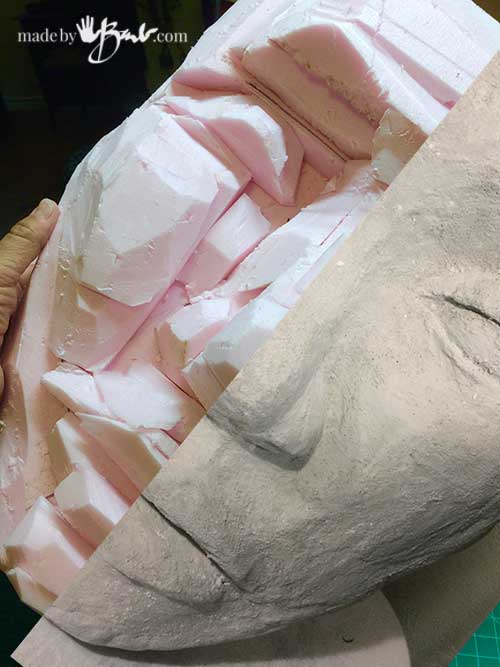
It is just a matter of filling in the features. I was not that concerned that it was super smooth as I like the look of aged and pitted concrete as then it looks more like an ancient deteriorating sculpture of an old master artist… If you need some reference, grab a simple cheap Halloween mask to look at, all artists use reference materials.

Those are some big lips! It was also easier to sculpt since it was so large.

Eye lids, simple open eyes, remember eye balls are round…

There are so many different noses out there! Pointy, squared, up-turned… whatever you like.

Use an old brush to get rid of any crumbles or brush on a thin layer to even out roughness.

Whew, the face is sculpted! It will still be light and the concrete holds quite tight to the styrofoam. You could keep it like this, however I did not want the bulk of the back so I will take it to the next level.
This will become the ‘master’ for the mold that I will make. See this post to watch how to make the silicone mold.

Phew! I am about to try this in the upcoming days. Am I the first?
Anyways, great blog and thank you so much for this project upload! If only I get half the success you had with this, I’d be happy.
I am from the Netherlands. The past 2 days I’ve been translating and researching what products I’ll be able to buy. It’s less then 40 euros (50 US dollars) for the first try.
One question: Do you use cement without additional peat structure for the ‘Master mold’ and add peat to create some rough structure for the faces? Is peat just dirt I can shovel up from my garden?
Thank you! You are awesome!
I am glad you have some determination! The master can be made of anything that you can sculpt that will become hard. I used the concrete since I was pretty used to it and it is the quick setting kind. I did not any peat at that time. You may also want to give it a bit of ‘grease’ before the silicone molding since it may stick (depending on a lot of factors)
Peat is a plant material that we buy to add to soil, it’s actually peat moss, and comes dried. I am sure you have a similar product. When I am in doubt, I do small tests.
Mine ‘faces’ have been out all winter mostly under the snow, since we had so much this year. Now that they are finally peeking out they look just as good as they did last year, even with the ‘moss’
Let me know how it goes…
hi,
I love your site and your tutorials!
What kind of glue did you use on the styrofoam?
Thanks! You need to be careful when gluing styrofoam as it will dissolve when using a solvent based glue. (Ya, I usually figure it out the hard way) I’d say using a hot glue gun is easiest and most immediate. Sometimes just let it cool a bit or use a lower temperature one. Good luck!
Oh my gosh this is awesome. I’ve been looking for something like this for such a long time. I ended up taking a male and a female styrofoam head and digging out the top of them to make a little indentation on the top to plant flowers in. I’ll bet I could put this cement right over a styrofoam head couldn’t I? but then will I ever get the styrofoam center out? Would I even need to? I just notice every year (this is the 3rd year I’ve had them) that the styrofoam is starting to pick off and break down. I spraypainted both white heads with a concrete type spray paint and I plant moss roses in them. They really do look like concrete heads. I then have each of them sitting on a piece of rebar that is sticking out of the ground. My sister thinks they are creepy but I really like them but would prefer to have them in cement. I also put old broken down tree faces lying down face up in my garden beds when they start to get old. My grandaughters love to see the faces in the garden. So something like this would really be fun to do.
Gee, it sounds like we are alike! I love the rustic look and the odd edges as if they just fell off some ancient building. Mine have weathered great. This concrete is quite amazing! I bet you would love these as well! They look great in a rock garden, kinda subtle… and silly!
you are an inspiration…brilliant,
i’m off to the table now
That’s kind of you to say! But I don’t think I’m that brilliant; I am just really stubborn and will keep at it til I get what I want! And I have the courage to try new things. One the hardest things about concrete is that some of those bags weigh 80 pounds!
Hello Barb. I too ,love all that you do. Just finished a face sculpture. Doesn’t look much like yours:) I love it though. Just waiting for it to cure before I take the Styrofoam off. Can you please help me out with that? It looks really stuck on! How do I tackle this without breaking the cement? Sincerely, Mary
When I made the main sculpture it was to create a master for making a mold. Then I am able to make many. I did not take out the styrofoam from the ‘master’ If the concrete is strong enough you could cut away at it from the back with a big exacto knife. The way I use mine in the garden does not show the back anyways… See here for part #2 ‘Hope that helps!
I love your work !
Can’t wait to try the face sculpting!
I keep my eye out for some great masks during halloween as that could make a good base as well. Thanks kindly.
I found your instructions following a photo link of your face sculpture on Pinterest. The instructions read well but I’m a visual learner and all the links to your photos are broken. I’m hoping you’re still following this post and will be able to fix them.Thanks in advance!
Well, I just tested on a few devices and they are all working fine. I am not sure what device you are on but all the images are appearing. Maybe try another device… I do have a lot of images in a post so it may take a while to load as well. Good luck.
Open in your browser I had the same problem
Hi Barb,
I just left a comment on the follow-up page from this project. I am afraid I was confusing in my last email. I am looking to buy* this mold. Do you sell them?
Regards,
I am sorry I do not as then my sculpture could be reproduced in unlimited ways… Maybe find a face sculpture that you like and take a mold yourself. I am not sure about the legalities of that though. Mine is really large too!
Good luck & happy making
I am thinking about making a mud head type structure to go in a shade garden, and I want it to be more durable than a dirt mound. I have been researching making the face out of concrete, and your information has really helped and inspired me!! My little giant will be about 2 1/2 feet across, and will end up being like a modified planter. I am just now starting the base for it, and I have gotten seeds for ornamental grass for his hair. Since he will be in a fairly shady spot, I really wanted him to stand out–his hair will be a bronzy-red to contrast with shade and green vegetation. I think my grandchildren and their multiple cousins will love visiting him!!
Very cool idea! I think it’s a little like these. They are quite fun too! Do make sure you get some of the alkalinity out of the concrete for the sake of the plant by soaking in water after setting and change water often.
I’m try to make a planter to attach to the wall like this any ideas? Do you think it would hang on the wall or be to heavy
My masks are made quite thin since the mix is really strong. It would hang on a wall no problem as long as it is attached well on the wall and the mask (imbed well into the concrete) Have fun!
Do you have any photos you can add ? It’s hard to visualize what is to be done. Tx
Yes! Make sure you are on this page! Or make sure settings are to ‘load images’.