
Mitten Making Mania with free pattern


With the chill in the air I’m back at one of my obsessions again; Hand making mittens! Perhaps it’s that quest for the perfect combination of fit, warmth and function that sends me to making and perfecting each year. One can’t have enough mittens can they?! Our precious hands do so many things that may require various types of protection. I have taken my ‘Mitten making mania’ to natural fibres this year so I’m in love with wool…. And I have a free pattern…
Here is an updated post for more mitten making with an eBook
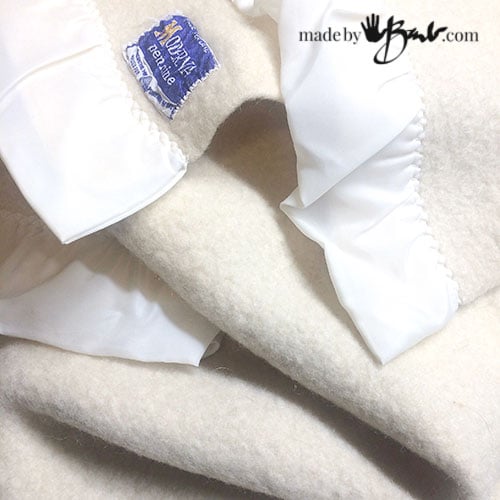
Where to Find Wool:
I have been collecting those old thick vintage virgin wool blankets. They were once the cherished staple of each household and lasted for decades. It is sad to see such wonderful pieces end up in the landfill (or thrift shop) due to being replaced with those darn cheap ‘comforters’. Here’s one way to make great use of them. You can also use wool sweaters that have been ‘felted’ (accidental wash in the washing machine & dryer)
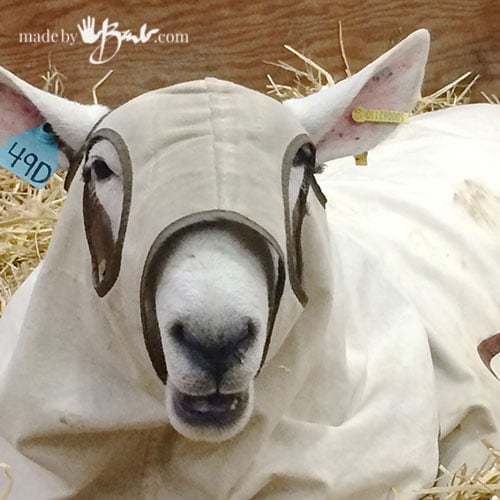
I recently visited the Royal Agricultural Winter Fair where I met this charming fellow. He was ‘telling’ me the great virtues of wool. I had no idea how strong it is; each fibre can bend back on itself over 20,000 times. It has the ability to absorb moisture to up to 30% of it’s own weight but resists building up bacteria since it releases it back into the air. The crimped nature of the fibres makes it able to return to it’s shape after wearing. It is biodegradable and each sheep makes a new fleece each year.

Felted Wool Blankets or Sweaters
The other reason they are so great is that they are probably already ‘felted’. Felting happens when the wool is washed and is somehow ‘shocked’ by different temperatures of water. This makes the fibres mesh strongly with each other somewhat like those dreadlocks seen in hair. You can tell if something is felted by checking to see if the individual strands of wool fibre are now all ‘fuzzed’ together so that they are indistinguishable.

Why is felting so great? Well it now makes it super dense and thick. It also makes the edges NOT unravel when you cut it. Being a sewer I love it when I don’t need to always ‘finish’ the edges of the fabric that I’m using. It also allows Needle Felting; a great way to permanently add images to the wool!
You can also make sweater mittens with this ‘Bernie Style Mitten’ pattern & tutorial. They also fit well and can be lined. They are a great way to use that old sweater.
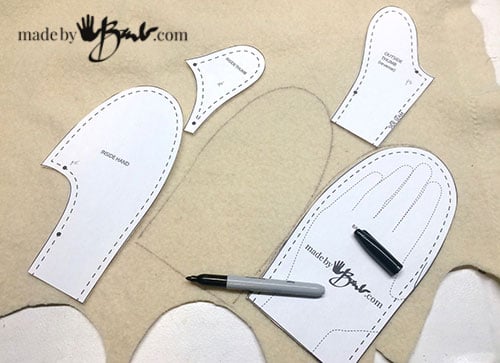
The Free Mitten Pattern
It’s a good idea to wash the wool before using if it is vintage or stored for a long time. Make sure it is perfectly dry as well.
As a bonus I have drafted out a pattern for you (see blue button below). It is sized for a medium/large lady’s hand. Download the free pattern (2 page PDF file) and print it out (make sure that your printer does not shrink the pages to print). Perhaps make a test mitt for sizing purposes.
UPDATE: I also have an eBook for my Newest Mitten Pattern (sizes S – XL) and instructions in this PDF.
When laying out the mitts pattern pieces, it gives more stretch of it is cut on the bias (meaning at a 45 degree angle). Pin and cut or trace with a marker.
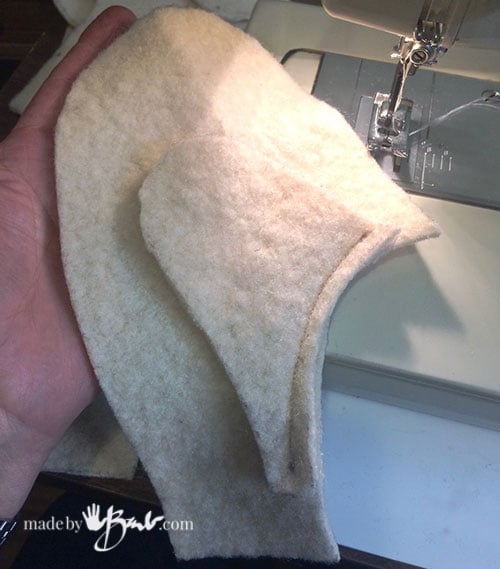
The unique method I used has seams partially on the inside and outside. (you can however use the pattern either way) I like to make a ‘test piece’ with the instructions since every fabric will have a different amount of stretch, thickness and fit.
Step #1
Sew the inside thumb piece to the inside palm/hand matching the dots. This seam will be on the inside as it is more comfortable that way.
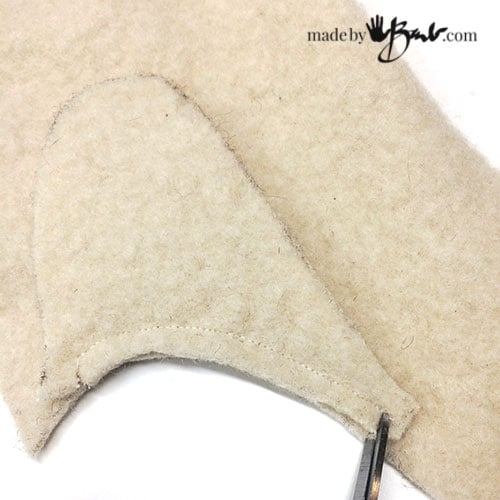
Step #2
Clip the mitten pieces at the dots to the stitching. This will allow the fabric to change to exterior seams for the rest of the mitten. (omit if sewing all with right sides together)

Note the clipped sections after seams.
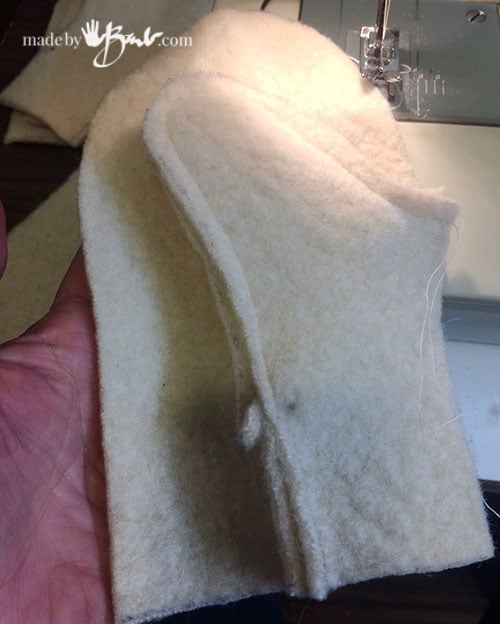
Step #3
Bend the inside thumb up and match ends to sew around the thumb and mid seam. The thumb is slightly shorter on the inside to allow better bending towards hand. Ease to fit edges together.
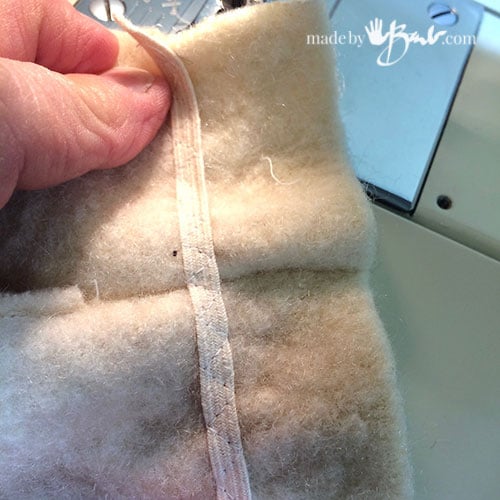
Step #4 (optional)
If you want some elastic at the wrist, then you can add it at this point sew some elastic along the wrist cuff (test for your length) to the inside piece. I find that a snug fit is just as good…
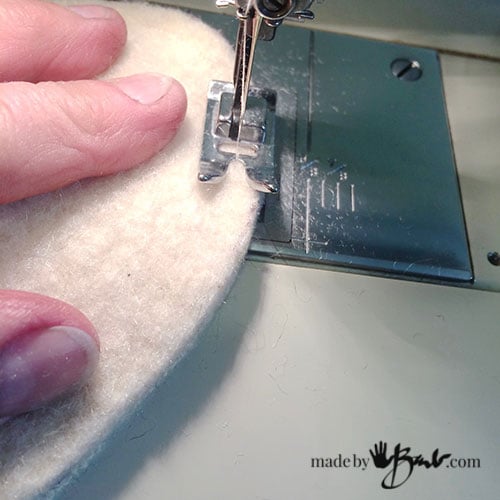
Step #5
Easing the outside to match the length with the inside (slight difference in length for comfort of bending the hand) and sew around the outside. The seam allowance can be adjusted to make the mittens smaller or larger.

After sewing at the seam allowance (about 1/4″) it is easier to then cut to a small thin even edge. When the wool is well felted the edges do not unravel.

Good job making your first pair of mittens! Note the inside seam of the thumb is towards the inside. You could have all the seams inside if you prefer, you will then feel them with your fingers though.
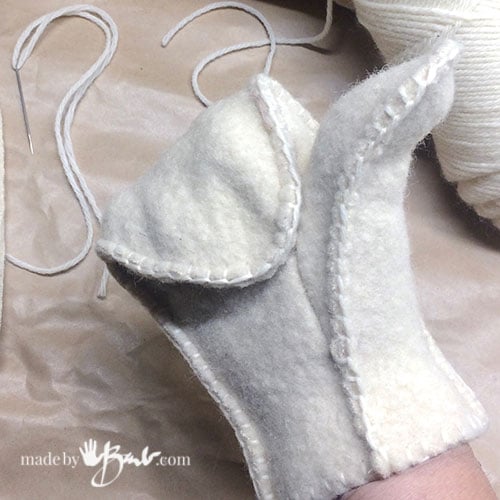
Step #6 Embellishments
Since these will definitely look handmade why not embellish them even more. A simple blanket stitch around the outside with a winter white wool yarn is perfect finished edge. I can imagine these with additional crocheted stitches at the wrist as well, or add some crewel stitching to the outside of the hand. I have also used this pattern to make lined mittens with a sweater-knit cuff attached – feel free to be creative.

Re-purposed Leather Mittens:
But don’t stop there! Make more mittens of all kinds… Reuse those old leather coats as they can be sewn nicely with a home sewing machine. In that case you may use the pattern with a slightly bigger seam allowance to make a liner as well.

Endless possibilities of Using wool !
I marbled some wool blankets to make some interesting colours.
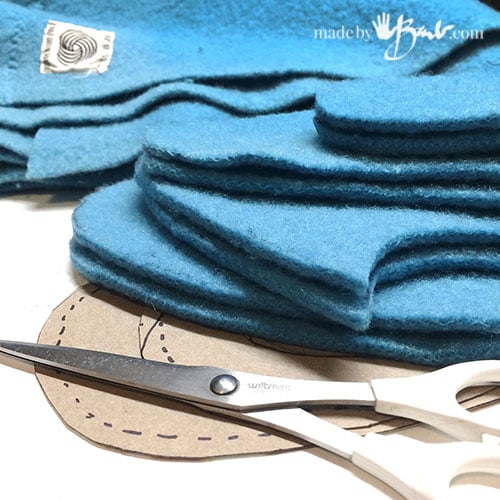
Virgin wool blankets come in all colours and can also be dyed or eco-printed.

In past years I made removable liners that were made of short faux fur. The inside mitts can removed to be washed.

Adding a small strip of some trim adds so much charm. I used a simple laced strap to tie it and add a poof of faux pompoms to the ends.

These are the warmest ever! Sometimes almost too warm! Soft garment leather can usually be sewn with a regular sewing machine, just keep the stitch length longer than usual and use leather needles.
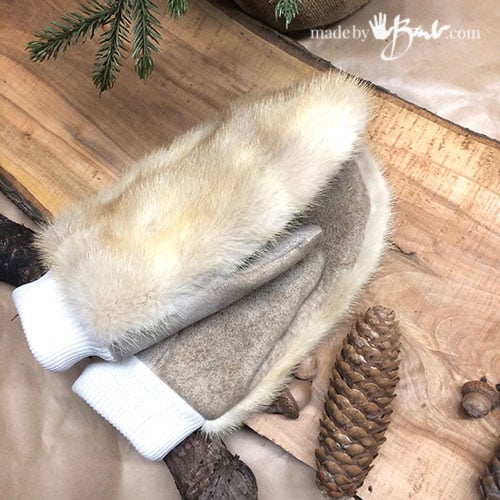
In my stockpile I have some vintage furs from my milliner mother so I could not resist a mink pair. I bet that mink is almost as old as I am. The up-cycled sweater cuff is attached last right-sides together.

To adjust the size for a man you can either print the pattern at a larger scale or add length by splicing in extra paper. Mittens are quite easy to adjust for size.

For the stretchy ribbing I used some tights as they will hold their elasticity perfectly. Black suede and faux mink… I can’t decide which I like best!

If you are scrambling to find gifts on a budget these are a great idea as they can also be hand-stitched. You may have all you need in the back of the closet already! There are so many leather jackets looking for a second life. Handmade gifts warm the heart…
…and warm the hands!
If you are looking for a whole pattern book with instructions (with sizes S – XL ) I have one available here
“Google yields a wide choice of patterns for homemade mittens. I chose the Made by Barb mittens pattern. This pattern consists of 4 parts so that you can also use the colors” Yes! these can be a cool combination of colours and patterns!
Thank you so much for your pattern and explanations. I’ve made mittens for me and my son and they are beautiful and comfortable.
Oh, wonderful! Such lovely useful keepsakes!
I’ve been searching for a great mitten pattern, and this ones seems to be the best so far. One of the problems I had was that I was making a lining of old sheep skin coat but the lining didn’t fit into the top mitten of leather. I’m wondering if I should increase the whole pattern so that it fits in, but I’m not sure by how much. Thoughts??
That would help. It will depend on how thick each fabric is, and how much seam allowance. The lining could be made a bit smaller if it still fits. As a rough number I’d say the difference of size could be 1/8″ – 1/4″ which could be adjusted at seam allowance, rather than printing pattern larger. Every fabric ‘behaves’ differently so it may take a test run. Working larger allows you to adjust smaller until right. I hope that helps!
Thank you for the pattern! I pray you heal well … I have a bionic neck! 🙂
Gimme all the parts I can get! haha
Download was no problem. I’m making a pair of leather men’s mitts and ladies wool with hand embroidery on the front. Cutting them out today. Thank you for the pattern and your blog. Do you use a leather needle o your machine?? It seemed to split the leather abit.
I use a leather need sometimes but did think they were a bit thick. If I have a nice soft garment leather I use a sharp fine needle (small hole) just make sure your stitches are not too close together, too much chance of breaking through the leather.
I just downloaded and cut out your mitten pattern. Thank you for sharing! I’ve been collecting some wool and cashmere sweaters, washed them in hot water and dried them. They are all ready to be made into adorable mittens! I might be able to sew up a few pair before Christmas if I don’t get sidetracked. I have an unrelated question to ask you. I have a mink stole from my mother. I’d like to disassemble it and make neck wraps for my daughter and daughter-in-laws. Have you tried that? I have searched Youtube for tutorials and haven’t found anything helpful. Any information or help from you would be greatly appreciated!
I have spent many years watching my mom who was a milliner in Europe. The minks are probably sewn in strips, (look at the back) and might fall apart if cut through seams. It can be done, but care needs to be taken. Cut fur from the back (leather) with a sharp knife/scalpel or even a razor blade (my mom used a double sided razor blade) so that the fur does not get cut off. I hope that helps. Happy making…
No matter how long I wait, I cannot get past the link to any screen to order or download. I realize it would be free and you don’t have any obligation to help, but might you?
…done Enjoy!
I would love to make these Mittens as I have had no luck with other patterns however I cannot get the pattern to download. Any help would be greatly appreciated!
Thanks
Lisa
… check your email
I too cannot get the link to the .pdf to activate. Wondering if it is an issue of trying to access it with a cell vs a laptop? Odd. Would-yah-could-yah email it to me please?
Thanks Heaps,
Kim
Done!
Hi! I would love to give your pattern a try! Having trouble downloading it! It says “cheating, huh?” When I enter my info. Was wondering if I could get it emailed to me too? Thank you! Would like to try scaling it down for my son!
That is so strange, I have so many who manage to get the download and I keep testing and it works. It is sent…
I have been getting the same results. Even trying to merely read your blog is very time consuming due to all the affiliate links that delay the loading time.
I am sorry about that. There’s so much involved to load a page, and I have hired a web developer to improve speed and experience. I’m good at the ‘making’ part but the mechanics of a site is mind-boggling. ‘Please bear with me…