DIY Rock and Concrete Orbs
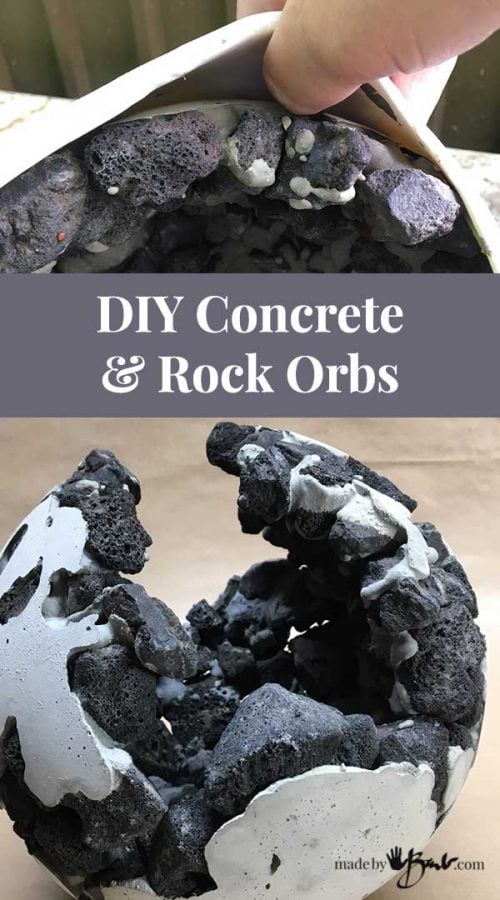
When I get an idea in my head I am so determined to make it work that I sometimes wonder if it will ‘kill’ me first! This was one of those ideas… I was on a mission to create another orb design; but not just a typical one, I have to be super unique! With the help of a volcano and ingenious thinking see how I managed to make these DIY Rock and Concrete Orbs work.
The Spherical Mold:
I wanted to create a casting from the inside of a mold, a sphere of course. Well, if you have ever tried to find a perfect sphere it’s not easy! I bought ball after ball and cut them open. Nope, not smooth enough. Basket balls have wierd seam lines inside. Other balls shrink to a limp skin. Plastic orbs are next to impossible to find… Soooo, I had to do what I usually do; make one.
My ‘Go-To’ method of making a mold always seems to save me.
What you need to make DIY Rock and Concrete Orbs
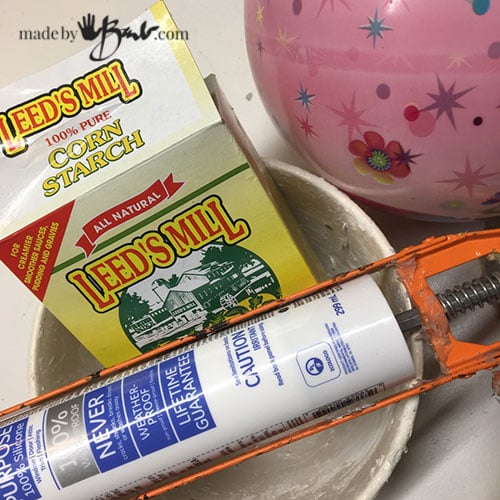
- One box of corn starch
- One tube of 100% Silicone Caulking
- Old bowl
- Gloves and good ventilation (super smelly stuff!)
- Caulking gun, knife to cut it open
- A smooth well inflated ball (cheap kids play-ball)
Have your ‘master’ ball ready by sitting on a bowl for stability.
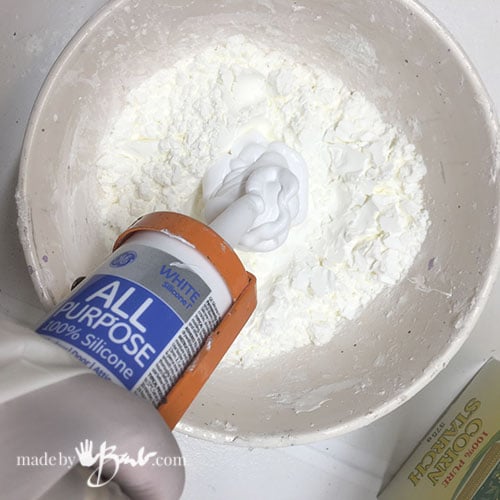
Squeeze the entire tube into the bottom of the bowl that is well filled with the corn starch. The intention is to keep it suspended in the starch so that it does not start to stick on the sides. Keep it in one mass, tossing and working in more starch so to get less and less sticky.
Try to keep a layer of starch between it and your fingers as well.
Turn and toss carefully incorporating more starch and it will become less sticky.
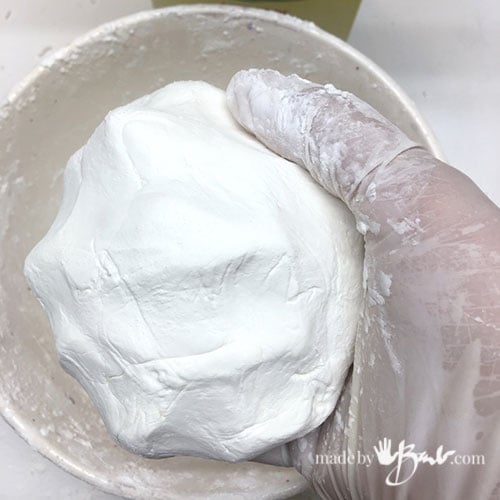
After it absorbs more and more starch it will start to become moldable as it won’t stick to the fingers as much. This is so much like making a dough (I guess my years working at a bakery helped!).
Roll in your hands to make a ball of even consistency.
Flatten the ‘dough’ on a flat surface that has a dusting of corn starch to about 1/4″ thick.
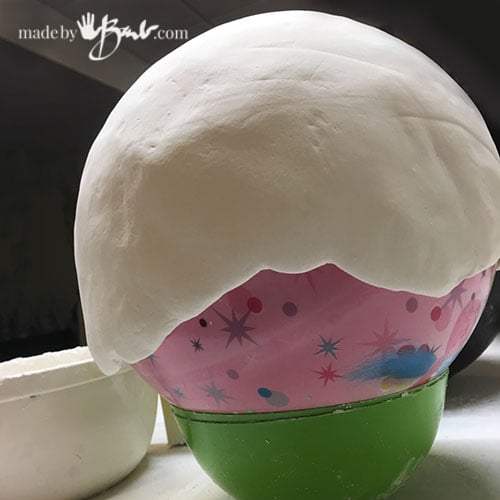
The mix starts to set pretty quickly so immediately place it over your form ball and smooth it out. Do not worry about the edges or excess. I was aiming to have a good 1/2 of the ball or bit more covered.
It will usually set with in 30 minutes I find. When you you poke it and it feels like rubber then it is set. It popped off easily and I finally had my sphere mold. It is flexible but also keeps it’s shape well – perfect!
The Rock:
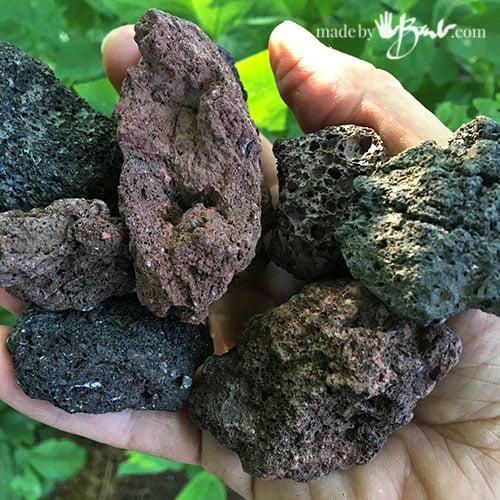
As you know by now, I love rock! It has to have some character, I’ve always marvelled at the way that lava rock is made, cooled lava from a real volcano. It is available as the internal rock for BBQ’s and also as a landscape type mulch. I used both types, but the bagged lava rock was larger and more colourful.
Which Concrete Mix to use:
I am always trying to get so much done (life of a blogger & maker) so I am happiest if I can use one of my quickset concrete mixes. I used the Quikrete Fastset Allcrete on this project but the Rapidset Cementall will also work here (it ends up lighter colour)
Both these mixes can work at various consistencies. I did try a few variations and the results were all great.
If you would rather not see the any of the stones in the final form you can mix a very fluid mix and let it run between the rocks that line the mold. If you want to see more of the rocks you can use it more as a thicker mortar and just have it between the rocks.
You should experiment… I did realize that it is strong and holds the rocks together even if there are some empty voids.
The Method:
This is not a perfection type of orb, it has a lot of character and will be quite unique. There is somewhat of an element of magic here as to how it turns out; but that is what makes it so refreshingly different.
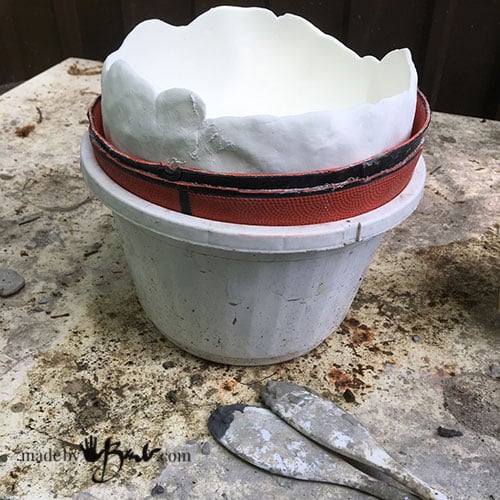
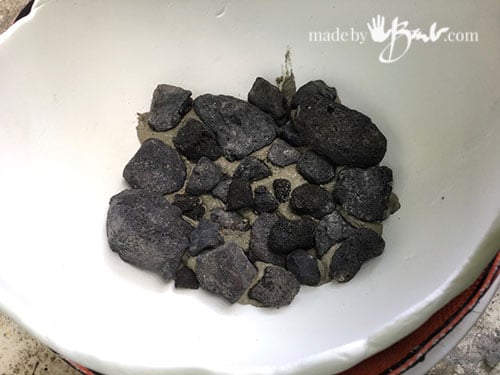
The ingenious thing about a sphere is that you can work in partial portions. Gravity is something that will work against you so working in smaller sections is better.
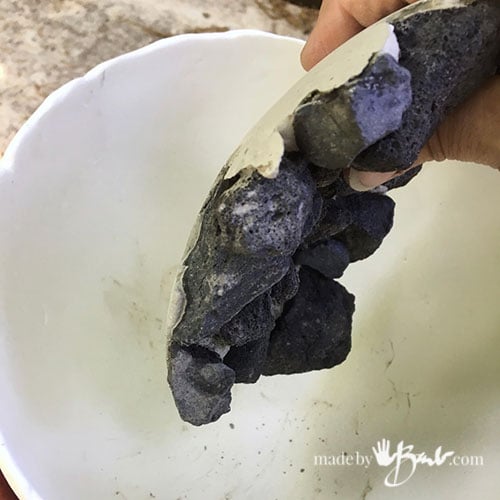
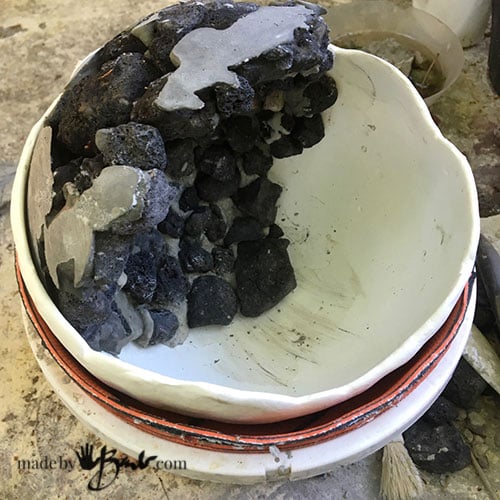
Once one section is set (about 1 hour if it’s warm) you can move it up the side to then work another bottom section next to it.
Place that set section on one side and then add more in the bottom. Slightly mist the existing set concrete to have better adhesion.
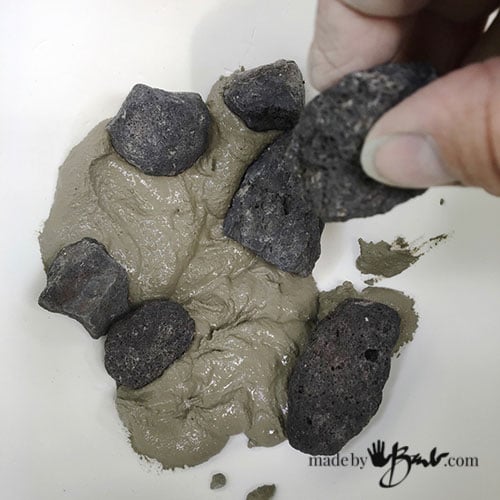
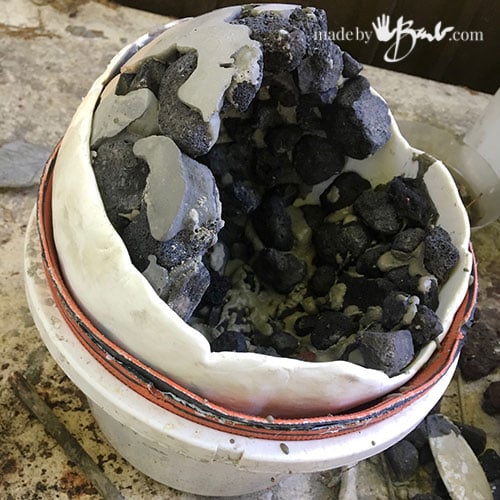
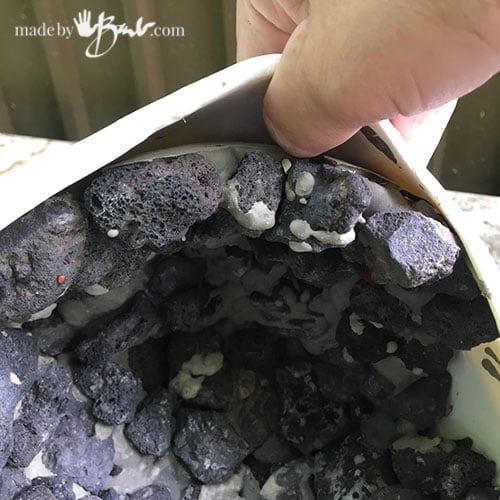
Add rocks by letting the mix run in between or ‘mortar’ the individual rocks where you’d like them. You are in charge here.
You can continually adjust position to ‘fill’ as much of the form as you like after each addition is set. My vision in my mind was to resemble some type of ‘carved-out-of-rock’ orb. The hollow void will be great for the other ideas I have!
I love the flexibility of this mold! It does tend to stick but can be worked lose with a bit of manipulation. I do not really like the gunk that builds up when using a spray release like ‘Pam’.
The Reveal:
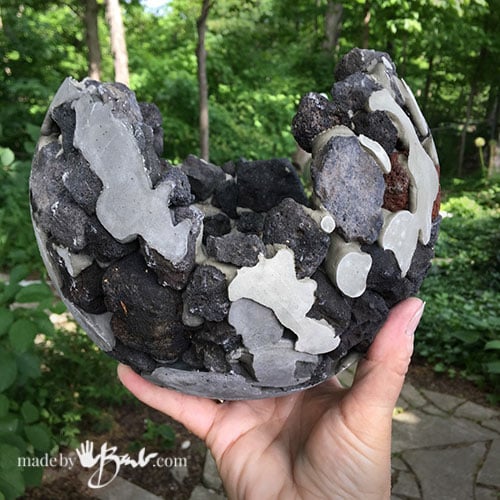
Once you pull it out of the mold you will be amazed… Isn’t that so interesting?! So many elements of design, form, texture, shape and colour! Yes, colour! You can add some concrete colour to the mix to have some variations of colour.
Ta-Da! So unique and a perfect accent to the natural landscape of a garden.
Each one will turn out with it’s own unique pattern.
The motto here; don’t give up, there will be some way of achieving what you want if you persevere!
Place these DIY Rock and Concrete Orbs in the garden or anywhere that needs a bit of natural interest. ‘But just wait to see what these will become… another vision has popped into my head! See part 2 here:
Happy concreting!





Adoro internet per cose come queste avere la possibilità di vedere e imparare a fare cose fantastiche come fai tu anche dal Italia ho frequentato l l’accademia di belle arti a Firenze ma certe cose così creative non si insegnano a scuola grazie di aver condiviso la tua conoscenza
“I love the internet for things like this to have the opportunity to see and learn how to do fantastic things like you do even from Italy I attended the academy of fine arts in Florence but some such creative things are not taught in school thanks for sharing yours knowledge”
Yes, I agree. I learn the best just by trying ideas in my head. Sometimes it takes a few tries but that’s the fun!
Hi Barb, love your site, which I recently discovered. I made an attempt at your silicone mold, intent on trying the geode balls. Problem came when I draped the silicone and cornstarch dough over the ball. The weight of the dough pulled it apart, so I ended up with thin and torn sections.. I definitely used 100% silicone. Should I have added more cornstarch? I had a 300ml tube of silicone and used most of a 500g pack of cornstarch. There is no indication of it firming up, even after a couple of hours. Thanks for your advice.
That is strange. I have read some issues about the silicone II (2) not getting stiff. I work the mix until it gets to the stage where it doesn’t stick to my hands anymore it’s pretty dense (stiffer than play dough) and it stays where I put it. It is also well mixed at that point. I have to work fast to get it over the form. Was it still sticky? The corn starch lets the mixture cure throughout, so maybe it needed more. If your’s eventually cures you could add a layer. Whenever I am in doubt I try small test mixes. I was ‘fighting’ with some plaster the other day… I think it was just too humid… 🤷🏻♀️
Hi Barb. Thanks for your reply. It did set overnight, but because I had to fight with it to keep it on the ball and ended up pressing it all into a bowl, it’s not the shape I was looking for. I’ll try again and work it a bit more next time.
I’ve been cruising your site for about a year now. Amazing how many other sites refer to yours! I have made a few basic molds using your technique with good results. We had 3 days this week with temps in the 60’s here in Virginia. It gave me opportunity to try some of your concrete ideas. I’ve been drooling over the orbs of all kinds and been collecting supplies over the fall and winter. I cut strips from a flannel blanket and tried using them in cement to cover a child’s punch ball, inflatable larger than a balloon. It was a fail as I could not keep the strips from falling off as I tried to wrap them. I thankfully had a smaller play-ball prepared also and had better success with that. I have popped the ball inside and cleaned up the concrete strips to finish curing. It’s looks very messy and unsymmetrical. I went back to your site and CAREFULLY READ your directions again! I think that my mistake was largely because I cut the strips too wide (about an inch or a little over) and they were too heavy. So, now I have some very think yarn and will try again. If I try to cut the strips again, I may invest in the rotary cutter. It’s very tiring to hands to use scissors. I really do like the size of the punch balls. They can be inflated to 14-16 inches. I saw where you did only 1/2 of the larger sizes at a time. Is that the way you would still advise? Any other thoughts? Of course, it’s cold again now so it’s too uncomfortable to work in my garage. I am ready for SPRING! Thanks you for all the detailed guidance!
Thanks, I’m glad I’ve inspired you. I often try a small test before I dive in big. The large ball has some logistic problems as turning it and wrapping in a way that keeps it balanced. It is much like wrapping a ball of yarn if you do not try to keep it going over the full diameter. I understand, as tose were things I figured out at the beginning and mine ae much smaller. The large ones are the leaf and the simple ones are worked slowly and then turning but the key is having a good mix that does stiffen fairly quickly. Again, working with a certain mix needs to be figured out as the setting times depends on temperature, water and humidity. I had tried a yoga ball and thought it had it figured out but it was just too large to turn and keep strips on; you would prob need 3 people! Reinforce if needed (dampen first) with more concrete. Have fun! You’ll figure it out!
Hi there,
I’m looking forward to trying this. I just started recycling glass and have lots of cullet. If you would like to try some, please let me know. Would love to say thank you for sharing such a wonderful idea! Always looking for beautiful ways to reuse glass!
Oh, that’s sounds interesting! I’ve never heard the term ‘cullet’ before. There used to be a glass bottle company in our city and I heard that some would find huge solid lumps of glass in the rubble of the factory. I was always looking for the large glass rocks, remembering how they were used in the faux fireplaces of century homes. Enjoy the glass; there’s also the geodes to make
JESTEŚ SUPER !!!
PODZIWIAM TWOJE PRACE !!!
MIAŁO BYĆ TWOJE PRACE, NAPRAWDĘ SĄ SUPER. POZDRAWIAM