Simple Eco Printing on Paper

Welcome to my continued obsession of Eco-Printing and don’t blame me if it happens to you. After I ran out of fabric and scarves I looked for a new canvas to Eco Print on… anything white is not safe at my place. The good news; it’s worth the effort as this simple Eco Printing on Paper has again amazed me!

What you need:
Since I have been an artist & illustrator for a few decades (hardly believable) I have quite a stock of paper. This method involves some moisture so the paper needs to have some thickness and stability. I have used a multitude of papers and I can’t say any have been awful.
Watercolour paper works well however it may need additional soaking as it’s more absorbent. At first it may be wise to use inexpensive papers. Since my focus was to make cards I decided to go crazy and use whatever I found even using dollar-store card stock. Simple bond card stock has enough weight as well. In my opinion the combination of the leaf and mordant seem to effect the print more than the paper.
Well, yes, I almost forgot; you need leaves! Fresh, dried, frozen, whatever works for you. I use ones that I have dried by pressing and now store flat.
Preparation:
I know everyone likes exact recipes, but this art form is not quite like that. My leaves, water, paper may be different than your’s. I now have somewhat of an understanding of which leaves seem to ‘perform’ for me. Multiple maples, sumac, rose leaves, purple sand cherry, burr oak, walnut, weigela, are some of my favourites. I soak them in a solution of about 35-50% vinegar water that has a bit of iron sulphate added. Sometimes I just use some of my iron ‘liquor’ from my rusty-water-bucket. Don’t ask me how my laundry room looks!
Leaving them for the duration of readying the paper makes for about 30 minutes. The iron starts to react with the tannins in the leaves so I don’t leave them for too long.
Readying the paper:
Just as eco printing has many options for preparing fabric; as does paper. Paper is really just a cellulose fibre like cotton or tree pulp. Alum solution dip is one option but will yield more yellow results so I have simplified even further using just a vinegar/iron dip. You really should experiment to see how varying can affect the results.
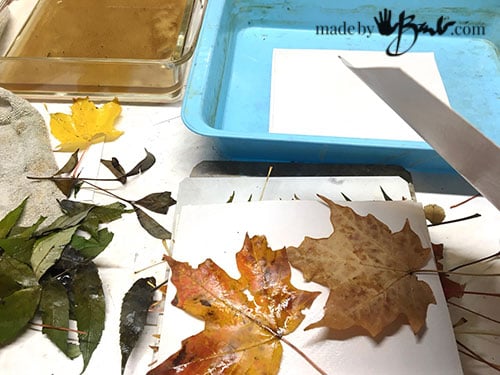
I slide each sheet of cut paper (plan the sizes to what your end product will be) through the solution and stack them immediately. They do not get oversaturated but can absorb while waiting for the layering. The thick expensive watercolour papers will need more soak as they are sized for painting on. Sizing makes the paint bleed less so water will also absorb less.
Lets make Sandwiches:
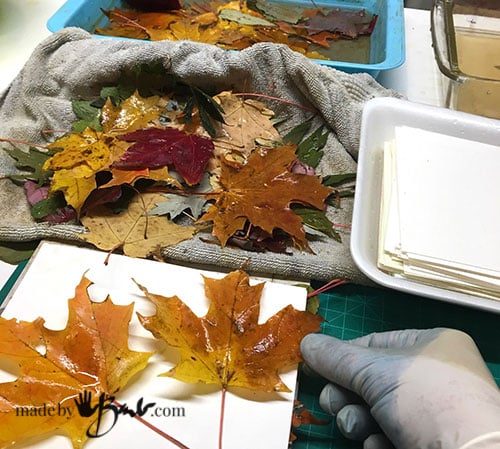
After soaking the leaves blot them on an old towel. Tip: if you would like nicely defined prints it should not be too wet, but also good flat contact. It’s best to wear gloves to place the foliage as you desire. My choice is to layer between each sheet and therefore get a print on each side to choose from afterward. Other options include rolling on a dowel or using folded cards.
Keeping the stacks of the same size helps give good contact.
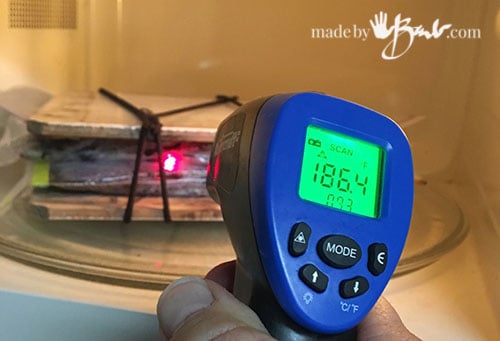
After stacking you will need a way of applying pressure and keeping them flat in a hot environment. Ceramic tiles bound with elastics or bungee cords work well. I do not use metal since I process in a microwave.
A Little Trick:
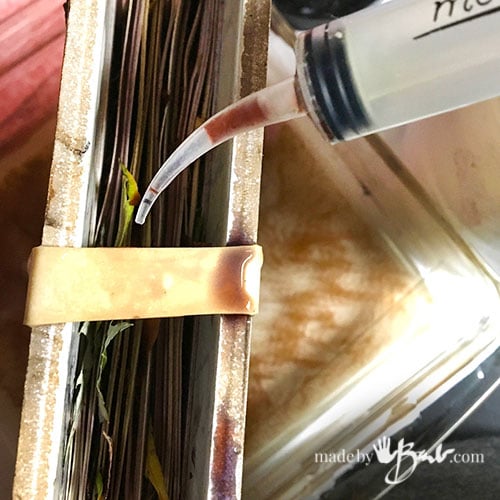
Since I do not submerse my stacks in liquid or dye but do like some ‘watercolour’ effects (not to mention I do have a multitude of jars of different natural dyes in my fridge) I use a plastic syringe to squirt some dye into the stacks and let it run through. Turn and squeeze.
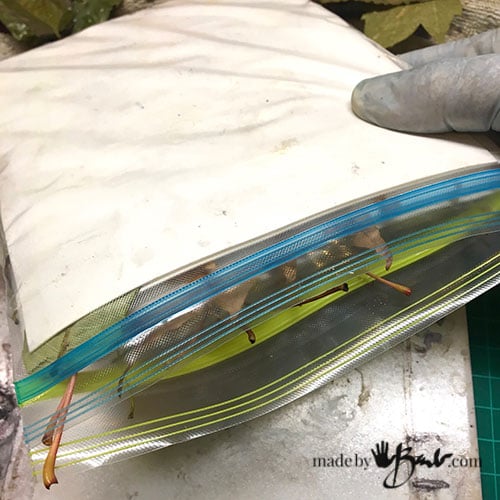
Either the stack can be set in plastic or into a glass casserole (only used for dyeing) to hold moisture. If working a few different dyes (such as madder, cochineal, some tea) each stack can have it’s own plastic pouch. If needed the stems may get snipped off.
Heat Processing:
Since having had good success with processing my fabric eco-printing in the microwave I have adapted my paper processing as well. There is some excess moisture in the stack but it s not submersed. Whether in a glass dish or plastic bags I aim to have minimal air leakage (to save the moisture) to assure that everything stays moist and not flammable.
A few minutes to start and checking for temperature (I love my temperature gun) to work up to about 180 -190 degrees. My microwave has a turntable, otherwise manual turning will ensure even heat. After reaching a good hot temperature it needs to sit and retain as much heat as possible so I pop the whole stack into my big old blanket for as long as I like. After a few hours I can stick my finger in and see how much heat it’s held. It is quite amazing! I can again heat it another round. Or not. I’ve had good results either way, as long as it gets a good rest with the heat. Flipping the stacks will also help distribute the ‘liquors’ in the pouch.

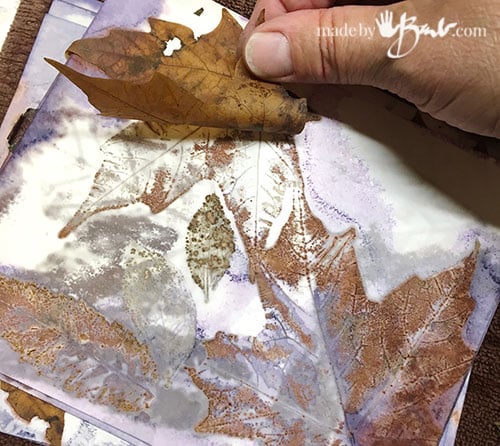
After processing I usually let it cool before opening but again that is not a rule. I ‘sooo’ look forward to the opening that I make it like a quasi-reward after cleaning or doing other less desirable tasks. It’s so much fun lifting each page and ‘wowing’ at the art!
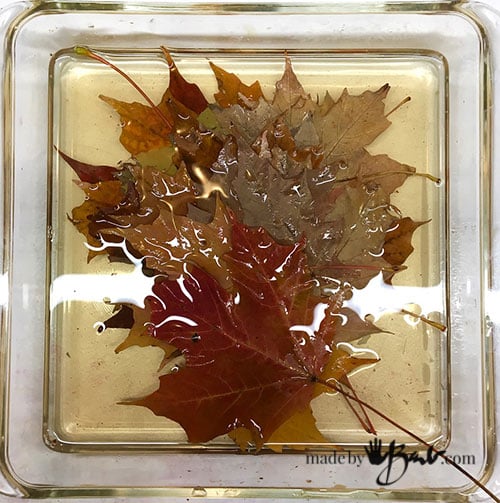
Oh, the colour!
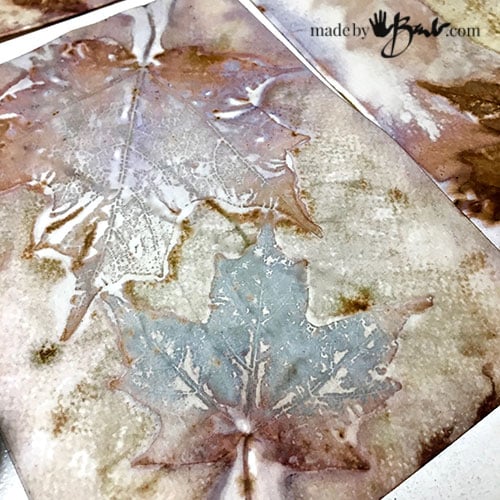
Yup! Maple leaves, sumac and a squirt of old cochineal dye (see my post using cochineal here) I love the purples that it gives since it is so sensitive to the iron and PH levels. Try madder, hibiscus tea, walnut… be creative!
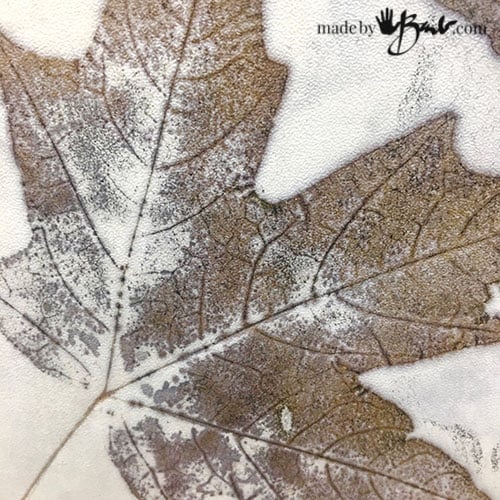
The amount of veining that can print is mind-blowing as well. It’s a balance of heat/moisture/pressure/absorption! Actually it’s a slightly controlled magic!

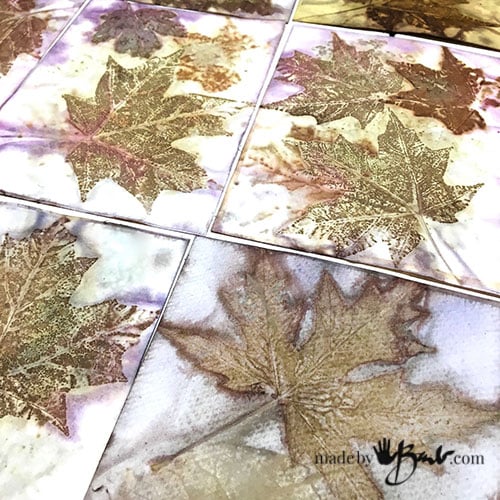
Can you really pick a favourite!? It might be difficult to give these away as cards…
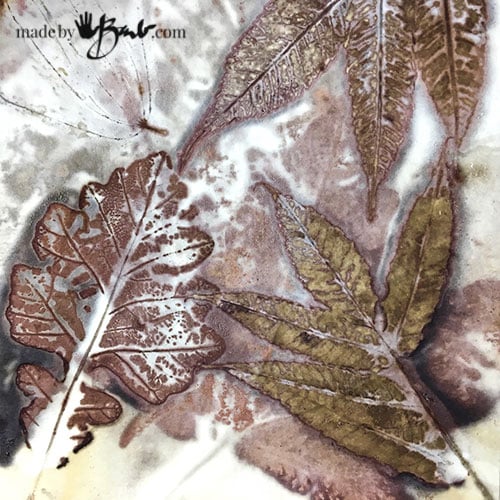
Sumac and Burr Oak! It makes being the ‘crazy lady who picks up leaves’ all worth it!
Sometimes the colours that magically appear are unexplainable.
The lovely soft washes of colour and definition come from the way the liquids run through between the papers and leaves.
I could not decide which pictures were the best either…

To think of all the hours I would spend meticulously painting details and here I can print 40 cards at once and no 2 can ever be alike!

Flowers can also print however don’t expect the colour of the petals. The bulkiness can also be a problem as the stack will get very lumpy and not have good contact. But usually where there is a will there is a way…
If you are new to eco printing this may be the easiest way to get your toes wet and could be quite inexpensive. Check out more eco Printing posts here
Wow, this is amazing. I’m also that crazy lady picking up leaves all autumn. Maybe I should begin using them. Thanks.
I have grown up having an appreciation for nature so when I discovered eco printing it was a perfect fit! As is the fact that I grew up sewing my clothes. See, it all comes together at some point!
I just love how clever and creative you are. I enjoy your blogs and hope to try some of your different projects. Thank you!
Thanks for stopping by and commenting! I truly enjoy how happy making can be and hope to share that to make our world that little bit better…
I want to try this in the microwave. Do you close the zip lock bags completely? Thanks!
yes, you can but need to watch and stop it before bursting. When it puffs up that usually means it’s boiling inside. Once up to a hot temperature the stack can be insulated under a thick blanket to hold the heat and further process. It can be left for hours if need be. Happy printing!
These are unbelievably beautiful!! I envy the lucky people on your card list 🙂
Well, that’s the thing… I’ll keep this one… and that one… and that one… ohoh!
I just recently started scanning my eco-prints, so I can keep a copy for myself if I particularly love one of them. I have given away some that I wish were still mine.
That has crossed my mind! I am considering making images that can be printed on fabric! How novel that would be! That’s what happens when you are an artist…
I love it! I’d like to do the same.
Dang! The leaves are all covered with a foot of snow! But I love this idea! Thank you for sharing! I’ll be trying this for sure!
There’s always begging at the florist (I’ve done that) as rose leaves (not petals) print great! And if they have euca even better!
How beautiful!! And I thought I was the only weird one that’s constantly picking up leaves, there isn’t a book in my home that isn’t full of leaves.
I like to use my newspaper method as I would keep losing track of them all. I now have them sorted and ‘waiting’ for me whenever I get the urge. Enjoy printing!
Do you ever do workshops?
Not yet, but asked all the time. I also still teach at a college; just too busy!
Do you have a dedicated microwave? Or can you use the one in our kitchen.
I have a dedicated microwave. I also use it for my use of fibre reactive dyes. There may be residue on the inside from the dyeing.
Can this be done with dried leaves or must they be fresh?
They can be dried and rehydrated in the solution.
How long do you rehydrate your dried leaves?
I rehydrate them very quickly if I am going to not add the iron to them (iron blanket) It usually just takes a couple minutes since I don’t want to lose the tannins (think tea) Warm water accelerates it. ‘Just enough to make them not brittle. Hope that helps.
Do you close the ziplock bags? and if you do it seems like they would blow up the the microwave veggies do.
What do you use for the iron? I’ve been taught rusty things soaked in water.
I try to zip it but may just it folded over. If it’s sealed it may blow up if you cook to the point of boiling. When I use the similar method for my fabric I stop it before the burst so it is just under boiling point. It will also keep the smells and fumes much less. Yes, I use both iron sulphate and rusty water…
wonderful, thank you for sharing, I will have to organize a rusty tin /bucket for my water.
I am definitely try this
Yes, I have the craziest collection of buckets of ‘stuff’! I should not be alone… ~ eco-print-o-holic
Thank you for sharing. You said you squirt a little watercolor. Did you squirt it anywhere special or just inside the package and let it run?
Thanks,
Jo
I don’t use water colour, I use some of my dyes like Cochineal or even hibiscus tea. I suppose water colour could work but it really does just sit on the surface whereas dye gets into the fibres. Letting it run through will give interesting somewhat uneven results. This printing is very unexpected but that’s the beauty of it! Such magic…
I’m another mad leaf lady! I fell in love with eco printing on paper but I never thought of using the microwave. Must try!
Have you tried strawberry hulls? They make beautiful rosettes.
I have been doing all my processing in the micro, and I bet it is on par with the steaming. I have had quite nice results lately even on the fabrics. As for the strawberries, is it only the leaves of the hull or the middle section too? I have to go raid the fridge… Let me know how you like the micro…