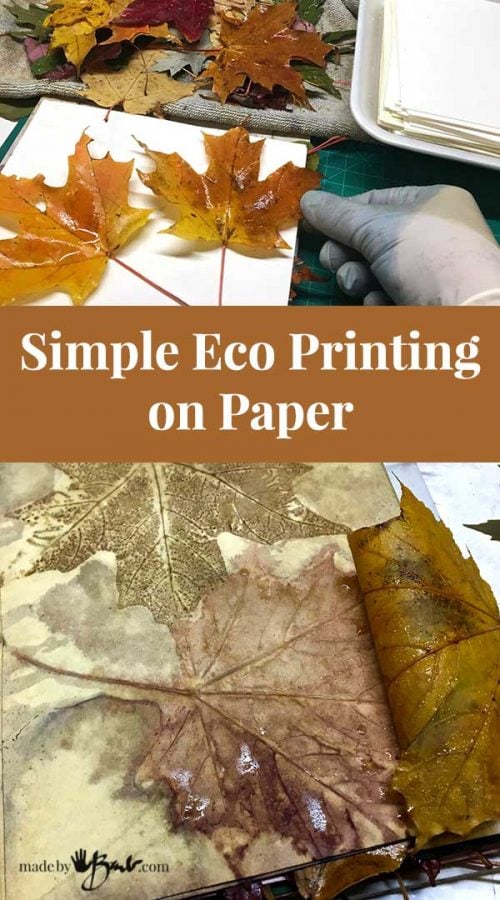
Simple Eco Printing on Paper
Welcome to my continued obsession of Eco-Printing and don’t blame me if it happens to you. After I ran out of fabric and scarves I looked for a new canvas to Eco Print on… anything white is not safe at my place. The good news; it’s worth the effort as this simple Eco Printing on Paper has again amazed me!
What you need:
Since I have been an artist & illustrator for a few decades (hardly believable) I have quite a stock of paper. This method involves some moisture so the paper needs to have some thickness and stability. I have used a multitude of papers and I can’t say any have been awful.
Watercolour paper works well however it may need additional soaking as it’s more absorbent. At first it may be wise to use inexpensive papers. Since my focus was to make cards I decided to go crazy and use whatever I found even using dollar-store card stock. Simple bond card stock has enough weight as well. In my opinion the combination of the leaf and mordant seem to effect the print more than the paper.
Well, yes, I almost forgot; you need leaves! Fresh, dried, frozen, whatever works for you. I use ones that I have dried by pressing and now store flat.
Preparation:
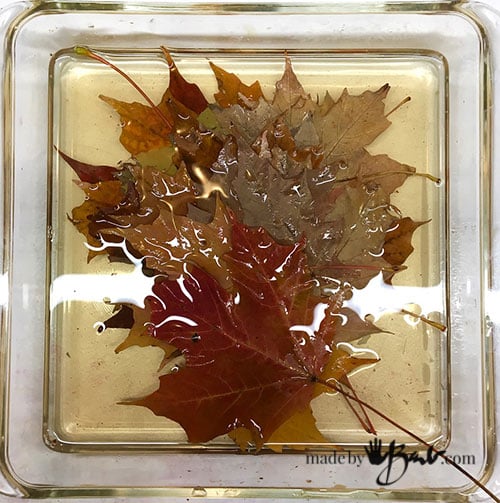
I know everyone likes exact recipes, but this art form is not quite like that. My leaves, water, paper may be different than your’s. I now have somewhat of an understanding of which leaves seem to ‘perform’ for me. Multiple maples, sumac, rose leaves, purple sand cherry, burr oak, walnut, weigela, are some of my favourites. I soak them in a solution of about 35-50% vinegar water that has a bit of iron sulphate added. Sometimes I just use some of my iron ‘liquor’ from my rusty-water-bucket. Don’t ask me how my laundry room looks!
Leaving them for the duration of readying the paper makes for about 30 minutes. The iron starts to react with the tannins in the leaves so I don’t leave them for too long.
Readying the paper:
Just as eco printing has many options for preparing fabric; as does paper. Paper is really just a cellulose fibre like cotton or tree pulp. Alum solution dip is one option but will yield more yellow results so I have simplified even further using just a vinegar/iron dip. You really should experiment to see how varying can affect the results.
I slide each sheet of cut paper (plan the sizes to what your end product will be) through the solution and stack them immediately. They do not get oversaturated but can absorb while waiting for the layering. The thick expensive watercolour papers will need more soak as they are sized for painting on. Sizing makes the paint bleed less so water will also absorb less.
Lets make Sandwiches:
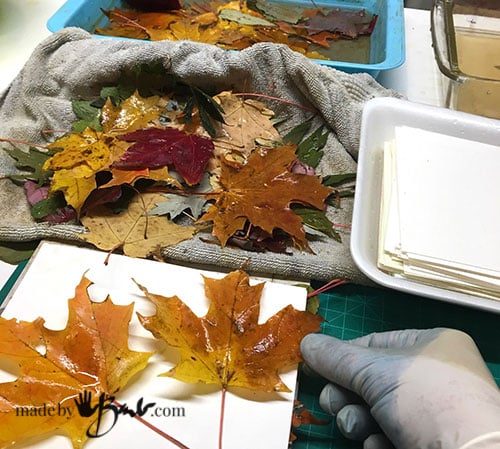
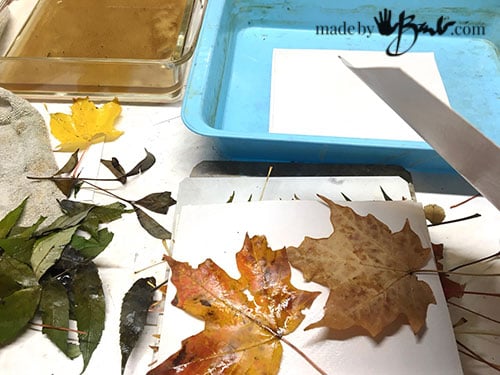
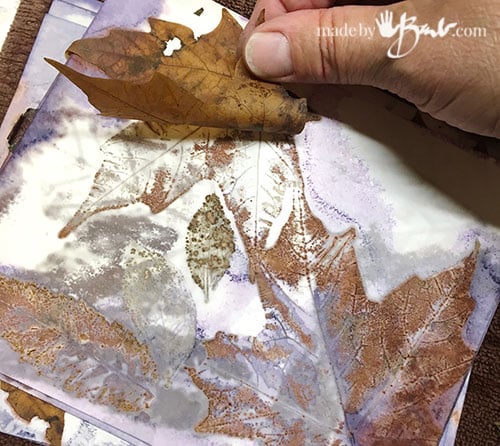
After soaking the leaves blot them on an old towel. Tip: if you would like nicely defined prints it should not be too wet, but also good flat contact. It’s best to wear gloves to place the foliage as you desire. My choice is to layer between each sheet and therefore get a print on each side to choose from afterward. Other options include rolling on a dowel or using folded cards.
Keeping the stacks of the same size helps give good contact.
After stacking you will need a way of applying pressure and keeping them flat in a hot environment. Ceramic tiles bound with elastics or bungee cords work well. I do not use metal since I process in a microwave.
A Little Trick:
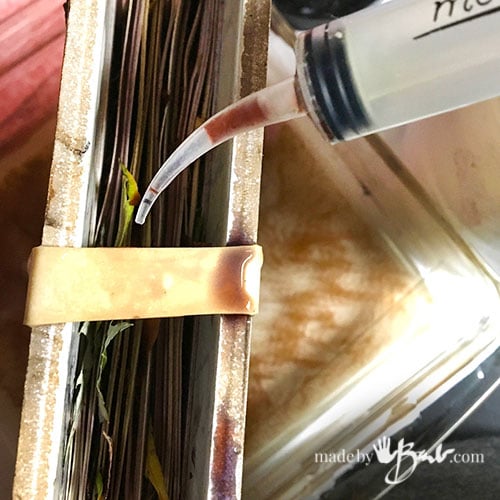
Since I do not submerse my stacks in liquid or dye but do like some ‘watercolour’ effects (not to mention I do have a multitude of jars of different natural dyes in my fridge) I use a plastic syringe to squirt some dye into the stacks and let it run through. Turn and squeeze.
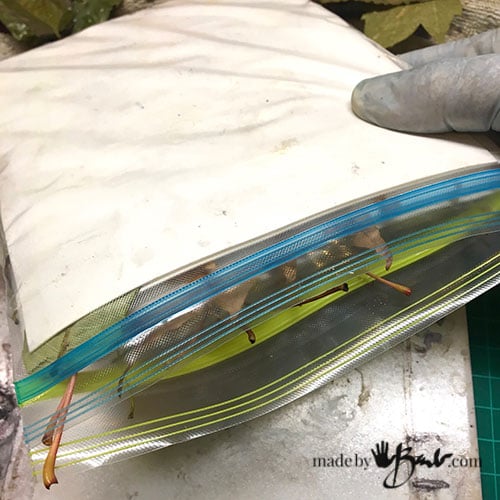
Either the stack can be set in plastic or into a glass casserole (only used for dyeing) to hold moisture. If working a few different dyes (such as madder, cochineal, some tea) each stack can have it’s own plastic pouch. If needed the stems may get snipped off.
Heat Processing:
Since having had good success with processing my fabric eco-printing in the microwave I have adapted my paper processing as well. There is some excess moisture in the stack but it s not submersed. Whether in a glass dish or plastic bags I aim to have minimal air leakage (to save the moisture) to assure that everything stays moist and not flammable.
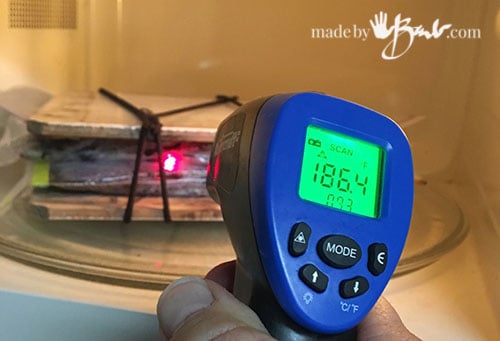
A few minutes to start and checking for temperature (I love my temperature gun) to work up to about 180 -190 degrees. My microwave has a turntable, otherwise manual turning will ensure even heat. After reaching a good hot temperature it needs to sit and retain as much heat as possible so I pop the whole stack into my big old blanket for as long as I like. After a few hours I can stick my finger in and see how much heat it’s held. It is quite amazing! I can again heat it another round. Or not. I’ve had good results either way, as long as it gets a good rest with the heat. Flipping the stacks will also help distribute the ‘liquors’ in the pouch.
After processing I usually let it cool before opening but again that is not a rule. I ‘sooo’ look forward to the opening that I make it like a quasi-reward after cleaning or doing other less desirable tasks. It’s so much fun lifting each page and ‘wowing’ at the art!
Oh, the colour!
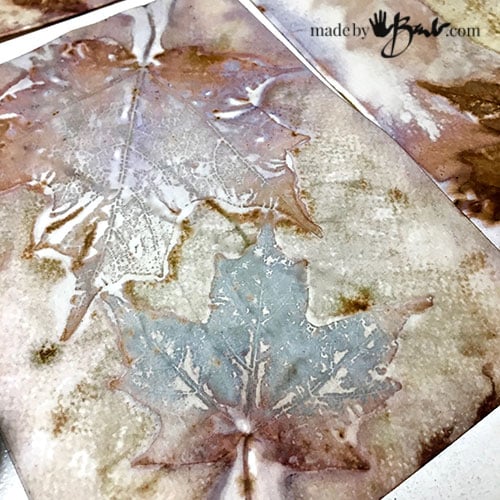
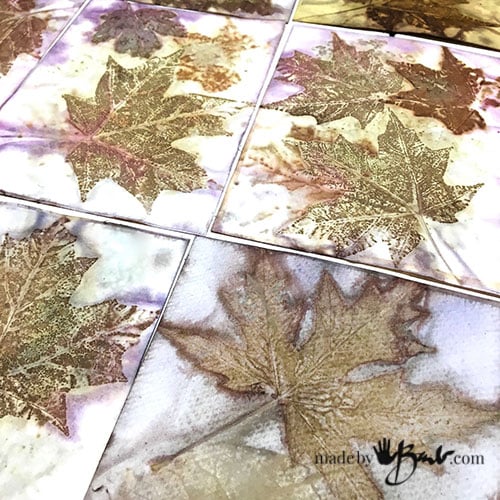
Yup! Maple leaves, sumac and a squirt of old cochineal dye (see my post using cochineal here) I love the purples that it gives since it is so sensitive to the iron and PH levels. Try madder, hibiscus tea, walnut… be creative!
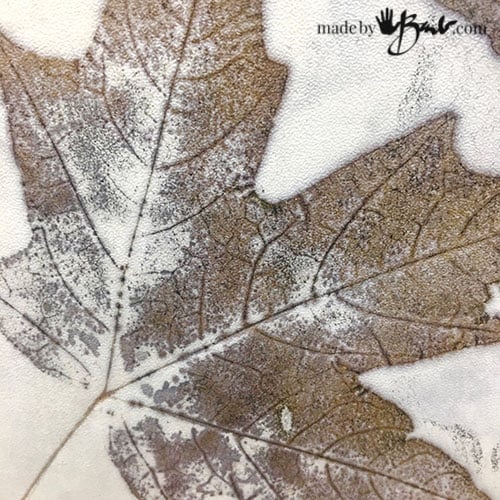
The amount of veining that can print is mind-blowing as well. It’s a balance of heat/moisture/pressure/absorption! Actually it’s a slightly controlled magic!
Can you really pick a favourite!? It might be difficult to give these away as cards…
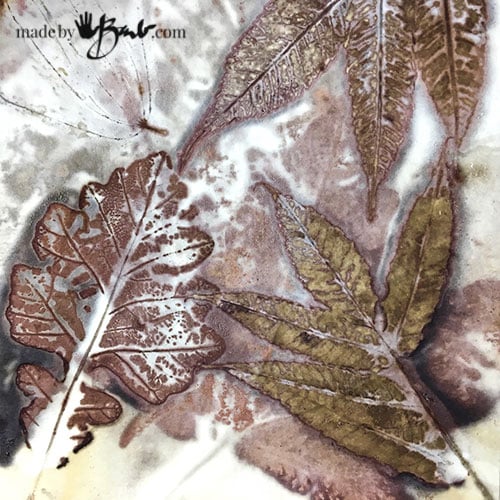
Sumac and Burr Oak! It makes being the ‘crazy lady who picks up leaves’ all worth it!
Sometimes the colours that magically appear are unexplainable.
The lovely soft washes of colour and definition come from the way the liquids run through between the papers and leaves.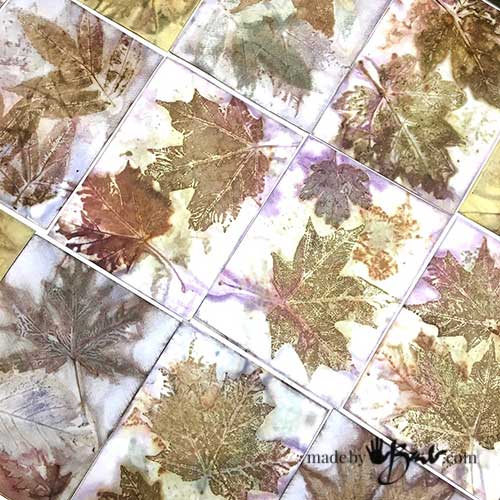
I could not decide which pictures were the best either…
To think of all the hours I would spend meticulously painting details and here I can print 40 cards at once and no 2 can ever be alike!
Flowers can also print however don’t expect the colour of the petals. The bulkiness can also be a problem as the stack will get very lumpy and not have good contact. But usually where there is a will there is a way…
If you are new to eco printing this may be the easiest way to get your toes wet and could be quite inexpensive. Check out more eco Printing posts here





Hi Barb, I am really excited to try this technique. When using a glass dish with dyes do you put the ceramic slabs on top of the paper?
The stacks of paper with the leaves in between the pages is held secure between the tiles to give pressure with elastics or tying. This can then be put in a dish or plastic bag before or after being put between the tiles. Many ways will work and depend on what supplies you have. Experimentation is the best part of eco printing! Have fun!
Thank you! One more question, can you reuse the leaves to make more prints?
They usually will be quite soft and I think the tannins may be leached out. If it is a method of only really using the shape as a resist then possibly they can if they a hardier type.
Great explanation, thanks!
Where do I get the iron sulfate you use?
I don’t have a microwave, what can I use instead?
I get mine from The Fibre Garden but some good garden supply will also carry it. You could steam them using a turkey roaster, or an outdoor BBQ side burner, or even a solar oven! Lots of way to get heat!
I find your info of incredible value to me. I enjoy using your techniques to create some wonderful work. I’m a visual artist so getting outside and collecting in the wild and in my garden has been very inspiring and somehow meditative. Thanks for sharing. I’m loving the process!
Hi, Barb. I truly love all your wonderful eco printing tutorials, and they have really helped me to get started, thank you! I have a question about something you wrote here – you said you keep dyes made up in the fridge, and I wonder if you have any tutorials on mixing the natural dyes. I use synthetic dyes for tie-dye, but typically just make a standard strength for most projects. Everything I have read so far on natural dyes says to base the amount of dye powder on the WOF, so do you use that method, or some other way to gauge how much dye powder to mix up? Again, thank you so much for all your wonderful information!
Judy
Well, I’m afraid I like to be a bit less scientific. I don’t buy the natural dyes in dye powder form, usually Madder chips, cochineal bugs, logwood chips, or onion skins. Each can give varying results especially after the first use when it is somewhat exhausted. I do use a rough WOF measurement (usually marked on the dye package) but also just go with a ‘feeling’… like painting, add a bit until I like the look!
Dear Barbmaker,
your eco-prints are amazing and thanks a lot for the practical instructions.
Do you basically use the same concentration of vinegar-iron-water for soaking the leaves and soaking the card stock paper?
Best, Gudrun
You could use the same, but I usually don’t soak the paper, I just slide it through and then it gets wet enough. Depends on the quality of the paper whether it can soak.
Hi Barb,
Just wondering if you have had any luck printing envelopes, and if so, how would you approach that in keeping the sticky seal from sealing against the envelope itself? I’ve been wanting to make cards, but I thought it would be fun to have envelopes to match too. Thanks for you thoughts and help.
I have not tried that! In my opinion maybe it’s best not to, as they may lose strength. One option would be to print flats and make envelopes afterward. Or, another idea would be to just add an embellishment of a leaf to the envelope as I have made a stamp Depending on the colours/inks used they could match nicely! More making fun!
Thank you Barb for your thoughts and help about printing on envelopes. I have been looking on your site to see if you have anything on first dyeing a silk scarf and then eco printing on top of it. Could you direct me to that post if you do have instructions on that. I thought it would be fun to natural dye a scarf then try to eco print some leaves over the dye. Not positive how to do that. Thanks again!
One of my favourite ways to add colour is using madder or cochineal before eco printing. The effects can be quite lovely and also a wide variety of coloyrs depending on all the variables. Hope that helps!
Hi! I’m really excited about this because I am a teacher and I plan to try this, but with 6 classes a day the microwave seems WAY preferable to the crockpot. I have three questions: One, you mentioned tiles – do they go into the microwave on top of and also under the bag and then stay around the bag in the blanket? If so are they extremely hot when removed from the microwave? Two, what kind of bungee cord are you using to hold it together – would large rubber bands work or would they deteriorate in the microwave? And three, could the paper be sprayed with the solution instead of “dipped”? Thank you so much!
The tiles are a way of applying flat pressure. You could fashion any other method as well like using a casserole dish and some flat heavy vessel on top. Size of my micro determines what I use. Yes, things get kinda hot, use mitts. Rubber bands do work but I find they just don’t last like they used to, maybe they aren’t rubber anymore. Spraying can also work just don’t have it in the air to inhale, not a good thing with iron solution! Exercise proper safety and wear gloves as well. I would do a test run with your choice of solutions and simplify as much as possible. Also the choice of leaves is important, sumac and maples are pretty fail safe as is walnut. See also the post on processing Good luck!
Hi Barb,
Have you ever attempted using those large oven baking bags to put the bundle of papers in to heat up in the microwave? I’m curious as I’m wondering if I could get a large bundle(length and width of paper) in one of those instead of a gallon size plastic ziplock bag? I would fold over the open part of the bag and still be able to open it to check temperature. I’m thinking and guessing if your temp did not get over 200 degrees, maybe it would be safe? I thought I would put that question to you and see if maybe you have used those to put your bundles in and how and if they worked. Thanks for any help and thoughts on this.
I am wondering if you can leave a bundle you have printed for a week? Since I will be doing this with a class of children I see no way of accomplishing in an hour?
I have heard some eco printers do that. The effects may get quite strong. I think it would work, but I’d make sure they don’t dry out as then the paper may stick to each other and the leaves. Myself; I would do a test run… would hate to disappoint a whole class!