Eco-Printing with Madder Root
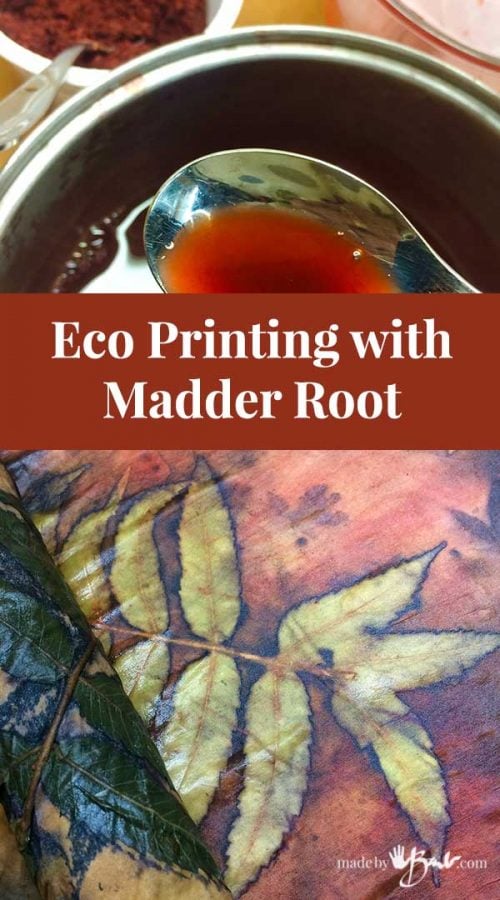
When I embarked into the vast world of printing and dyeing with natural elements I never knew that ‘wood’ could provide so much colour. Imagine a root that can ‘gift’ you such amazing rich reds… Eco-printing with Madder Root is such a delight.
Madder Root comes from the tree Rubia tinctorum. The roots provide a variety of reds, from orangey to bright red. Factors such as the soil, the water during growing and temperatures during dyeing create different red outcomes. It is not a very expensive dye but does need a fairly strong brew.
The Little bits:
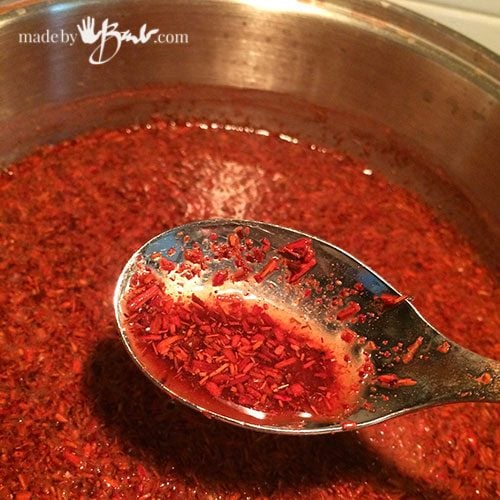
In this process of eco printing I am using habotai silk. The amount of madder root to fiber (fabric) should be about 100% to WOF (weight of fiber) if a strong red is desired. It is still your option to increase or decrease the potency. My madder root came in a slightly coarser consistency than what I used prior but it will all work. The coarser the ‘grind’ the more you will need to do to get the pigment out of the roots. To keep the reds stronger and less dull do not boil the solution of madder root and water, it should remain lower than 80 degrees celsius. I like to give mine at least an hour and sometimes let it sit overnight as well.
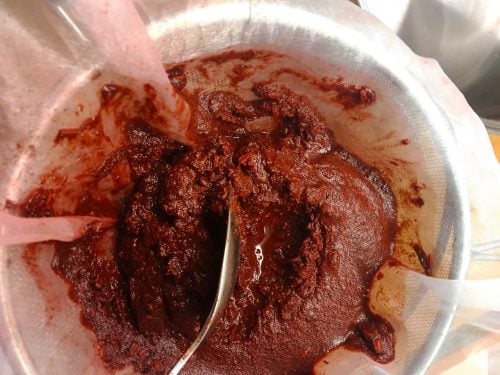
If it is a powder you may immerse your fibre with it but it may still be messy to rinse off. I like to strain the ‘roots’ from the ‘madder tea’ with the use of some sheer polyester organza fabric (like old curtains).

Once well drained, squeeze as much as possible from the steeped roots. I like to collect the ‘matter’, let dry and save for a possible weaker solution next time… and it’s what us crazy dyers do, never waste anything!

The Madder Dye:
Such wonderful earthy reds. There is some belief of using calcium carbonate with the dyeing of the madder root but I did not use it.
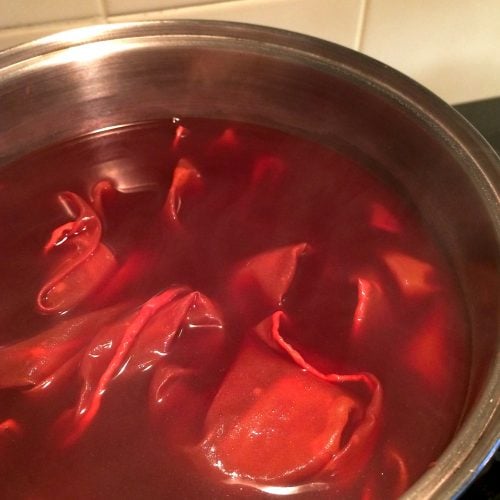
I like to keep things simple and find that the habotai silks (protein fiber) dye quite well without a pre-mordant. To allow best colour absorption I like to steep it below 80 degrees for as long as I can, again possibly over night. Much depends on my impatience… It should move freely in the solution to get the most even dye application.
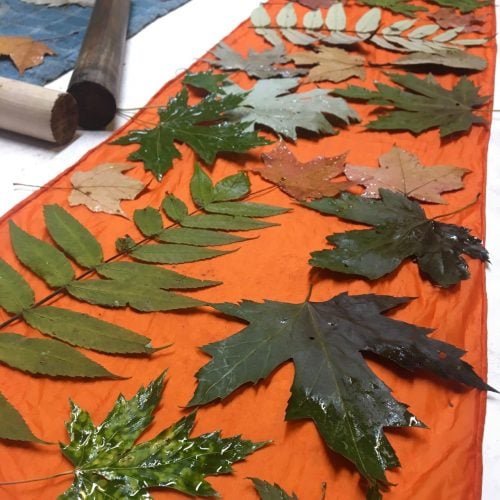
In this process i add the botanicals after I dye but that’s my choice, not a rule. There really are no rules in Eco-printing as it was probably discovered by breaking rules. I generally just wring out the silk and use straight away.
My Bundles of Joy:
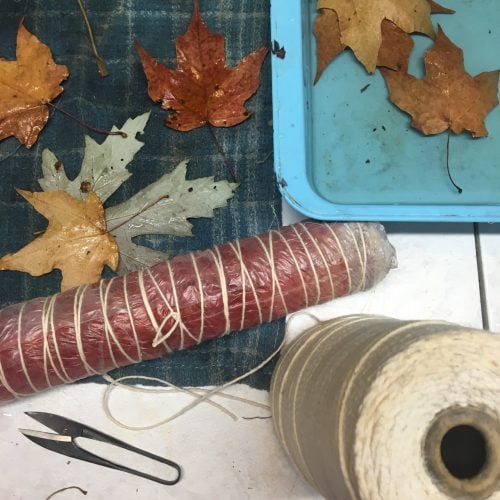
To get the most distinct prints the contact with the fabric should be as tight as possible. In this process used an iron blanket to give extra definition as the tannins in my leaves combine with the iron to make permanent marks.

I have used steaming in this case but do also use the microwave processing with success. The very interesting thing is that the tannins in the leaves created a chemical reaction that made the dye change where they were placed; as if it displaced the dye.
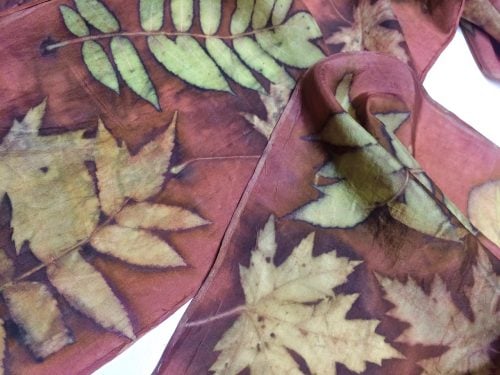
Since the sill is such a fine weave it picks up such amazing detail. The iron does also combine with the madder and darken.

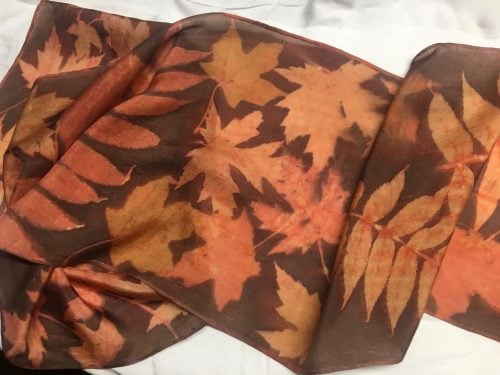
Always something different:
The nature of this art form is somewhat unpredictable, but that is what makes it so interesting and keeps challenging us. This scarf was printed a couple times hence some dark prints and some resist prints.
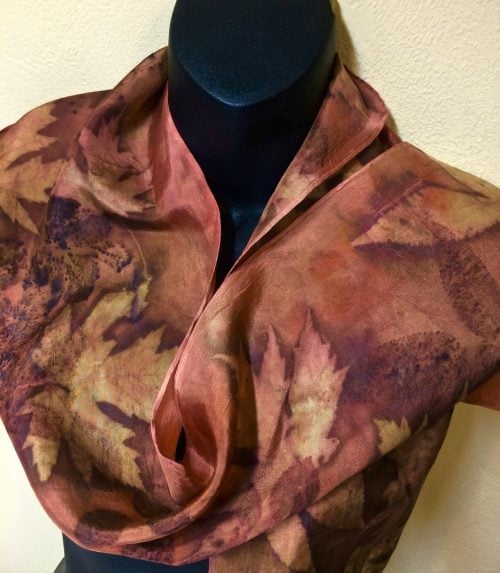
Maple and sumac have much tannin so they create great resists.

The reds were quite ‘saddened’ in this case where my iron solution on the ‘blanket’ was a bit too strong. There are still red undertones and a lovely gold resist that are captured in such lovely shapes.

Alright… can you tell I am a bit obsessed?! I absolutely never tire of opening a bundle! ‘Kinda like checking your lottery numbers but in this case I almost always ‘win’ something beautiful.
Join me in the ‘game’.
This was a lovely explanation on use of madder.Could you pl explain how did you print the scarf couple of time.I mean how is the process to do so without disturbing the prints already achieved
Thanks in advance
Do you mean the way that I printed it again after the first time? It was just washed and then the process repeated. The first prints stay and some i=unexpected thing can happen according to where iron or tannin is/was. Give it a try!