DIY N95-Style Face Mask Pattern
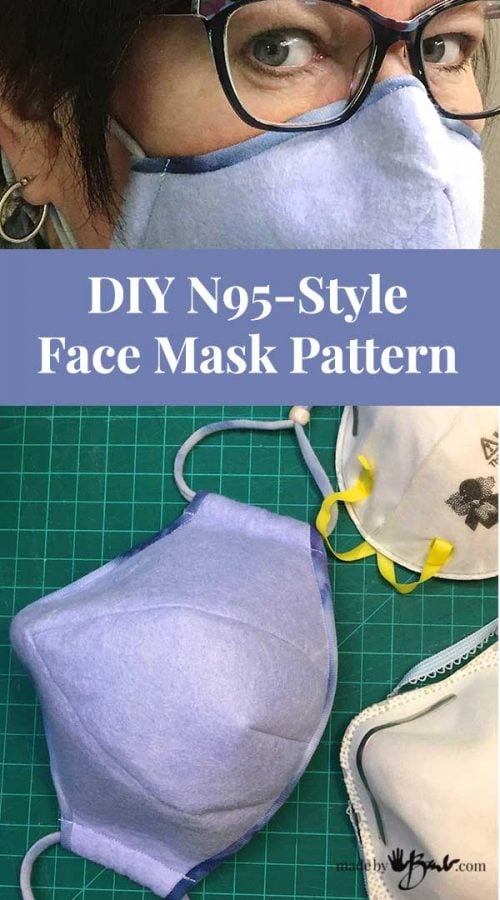
After having my mask keep sticking to my face I knew there was a better way… Welcome the next in my series; the DIY N95-Style Face Mask Pattern. It closely mimics and holds shape as the N95’s.
Am I a mask expert? No, but I am one of those particular people. When I see something that is not functioning well I want to make it better. It’s how I have been pretty well as long as I can remember. The curve of the Ultimate Face Mask also scared some sewers so this only has a point.
What fabric?
I have been going through my stash of fabric (trust me, it’s a pretty extensive collection) and holding it up to the light (to see the holes) and over my mouth to test breathability. I question the high thread count cotton as it’s so difficult to breathe through!

I saw some advertising of using faux ‘Shammy’ fabric. These brand-name products are a non-woven felt like fibre made of rayon and polypropylene. It’s quite thick as it can hold a lot of water. Since I do a lot of dyeing and sewing I have to know my ‘fibres’. Rayon is a natural fibre made of wood products, absorbent as well. You may have a blouse that is quite comfortable to wear and also very silky soft; it’s probably Rayon. Viscose is almost the same as well. Craft felt is often only polyester and much thinner. There are some wool felts but I am not sure of the comfort level.
I was told that cotton can take the moisture from the covid partical where as polyester does not. Odd, as any professional N95 masks have no cotton in them. (Do your research)

These shammy’s (like Sham-wow) are machine washable and some even bleachable. I love felt type of fabric since it does not fray at edges, can be sewn so easily and hold shape well. I have used industrial felt for purses and containers often.

Back to Designing:
My N95 mask (from concreting) is sturdy and stiff. I like that. It stays OFF the face and he round outer edge rests pretty well around a wide variety of face shapes. So, from that shape I took my inspiration.
I teach a technical type of drawing so I understand form quite well. I love the challenge of working with forms (I guess that’s why I like concrete) and constructing or deconstructing them.

Fabric is flat and then needs to fit a rounded form. How ‘cool’ is pattern making?! I have never had to ‘fit’ faces; usually just my ‘bumps and lumps’! Round becomes flat… awesome.
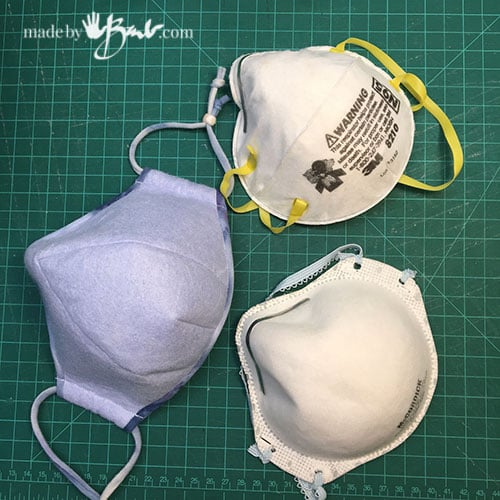
I have fond memories of my mother working as a milliner, over a wooden head form making exquisite hats for some very sophisticated ‘dames’. She would cut and sew and steam and get such amazing shapes. It’s been over 50 years but it must have made an important impression. Look how similar to the N95 the shape is!

I have made a pattern for you; download it here:
The DIY N95-Style Mask Pattern:
- Can be left unlined
- Bias edge finish, no turning
- Optional extra stiffening insert
- Very flat Metal Nose Piece
- Keeps form & shape
- Innovative 2 piece Pattern
- Adjustable tie casings
Print the Pattern at 100% (note folded piece) and cut the pieces. I like to trace it on the felt with a fine marker as then I can cut it more accurately.

As with the ‘Snug-nose Mask Pattern’ I love using the iron-in nose strips. You can put it in place before assembly if not lining or between the layers if lined. For the unlined version cover the inside with some folded bias fabric. Keep it .25″ from the edge.

The Scary ‘Point’:
The nose section is sewn in 2 stages. Match the dots after clipping to the dot.

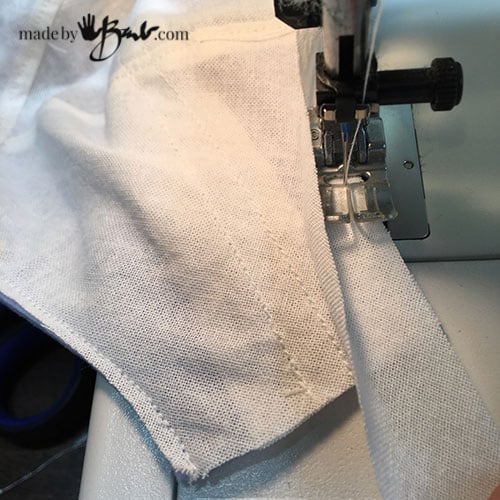
The stitching starts at the ‘dot’ and continues to the edge. Clipping around the face curve helps sewing the curved seam.

Not so scary… 1/4″ seams.

After the first half, open at centre and match the other side and sew to the matched dots again.

It is like 2 seams that meet at the dot, and clipping is vital. If, it is too complicated, feel free to add seam allowance at the centre and then treat as separate seams (but still match dots)

The bottom centre seam is much like a dart; and ends curving into the edge at the dot. Trust me, after one, it’s super easy.
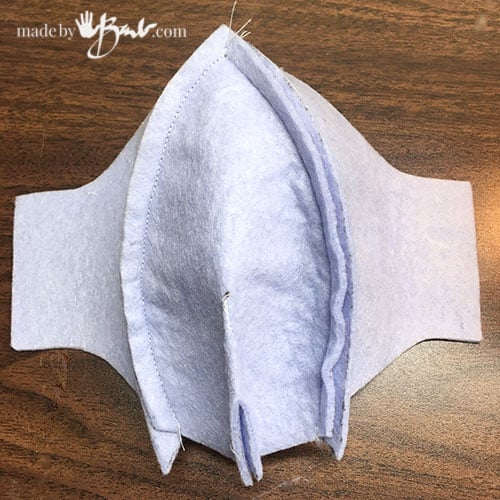
Looks odd, but has great shape already.

Since this felt like ‘shammy’ is a felt, it does not fray and can be trimmed very close. I love that about working with felt.

Turned right side out it holds shape already, without any pressing at all.
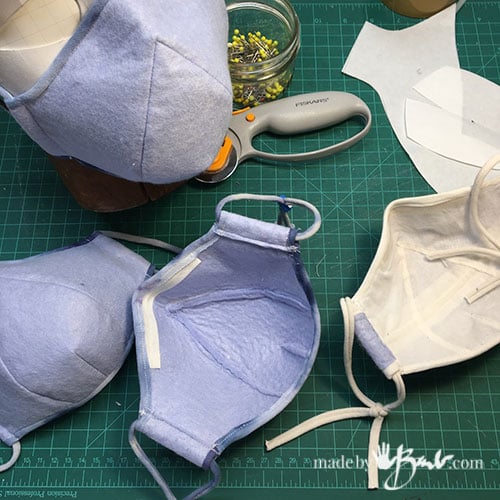
See the unlined and lined option. Rayon is not uncomfortable and this mask pattern does not really lay on the face, so I actually like it in one layer… but suit yourself. (skip down to the edging if no lining desired)

Lining Optional:
If desire you can also line this N95-Style Face Mask Pattern. Repeat the same steps as for the outside with a cotton fabric. Be aware of breathability. I like to top stitch to keep seams as flat as possible and less ironing.

Shape Stiffener:
To make a mask not be able to keep collapsing you can also add some ‘boning’ as they call it in the fashion industry. Remember the corsets? To add a flexible but shape hugging strip ‘zip ties’ can be easily cut and inserted into an added casing.

Determine where you would like the strip to follow across, higher near the nose is better as that is where the space in the mask is most comfortable. Cut a 3/4″ strip of fabric on the bias (45˚ angle) and pin across.

Stitch across on the wrong side of lining.

Sew the casing by leaving a space wide enough for the zip-tie.

When using a lining the metal nose piece is ironed into place between the layers. (make sure to keep at least 1/4″ from edge)

Stay stitch lining to outside, wrong sides together.
Edge Finishing:
As an edge finishing, the outside edge has a bias strip applied. You can use purchased bias band or easily make your own.

I like to stitch the outside last so I sew the first seam from the wrong side.

Fold over to the right side and topstitch the bias band only on top and bottom edges. (side casings will be folded)

Sew the casing line on one side. Insert the zip-tie and cut to length taking in account of the fold for the casing.

Sew the other casing line. This will keep the zip tie in the channel.

As an alternative to double folded bias, you can ‘cheat’ by only folding back and leaving the raw bias edge on the inside. Bias edges tend not to fray. The seams are also cut very close so there is no large seam to bother your face.

Tie one on:
Rather than elastic, (which is getting scarce) I love to use t-shirt strips! If you use a t-shirt with some lycra it has a great stretch, and is soft in the ears. 3/4″ wide or so works well and a ‘Pony Bead’ can act as a toggle.

So, what do you think of this N95-Style Face Mask Pattern? It holds shape nicely, stays off my skin, breathes well, and is blue. But you be the judge… I have a few patterns to offer. We all don’t like the same.

But above all, make good decisions and practice good cleanliness. I hope to just help keep you safe and comfortable one mask at a time.
please forward the N95 pattern. Can’t download. Thanks!
done!
i am wondering what else can be used for the nose wire? i don’t drink coffee so don’t have access to coffee bag twist ties. i can’t see in your sewing method where you buy the nose wires you use. i am a sewer so do have iron on pelon but can’t think what to use as the wire! i live in canada. any suggestions?
The thing I like best lately is the tops of the sardine cans, cut in strips with some old shears. Then use the fusible web or other iron on way to attache it. Cut about 1/8″ to 1/4″. See some steps here I am in Canada too!
thanks so much barb!
You can use plant twist ties available at garden shops — they come on a big roll. Have also found them ay Dollar Stores.
I like the nose wire to be very flat and snug. I really like the iron-in ability as well!
Thank you Susan for pointing out the size of the virus! I see soooo many well intended people out there professing mask desigs. Sadly, none of them seem to understand the microbiology behind the virus. They are designing masks and they are often wonderful designs, just as this one, however, PLEADE. PLESDR stop referring to them in any misleading statements as comparable to a N95!! The minute you put a needle to fabric you have opened a pathway for the .1 micron sized virus to enter……and exit. There are no seams and all edges of a N95 are heat treated for that reason. Even with an N95 to work, hospitals go through about a 45 minute fitting process to assure proper seal. People have the false security that marks stop the virus. They only slow the spread. Even the N95 with the vent are expelling contaminates from the wearer. It must be an airtight seal around the mask to stop viral escape. The denser the fiber the better it contains the virus from passing through but NOT around edges and through needle punctures. If you truly want to protect yourselves and others, PLEASE do your research and homework before professing the safety of homemade masks. The droplets can also enter through any exposed orifice, including the eyes. That’s why face shields are part of PPE protective wear. Using the glue to seal and join seams is a better idea than machine or hand sewing. Thank you for considering these comments, your inventive mask design and above all STAY SAFE AND HEALTHY!!
Thanks for the info. I see so many ill fitting ones and now people just wear a shield (so much air travels down and out!) I do not profess these to be equal to N95 but the fit is quite nice compared to many. YES, do your research and Stay Safe!😷🤞🏻🤷🏻♀️
I am wondering is there a certain percentage to go up or down on the copier? Ism assuming this is a medium. If this fits me comfortably how do I adjust for my husband or a smaller faced family member. Thank you.
Nancy
I would measure across the face and then measure similarly on the mask to figure out the percentage. It’s a pretty simple math. However I don’t see the N95 available in different sizes.So it would fit a man.
Hi
I would love to make this mask but am not able to download it,. Please could you email
the pattern to me. Thank you Barbs for sharing this with us.
Stay safe x
done
Hi there – thank you so much for taking time to show us your amazing work and for sharing it too. I am another one who cannot download the pattern. I did donate a small amount of money to you – and emailed you in the hope you could email me back the pdf. I am going to make mine out of some silver material – I have no idea how comfortable with will be but it will look so cool, I also managed to source the equivalent of Wizcloths here in the UK from Amazon. They are 80%viscose and 20% polypropolene (as per the photo you shared) and they are called Eden Ecomony Pack of Floor Cloths 50x60cm orange pack of 5 for £8.95 Thought I would share this so any UK followers of yours can source them. Thank you once again and I hope to receive the pattern soon. Stay safe with your new mask.
Thanks, just sent the pattern. Not sure why there’s still download problems as my web designer assures me all works. Good luck with your’s!!!
please send me the pattern. it looks like it will be a great mask. thank you
done
Do you make these? I’d happily pay for one. The sewing is not a strong point for me and the fabric glue I’ve seen is way too “smelly” and I’m extremely allergic to scents and chemicals (I use unscented everything!)
I have see so many home sewists start making/selling. Maybe they would welcome a mask pattern. I just don’t have the time to sew, list and sell. This may be a good easy project to start sewing… 🤷🏻♀️😷
I just made this mask in cotton with 3 layers, the fit is amazing!! I have tried 4 different styles and this wins hands down. You should do a video for youtube. Thank you for sharing this mask pattern. 🙂
Thanks so much much!!!! I do love it too!!! Getting a good fabric or felt-type is key. Yes, making videos is on my ‘to-do’ list. Check back soon! Stay safe 😷
Do you have a video tutorial for this mask on YouTube? I’m a visual learner and would love to see you make one. Also do you have a desire for this mask with a filter pocket? Will be making mine from plain cotton fabrics and muslin for the inside. I will probably add some kind of facing the the top mask piece also. I am using 1900 HEPA filters for the filter.
Thank you for the pattern. One more thing, how would you go about scaling this pattern to fit XL men, teens, and child age 6-10?
I just made a new design with a video! Maybe I’ll be able to. To scale I would measure from top to bottom and then see how that would fit on a man. Divide the desired height by the original height = larger than 100%. Do the commercial N95 even come in different sizes?