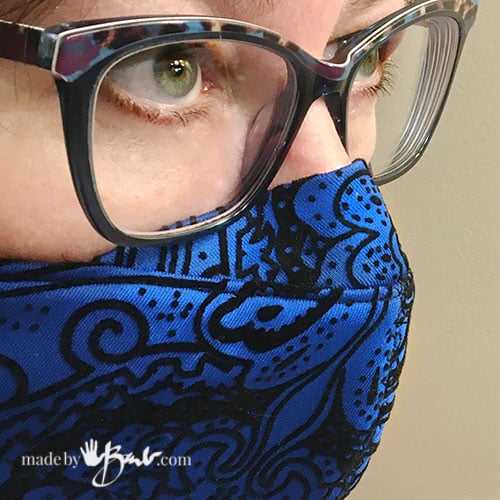
Fitted Face Mask Pattern for Glasses
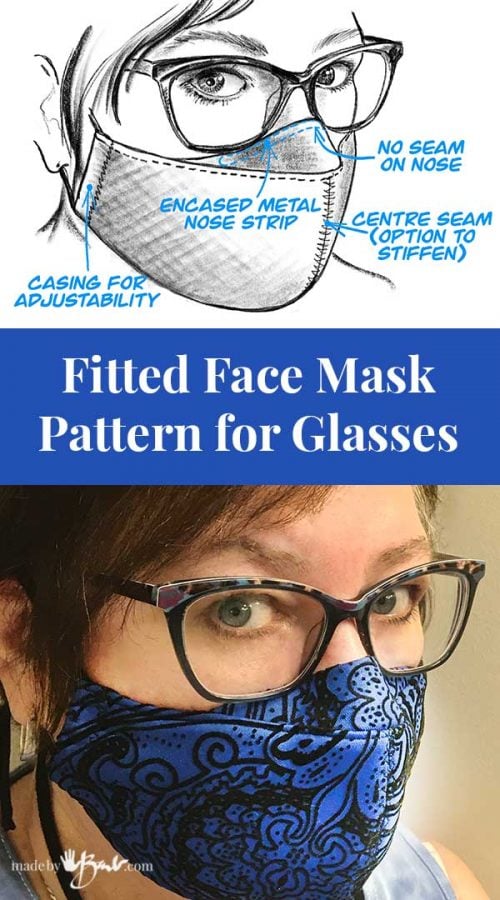
Design should always be about necessity! ‘And that is my purpose here; to fill a need for so many frustrated people who wear glasses and want a good mask pattern. My Fitted Face Mask Pattern for Glasses comes to the rescue…
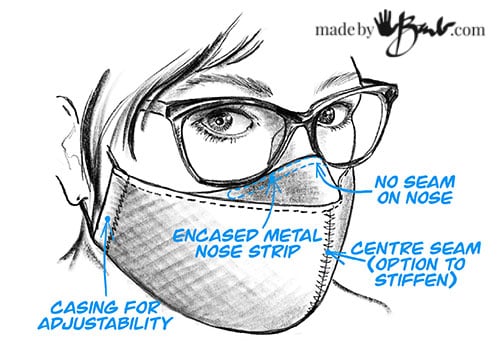
The Unique Nose Piece:
Oh dear! I am appalled at the way people wear their masks, so each shopping trip is like research. I’m seeing commercial ones but have still not seen that many that look like they are really comfortable or fit well. Maybe that is why there are so many ‘un-masked’ rebels! Fogging glasses and touching mouth are very common complaints.
I know the ‘Olsen style’ mask is very popular and my first design has had great reviews and mass amounts of downloads. The problem would arise when there was just too many layers at the centre seam and that would push glasses up or out, which would affect visibility. To remedy that I removed the centre seam AND the top edge seam to make a single piece for the nose in this fitted mask pattern for glasses. Also, even better; it has a super flat aluminum nose piece ironed inside to make it super flat and adjustable!
To make this Mask:
Download & Print the Pattern. Cut one nose piece, 2 lining and 2 outer pieces. (you can add layers/filter pocket as you like) Fold and press the nose piece in half.
You can also watch it in video form: (please subscribe, so that I will continue making videos)
Make you own Metal Nose Pieces:
Check out my video & instructions to see how to make these nose pieces. Trust me, it’s easy.
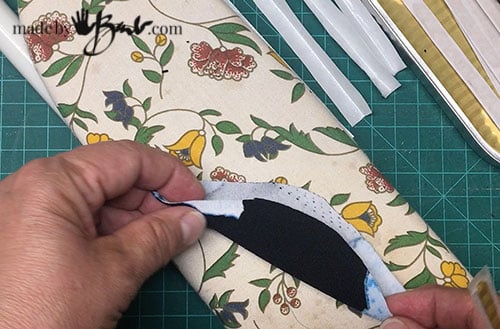
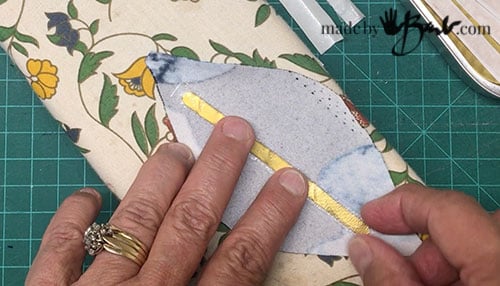
They are made with fusible web so they can now be ironed into place and stay there. Place it next to the centre fold.
Fold over the fabric and make sure the metal piece stays centred. It should be at least 3/8″ away from edge.
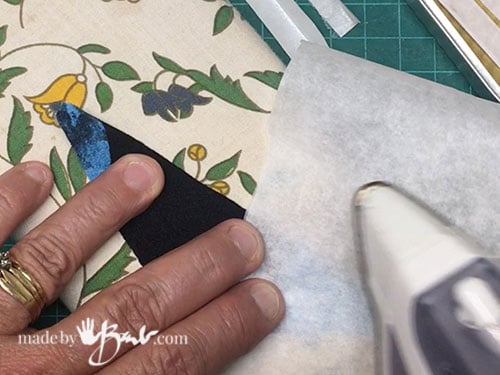
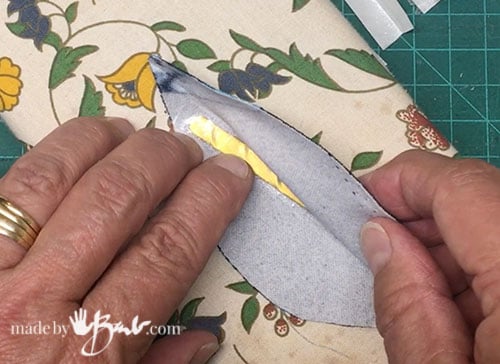
Use some parchment paper to protect the iron from any possible contact with the fusible webbing. (don’t ask me how I know that!)
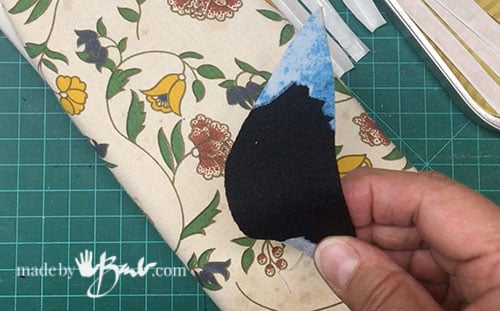
Ta-da! You now have a ready to use nose piece. It is bendable and very slim. Yes it is only 2 layers but if you desire you could do more and use more fusible webbing as well.
I have found that breathability is making the decisions for mask fabric choices… but that’s a whole other discussion. Do make your own decisions.
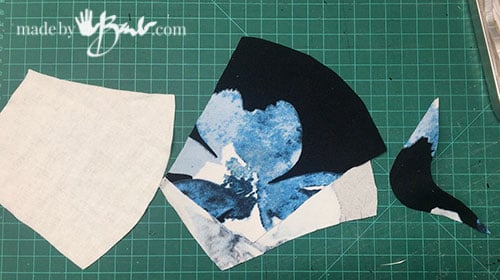
Cut 2 of lining and 2 of the outside fabric. I have decided on a polyester knit here.
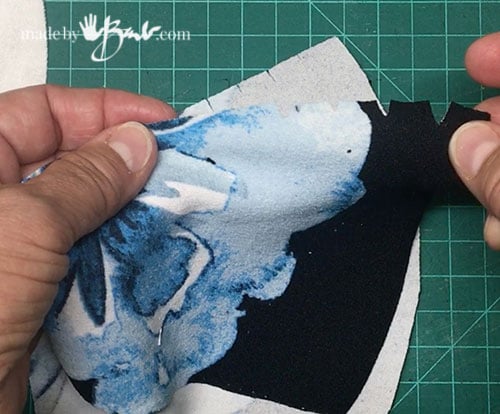
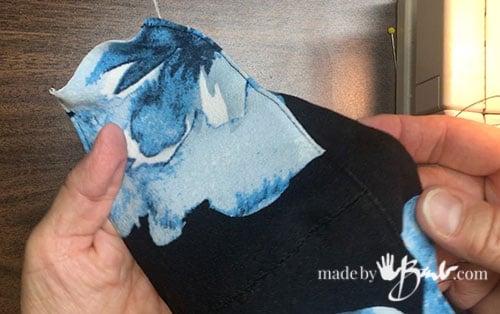
Since the nose piece is not flat, clip at the markings on the top edge.

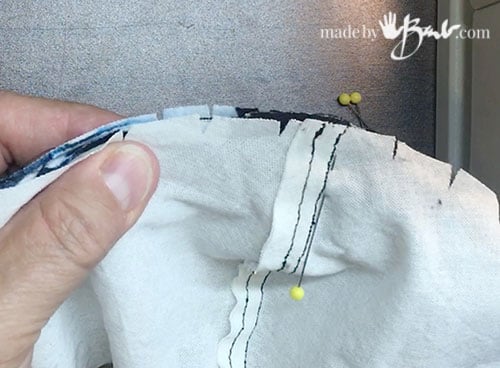
Sew the front centre 3/8″ seams of both the lining and outer fabric

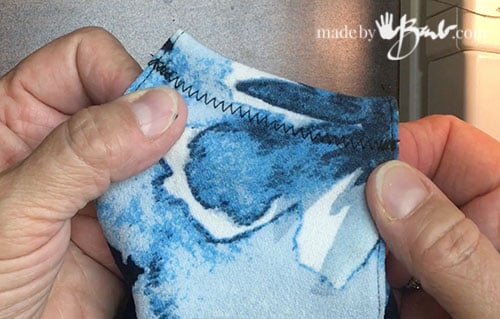
Fold open the centre seam and flatten with top stitching (zigzag or mending zigzag work well)
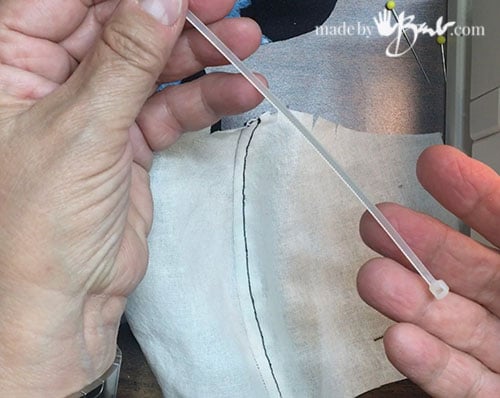
Top stitch a line slightly over from the centre seam and there is the opportunity to put a stiffener in this channel. Zip-ties or pipe cleaners work well and prevent the mask from collapsing at each breath.

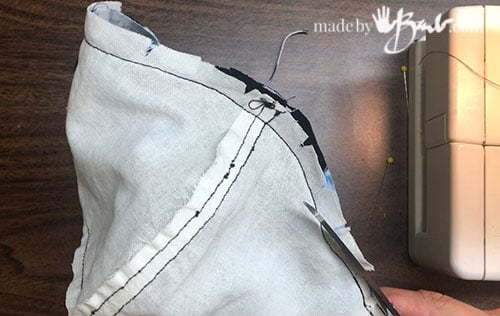
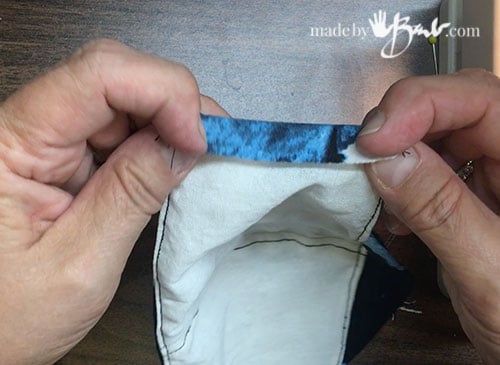
Centre the nose piece on the top seam (right sides together) and sew seam, spreading at clips to flatten nicely.
Repeat by adding the lining piece and sewing seam.
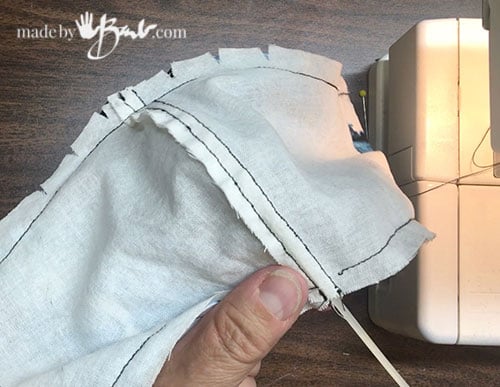
Insert Optional Stiffener:
Push the zip-tie (or pipe cleaner) into the channel and cut at appropriate length and stitch closed. This will help keep the mask off your face. I do not particularly like having something touch my lips, just saying.
Trim excess seam allowance to make as flat as possible.
Right Sides Out- Fitted Mask for Glasses:
Turn right sides out (ends are still open) and top stitch close to edge to keep flat and in place.
Fold over ends to make casings for the straps.
Zigzag or straight stitch depending on how much the fabric frays. I prefer to use some cut strips of spandex-mix t-shirt (like camisoles) to make soft easy-stretch straps/ties. They can be looped around as one long tie or just behind the ears. This is better than permanent elastic.
Extra Stability:
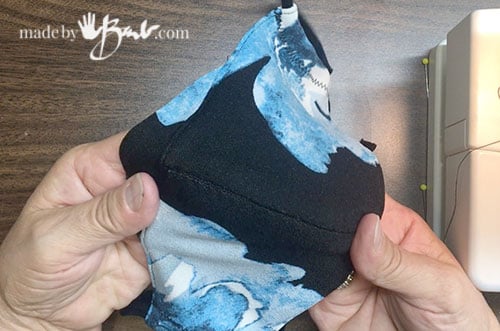
Another thing that makes for a better fit of this Fitted Mask for Glasses is that all the layers stay together. I know, you do not want to stitch and makes holes through the fabric, but it can really help keep it more comfortable, off the face so that makes breathing easier since it allows more surface area to bring in air. (You decide) I like to stitch through the layers to keep the lining stable. You can stitch through the front centre and/or across the width.

The nose piece set in this way allows for better angle and is much less bulk than having a top seam. Keeping as much stability at the front seam also makes it less likely to keep suctioning to the face.
I know I have the other styles like The Ultimate Face Mask & The DIY N95 Style face mask but they also have edge seams at the nose or do not ‘scoop’ lower over the cheek. Small differences in this Fitted Mask for Glasses can mean a lot… (think about the fit of your pants – we all have a favourite)
Whatever you do, please keep yourselves and loved ones safe. We do ths for ourselves AND others!
Can you please talk to me about the fabric that you choose. It appeared to have some stiffness to it? The lining looks you may have used flannel?
Thank you for using your creativity and sharing with us.
Lisa
Oh the fabric discussion (debate). I have a stash of all kinds so I test it by putting over mouth for breathability and hold up to light for seeing the holes. Considering some people just use a bandanna it is really up to you. At first it was all about cotton, but now there is talk of polyester and chiffon and polypropylene… I used a cotton lining, not too hight thread count and a polyester knit as the outer layer. I’m sure it does not equal N95 so please do your own research. I am not a health care worker so my choices can be different. Where I live we are doing really well, I am lucky…
Thank you so much for this mask pattern. not only do I wear glasses, but I, a non smoker, have a lung condition from from being born prematurely. It is so hard for me to wear a “normal” mask as it is so hard to breathe in them. I feel this mask will not only help not get in the way of my glasses, but stay off of my mouth and help breathing be easier. Stay safe. God Bless. Xx
Oh I hope it helps! I also have the Ultimate Face Mask that has even more space in front of the mouth. Stay safe…
I love your glasses pattern. My family wears glasses and this will help a lot. Thank you for sharing. God Bless and stay safe .
Pattern looks great thanks.
How do you do the FINAL row of topstitching without sewing over the encased cable tie?
Thanx
The top stitch is only across the top of the 2 centre pieces, not where it is encased and is below, so it would not touch it. Hope that helps!
I use a high threadcount pillowcase for my liner. It’s cotton so it feels nice on your face but you can be more sure that it catches the droplets because it has a higher threadcount.
Hi Barb,
Great ideas on this mask.
Dorothy
Thanks!
Your design has so impressed this fellow artist that I decided to donate to your cause even though initially I wasn’t going to. Keep creating…your other projects are amazing!
Thanks! Fellow artist, I need to clone myself… so busy.
Are you the one that made the viedo for the mask for glasses. How can I get 2 or 3 of them
I’m sorry, I can’t manage to make and sell. Possibly take the pattern to a local sewist… Best of luck!
When sewing together mixed fabrics like that, what type of sewing machine needle do you use? Does it matter if you use a regular one or should you use one for poly knits?
It’s a toss up, I used a fine needle and had no issues. I do not think it was a ball point needle. Frankly I have never had issues with needle choices unless working with leather etc. If it ‘hits’ the thread it may be dull or too big.
Thank you for this fantastic pattern! It turned out great and it’s so comfortable to wear
For some reason, though (maybe my face shape; happens with all of the masks I wear) I have gaping on the sides. How could I rectify this?
Thank you!
You could add a dart (pinch and sew) or pull the ties tighter?
I took some of your other designs and made the elastic to wrap around the back of my head/neck. The elastic reinforces the position of the glasses no matter the front-facing fabric designs. Thanks for keeping up with the posts. They are super helpful and I have been sharing them with my peers.
Thanks, good tip.
Can this mask be made from cotton
Yes, you can make it from whatever you like. t may end up not as stiff though.
Wondering what keeps the nose wire from sliding down? Did yours have some sort of adhesive? Or does it just stay well without stitching it in place? Thanks!
The Nose wire is adhered with the fusible webbing. It is ironed in between the layers. That also makes it much flatter since no seem there!
Thanks! I was also wondering how I should size this down for a child. I was thinking maybe print it at 80%?
Can you please tell me where you purchased, or send me a link, for the nose wire and cable ties? Thank you! I love this design!!!
Thanks! I make the nose wires and the cable ties are available at most hardware stores, even dollar stores.
Greetings from Australia and thank you for your mask pattern! I have made a mask for myself and one for my husband and they fit perfectly. (I printed the pattern a little smaller for myself and a little larger for my husband) I am very happy to make a small donation to you in return for your kindness. Take care!
I love it when I hear back! Thanks so much ❤️
Hi Margaret,
I just wanted to ask you how much you reduced the printed pattern by for your face mask.
Thanks,
Daphne
I used the size of the print (print at 100%, not fit to page)
I am in Australia, can you do an A4 paper or as metric dimensions please?
A4 is a bit narrower and taller (210c x 297cm) When using your print software choose 100%, not ‘fit to page’. It should then print it right, measure the squares to see they are indeed 1″. Print software wants to do the thinking for us…
Sorry hadn’t found this reply when I asked you to send A4 size but when I printed as suggested it was not – 1″=1″ your inch on page was 2-3 16th’s smaller when measured.
Thank you for these wonderful patterns and very helpful instructions. I’m headed out to my fabric stash after I watch the videos.
Totally off topic, are those your green eyes on the model? They’re beautiful!
Oh my! That’s me, but I have more blue than green… and self trimmed covid-hair. We are all in this together.
How do you sew in the channel in the lining? I can’t wrap my head around d how this is done. I am excited to try this mask I have been looking for a pattern with the nose piece.
I use the seam allowance as the channel, and folded it to one side and top stitched it down. If that is not wide enough you could also just sew strip to it on the wrong side. It will depend on what you want to use to stiffen it. Some fabrics will be stiff enough if topstitched. Good luck!😷
Just wondering what you used for the teal piece in the nose section? Also where you got it from. Thanks
Do you mean the nose wire? I make them with sardine cans It works great!