Eco Printing with Autumn leaves

It’s happening! Mother Nature is throwing so much colour at my feet I’m going crazy! The stunning colours and abundance of leaves has me bundling everyday! Won’t you join me Eco Printing with Autumn Leaves to see what colours you get; science magic?!
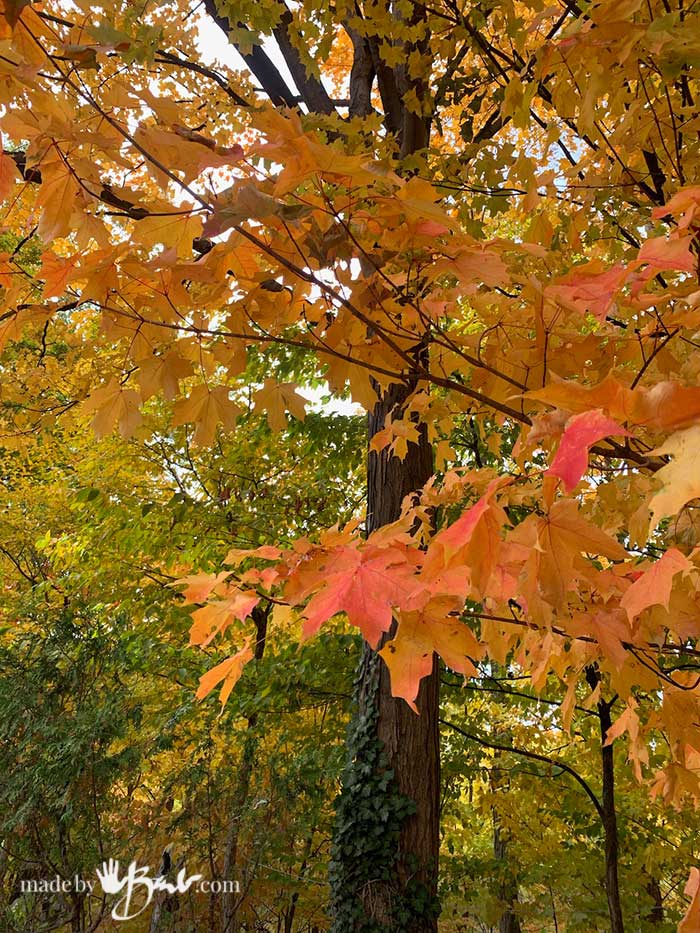
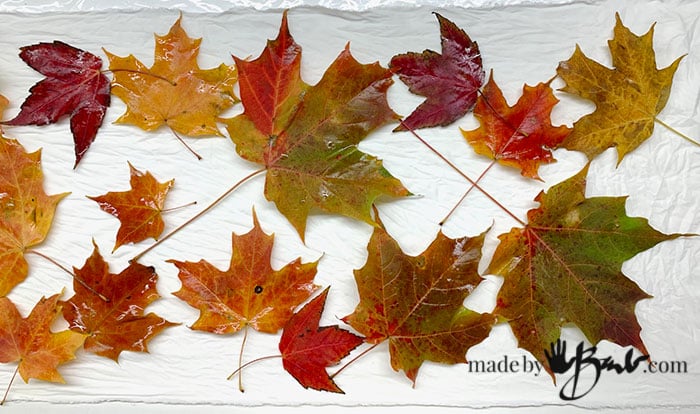
Oh, the Colours!
My view of my yard is GLOWING! It changed so quickly this year & it seems like it’s all at once. The ground is covered and the bit of rain has kept the leaves from getting dry and crispy.

Oh, the Maples!
Almost all the leaves I get here in Canada are Maples; but so many varieties I can’t keep track! I especially like the leaves that are variegated; not all one colour. ‘But I wonder; an I expect a certain colour to print from a Autumn leaf? Since I plan on printing pretty well immediately I just pick them, stack them in up-cycled bags in the fridge. You can keep them longer if you dry them between paper for later printing.

The Fall Colour Science:
Since I have a clear view of all this I can follow how the changes start. It never ceases to amaze me how the colours appear! In the fall, the length of daylight and changes in temperature stop leaves from making their food; the green chlorophyll breaks down, the green colour disappears, and the yellow to orange colours become visible (yellow carotenoids). This spooky fellow guards my leaves and always seems to get a nice variety around him

The reds that you see however are Anthocyanins that are produced by the trees in the fall. These pigments can vary in colour from red to blue to purple. The golden-browns are the tannins that help give variety to the colours. Wow, now that all makes sense to what colours I get!!!

Red maple (Acer rubrum):
One of the most amazing trees I discovered is this red maple (Acer rubrum), it has the most amazing reds but without the brown/yellow undertones. When I print with it I’m always amazed. It turns red all at once and seems to skip the yellow stage completely so I assume it’s all about the Anthocyanins here!

Anthocyanins are water-soluable pigments that can range from blue to purple depending on the PH. This print on bamboo (Aluminum Acetate mordanted) is more blue but on silk it is more purple (dipped leaves in iron/ferrous sulphate solution) Cotinus can be different colours throughout the year, sometimes quite red and also has the ability to print blue.
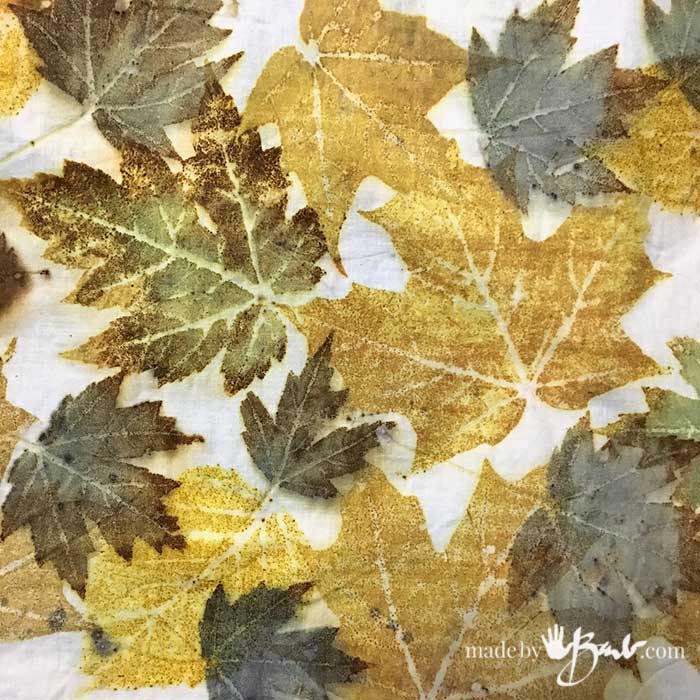
In these botanical prints the tannins here tend to be on the dark edges of the leaves and the yellow carotenoids give much golden splendour!

Understanding the science will help me make some choices of which leaves to choose, but Mother Nature will always keep us guessing!

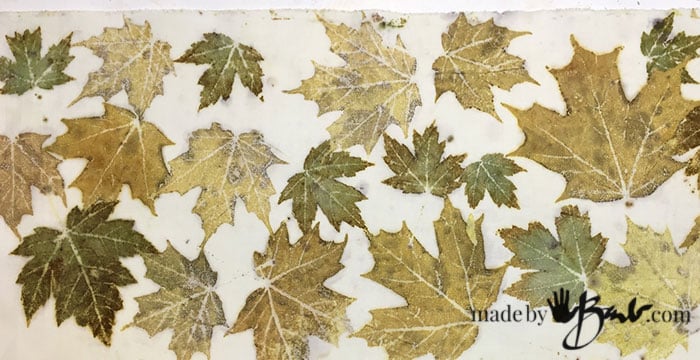
Look for leaves that are bright colours, less brownish for richer hues (colour). The darker reds will print darker and the browns & yellows (oak leaves) will print golden brown with iron. See below:
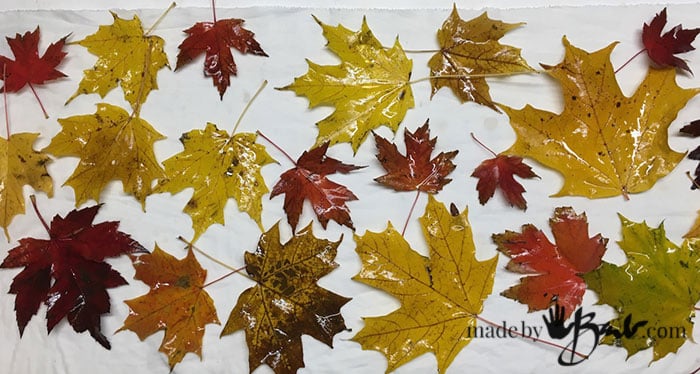
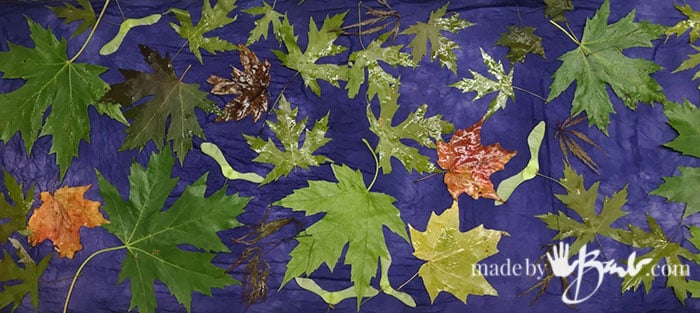
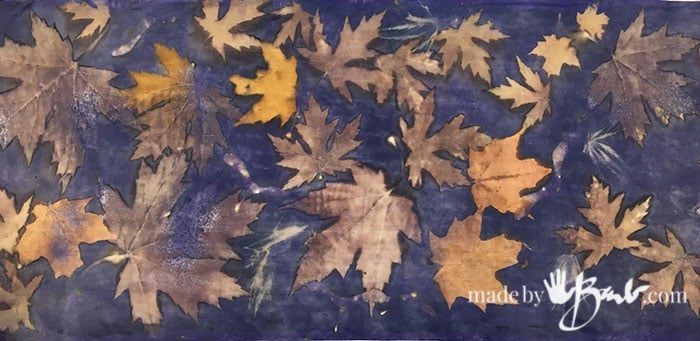
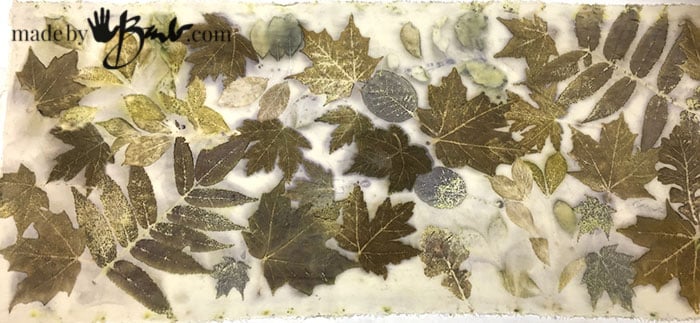
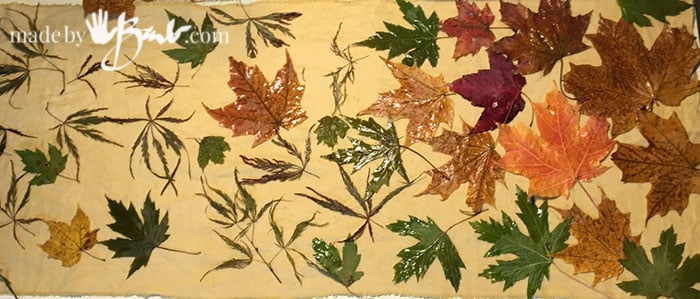
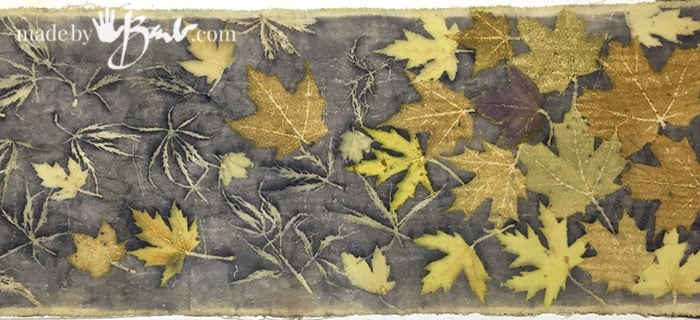
Before & After:
To be able to observe (the best way to learn) here is the same fabric piece before and after bundling and processing.
In this eco printing with autumn leaves so many colours happened. All these leaves have a bit of yellow (carotenoids) and some have the reds (anthocyanins) but when you mix those colours you get what you see here. Some understanding of colour theory does help (blue and yellow = green)

The Iron mordant will react with the tannins and darken (sadden) the natural dyes on any fibre (cotton, linen, wool) Sometimes the ends of the stems of the leaf prints have a burst (dot) where the tannins/dyes seem to leak out to create a circle.
See the Anthocyanins!
Isn’t science fun? Yes, different mordants, modifiers will give varying results but will still give unique pieces of art none-the-less! See the beautiful reds!?

Can you see where the Red Maples printed their bluish tones? If I had used less modifier iron these would be lighter and less dull.
These cotton fabrics were not ‘cooked’ using much energy in a pot on the stove, on hot plate or turkey roaster but in a microwave oven. Make sure to bundle tightly on your dowel, (or sandwich if using pieces of paper) and use a barrier if you want clean (no bleed) prints. The choices are your’s. Eco printers should wear gloves when using iron solution (ferrous sulfate)
Addition of Natural Dyes:
This silk scarf was dyed with a strong logwood dye before bundling with fresh leaves. These maples have the potential to discharge the dye, but not all leaves have that ability.
It’s hard to believe that the colour changes so much during the processing! The fun part is always opening the bundle and this magic keeps me interested…

The Big Question:
What is the recipe? How are you assured to get a certain result? Well as much as I’d like to say it’s guaranteed, there are a few factors that can make variations in the outcome. Even the amount of sun a leaf gets will affect it’s composition.
The amount of iron involved will have an effect as you see here. Keeping notes is vital but as you know I like to throw ‘caution to the wind’ sometimes and just go by feel. That’s what you get to after you’ve cooked for many years so this is similar.
This was dyed with Myrobalan before placing the leaves and then I used an iron blanket.
The Japanese Maples leave nice silhouettes since the leaf shapes create a resist. That means the iron and myrobalan react and the leaf actually doesn’t even need to leave a colour. I hope your head isn’t spinning, it will all make sense as you experiment and observe…

Next time you are stomping through the leaves or complaining about having to rake (I know that all too well) then remember the amazing pigments possible by Eco printing with Autumn Leaves! (silk scarf)

Hi, I am very grateful for all your tests and tutorials, Barb!
I’ve been experimenting with eucalyptus and a few other leaves on cotton (with tannin + alum acetate), getting some reasonable results.
I’ve just found a source of coloured maple leaves and was keen to try. However, despite wrapping them tightly and using a plastic barrier as I usually do, the colours bled a LOT. Do you have any advice for preventing this? They were fresh leaves so I’m wondering if it would be better if I dried them first, or soaked them. Eucalyptus seem to work better if soaked for a couple of weeks first, although they are a lot tougher leaves than Maple. Have you tried soaking?
In my experience the bleeding can be from being too wet. I am not sure if you simmered the bundle, as there may have been quite a bit of available tannin that will continue to ‘travel’ if it’s in a wet environment. I love using the microwave so that it’s damp enough but no excess moisture. If you soak them you will likely loose the strength of printing. Drying won’t help as you shouldn’t roll if they are dry anyways. Did you steam or ?
Thanks for your reply, Barb 🙂
Its possible I overdid it. I usually bundle them very tight and steam for approx 2 hours, making sure they are on a raised bamboo steamer so they don’t go into the water. This time, after I steamed them, I left them in the pot (with water still in the bottom) overnight and then tried 30 secs in the microwave. Perhaps this added too much moisture. I will try again without the microwave part. Also going to try soaking the leaves for a few days first and see what difference that makes.
If you are using leaves other than eucalyptus I worry that you’ll lose the tannin by soaking too long (think how tea is weak after the first use of the tea bag). Hmmm, maybe the moisture that was in the bundle did ‘run’ as more water could condense on it after the heat.