Make Cement Paper Clay for Concrete Sculptures
If you’re looking for a lightweight, sculptable, and durable medium for crafting, cement paper clay is a fantastic option. It’s especially loved for its stone-like finish with the added flexibility and texture of paper pulp. I’ll show you how to make cement paper clay for concrete sculptures.
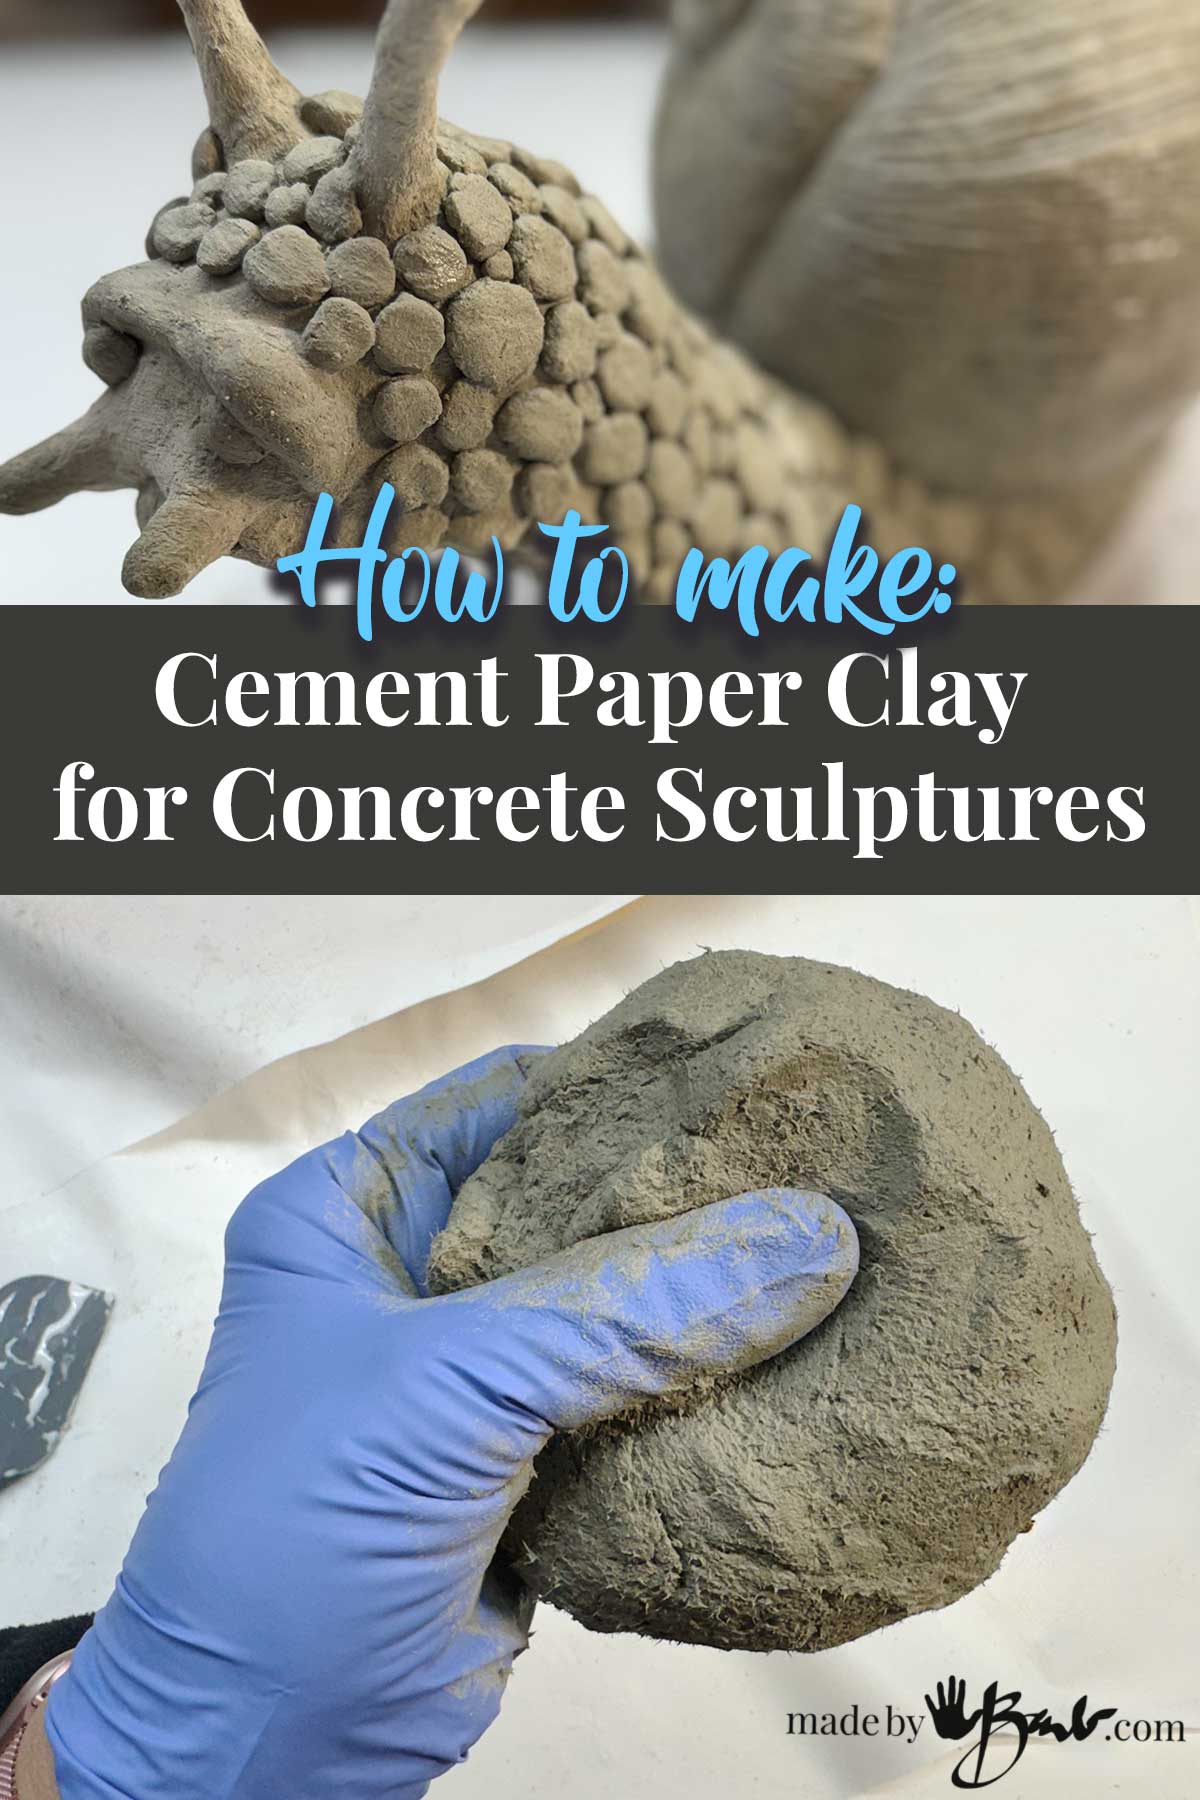
Perfect for sculptors, garden art makers, or concrete crafters looking to try something new, this clay blends the strength of cement with the workability of paper clay.
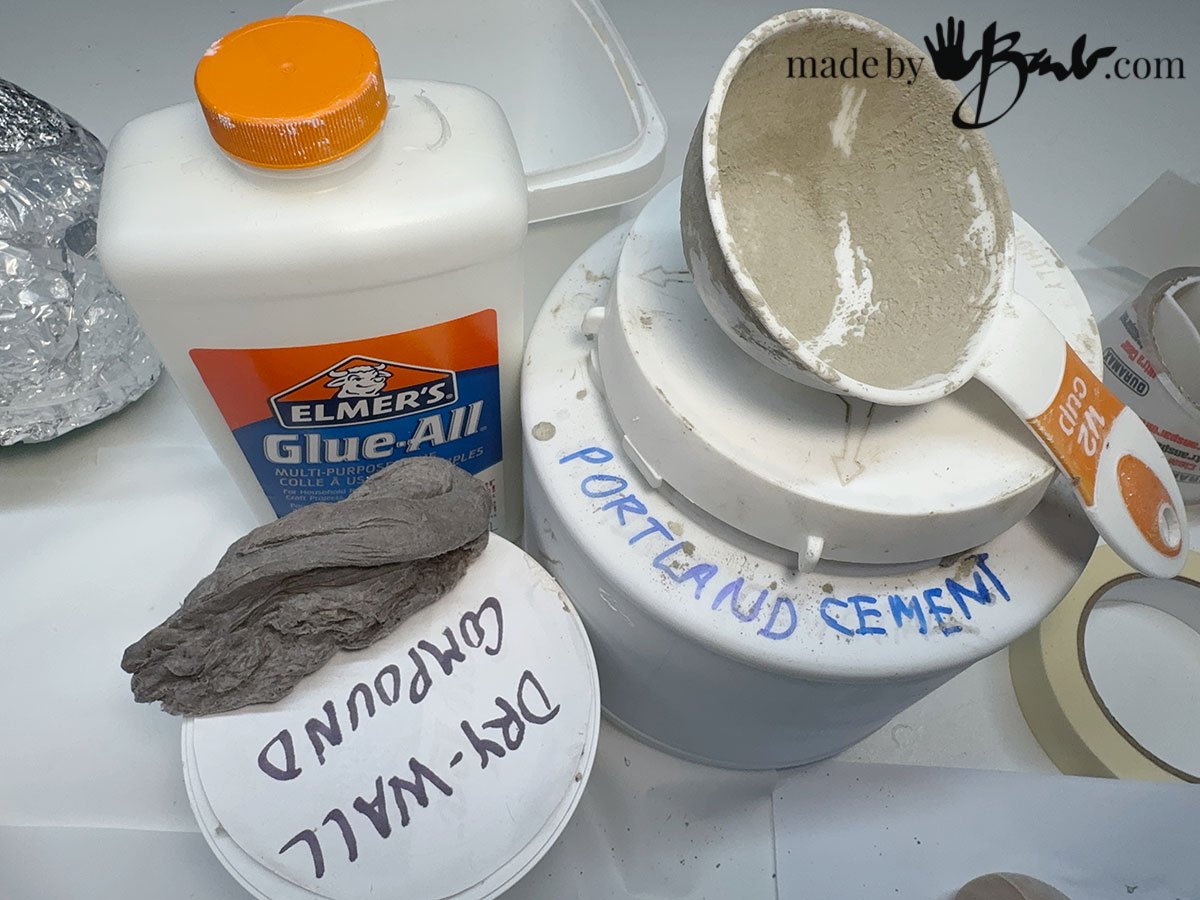
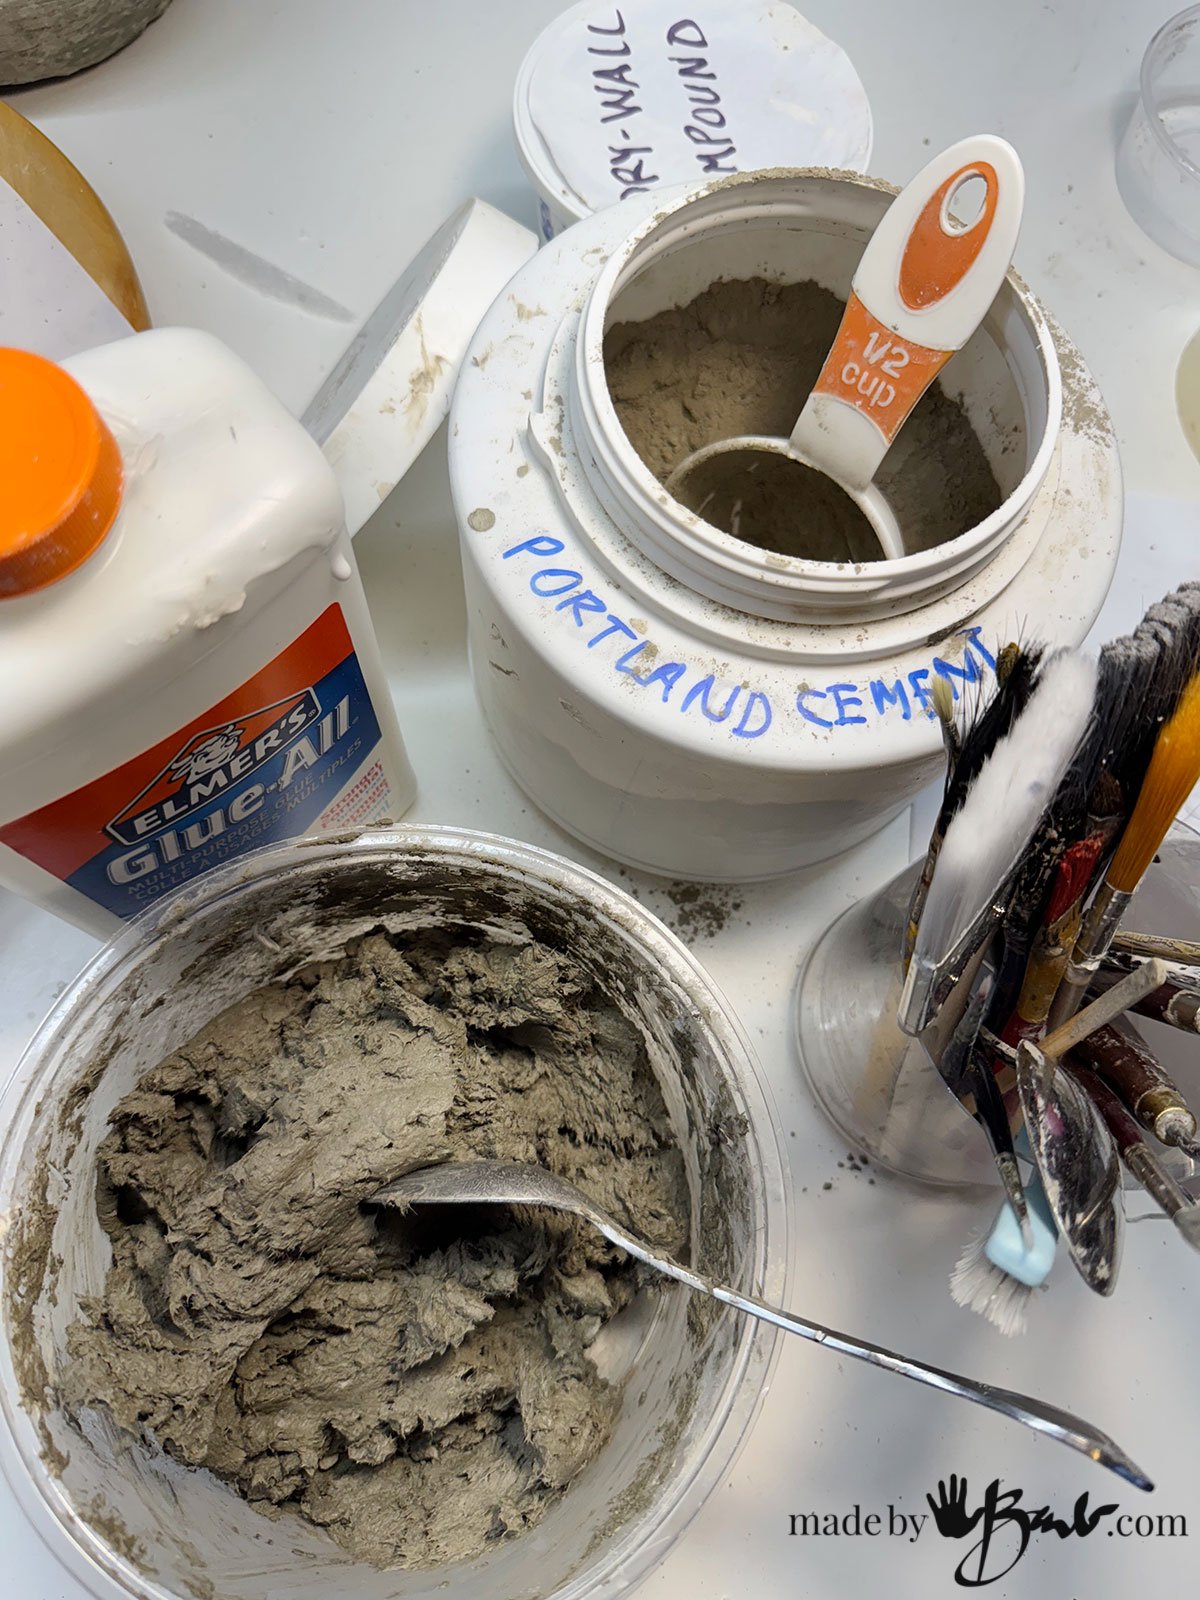
This is my next exploration of how to be even more creative with concrete and cement as a medium for sculpting, a way to make a weatherproof paper mache clay. I have worked with concrete for decades in many unconventional ways and am excited to take it to an even more creative direction. The ingredients; Elmer’s Glue-All, Drywall compound, paper fibre, and Portland cement. They are quite simple and easily found
What Is Cement Paper Clay?
Cement paper clay is a hybrid material made from cement, paper pulp, and a binder. It is similar to the ultimate paper mache clay but includes cement.
- Sculptable like regular clay
- Lightweight compared to solid cement
- Stronger than traditional paper mache
- Perfect for detailed texturing and garden-safe pieces (with sealing)

Ready The Paper Fibre:
I love that you can source the paper from so many places, often from what you would just throw out. Paper from egg cartons, fast food trays, newspaper, toilet paper (unused, haha), old files or even amazon boxes can all work. Break it up into smaller pieces. To prepare the fibre I soak the pieces it in hot water to speed up the process.
Make Cement Paper Clay for Concrete Sculptures
Equipment
- Blender
- Food Processor
- Bowl or vessel
- Mixing spoon or utensil
- Strainer & cheesecloth or sheer fabric
- sculpting tools
Ingredients
- 1 part Elmer's Glue-All
- 1 part Drywall compound (pre-mixed)
- 1 part Prepared Paper Fibre
- 2 parts Portland Cement
Instructions
- Shred plain paper (toilet paper, newspaper, egg cartons, or printer paper work well).
- Soak it in hot water for several hours or overnight.
- Blend it using a hand blender or food processor until it’s a smooth pulp.
- Drain excess water using a fine mesh strainer, fabric or cheesecloth.
- In a large bowl, add your paper pulp
- Add glue and Drywall compound and mix thoroughly
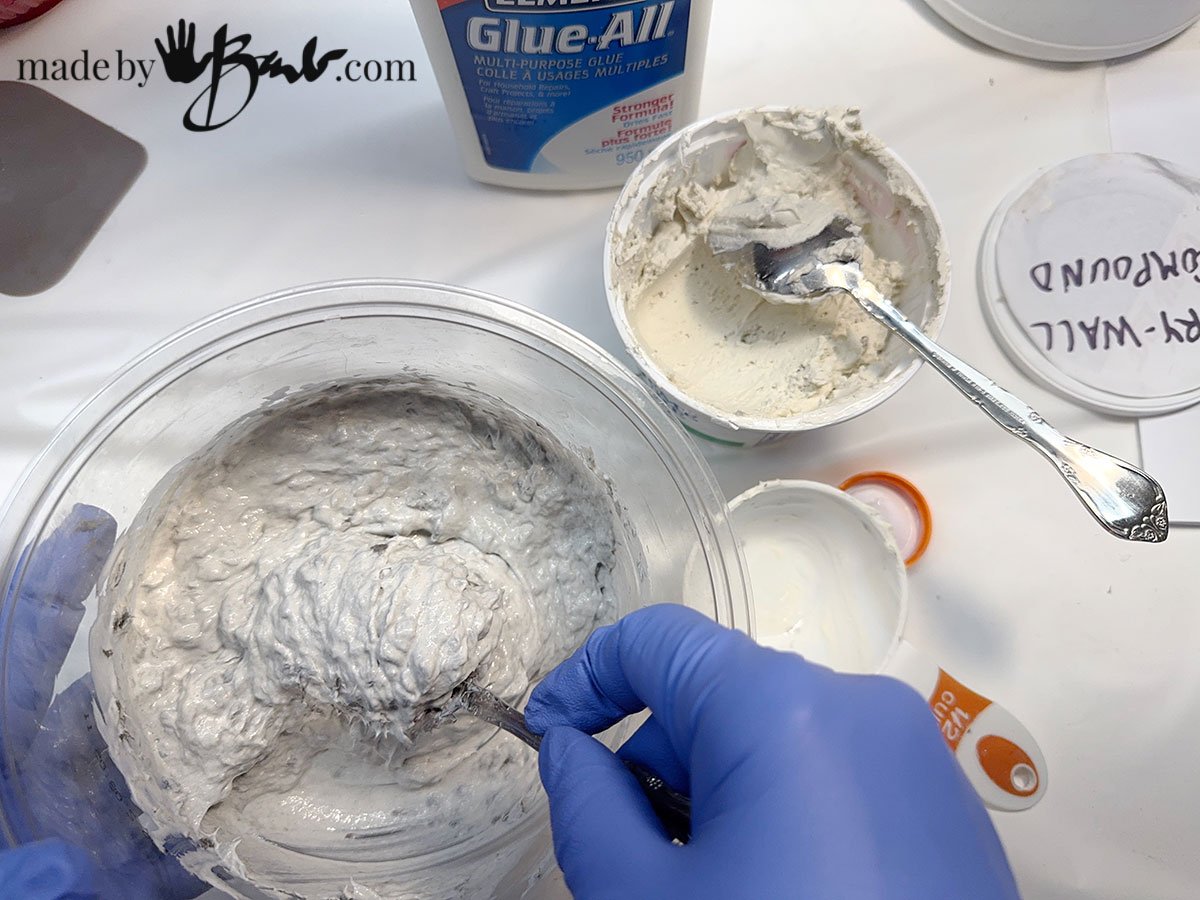
- Add the Portland Cement
- Mix well, add small amount of water if needed
- Knead and use quickly
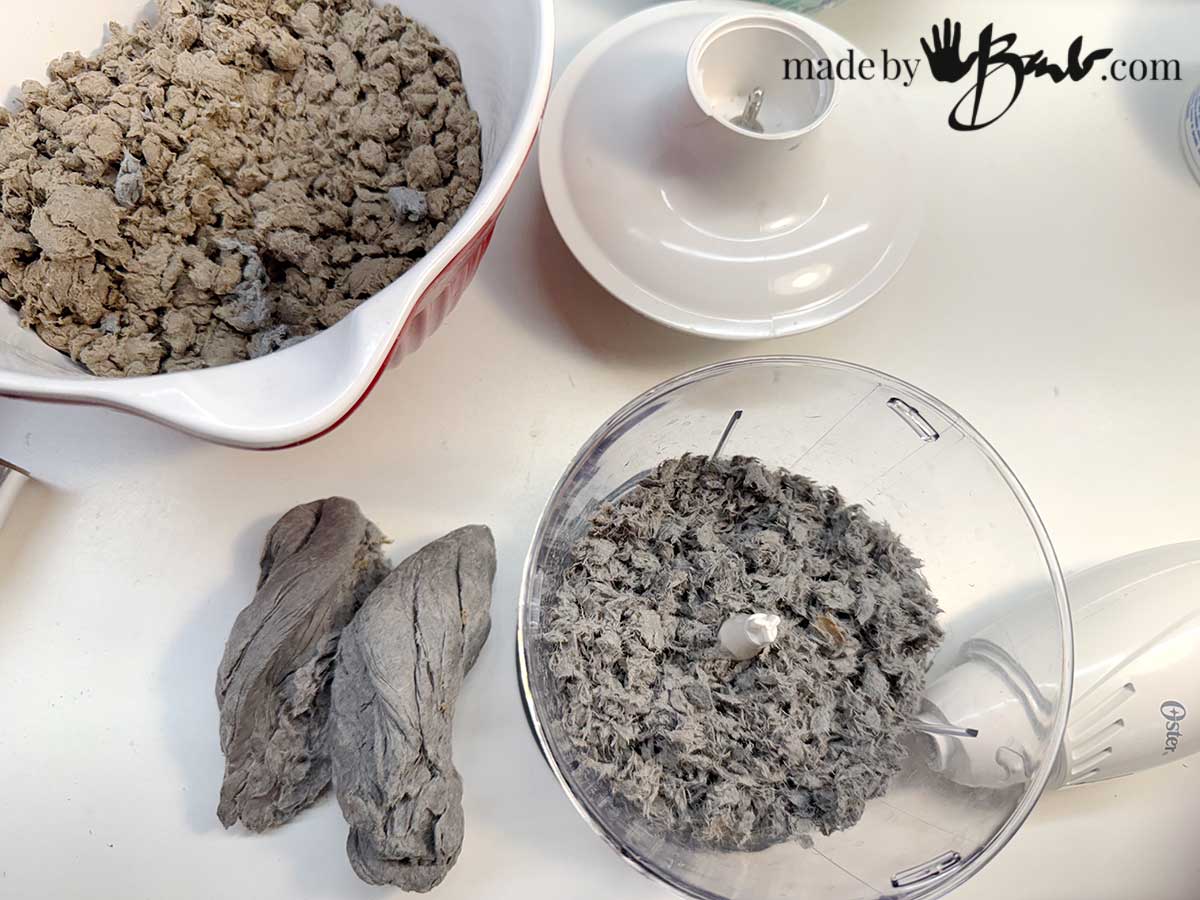
To make it easier to break up the fibres I add the wetted fibres and plenty of water to a blender. This makes it so much faster and much more smooth. My Blentec, Magic bullet or even old Oster kitchen appliance work great as long as you have enough water to disperse the fibres. I used a paint mixer when I prepared the paper for the Papercrete Bird
Preparing the fibres is the same as when I make Paper Maché Clay. After the blitzing I strain the fibres and wring out with a sheer fabric. These twisted ‘lumps’ are then ready for the next step and if needed I store them in the fridge (prevent possible mold) until the mixing stage
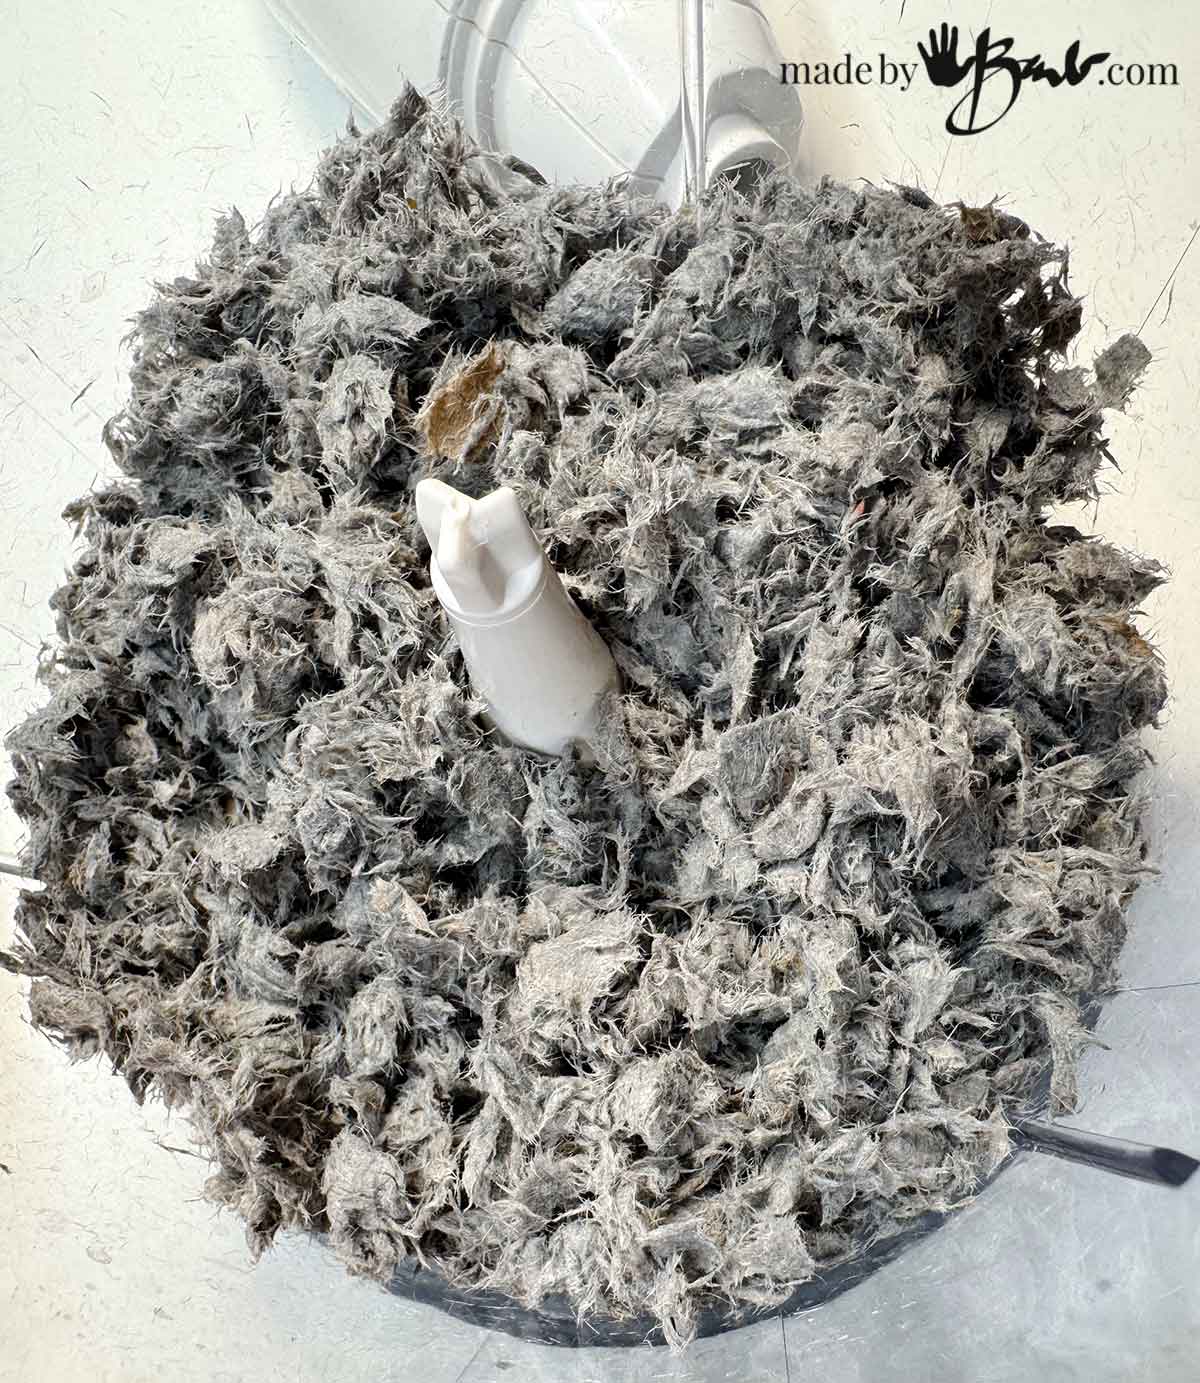
The wetted fibres mix much better with the other ingredients if broken into the smallest bits. After much experimenting my method of choice is the use of a small food processor. The blades whip them into small pieces before adding the other ingredients so there is less chance of lumps.
The Cement Paper Clay Recipe:
- 1/2 cup Elmer’s Glue-All (PVA glue)
- 1/2 cup drywall joint compound
- 1/2 cup damp recycled paper (small bits)
- 1 cup Portland cement
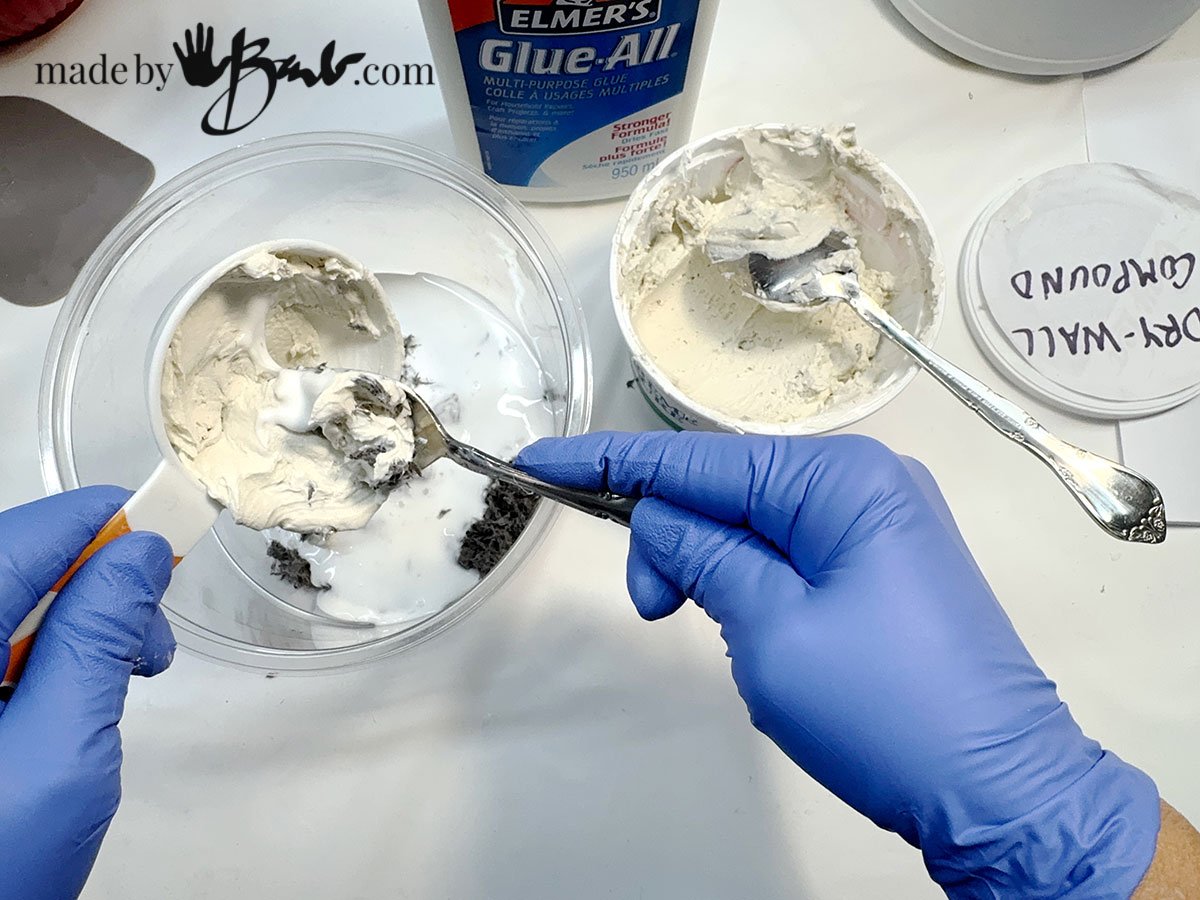
To let the paper fibres break up even more I like to add the wet ingredients first and mix well.
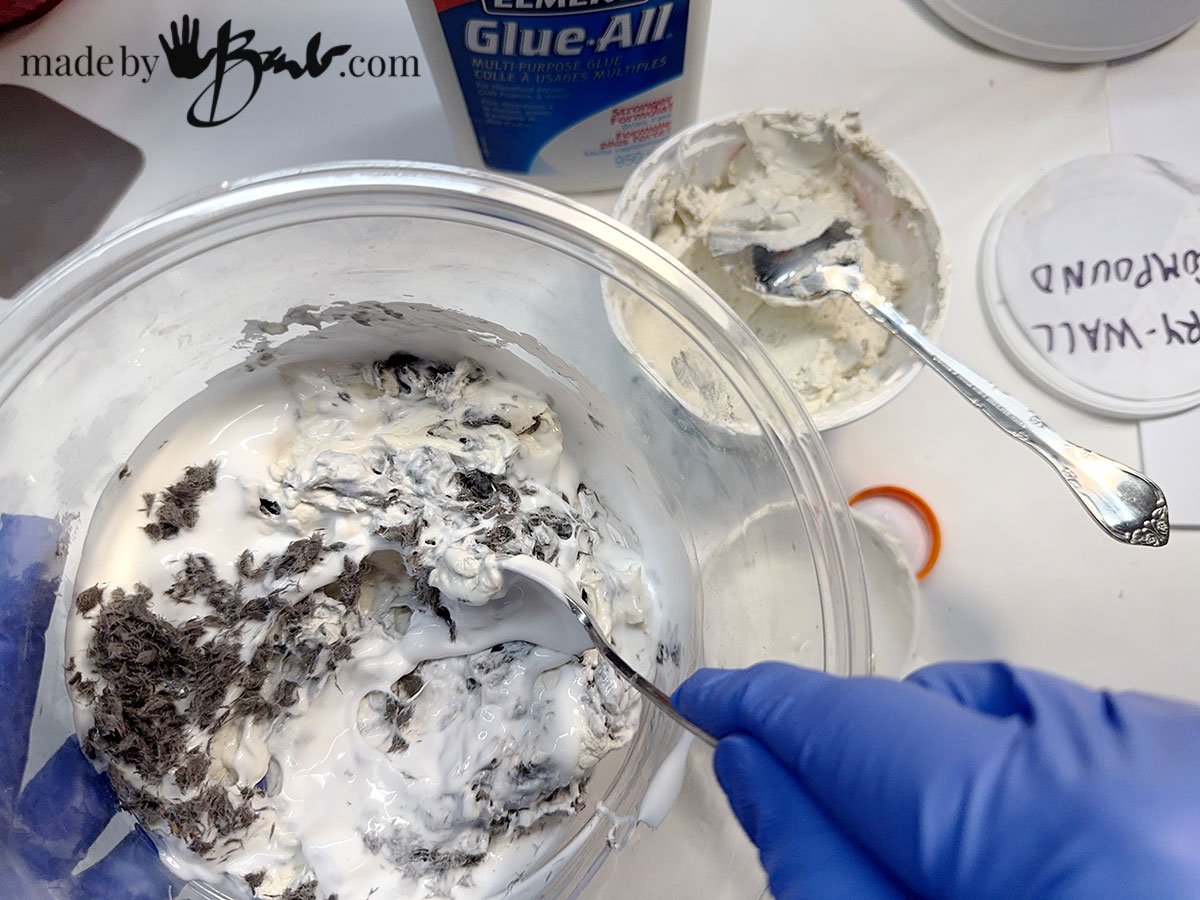
Mix this quite well so that there will be less lumps of paper and good dispersement of the fibres.
If you desire you could use a hand-mixer for this step but it is a chore to clean the beaters afterward. I avoid any drywall compound or Portland cement going down the drain!
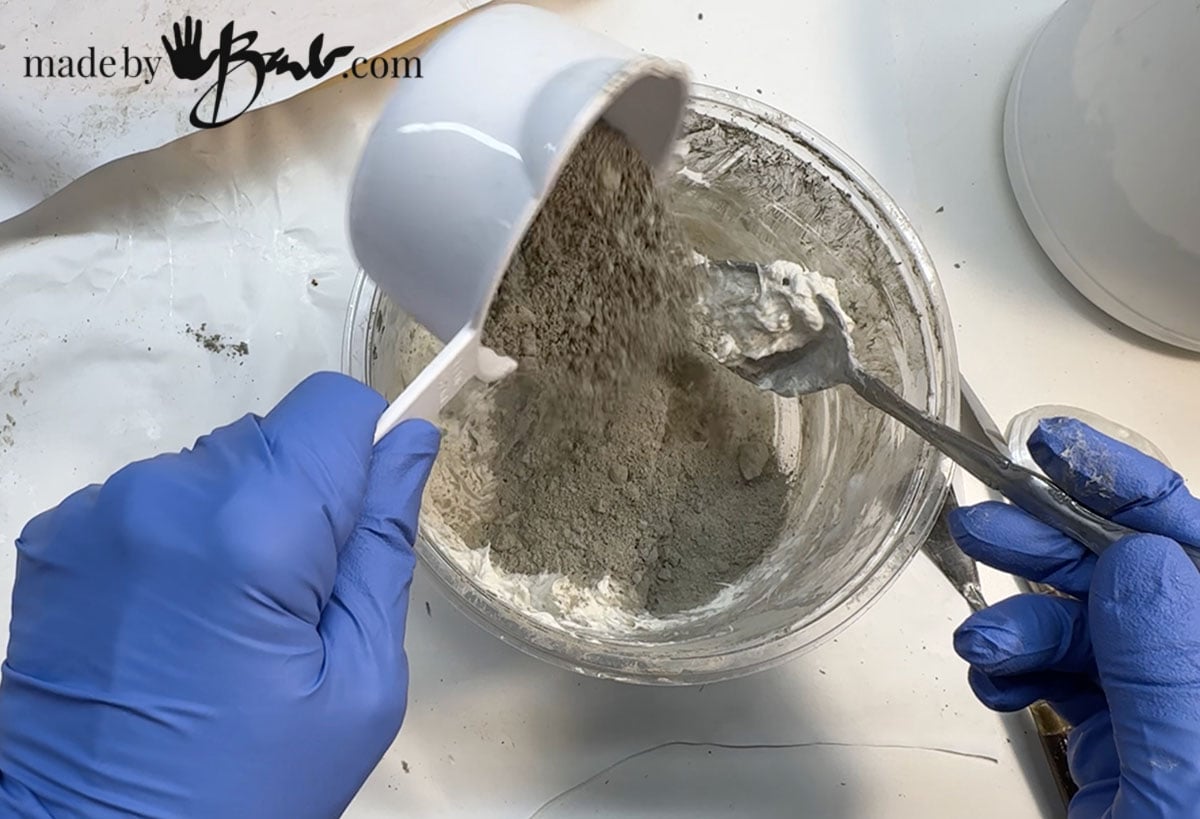
Adding the Portland Cement:
Portland cement is the main ingredient in regular concrete mixtures. (You can see how I use it in the concrete draping technique) Please be aware of concrete dust hazard; wear proper PPE. Mix the cement in slowly to minimize dust in air.
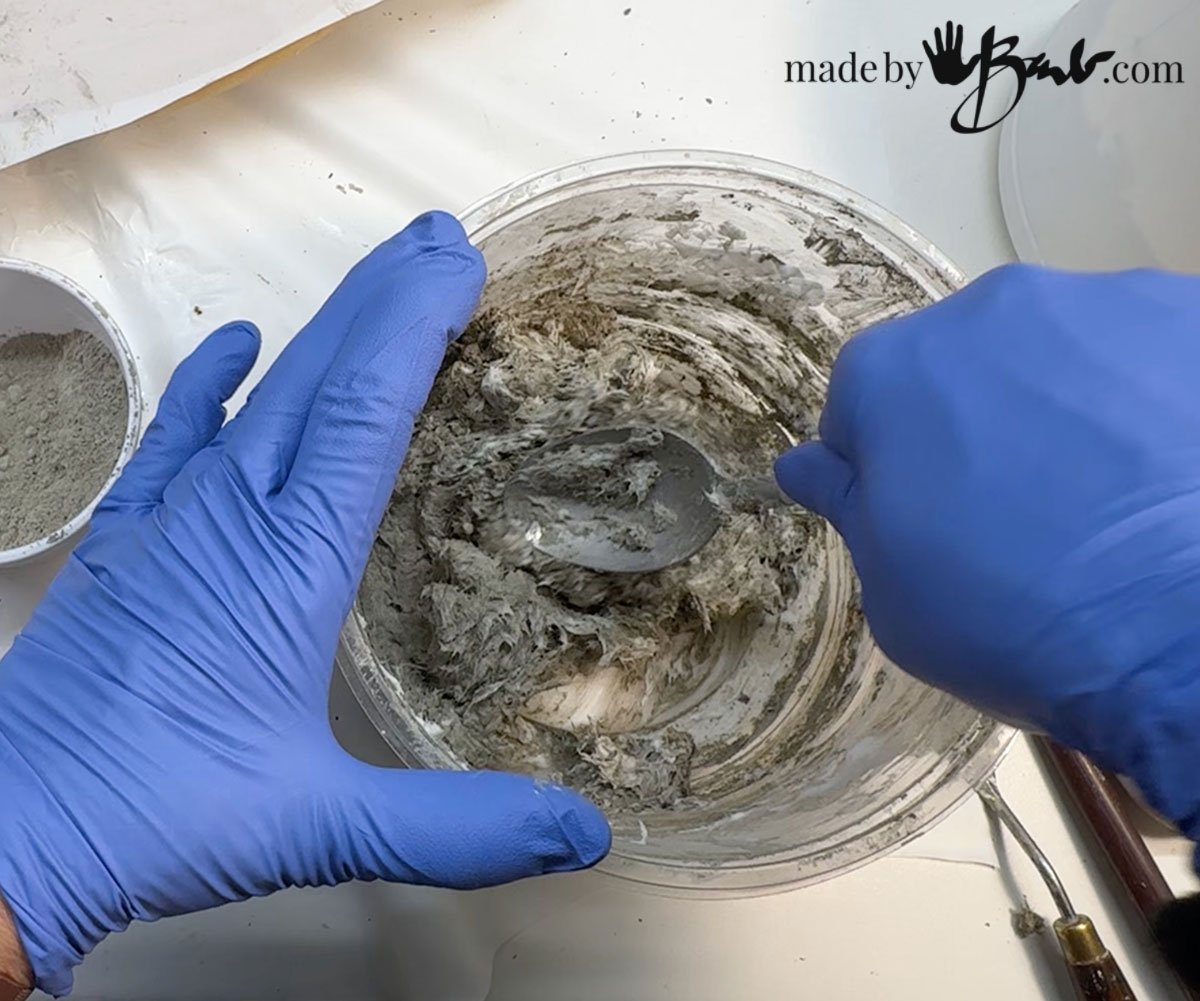
If mix is too dry a bit of water can be added; depends how dry your fibres were.
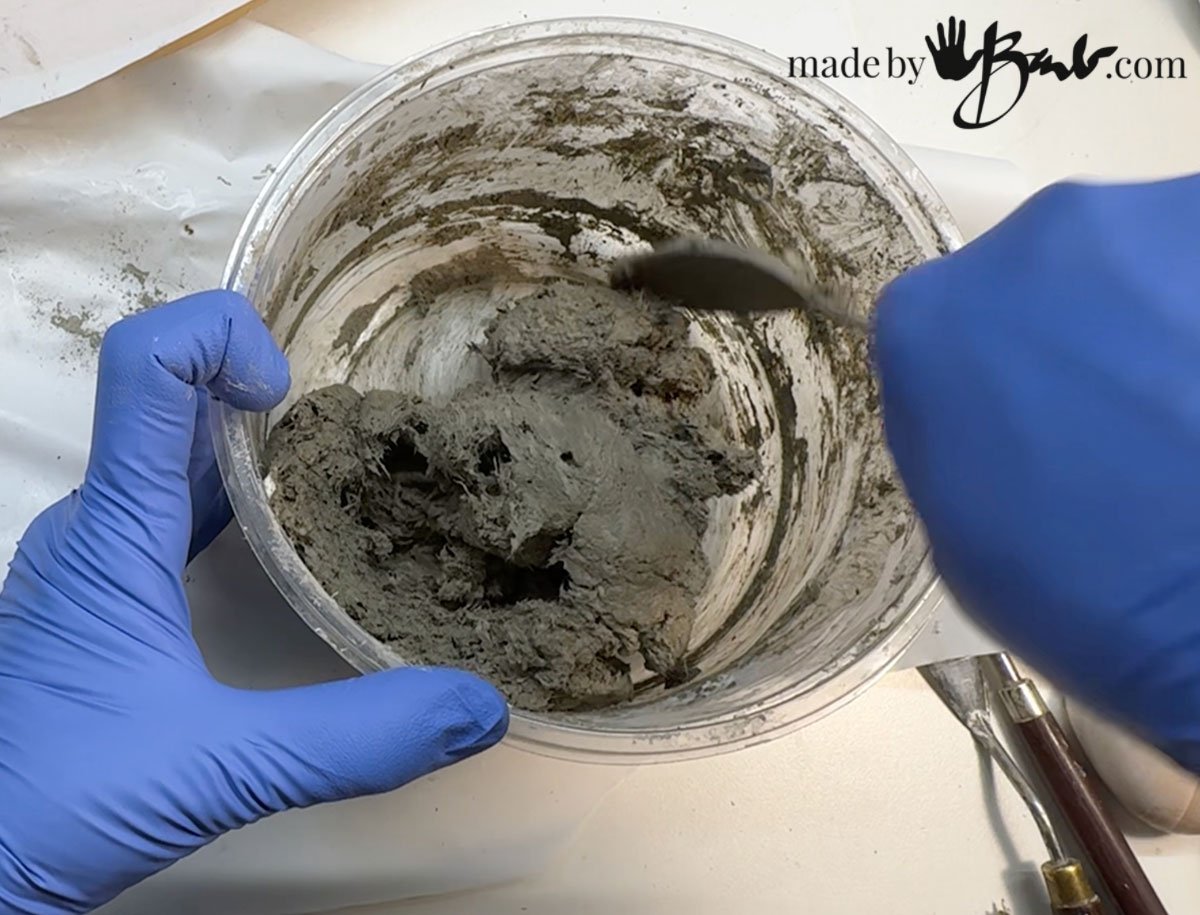
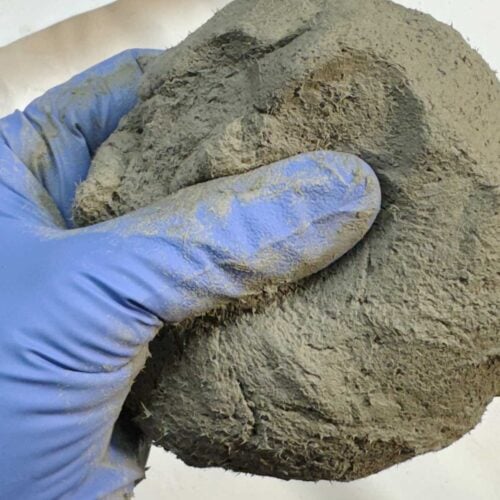
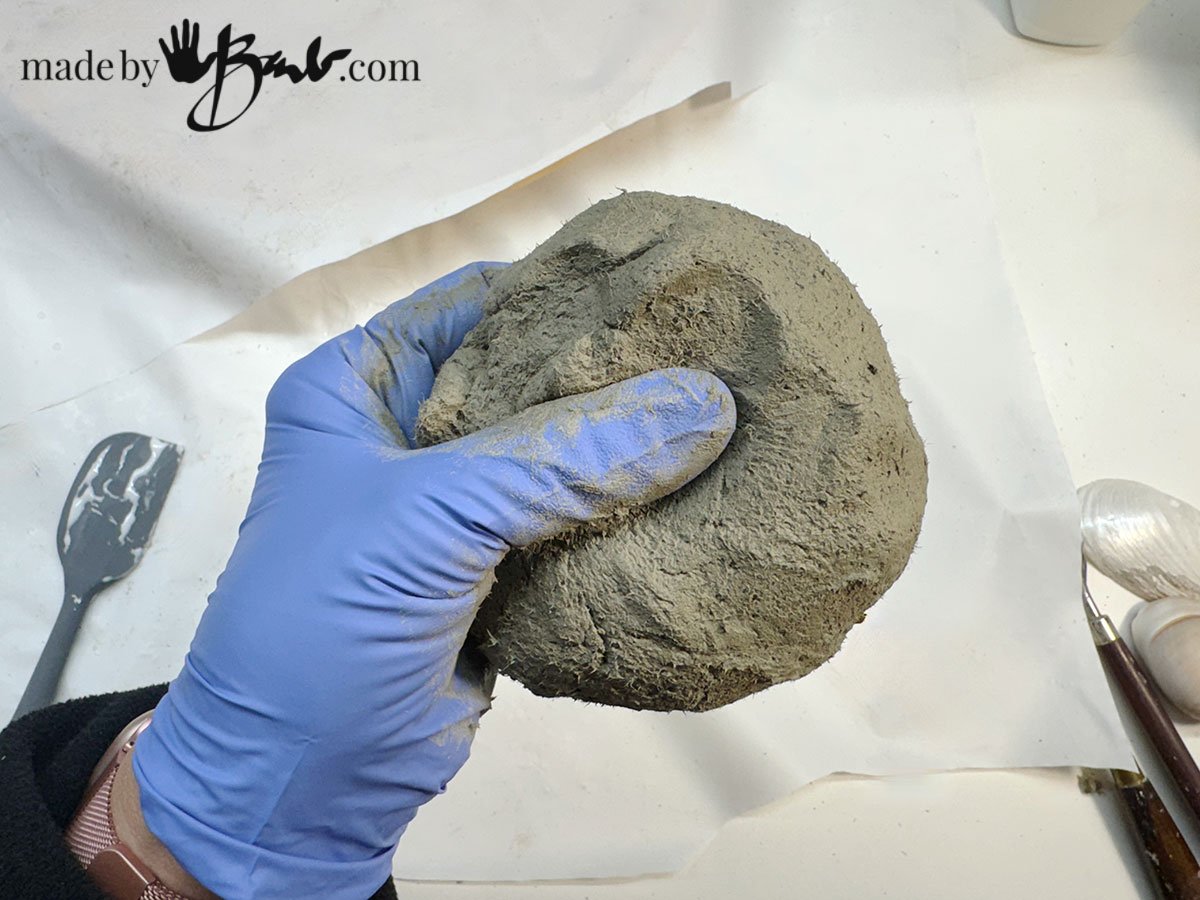
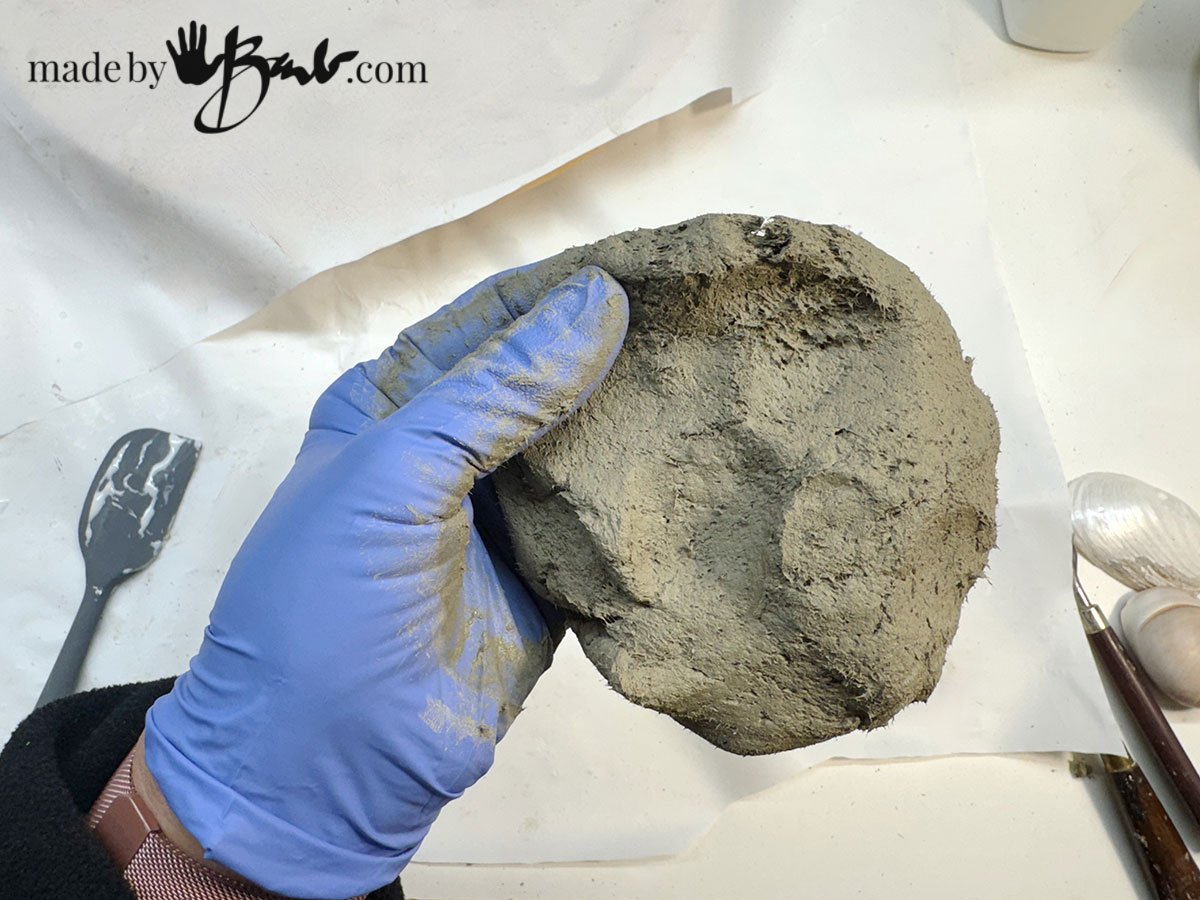
The Cement clay will become thicker and more moldable.
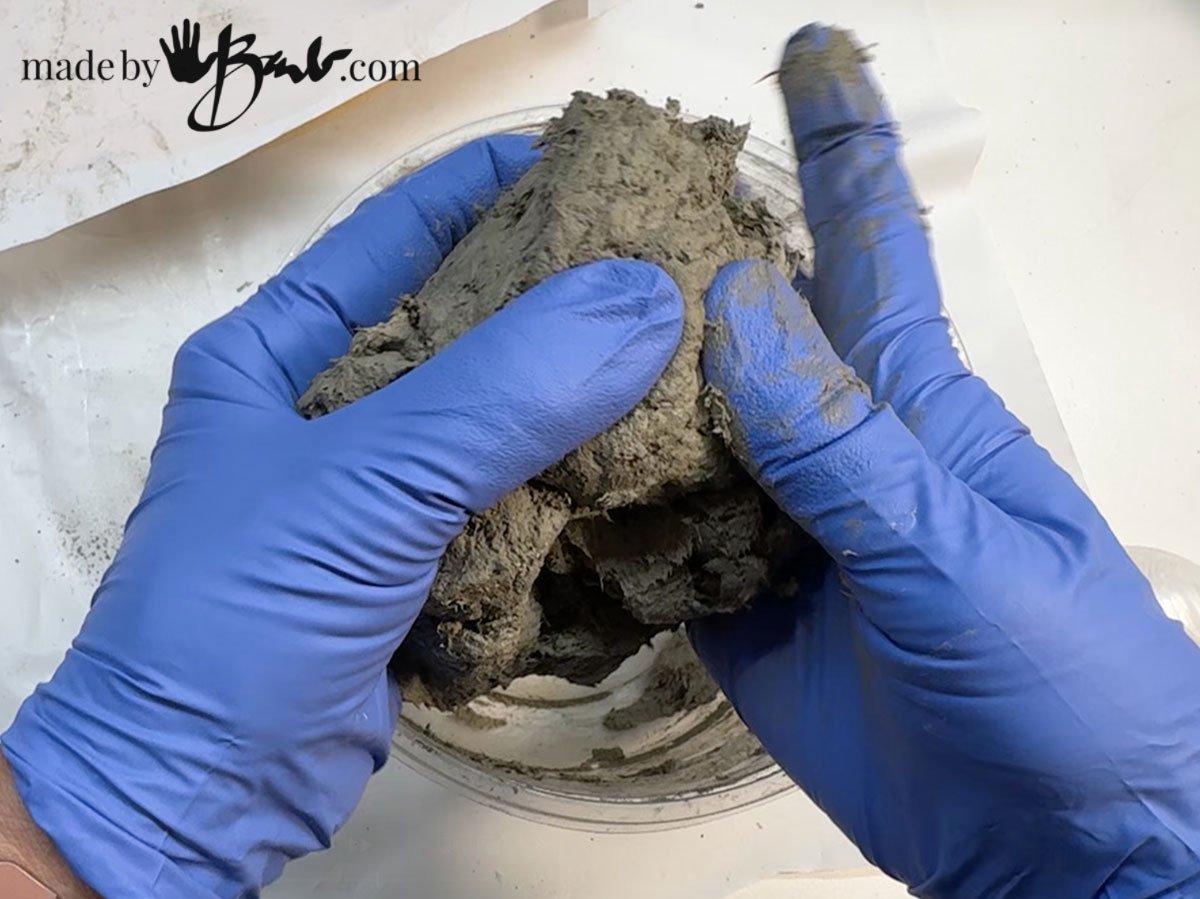
Once it comes together it will be able to be manipulated by hand. It does not stick very much at this point.
Working Time:
Similar to pizza dough I like to knead it a bit but be aware of time. As soon as water and Portland cement mix they will start the reaction, it is not just drying like paint. I had about one hour before it started to get stiff. (depends on temperature) Plan your sculpture before mixing a very large batch.
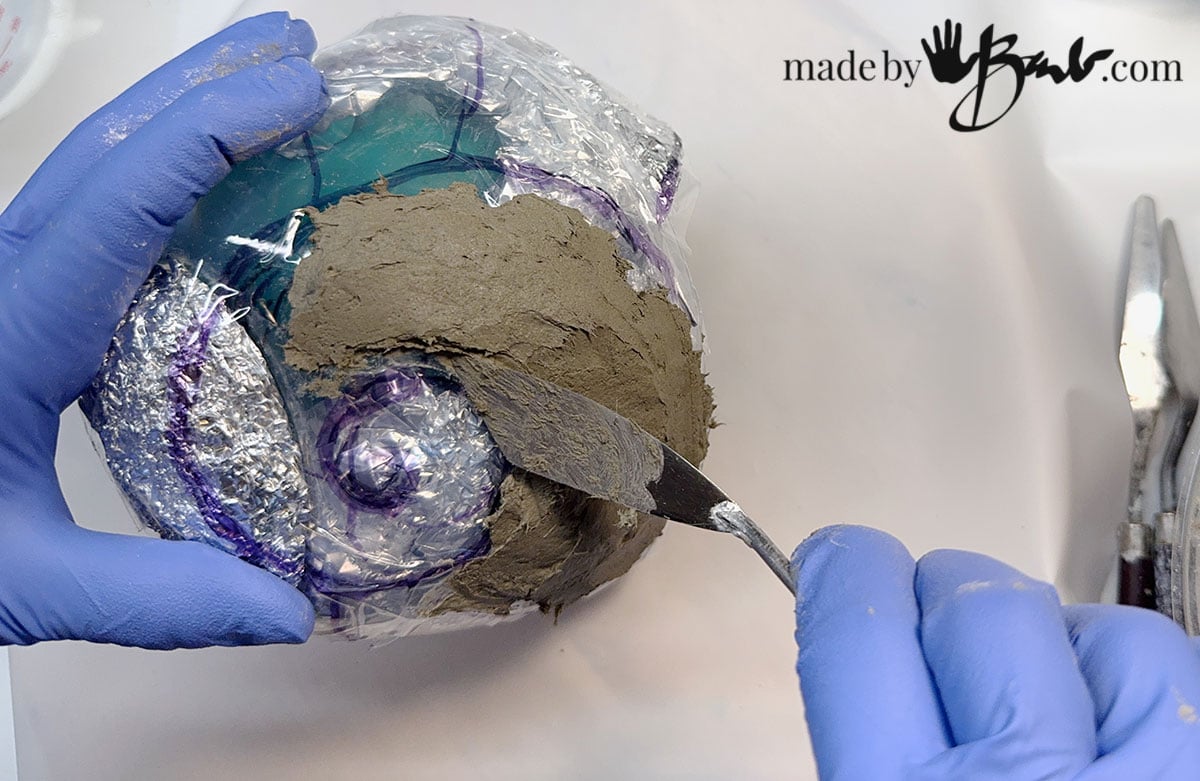
This Cement clay will hold it’s shape quite well. To make sculptures that require less clay and are lightweight it is best to work over a framework or blocked out form. Many materials can be used to create a form.
I do caution you though, since I want these sculptures to be outdoor durable I avoid using core materials that will absorb water & moisture like paper, wood, and cardboard. When a wet material freezes it can expand and crack. For that reason tinfoil, plastic, styrofoam, tape, chickenwire are better choices.
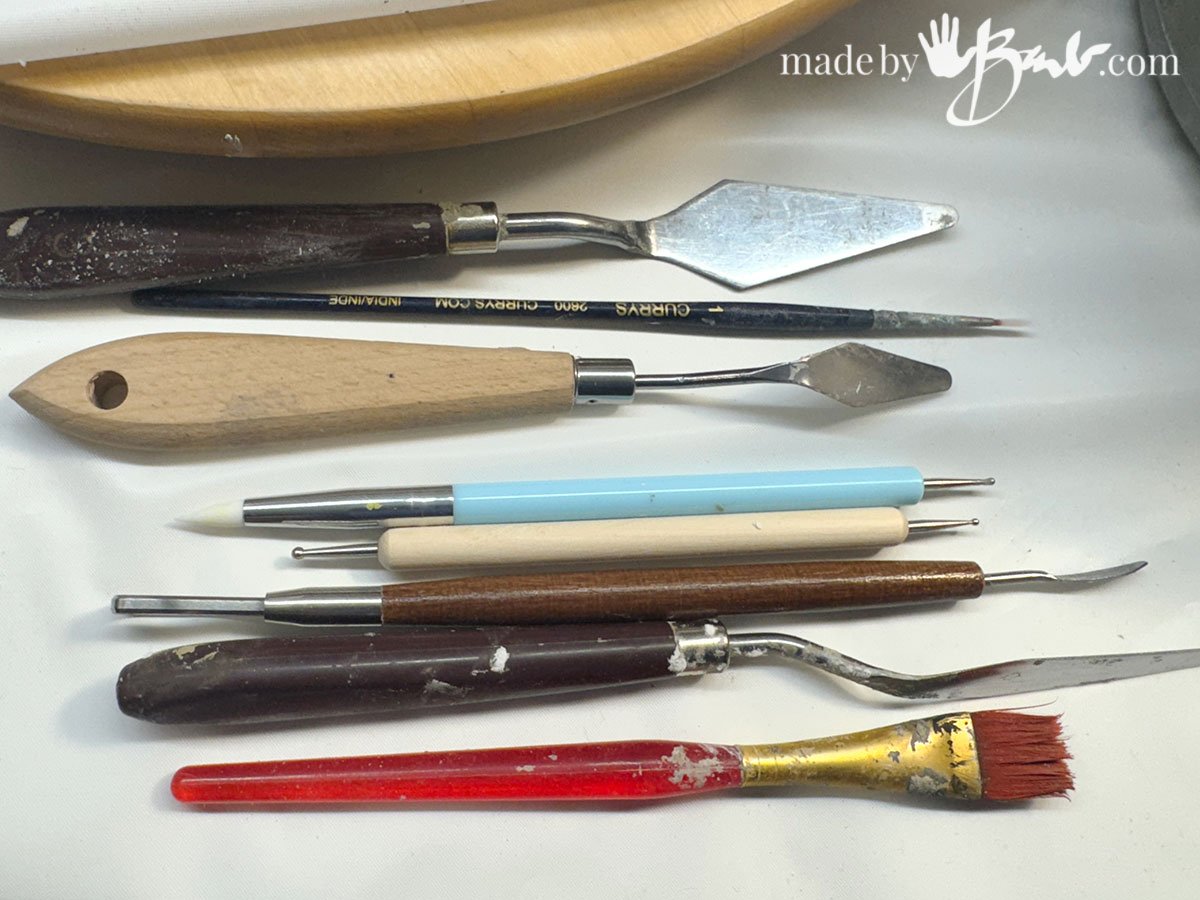
What sculpture tools will work:
There’s really no rules to what will work. Concrete and cement will stick to metal tools if not cleaned after use, but can be scraped later.
Smoothing works great with palette knives and even old kitchen utensils. Wetted brushes will help smooth and also join sections.
As the concrete starts to stiffen it will allow some smaller adjustments. If it is your first projects it is always a good idea to make a small test as you will learn how quick setting and workable this clay is.
What Can you make with Cement Clay?
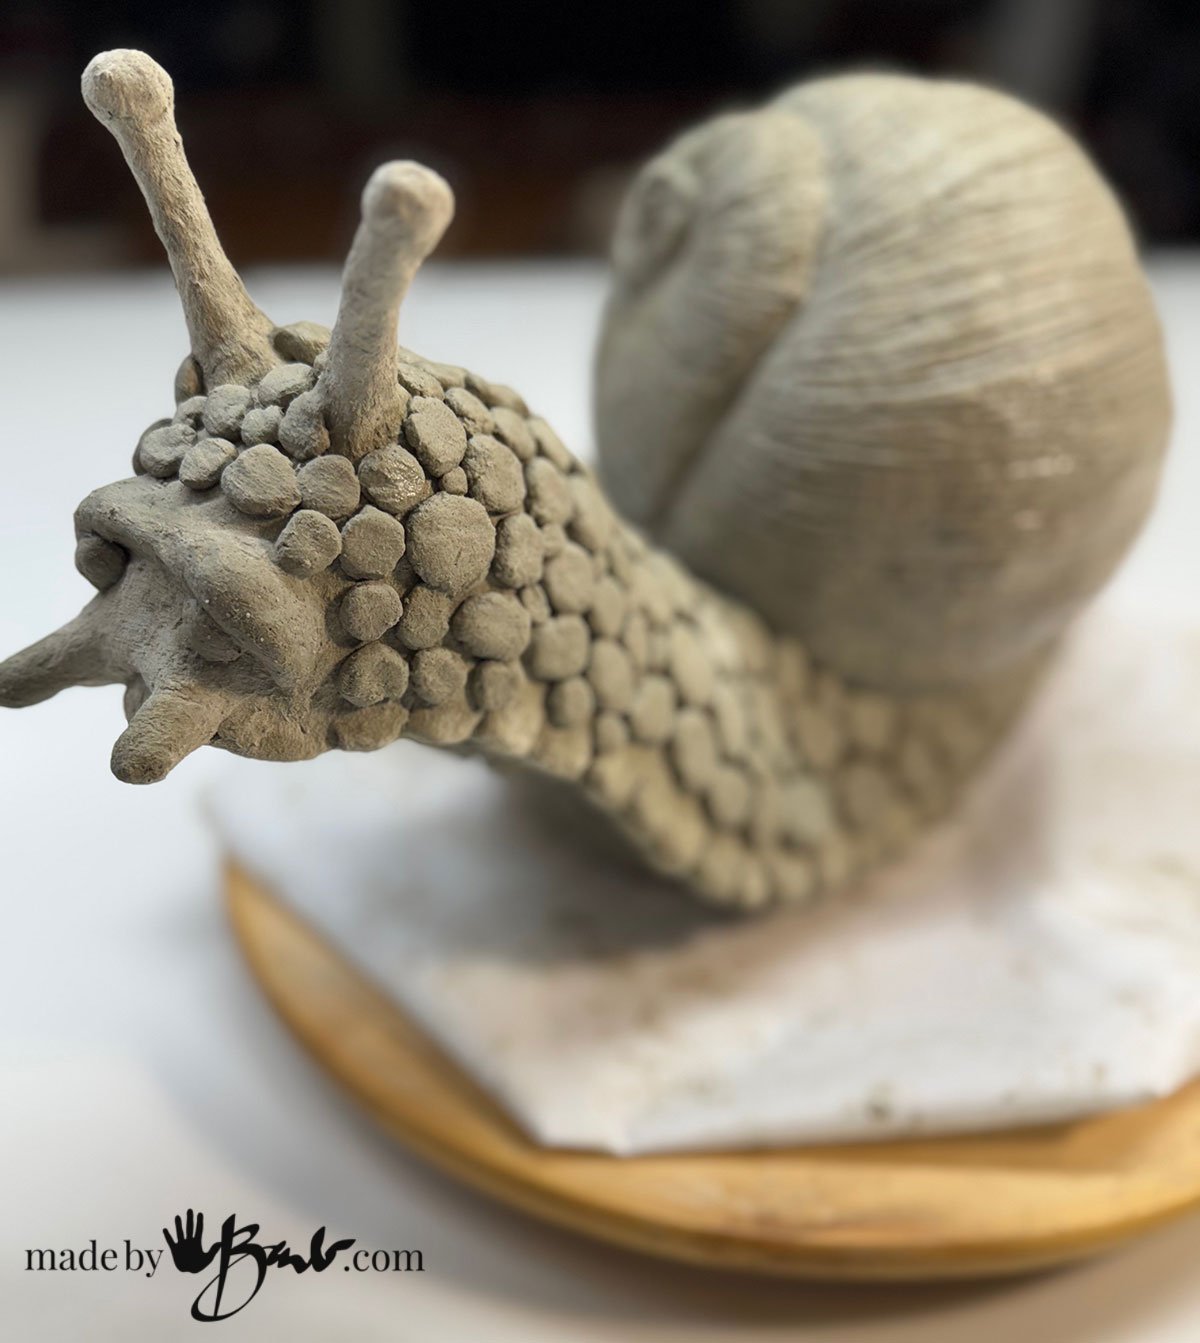
Well, the only real limits is your imagination and ability to make it a reality. This Snail was sculpted in 2 sessions (yes you can add more clay). Tutorial will be posted soon. It’s quite exciting for me as this clay has opened up a whole new world of possibilities. Smaller details and textures seem more attainable now. Get ready for some more sculpture fun!
I may also try to adjust some of the proportions to make new recipes depending on what I am trying to achieve. Let me know how it works for you too!
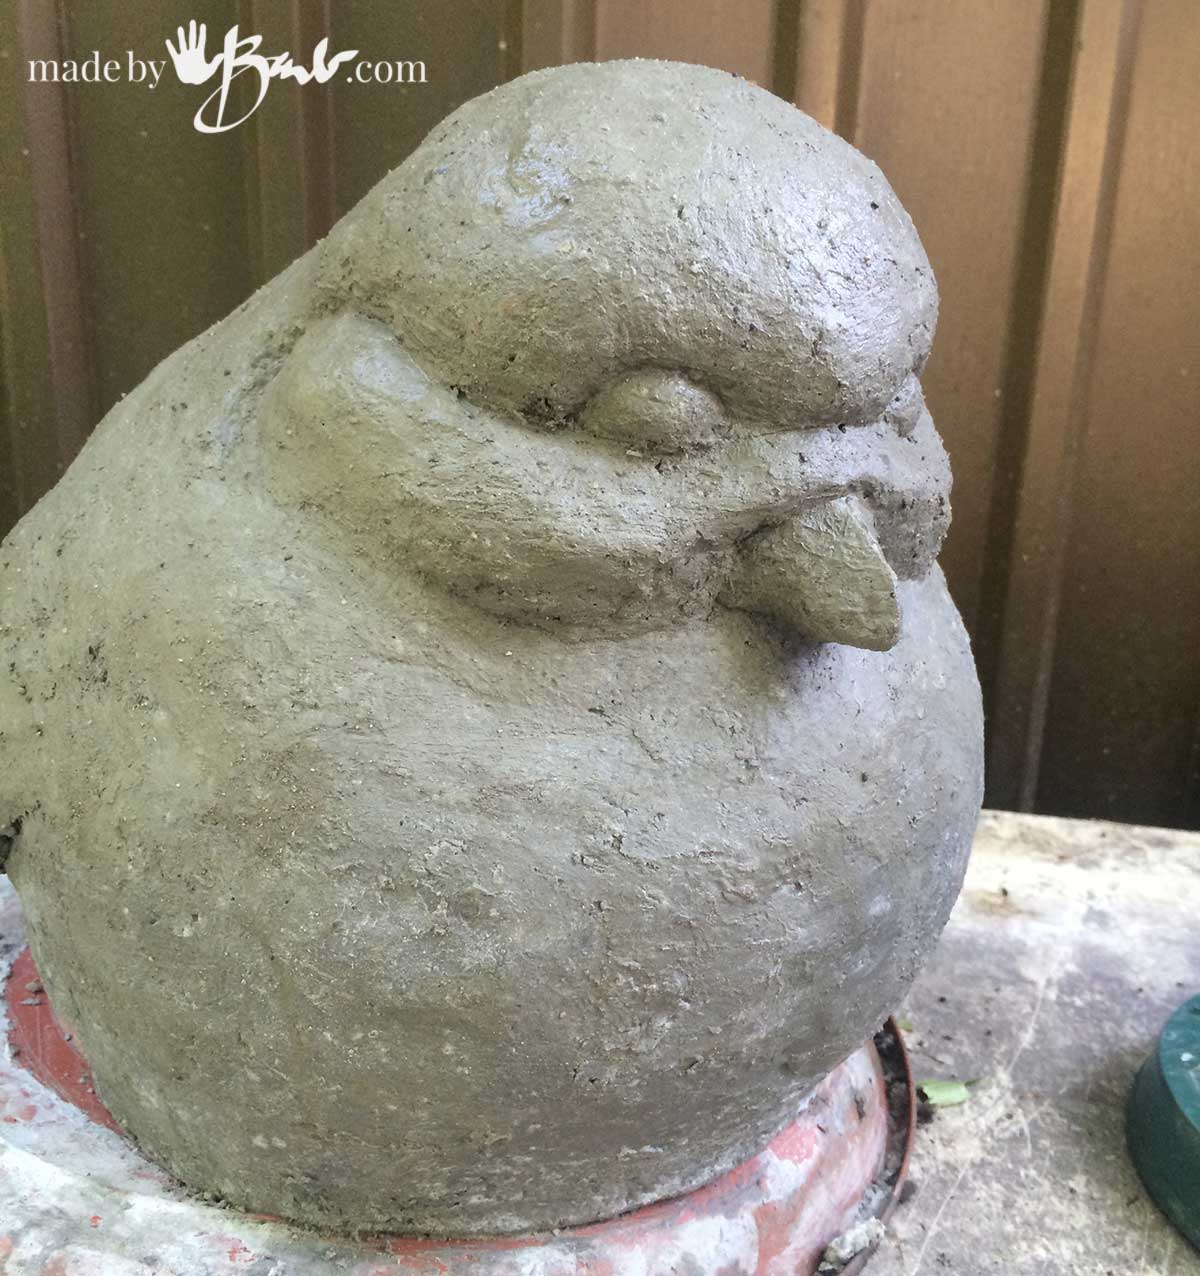
My unsealed Papercrete Bird (above) has been sitting on a stump (off the ground) for 9 years! It was a coarser mix (includes sand) but has held well as an outdoor sculpture. I have not had this ‘new’ Snail fellow in the garden for a winter yet but I am quite confident. I do live in a climate where we have quite the fluctuations of temperatures form over 30ºC to -20ºC here in Canada.
I also love that these ingredients are quite inexpensive, Portland cement can also be used for a lot of my other projects.
Here’s a helpful tip; since the Portland cement comes in a very large heavy quantity I often divide it into much smaller containers that are water tight (plastic jars) to make less storage and mess issues.
I hope I’ve inspired you to sculpt something of your own imagination… It really is not that difficult if you give yourself the chance. Enjoy how to make cement paper clay for concrete sculptures!
I THANK you so much for this detail post. Exactly what I needed. You are fab!! Gracias
That’s so sweet, enjoy! I will updating how well this fellow has lasted out in our very cold winter, he looks just like he did!
Hello Barb. Thank you so very much for your detailed post! So very kind og you! I´m looking to make outdoor big “teracotta”-like plant-pots out of your recipe…. So, just to know if I got it right…. You added sand in the mixture for the bird you have had outdoors for 9 years…. is that it? and how much sand? Thank you again, Trine
Here is the complete post This recipe for the Papercrete; 1.5 parts Portland Cement – 1 part paper pulp (scoop) – 1 part sand. I suggest that you make a small test to see how well the consistency works for your application. Moisture and variables of materials can have an effect. Good luck!