
Concrete Lighted Step-Spook

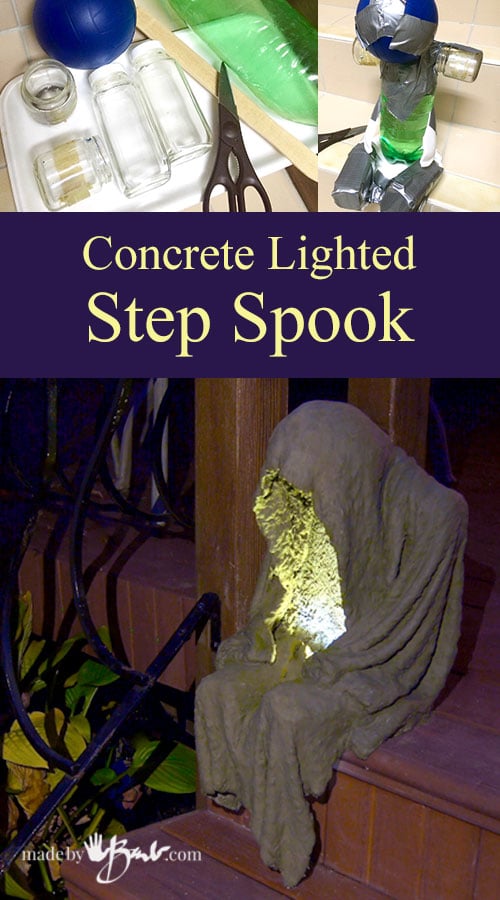
This warm weather lately has let me squeeze in one last concrete project; a Concrete Lighted Step-Spook using fabric draping. It opens a whole new dimension to this art-form. I also like to keep things manageable and somewhat portable so this little fellow can sit on your step and scare the bad ghosts away…
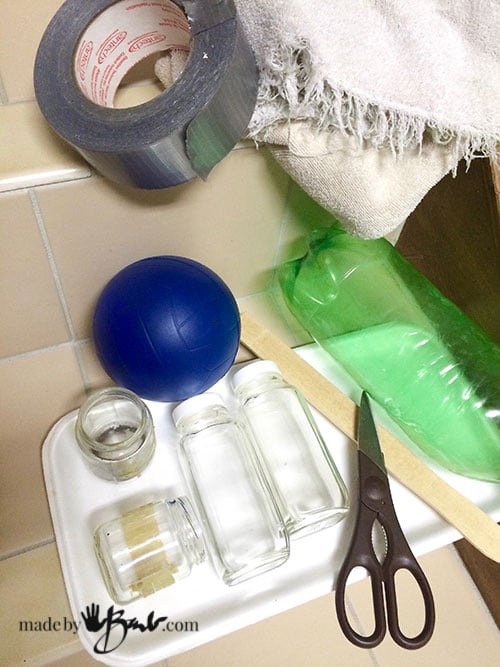
This is extremely low cost. Why throw it away when you can reuse it?!
Materials for the Concrete Lighted Step-Spook:
- a large 2 litre plastic pop bottle (sealed and full of water)
- Duct tape or packing tape
- scissors
- approximate 6″ sponge ball (dollar store)
- paint mix stick
- styrofoam meat tray
- 2 small baby food jars
- 2 longer thin juice jars
- plastic sheeting or bags
- fabric that will absorb concrete (towel or fleece)
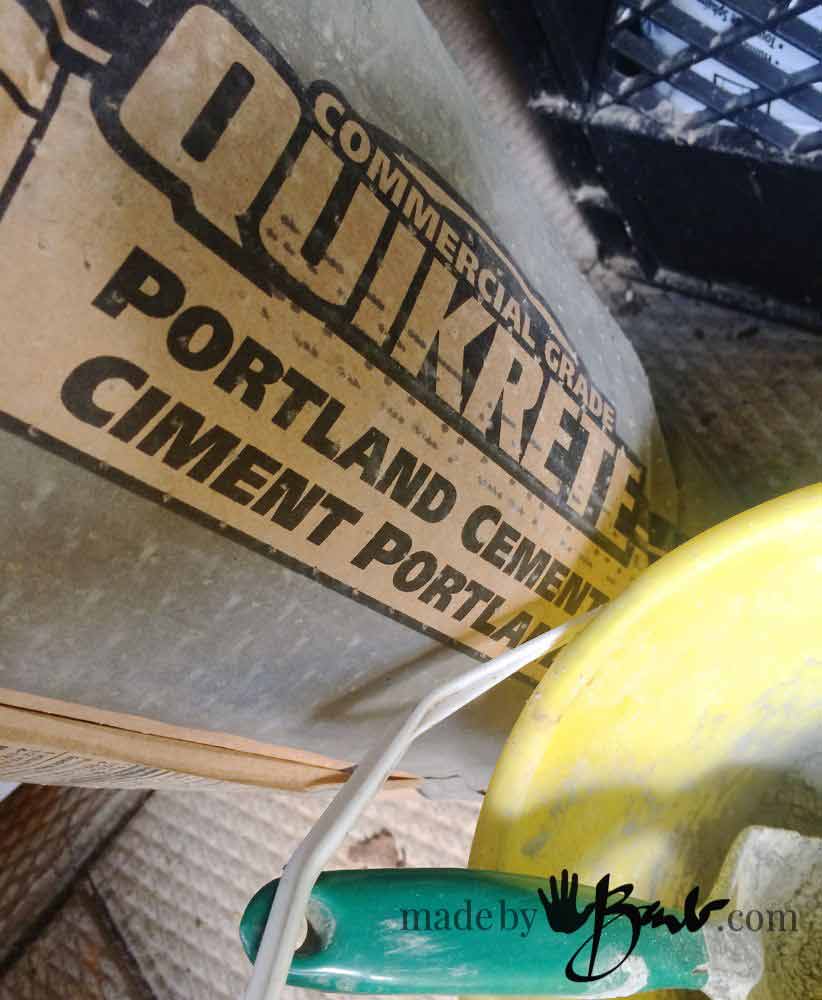
- Portland Cement
- water, mixing container/utensil
- cheap acrylic paint
- basic flat paint brush
- battery or solar powered light(s)
(this is the original design by madebybarb.com)

I substituted this fleece for the terry towel. I like the strength that polyester has and it has so much fuzziness to hold the concrete in the fibers.
The structure:
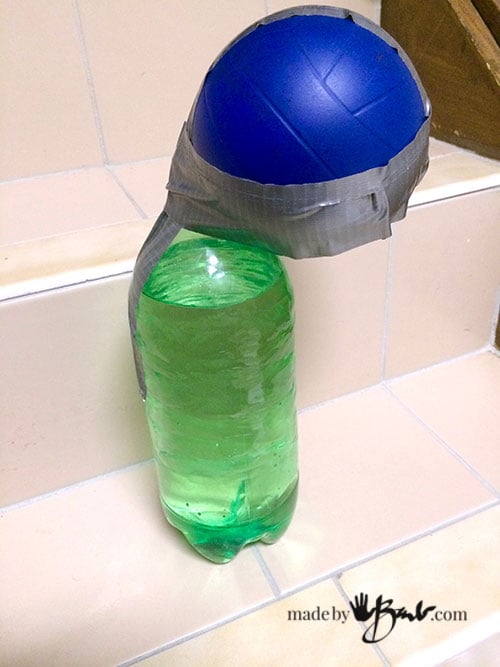
Time to put his body together. Position the sponge ball to the front of the bottle neck. Tape it up the back and around the front. This type of ball ensures that there won’t be any deflating or bursting. I really HATE when a ballon covered in concrete bursts! Choose one that is soft enough to cut up later. (ie, cheap dollar store)
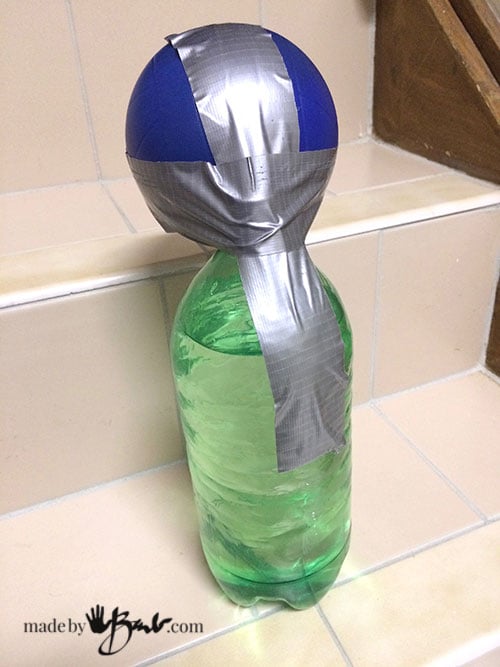
Secure around the ‘head’ from the back.

The shoulders seemed too wide so I cut the paint stir stick a couple inches shorter.
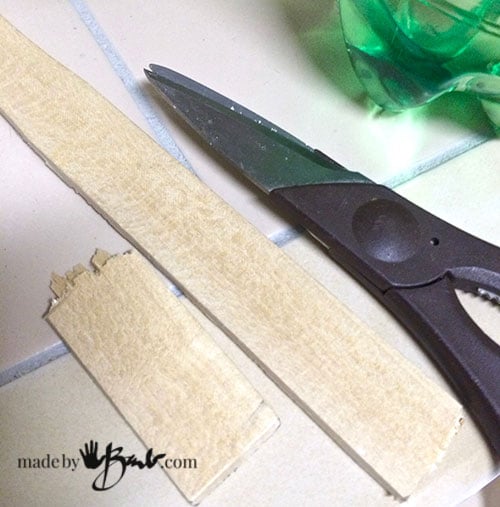
It doesn’t need to be perfect, just shorter.
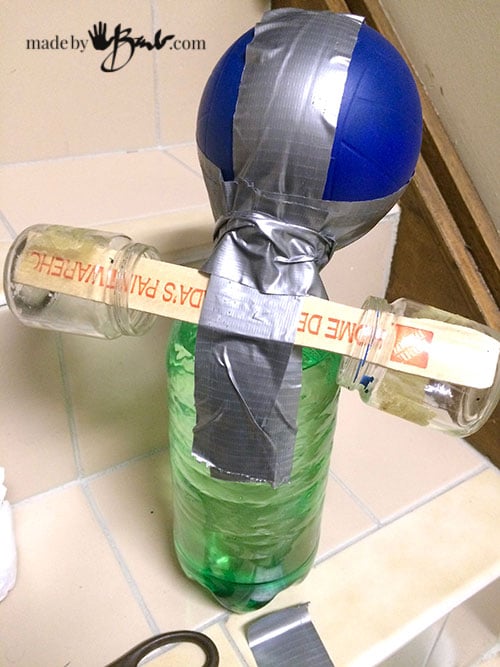
The small baby-food jars are meant to be the shoulders. Test how the proportion is.
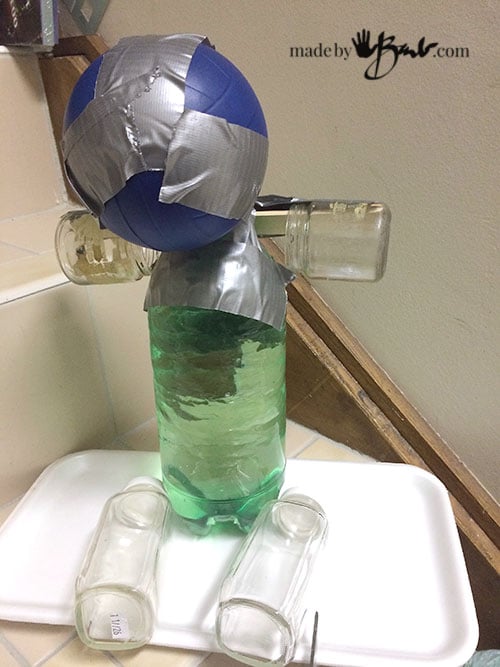
Tape the jars on across the back. He’s taking shape quite nicely… For the upper legs/ thighs I used longer jars and a styrofoam meat tray to have something to anchor to that is easily cut.
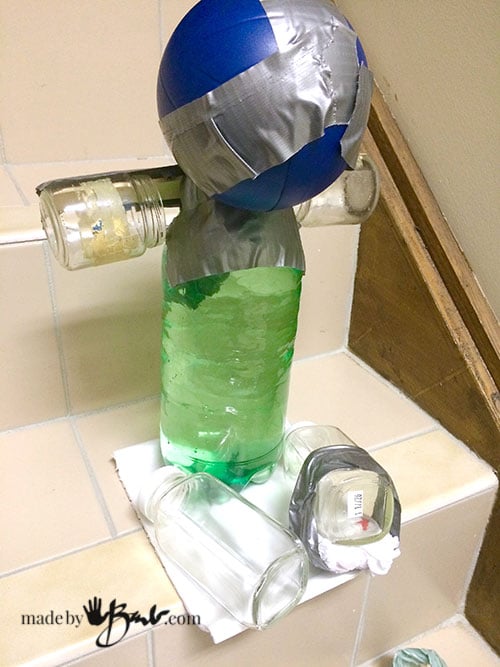
To make it a bit more realistic I propped one leg up a bit with some plastic bag.
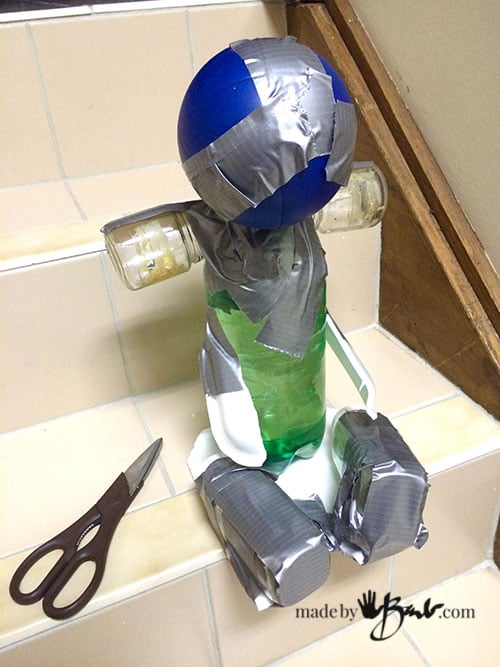
Secure the legs to the tray. The bottle has a fair bit of weight so it will stand on its own pretty well.
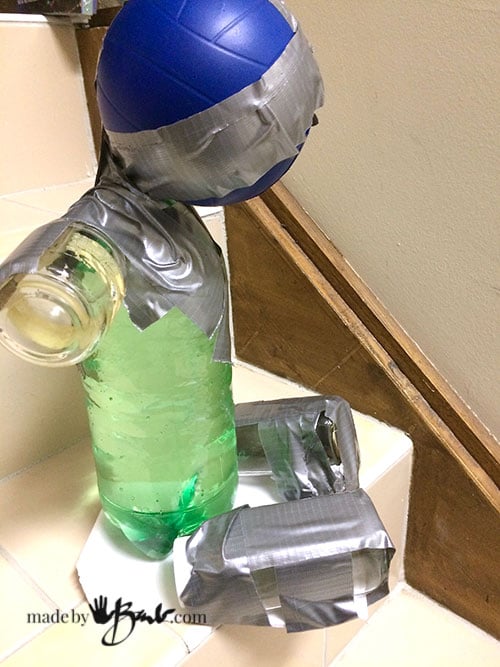
Look at him from all the directions to imagine his proportions.
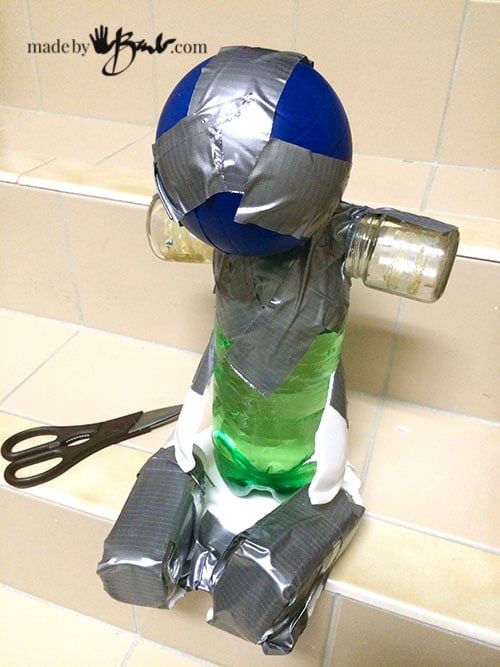
Good job! Minimal expense. The flaps were an attempt to make hands, but could be eliminated.
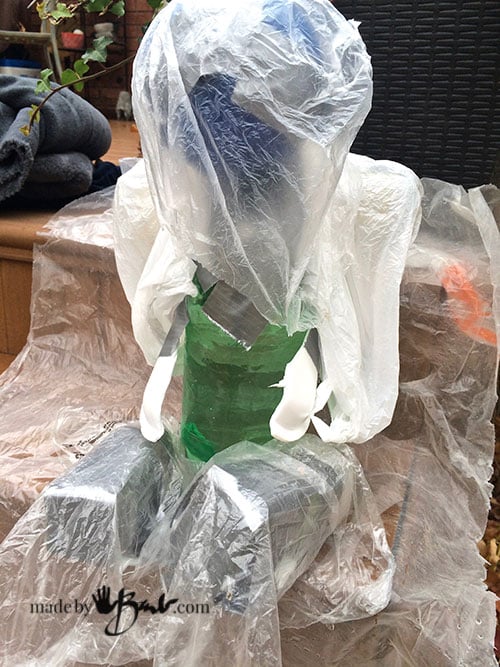
Concrete Draping:
Now it’s time to go outside since it may get a bit messier… Cover him in some plastic sheeting or bags.
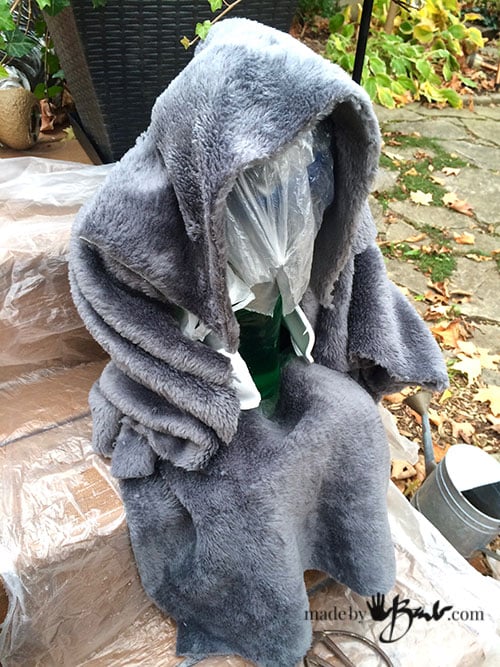
Make sure the fabric is right with a dry fit. I used 3 pieces of fabric. One for the hood (about 14″ x 10″) legs (about 14 ” x 14″) jacket (16″ wide x 14″ tall) It is very forgivable so a bit larger won’t matter. Different fabric may need more for more draping as well. You want something where the cement can get into the fibres.
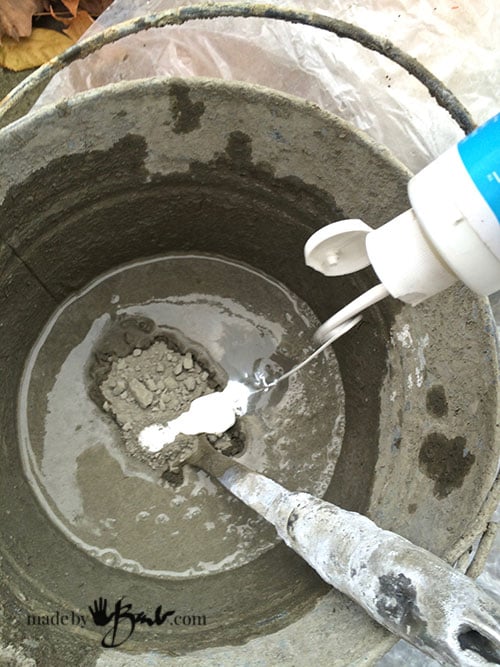
Put a couple scoops of portland cement in a bucket and slowly add water. Add a couple squirts of acrylic paint (I used white) but you could use whatever colour you prefer. Acrylic provides a binder for the concrete and has been known to add strength.
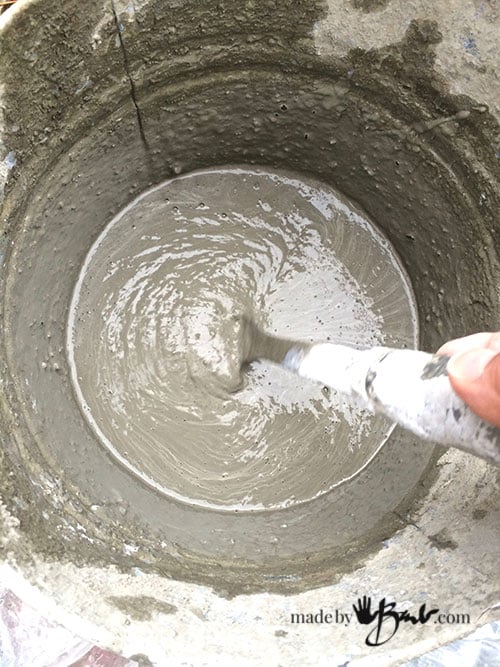
Mix it until its like a milkshake thickness. Make sure there are no lumps.
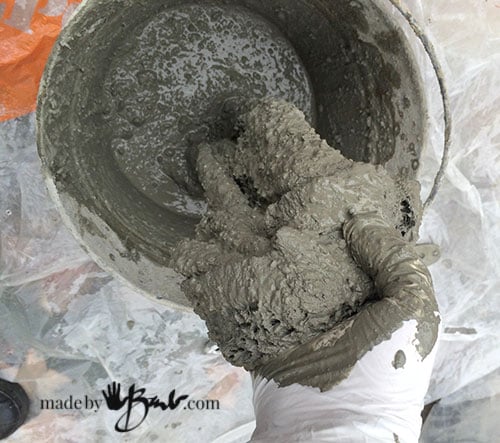
Put the hood fabric in the bucket first and knead it so that the cement gets into the fibres. It will take a fair amount of squishing. If it gets too dry add a touch of water. The fabric tends to suck the moisture out of the mix.

Plop it over the head and adjust the draping.
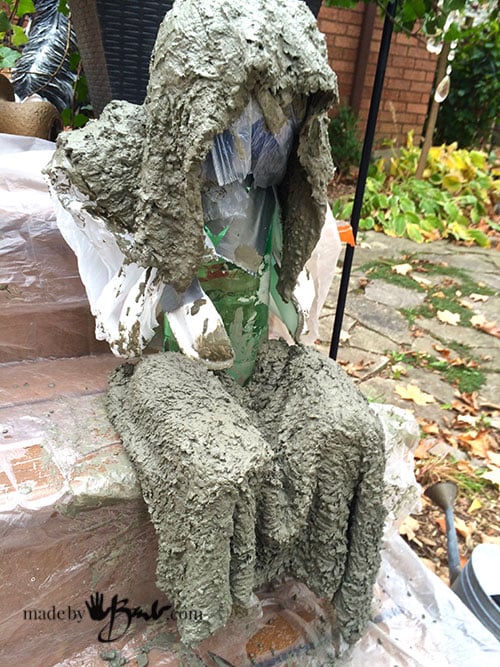
Do the same with the ‘pants’ and tuck at the sides. Make sure the pieces are well saturated.
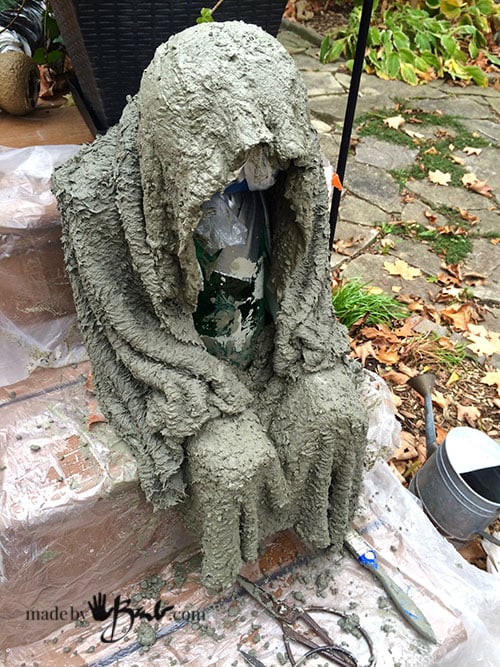
Lastly the jacket goes on. Work it over the shoulders and around the front working the folds evenly. Tuck the ends on the ‘lap’ where the hands would be.
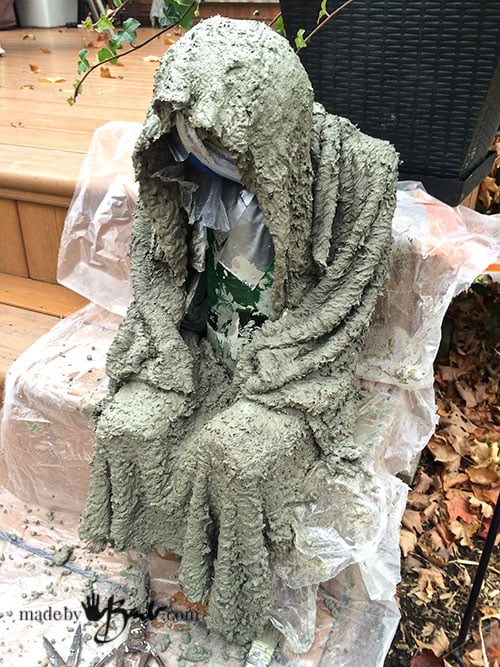
Amazing how easily it comes together. You can fuss wit the draping as much as you want.

The fuzziness of this fabric made it very rough. Very ‘mud-monster-like’! If you like it smoother you can brush down the texture. Once you are happy, give him a chance to rest and cure. Depending on the weather and temperature it could take 24 to 72 hours. I covered mine since it was quite cold here. You don’t want to rush it.

Hollow Out:
Finally… more fun. Now it’s time to pull the ‘guts’ out! Make sure this concrete step spook is sturdy and set enough and then flip him on his back. I left the front very open so that I could pull out the structure. I cut(stabbed) the bottle to empty it and started to disassemble the inside.
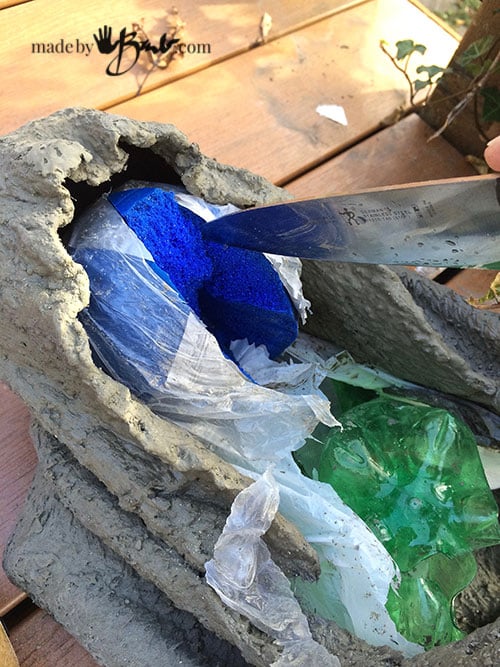
Cut the ball into wedges to pull out carefully. Cut at the tape, squish the bottle and twist out. Pull meat tray from the bottom.
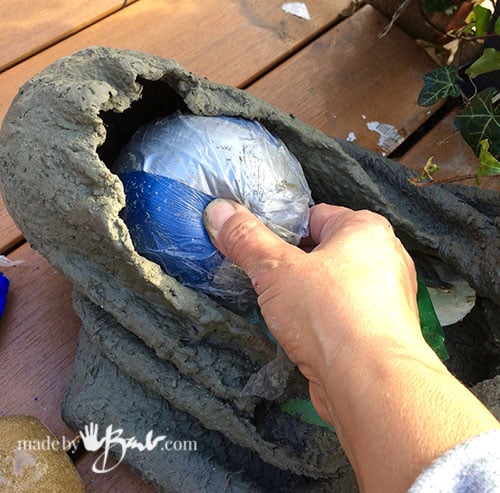
Pull out his head… (hehehe)
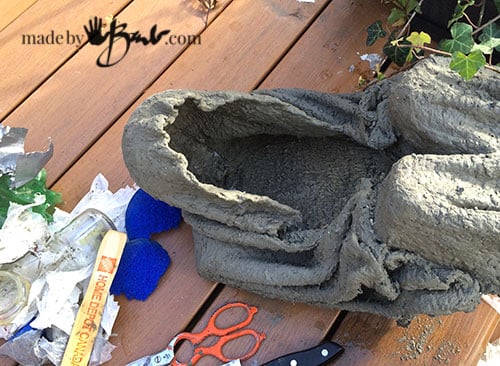
There you go! He’s now body-less; a true SPOOK, a concrete lighted Step Spook!
Finishing touches:
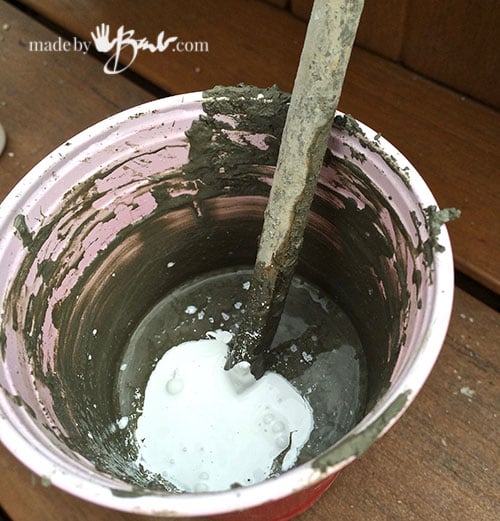
You could be happily done or if you are like me, want to perfect the texture…. Mix up a bit of cement slurry with some acrylic paint and water.

I want this to last for years and this coating will reinforce any parts that are a bit ‘soft’.

Brush across the bumps and they will become filled with the cement.

It will get smoother and stronger.
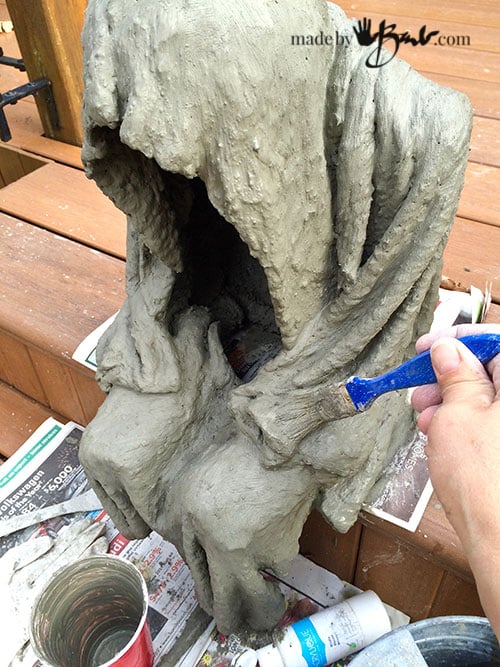
There’s something oddly therapeutic about this… hmmm.
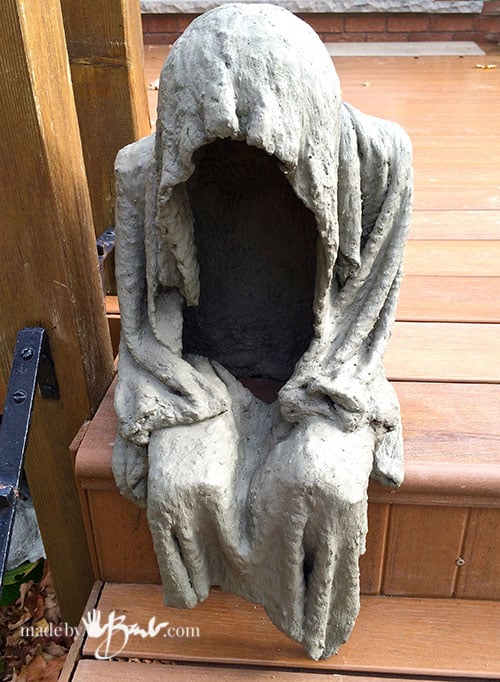
Wowsa, I’m impressed how much personality he has.
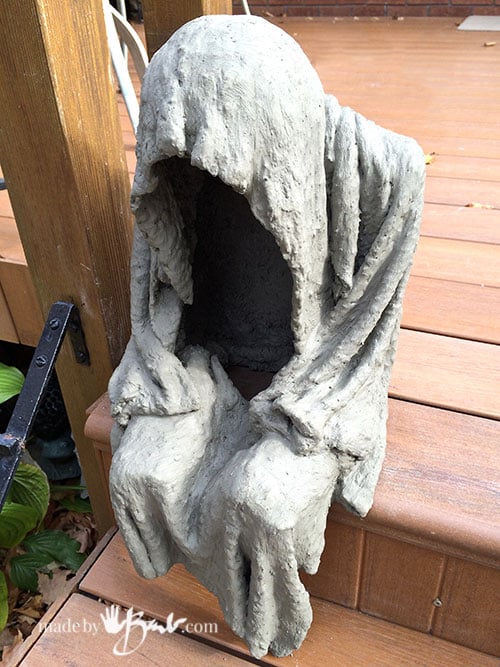
He sits nicely on the step as he was cast there. His weight keeps him sitting quite well.
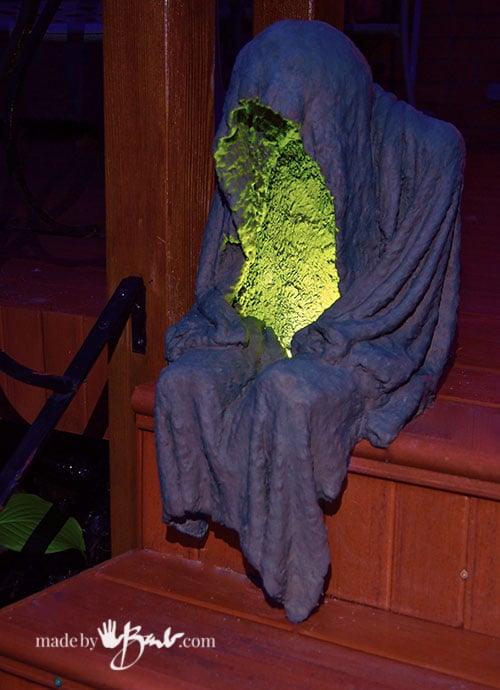
To add light I just added a set of battery operated lights into the open body cavity. You could run a small light cord if that is close by or there is much room in there to possibly even add a candle when supervised.
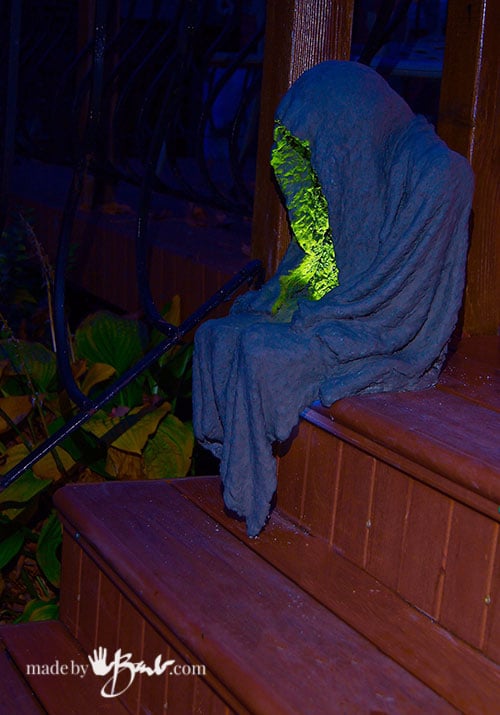
I like the fact that he is portable and can sit anywhere. He weighs about 8 pounds I think.

Oh he is so spooky! And he will be able to withstand all the elements to protect your place year round! Check out his Witch friend, Cat friend and Scarecrow
(Intended for personal use only: Publishing of this design is prohibited without permission)
Fantastic!
Thanks! He now has a pet and a friend Happy Concreting!
So glad I “stumbled” onto your site. Love this project and several of your others. I’m new to concreting and have, of course, already made several mistakes. So it may be awhile before I start a spook. I was wondering if this requires portland cement or if FastSet All-Crete would work as well (the link is too long but if you Google those words, you’ll find it). Thanks so much for your help and inspiration!
I am thinking the fastSet is like the Rapidset. I have tried it with cloth but the sand component tends to just sit on the surface or stay in the bucket. I use Portland as it gets into the fibres better. If you already have a mix you could do a practice test like I did here It also depends on the fabric, as a ‘nubbly’ one would hold more of the grit. It’s all like playing in the muck… good luck.
I love your stuff you make, I’m make some creepy yard art myself. I’m wondering have you tried cheese cloth? I have used it with monster mudd but want to try with concrete.
No, it is really thin! I have made some experiments of different fabrics though. I like ones that have some ability to absorb but aren’t too thin… I bet you’d like the cat Happy garden-art making!
I did hands using wireand masking tape. They turned out fabulously spooky
Oh, that sounds interesting. Ddi the concrete stick to the masking tape?
I love this idea! Thank you so much for sharing it. I’m very new to concrete work but since I’m retiring in about 4 days 😁😁, I plan to give it a shot. I’m going to enlist the help of my 12 year old grandson. He’ll love it and it’s time to get him started on crafting!
Aren’t you fortunate! If you are new to concreting you may want to do some small practice draped planters or such. Also this post will help! Good luck, it will be fun!
Wow amazing idea👍🏼I want to do this same but on live size😂Thank you and all the best
Oh it’s totally doable, but the extra weight of the soaked fabric will require a really good structure! And the final weight may be a bit heavy. Happy making!
YAY! I have been searching and searching for detailed information on how to do this fascinating form of artwork. I am thankful for how detailed your description has been! I’m so excited to try this out for myself. I know you posted this a long time ago, but your work is really cool and inspirational. I’m so excited. I saw a witch that you did as well that thought it was just amazing! You are an inspiration to me. Thank you so much for posting such detailed information. Warm regards. 🙂 – Kristy
Yes, he has been sitting on the stump for a couple years now, winter and summer, under snow as well! He’s still great! There is also a cat!
I have to say thats’s really cool. How easy was it to remove the jam jars, could you use plastic water bottles instead?
The thin jars can stay in if not visible. Yes, plastic water bottles work too, or even cutting them. Just keep an eye on the proportions for a body like shape. I’ve seen these made from my site all over the place in various forms… Good luck!
Barb I never seem to get the cement to water ratio correct. Always to dry and more water then to wet! Ugh
Thanks
You will probably get better at it, just like cooking. It also depends on the way the fabric absorbs the water. If the fabric is extra absorbent then dampening it will help from it ‘stealing’ the moisture. DOn’t despair!
Hi Barb
Wow the ghoul is so cool I made him two weeks ago and had some fun doing it. I live in Taupo New Zealand in the middle of the north island.
Regards
Paulette
I’m so happy to hear that! ‘Just as someone wrote to tell me that I have too many ads. Nice to think my ghoul has a ‘brother’ in New Zealand!! I have snow here, but am itching to get concreting! Thanks for the note!
Love this project! I’m on my 3rd Step Spook now. Each one bigger than the previous. Easy to do with your great directions. I found that Polar Fleece is the perfect Dipping Cloth to drape this little guy with. Interesting finding too….birds will love this spook if you leave him out year round – twice now, I’ve had to “re-locate” birds which found his face to be the perfect space for a nest. Thanks Barb for your creativity and concise, clear directions!
Are you ready for making him a friend? The scarecrow and witch keep him company, 🤣 The cat is a quite ingenious draping as well. Yes, I have had nests in the witch as well. Have fun!