DIY Fitted Face Mask
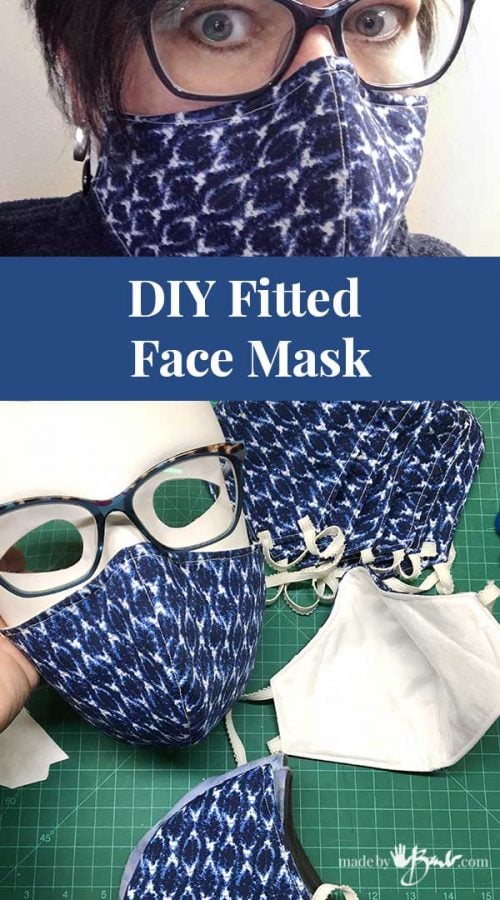
What has everyone been up to?! Yes, do not roll your eyes… I have a lot of fabric and abundance of ideas. I’m just keeping hands busy and mind content. My gift to you; a DIY fitted face Mask with pattern.
Yes, I know!
I know, I know; before you tell me that this mask will not replace a N95, I know. Depending what fabric you use will depend on the amount of particulates it will filter. There is some interesting data here. I’m not a scientist, but I can draft a pattern.
I’m a maker, and spending safe time in my house I wanted to be productive and make a difference for those I care for if even just a tiny bit. DISCLAIMER: I am not giving any assurance that this will protect you from all airborne virus or like. Research carefully and make your own decisions.
My main purpose is to make a mask that fits me as I like. My international students have the etiquette to wear masks even in the best of times many years ago and I have marvelled at how stylish and comfortable some are.
You will need:
- Fabric (t-shirt knits, tight weave cotton, dish towel fabric, vacuum bags)
- Thin elastic (1/8″ – 1/4″)
- soft bendable wire
- sewing machine, thread scissors…
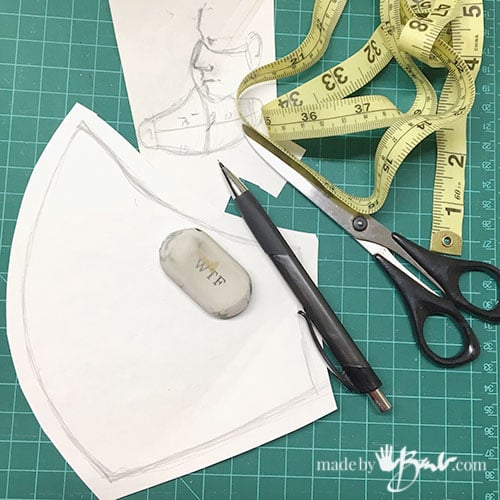
- PATTERN
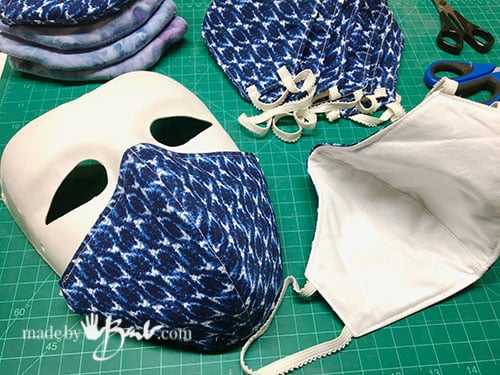
Using my ‘mug’ and a mask I designed this pattern (print full size, no reduction on letter size paper) to fit over the nose and give space for the lips. Yes, it has a seam down the middle, you choose. Some have pleats and are quite flat. I find the leakage around the nose can be a problem, and this has a wire shaping as well.

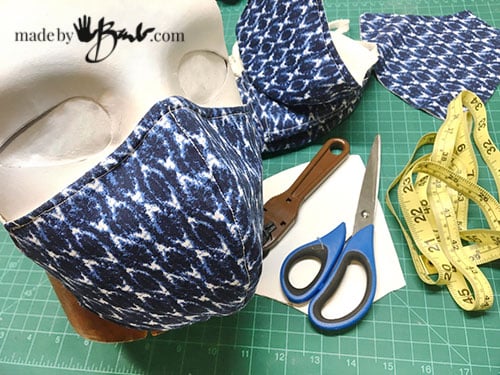
In my research for fabric and material I found that vacuum bags provide good filtration. I do have some HEPA vacuum bags, which have 3 layers. One thing to consider is comfort and breathability and the vacuum bags work quite well.
UPDATE: I am getting a lot of comments about the possibility that these vacuum bags have fibreglass in them. It seems to be a debate, so please choose wisely. This article also addresses it.

One way to help make them more efficient is to layer, as I did here with 3 layers. Cut 2 pieces of each layer. Such a great way to use up some of the scraps of ice-dyed t-shirt fabric.

Easy Assembly:
Double up 2 layers and with right sides together, sew the front centre seam. Sew a 3/8″ centre seam of lining as well.

Since every face is different, it a good idea to make a test one. Adjust as you like from there. Here centre seam is sewn.

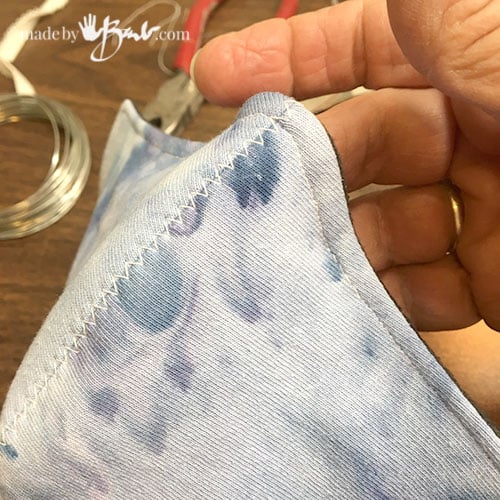
To keep the shape I press open the centre seam and stitch flat.

This will keep the form of the mask firm.

Since the seams may get thick trim back at top and bottom.

Just like a Pillow:
To join the inside to the outside, is much like making a pillow; sew all the way around (right sides together) and leave an opening to turn right side out.
Note: If you want to attach elastic before turning add to each piece at dots marked on pattern and loop inside. I like the option of adding later so that adjustments can be made; your choice.

After sewing clip corners off without cutting stitches and trim seam allowance as close as possible.

Such a nice shape:
Turn right side out and push corners out with a chopstick or skewer.

The nose bridge fits better if wire is inserted. I used a thin floral wire that it a slight bit stronger than a twist tie. Bend in the ends for safety. An alternate way is to use wired ribbon. Another great option is to use strips cut from tin cans (like the top flap of a sardine can or tomato can) See this post for details on how to make it iron-in.

Before top stitching the perimeter of the mask, insert the wire as close to edge as possible and pin/clip. Top stitch all around and close the opening.

To add elastic after turning loop a bit under so it is 2x secure and stitch on.
UPDATE: Due to some shortage of elastic, An alternate is using some t-shirt fabric cut in 3/4″ strips. It rolls when pulled and has some stretch and is soft on the ears. You can also adapt this Pattern to have a casing and open ends for filter pocket. See this post.

The Form & Fit:
The fit is quite comfortable. To size smaller a slight reduction in print size can work.
Everyones nose is different! If you like, you can reduce the height as seen on pattern. The nose wire can be shaped well to fit around your’s.

I wear glasses so I always find issues when wearing my masks for concreting! Yup, when you are a ‘designer’ you are much fussier!
If you would like an even flatter fit over the nose for glasses see this pattern as an adaptation of this pattern. We are all quite different (imagine how many fits of jeans we have)

This mask scoops under that chin of mine as well!
TADA! I can feel a bit better. I especially like the ‘vacuum bag’ face masks. They should be cleaned washed after each use. I would not just through them in the washer due to the wire. If you put them in a bag the heat of the dryer will hopefully kill anything.
Some more effectiveness can also be had by spraying the fitted face mask with a solution of citric acid and allowing to dry. Leaving them in the sun lets the UV also disinfect. Again, do your research and make good choices.

I’d rather be making pretty things than medical supplies or a fitted face mask… But this gives a bit of comfort anyways. DO be careful out there my friends!

See the look in my eyes!? The wonder, the caution, the hope of better times soon… but as a very very wise person said to me quite often; things coud be much worse so be grateful.
Yup, it’s odd, I’m a grandma now but I really wish my ‘Mommy’ was here to reassure me right now…
As a chid I used to watch my mom design fashionable hats from scratch; so now it’s my destiny to design some masks… like this and this.
Thank you! This pattern was perfect. Fitted hubby as is and I did a few adjustments for my small face. I’ve sent the link around to my friends and family as well.
Awesome, love to hear!
I made you pattern after making several different ones for family, friends and staff at an assisted living facility. I like yours the best. for myself. I added one trick I got from another pattern to add the wire..
Yes, thanks! See also how to make a nose wire here Stay safe!
Can these be made without the wire so as to be fully machine washable?
Sure!
Hi Barb! Thank you for the pattern, this is my first time making a mask after only recently learning how to sew, and I am very much a beginner right now so forgive the question but how do we turn the mask inside out? After I sewed the four pieces together down the middle (just making a practice one at the moment), I made the seam flat with the zigzag stitch but then wasn’t able to turn the mask the right way out, and I’m not sure what I did wrong. Thank you for the help!
Yes, I know, that has confused a few people, I made that with 3 layers so another layer would be added and then it would be turnable. (like turning a pillow)
Then how do you do that with only two layers?!
Sew the 2 outsides and then 2 insides down centre seam and then sew around the outside, but leave an opening to turn it. I would opt for a channel to make the ties rather than elastic. Everyone seems to like to be able to swap out ties. See the other mask patterns here as well.
Hi,
Thanks so much for this pattern, looking forward to trying it out, but I can’t actually download it
I click the download button and nothing happens, is there any other way I can get it?
Thanks in advance 🙂
Done, good luck!
I really like the way this mask looks but i just can’t figure these instructions out!! HOW DO YOU DO THE PILLOW PART?!
After the centre seams are sewn on the inside layer and outside layer, sew around outside (right sides together) but leave a small opening, then turn right side out. Another option is to leave the ends where the ties go open and then turn. After putting in the wire/nose piece, fold over and sew and small channel where the ties can be threaded through. You can see that here and here Adapt as needed. 😷
I’m wondering how to flip the mask like a pillowcase once the center seam is sewn. I can’t quite figure it out. Anyway to take a picture of how?
I know this has been a confusion, it is three layers total, so the first 2 are treated like one layer, then the outside is separate.
You are right, it does not turn. Those are the 2 inner layers (outer layer is separate) I hope that helps.
Found this pattern and gave making a mask with it to see how it went. A bit wonky (my fault) but I just make more to practice 😀
Glad to help
FLANNEL is NOT appropriate for face masks. Flannel has tiny fibers that you would be inhaling and is not 100% cotton..
Also the following is not appropriate other than tight weave cotton. (-t-shirt knits, tight weave cotton, dish towel fabric, vacuum bags) I mean really vacuum bags! According to our health minister in Canada masks need to be made with 100% cotton period. No inserts necessary. Using a t-shirt for your masks will give you NO protection. T-shirts are a stretch fabric. When stretched the fabric separates and creates small wholes in the fabric. These holes will allow the particles from covid an easy access. Fabric also needs to be prewashed because chemicals are applied to keep them dirt resistant when being sold. People need to do their research. There are a lot of people making masks that don’t meet the requirements and people are buying thinking they are protected but are not. Please be safe and use the correct materials. Remember you are breathing these things in. Down the road there are going to be a lot of people with breathing issues and diseases stemming from these masks.
I did not use flannel. Yes, I provide a pattern but the fabric choices should be considered carefully by the maker. Personally I don’t think a lot of proper research has come out about fabric/fibre choices. Stay safe and informed