Look closely; can you see it?! This endeavour was close to the heart for me…

It’s time to get back to a routine and school! Nope, not another mask pattern, but I’m still designing ways to improve our situation. No one wants a mask stuck to their face so I’ve designed a DIY Face Mask Support Frame that you can make from your trash/recycle. Ok, stop laughing… take a look.
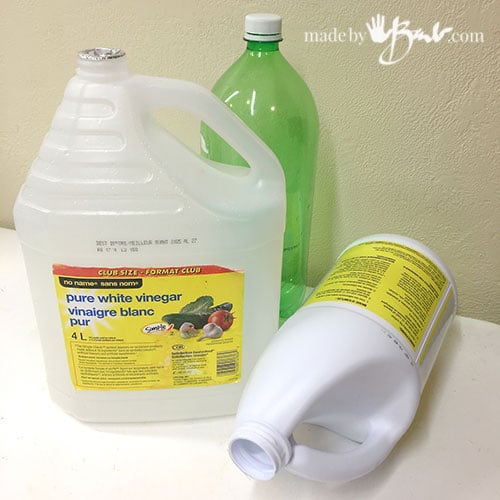
Look Around:
There are supplies everywhere you look. We have an abundance of plastics that make a quick trip through our lives; so why not reuse them?! The Vinegar and Bleach bottle are made of HDPE (High-density polyethylene) It melts at about 130.8 °C and is quite flexible but also keeps it shape. I can be cut pretty easily with scissors or xacto knife so it can make a great material for support your mask. The usual Soda bottle is made of PET (Polyethylene terephthalate) which has more of a ‘memory’ to keep it’s round shape but can also fit the bill.

Cut the bottles apart and take the largest flat pieces. The Bleach bottle is thinner and more flexible but does work quite nicely as well.

Free Pattern Download:
I have been testing and trying and watching and drawing… Many of the mask frames look like muzzles; I don’t think we want that much form on our face; we just want the mask to stay away from our mouth and nose. After a few prototypes this strangely simple shape came to be. The mode of attachment also works easily on surgical masks as well home made ones.
Print the pattern at 100% (do not fit to page) If you print it on some thicker paper it makes tracing easier.
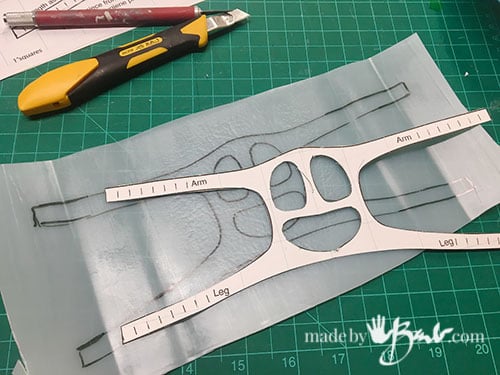
Trace it:
Using a permanent marker, trace the pattern to the plastic. The ‘arms & legs’ will be long but trimmed to fit your mask style.

Cutting is easy with some scissors (don’t use your finest or your best sewing scissors!). Try to keep the outer edges smooth to prevent catching later on.
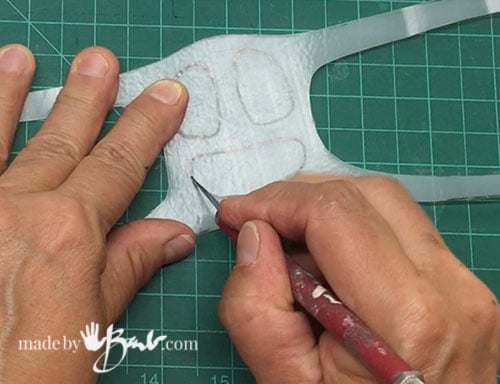
Cut the Face:
Please use a cutting mat to protect your table. Cutting the holes in the centre front section are a bit more challenging. It is not that crucial that they are perfect, it only allows air through but keeps the fabric back. The face ensures right side up… and offers a smile for these tough times. Xacto knives will cut through but need a couple passes. Slow and steady…

Another Option:
Another way to cut plastic is with a hot knife (Versa Tool Hot Knife) as I used to cut the Christmas Ornaments and Easter Eggs. It works well but will still need some pressure. Hint; do not touch the front metal part – ouch!

Adjustable Fit:
You can reuse this support frame after cleaning so you do not need many at all. Since most Face masks have a centre section that should give room over the mouth this support frame can fit in it. The key is keeping it in place in a variety of mask shapes/patterns.
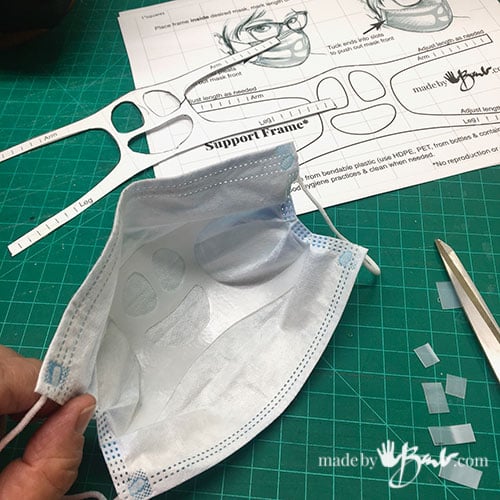
How To Install the DIY Face Mask Support Frame:
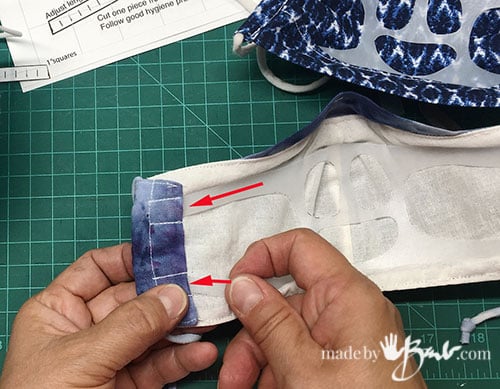
In a pleated mask (like surgical) centre the frame in the mask and force it to stretch across the frame. Mark where the ends of the ‘arms & legs’ meet the side of mask. Cut to adjust ‘arms & legs’. The pleats in these masks are perfect to slip the end of the frame ‘arms & legs’.

Cut the ‘arms & legs’ as needed. Do not cut too much, cut small amounts as once cut it can not be lengthened again. It should pretty tight across the mask to stay in place when wearing. It will bend across your face and mask top and bottom will still touch your face.

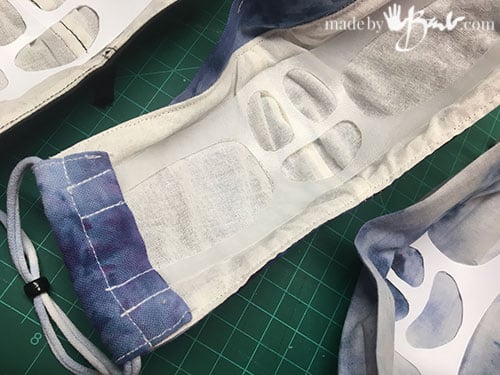
Notice how well the frame keeps the mask curved. You can push the DIY Face Mask Support Frame higher or lower according to where your nose end is, as it should not touch your nose end. It sits usually above the chin.

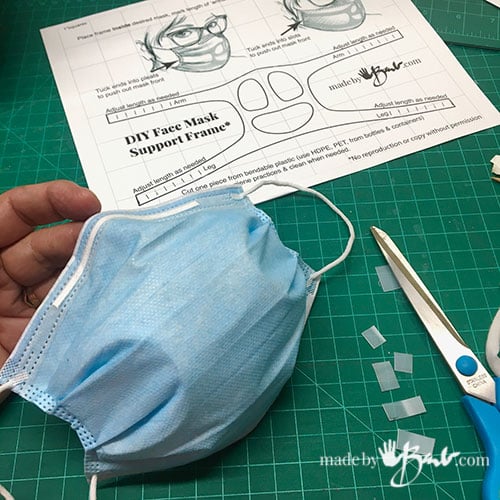
The unique frame shape pushes the frame outward and also the ‘arms & legs’ keep it place by their placement in the pleats.
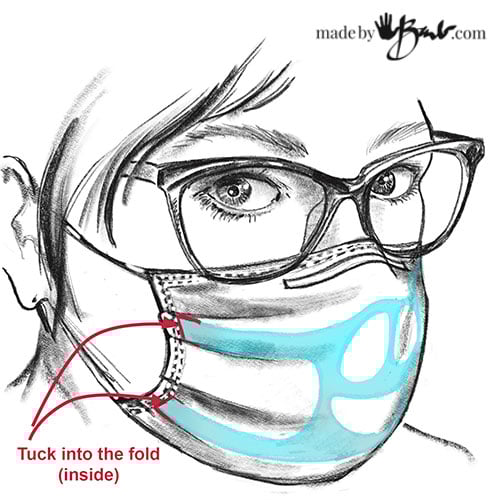
Adding or adjusting a mask at the side:


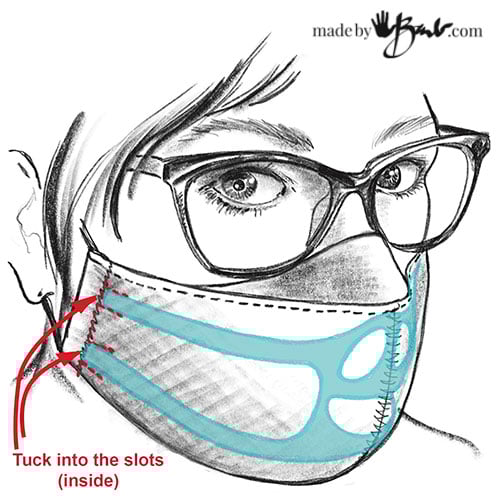
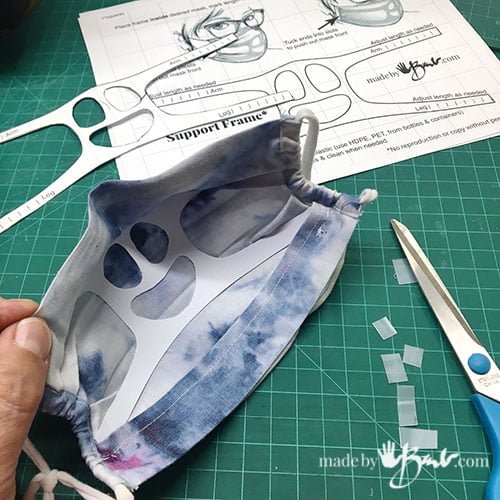
The Olsen style masks as well as my Mask for Glasses, Fitted Face Mask, Snug nose Mask all have sides that can be adapted to use the frame. The foldover can have some channels sewn to hold the ‘arm & leg’ ends or a piece of fabric can be added inside quite simply.
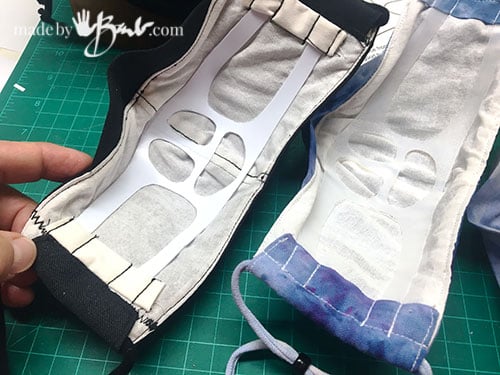
I used a thin casing (right above) and then used some extra foldover to make the places to insert ‘arm & leg’ ends.

Fit the frame into the mask by forcing it as tight as possible across. Slide into place (compression fit)

It works quite easily…

Once you put it will bow and curve outward and keep it’s shape to eliminate touching the mouth.

Home sewn pleated masks work quite well since the ends tuck into the pleats.

Another good thing is that is pretty well invisible. The more open the space is inside the mask the more surface area allows air through the fabric.
When needed wash well with soap and water, or wipe with disinfectant wipe as you would anything coming near your face. Carry in a pouch to keep clean.
Having a good fit around the nose is also key so I still like to Make Iron-in Metal Nose Pieces for Masks.
If you would like to watch the video:
And most of all; please stay safe, be careful, and keep all you love safe. Make good smart choices for yourself & loved ones… I hope I can be of some help.
Barb, you are a genius. I will be making these for my family and friends. I hope you dont mind if I share the heck out of your page because everyone needs this pattern. Thank you.
Thank you-thank you-thank you!!!!!
Finally someone has done what I needed but didn’t have time to do. I really appreciate this effort because I’m sooooo tired of tasting/licking/sucking in my mask!
Shhh, but I think we have a natural tendency to lick our lips when something touches them! I kept sticking my tongue out under the mask!
This is a great idea! I’ve been sewing zip-ties between the interfacing and inner layer, much like boning, to add structure to my masks. Your frame will allow us to bring our older masks back into the rotation. Thanks!
I also like that I can push it to the place I like it. We have all gotten quite ingenious!
Hi Barb,
This is a great idea! Thank you for continuing to make the mask experience better and better.
I have two questions:
I actually have no plastic bottle at the moment. what kind of plastic would you suggest purchasing to make these?
How can these be adapted to a mask with a filter pocket inside, such as the classic Olsen?
You can look in you cupboard for some other flexible food container. The Olsen can have a strip of fabric added (as shown in the post) to make a couple channels.
Thank you for continuing to make mask wearing easier. Your pattern for eyeglasses is breathable and anti fog! My favorite mask. That zip tie in there really worked well for breathing. I can’t wait to try this frame. Thank you for sharing your creative ideas.
So great to hear! Now if only I could make jeans that fit as well!
This is a brilliant solution to multiple problems Barb. It provides much needed mask structure and helps the environment by implementing the four R’s of Reduce, Reuse, Repurpose, Recycle. Thank you so much for sharing your creations.
Now, I look forward to your solution for well-fitting Jeans!!! lol
Brilliant Barb! ❤️ You’re such a clever, practical person. God bless you and thank you for sharing with us.
I appreciate that! I hope someday we can all tell these stories to young ones…
You are a genius and I hope I can use mask frame with all the cotton masks I sewed. If not I make your Mask for Glasses.
Much appreciation for your genius in helping us get on with mask wearing.
Sarah 🙂
I’m pretty sure you can or if needed print the pattern slightly smaller…
Your brain is so special!!! Look at you coming up with new mask ideas every other day! Thanks for looking out for the good of everyone. 😘
Well, I’m blessed with a very visual imagination. It’s like exercise for my brain. Sewing, illustration, geometry, design all come together.
‘Special’ is a good for it… I could get more done if it didn’t need sleep. ‘Glad to help 🤷🏻♀️
Barb – I just bought one of the muzzle-like ones – haha – this is way better. Thanks!
Well, then you can compare! Let me know.
I am constantly in awe of your creativity, energy and generosity in freely sharing such fun and useful ideas. Thanks again!
Ah, it’s what I do and have been doing ever since. My mom was a thinker too, always figuring out a better way. Thankfully I see it in my kids too!
Thank you! I’ve been struggling to figure out a solution to this problem. I’m looking forward to experimenting with this brilliant idea.
Watch for a video as well. ‘Hope it works for you!
Thanks for sharing all your great ideas with us! Bless you! Helen
It gives me great joy to figure out solutions, if even on a small scale. Some do crosswords, I design!
Thank you Barb! What a great idea!! I have to try this. I love the fitted mask for glasses pattern and this looks like a winner too. I have shared that pattern a couple of times in a Facebook group.
Awesome, thanks for sharing! Better breathing – one mask at a time…
Barb you are truly AMAZING.
Thanks a million for this. – I’ll be trying it out today.
I’m in Melbourne Australia and we’re in strict lockdown – only allowed 1 hour of exercise out of our homes every day.
I actually hate going out purely because of the collapsing mask issue so you may have saved me both physically and mentally.
Thanks again.
Chris 😊
That makes my day! Best of luck from across the globe! I hope it is good for you.
placemats from the $1 store would work or binder thingies/ page covers from there as well. nice idea, thanks so much!
Thank you so very, very much!
I kept pulling the mask away from my mouth. And we all know we should not be touching our faces or mask. I really appreciate the patterns you have been graciously allowing us to use..
Glad to help in whatever I can!
I’ve watch your video to the end I love it I want to know if it will fit someone with a full face structure because everyone has different size or is it one size fit all for kids as well as adult.
Love it
My face has some cheeks! I think so!
That looks awesome! Does it also help keep the mask in place while talking? I find it always slips down if I talk more than a few sentences. Can’t wait to try it!
That sounds like the nose does not fit good enough. Maybe you need a good wire around the nose piece too. We are all not the same, you may need to adjust patterns a bit.
Thank you! Yes, I plan to try your pattern for glasses next ☺️
Love the way you do the nose wires. I found that putting the nose wire about half inch down from the top works for me. The fabric goes under my glasses and the nose wire is at the ‘softer’ part of the nose and make a better seal for me. I also make a channel from the nose wire to bottom of mask and insert a cut down zip tie to keep the mask away from my face. Going to try your frame today.
Yes, I had tried the zip tie as well. We all have different faces, so we need to customize for ourselves. Good luck with the frame!
Superb!!! I made my first one from a clear plastic salad box and then tried a 650g yogurt container – it’s a bit thicker but I was able to use the xacto knife for the holes (scissors for the outer edges) and that worked like a charm. Then I realized that I could get two from one container so have passed the second frame to my neighbour to use in the masks I made for her. I will be offering to make them for the other neighbours in my building to whom I’ve supplied masks as well.
Oh, good thinking! I hope it makes for more comfort wearing your masks.
Thank you so much Barb. You’ve taken the hard work out of coming up with a design that works. I love that it’s so simple and easy to make. I can now make them up for my elderly clients and myself. Good job.
XXX
Where do I find the instructions for the Fitted Face Mask for Glasses pattern? I do not mind paying for it. Just give me a price, please
You can find it here and also see there is a video: https://youtu.be/Nx1I7CzlPLM
Thank you so much for your designs and the hats work you put behind keeping us all safe and comfortable ( to whatever degree is possible anyway!) My favourite pattern is the Ultimate Mask because it covers the nose and chin and glasses don’t fog either. I used a kitchen cutting sheet for the frame.
What about the wonderful mask for glass wearers pattern? I have a bunch cut out and would like to incorporate them. Do you think just an overly with channels would do, or better yet use the fold-over for the elastic?
Thanks, Kim