Easy Poured Concrete Bowls
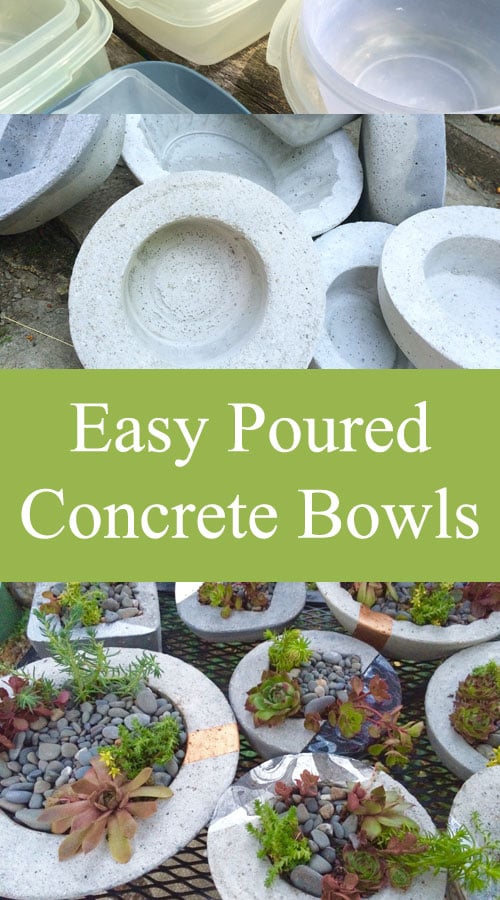
Lately this wonderful weather has meant more outdoor projects! You know concrete is one of my favourite mediums, and with the abundance of my garden lately, it just made sense to create some awesome bowls! Ok, I’ll admit, I hate to waste things so I had a bit (actually a lot) of ‘tupperware’ that was mismatched or missing lids. I knew I was saving it for something… You will love the beautiful shapes these Easy Poured Concrete Bowls can make in concrete!

If you have checked out my site you will see I have made quite a few concrete projects for my garden over the last 8 years. My stepping stones also use Quikcrete Sand Topping mix and I have found that they last really well, so I used it again. My concrete orbs used Portland cement. I also tried mixing sand with pure Portland cement, and found it to be quite the same as the topping mix, so save yourself the trouble and pick up (darn,it’s so heavy) a bag of Quikcrete for about $6-7.

You will need:
- Quikcrete Sand Topping Mix Concrete (like this)
- OPTIONAL Polypropylene Concrete Fibers (like this)
- Water
- Mixing Container & Utensil (shovel, spoon etc)
- Rubber gloves and Dust mask
- Variety of containers that fit inside each other comfortably.
- Some stones or like for weight
- Some release Agent like ‘Pam’ cooking spray or other grease.

Step 1:
Get set up so you have everything handy. Mix up your concrete by first adding the ‘Quikcrete’ to the bucket. Add water very slowly and mixing. Stir to the bottom and corners. I like to do smaller batches, as I find them easier to mix. I tend to keep the mix at a somewhat drier mix. It should just hold in clumps not run like pudding. I then add a small amount of the fibers (optional), and mix again. The fibers are meant to reinforce the structure of the concrete since there is no metal etc inside the concrete. I would suggest larger bowls need more reinforcement. Mine were on the smaller side so they could have done without the fibers.
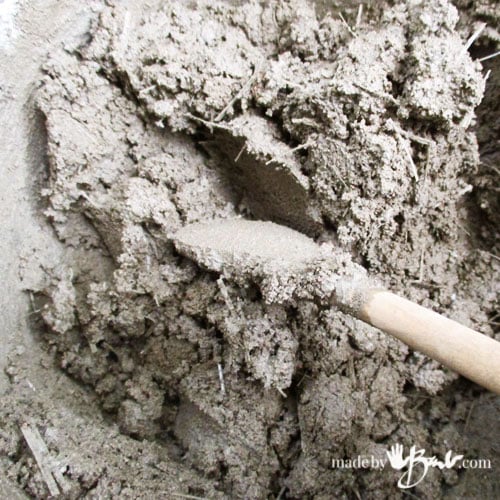
Mix again, to distribute the fibers evenly. The mix should not be leaching water.

Step 2:
Readying the containers. Make sure that the bowls and shapes are going to allow you to pull out the bowl. That means that the bowl needs to be wider at top than bottom and have nothing that obstructs it. Straight vertical edges do work but take more effort to pull out. It is also very advisable to have something that can flex a bit, but not to soft or it will bow out with the weight of the concrete. Dollar stores have a great variety as well. Spray the inside of the larger containers and the outside of the smaller ones. You don’t need much.

Step #3:
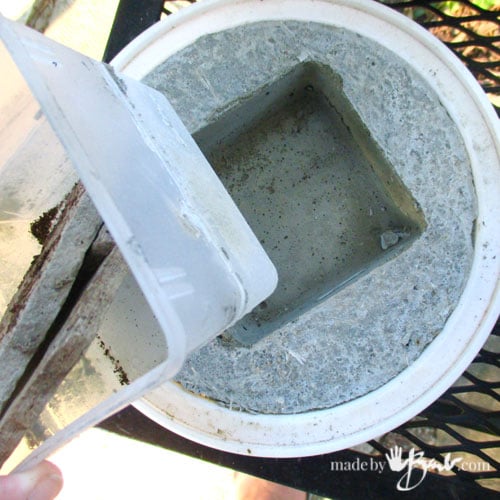
Plop some mix into the bigger of the containers and spread it around. You can use a gloved hand and push it against the walls. The trick to having concrete without bubbles is vibration. I have observed many ‘concrete guys’ working on driveways etc. There is a large vibrating stick that they use to get bubbles out. I just use my hand and slap the heck out the mix, and also slap (like trying to extremely burp a baby) the container. You can tap it on the ground as well. All these are doing the same thing, making air rise to surface.

Step 4:
Push the smaller vessel into the middle of the larger one. I sometimes like to add a bit of design by turning it askew, or even sloped. Let your imagination go wild. Again, I wriggle it to get any trapped air out and fill the voids with mix. The more you wriggle, the concrete levels itself. I used to try a wetter mix, but then too much water rose to the surface, which is what concrete does, so I started working a bit drier.

See here, they are all nestled and I have added the rocks to weigh down the centers.

‘Concrete guys’ work the surface after it has set for a bit. They trowel and brush it to work the out the water and disperse it. I used a small brush to do the same.

Step 5:
Leave it somewhere out of the direct sun if possible. Now wait… It takes some time to set properly, about 24 hours.
Step 6:
Once it’s set and no longer wet on the surface, gently pull out the centers. Then invert over your hand and let the bowls fall into your hand. If stubborn, slightly flex the form.

Step 7:
Optional. You may be happy and leave them this way, or further perfect them. These showed uneven surface colour since I had not discovered the brushing technique at that point.


Step 8:
Being a gal with her own power tools, I save my elbow grease and use power. Caution though! Use a mask as concrete dust is nasty nasty stuff! I use aluminum oxide discs on a drill sanding rig. I’m not over obsessed with the sanding, just evening out the surface colour.

Step 9:
Concrete leaches out chemicals that are not that friendly with plants. Also concrete loves to cure slowly and be wet to gain strength. I pile the bowls in a big bucket for a few days and change the water daily. The first day, the water is quite ‘soapy’. Once drained and dry, they will be a nice light gray colour.
 Step 10:

If you need some ideas for finishing see my post here. Get mixing… And collecting succulent plants… For more concrete bowls or even Polyhedron Concrete
Woah – starting to see how far you can take this with your other techniques – engraving or pressing and/or adding surface textures … succulents or alpine troughs … and/or bonsai great office desk ornaments (been eying all the lee valley hand tools for bonsai)
Oh yes! I now look at my salad bowls in a whole new way! I have more projects in the works and in the mind. Papercrete still in progress. Mold making on the radar! Enjoy! I do want to see your creations too.
I realized I can make my own larger pots for the plants I bought and even use their own containers as the inside mold! Then I’ll have some Quikcrete on hand for the mosaic stepping stone project as well! It all comes together . . . 🙂
For sure, just decide whether drainage will be an issue. I like portability of smaller ones.
Great idea! These look fantastic. Have you ever tried bigger ones? Would this work for a small fire pit, if suitable containers could be found?
I could well imagine that it would work as concrete does not burn. The challenge would be the weight of the piece and getting it out of the molds. I’ve seen many table-top small fire-vessels that are fuelled by some other method that wood, and usually have some rocks to cover the fuel container. That would look quite lovely… I have visions of that in my minds eye already! Let me know how it goes!
Working with concrete all day long, it’s fun to see the fun and creative things you can do with it at home.
Yes, it is a fun media! ‘And I like the permanency.
Regarding the Silicone sealand and cornflour, is it possible to cast your hands in this to make cement hands?
I have not tried it directly and have noticed that it does stick to hands until gets mixed with enough starch. I think I know what you want to do… I cast some hands in concrete by first making a plaster cast from a life casting in alginate.
I am not so sure I would want the silicone on the skin. It worked out well, you just need to consider the way the mold will be assembled and where the ‘undercuts’ are. Good luck!
I was interested in the stripes and designs in your work. But it is not addressed in this blog. Can you tell more about that? I love the metallic! Beautiful work! Thank you cathy
You may want to see this and this Hope that helps
These are fantastic. I’m about to try my first concrete project. What do you do with the water you soak the set concrete pieces in? Is it safe to slosh in the yard or do you drain it somewhere special? Thanks!
I don’t think it was that toxic, it felt a bit ‘soapy’. It was probably just a bit more alkaline than usual. If you are concerned about the garden then possibly it could go down the drain. Mine ended up somewhere in the garden or on the flagstone path. No prob. There are also the rustic bowls and the live edge ones Welcome to the concreting world!
I just discovered your amazing site and have bookmarked it for sure !! So many wonderful ideas ? Would you happen to know what type of food safe sealer I could put on concrete fruit bowls ?
Again, many thanks for sharing your talent !
So far I have not crossed that line into sealers. There are some made for concrete kitchen counters which I’d say are food safe. I’m hoping to make some and I have my eye on beeswax as it is quite water repellant. Happy making!
Thank you !
After lots of researching, beeswax or a mixture of beeswax and mineral oil seems to be the best option. The countertop sealers are good but the price is up there !
I’ve always noticed how hard it is to get the beeswax off my utensils when making solid lotion bars. And historically it was used to make oilcloth. It worked great on my Uggs too! Great!
Fabulous idea for the Uggs !! The most comfortable and warm boots out there! Your solid lotion bars sound really interesting !!