Make your own Mold for Concrete – Part 1

If you like gardening as much as I do, you may enjoy having some little concrete critters to add some extra interest. I’ll show you how to make your own mold to cast concrete forms. Perhaps you’d like some sweet little concrete birds perched on a rock. ‘And they last winter and summer, look great with aging and moss growth as well. Here’s a way to cast your own! This easy mold material works great and is quite inexpensive!.

You will need:
- pure silicone caulking like this (make sure it isn’t latex)
- 1 box of corn starch
- rubber/latex gloves
- a ‘non-precious’ bowl
- vaseline (as a mold release)
- a ‘critter’ to use as the master form (or make your own)
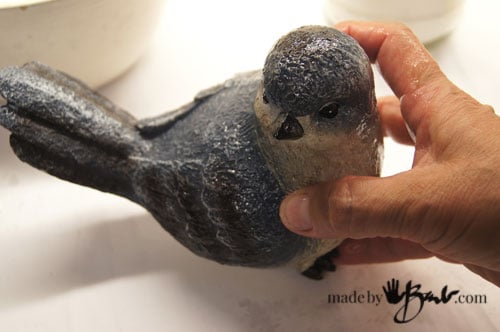
Since I have a weakness for birds, I was happy to find this fellow at a dollar store, not too large or too small. Also take a look at the shape, as it needs to be simple. In order for molds to release the form there have to be minimal ‘undercuts’. This means no areas that are very deep or complicated like holes or legs. A simple shape with surface details is best. This little guy has minimal details, short beak, and a rough texture which makes it forgiving in concrete.

Yes, he’s shiny, as he(she?) needs a coating of vaseline as a mold release. Smear him up good!
Making the Molding Compound:
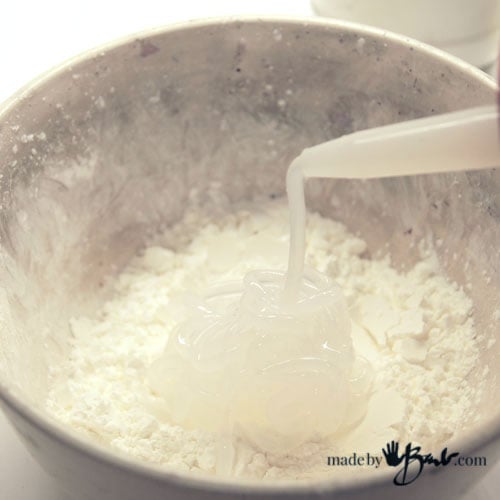
Now to make the molding compound. In a bowl that is not too precious (as this may not come off) put a pile of cornstarch at the bottom. It’s sort of like making pasta dough… Put the silicone in a caulking gun, cut the end AND poke a hole in the tube, then squirt it into the bowl (I used about half a tube).
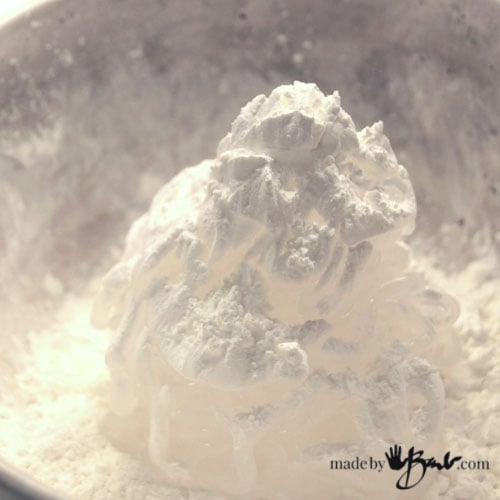
I put more cornstarch on top and started to stir with a paint stick ( disposable)
Once it starts to come together and become more like a pliable dough, you can get your fingers in there, trying to keep them covered in cornstarch
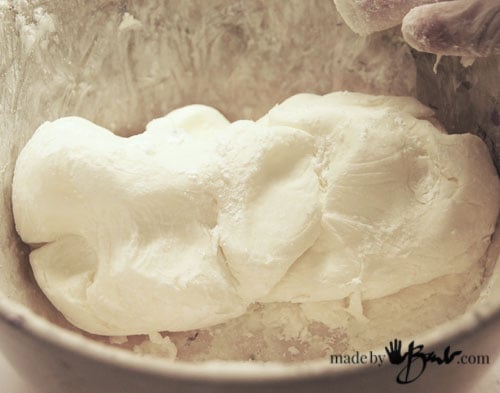
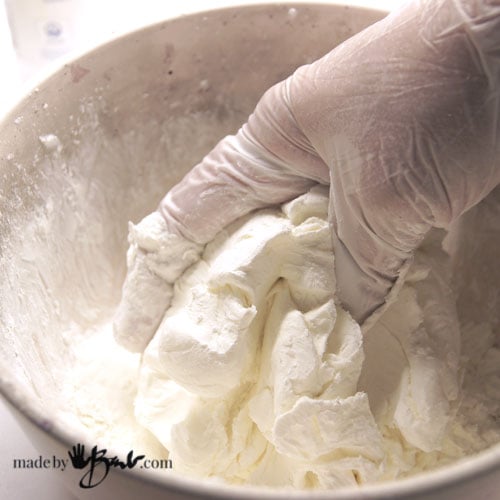
Work it til it feels like a modelling clay.
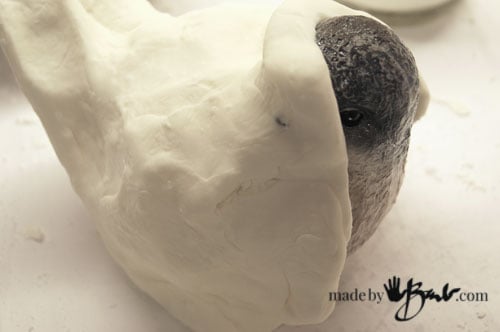
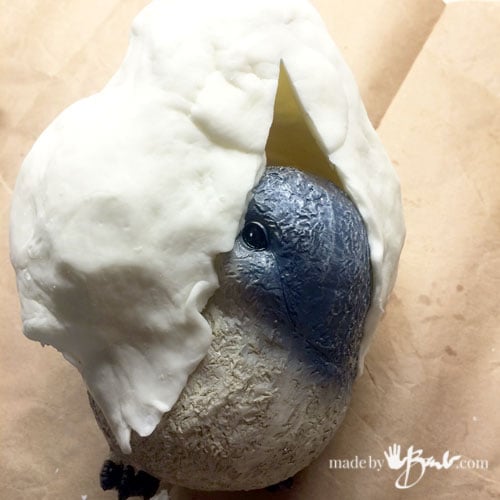
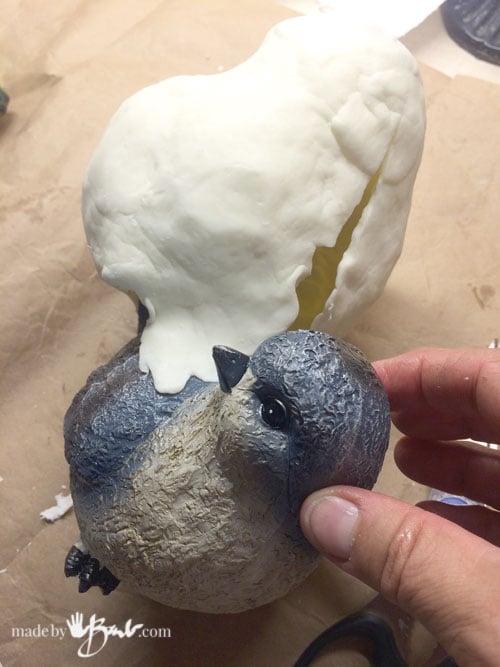
Knead it to have even texture and start to apply onto shape. You will need to flatten it and force it to wrap around the shape. You should try to get an even layer around all of the form. I find that about >1/8″ & <1/4″ is best. If it is too thick it will not allow flexibility to take out the master form. I planned that the bottom would be the opening for pouring (usually the case) so I left it empty
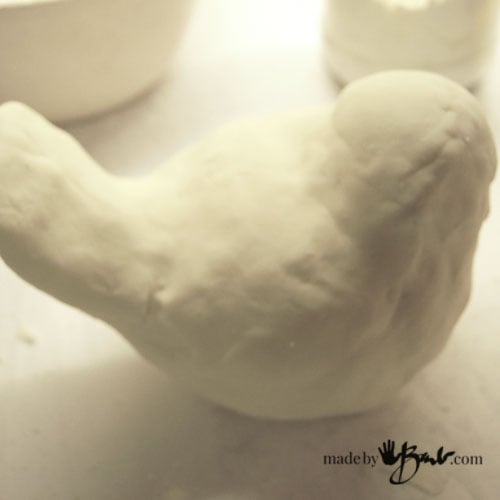
I brought the ‘dough’ around to completely envelope the shape. Make sure you press against the form to capture all the details. This mixture dries and stiffens quite quickly. Let set for a day once you have covered all.

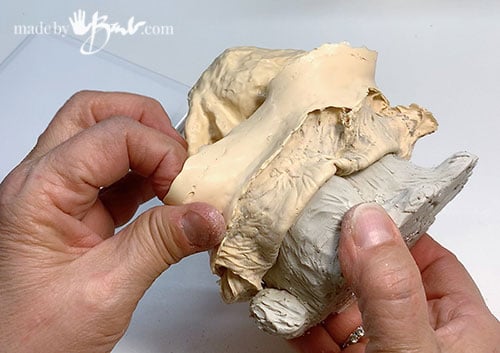
Once it’s set it’s obvious you won’t be able to pull the form out of this shape as it is. You will need to make seams that allow opening and closing, I cut up the middle and also up the bottom under tail. Sometimes you can see the evidence of where the original seams were in the original manufacture of it.
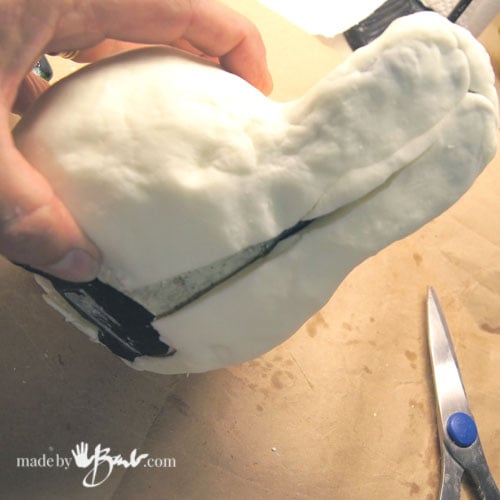
This allows the form to be pulled out. The silicone/cornstarch mix becomes quite stiff but still has some flexibility of silicone. I find it holds shape more that just pure silicone.
Here he comes out quite easily due to the vaseline.
You have now created your mold! Congrats! You may have some favourite trinkets that you can now mold.
See Part 2 for Casting your Own Critter out of concrete.
Be proud, you made it yourself!
I have many other concrete projects that are quite easy…
Explore other uses of this Molding Material:

This molding material will work for a variety of projects only limited to your imagination. I have used this Face mold for concrete many times.
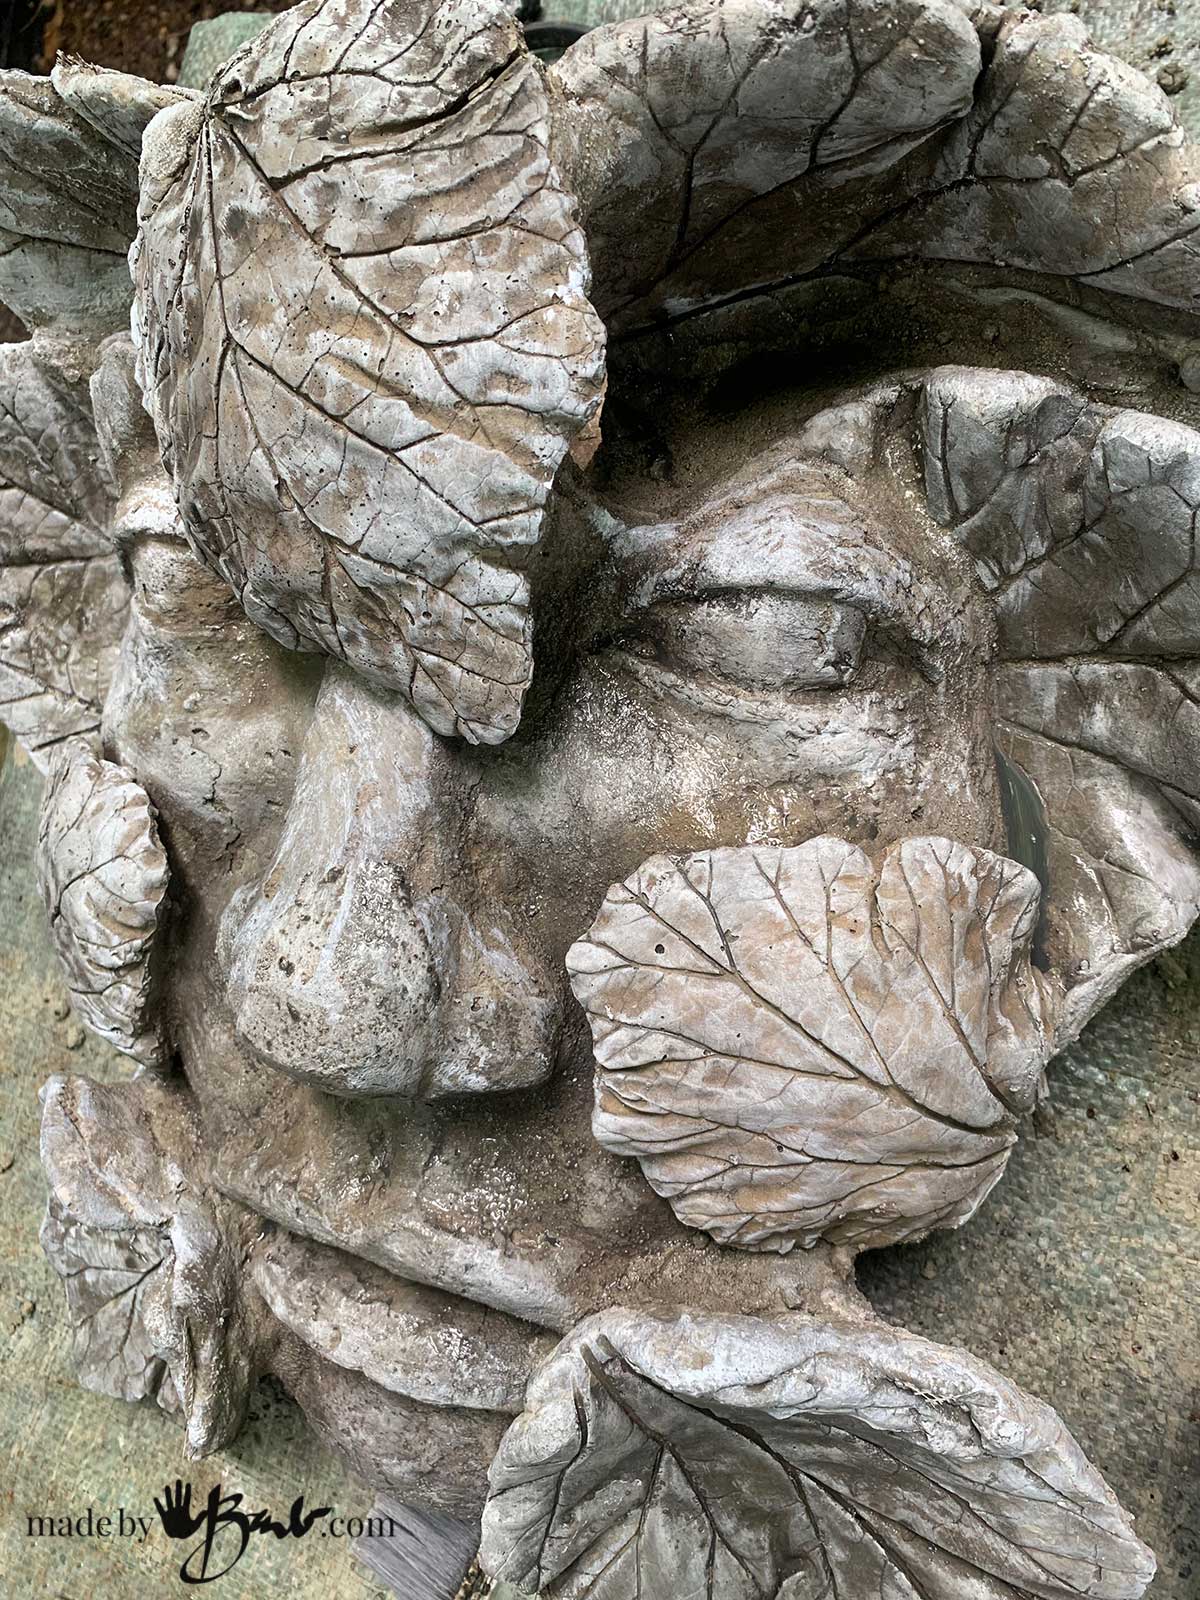
The face was molded with the silicone mold and then leaf-cast additions were added. Imagine what you can make molds of…
Another Option:
If you have a complex original sculpture you may also consider making a latex mold as it will be very very stretchy compared to this silicone mold.
Haha – well now I’m going to need to buy a house with a back yard to accommodate all these garden creatures. Great project! I am envisaging some little frogs on the roof deck now though …
Yes, do! More garden opportunity! Funny you should say frog… which I also made a mold. Problem was, each time I’d take him out of the mold, the foot would break off. ‘Need to perfect it!
You might need to put extra seams round the edge of foot and some wire bridging the angle inside the mould would help too. If you have all 4 feet on the ground, crouching, you could have an open base which is nice and easy to fill. I think the first way makes it more fiddly but if you want a frog……..
Thanks for the tips! Yes, there is usually a way when you think about it.
Barb I really love your ideas.
Thanks so much, I hate it when I see so much copying on the ‘net.
I tried making a mold and the silicone dried before I got my shape covered. Any suggestions?
That is one of the challenges! You need to have it all ready and get in on and covered. Your other option is some commercial mold-making material. I do not think there is a way slow it down as the cornstarch makes the silicone start to cure.
Hi Barb!
Thank you so much for showing us this!
I can’t wait to get started!!!
Hope you have a very Happy Thanksgiving!
Judy
I didn’t see the final mold?? Did you show us how the mold actually turned out??
Well, the white shape is the mold… It looks much like the shape of the bird. You can see it in use here. It becomes a white mass once done and depends on the original shape. Hope that helps
Thanks again Bárbara por shearing love ur projects
Blessings for you 💛🌺
So creative! I have been working with different medium and love working with concrete premix
This is so cool love to do more molds . Thank you for sharing ,Linda
Glad you share the feeling! It gets addicting! And I’m happy to see how concrete is starting to be an acceptable indoor material as well. I’m hoping to try some 2 part molds for more complicated things. Endless options!
Thank you for sharing how to make the mold! Plan to use and show others.
I’ve used that method often. You may also like these stamps and this Big Garden face Good luck, just don’t get the silicone all over your hands… happy mixing!
You are welcome! I have more ideas for some molding but Canada is too cold now for more. Subscribe and you won’t miss when I do more cool projects…
Very nice! I made a birdbath using Vinyl Patch & it’s wonderful. Now I’m ready to use silicone caulk to make a mold from the birdbath so I can make many more for friends. I can’t grow the Elephant Ears perfect or big enough. Have you ever done this?
Thanks for sharing! I am not familiar with the elephant ear plants here in Canada. I use the rhubarb leaves. If I am short on them, I use the big leaves from the thistle plant, usually many at the sides of the road. I find that silicone caulk/cornstarch mix can vary, higher on the silicone side to be more rubbery and stiffer with more cornstarch. It all depends on the shape of your original piece.
Hi barbmaker I’m real interested in all manner of garden projects could you be so kind to send to my email step by step instructions to make these moulds as well any other projects you would not mind sharing thank you so much
I have so many garden projects (under HOME > CONCRETE) here I am in the process of making an ebook that will be available soon. In the mean time you will just need to use each of the posts as they have much info and instructions on each. Happy making!
Hello! I just would like to give an enormous thumbs up for the good info you may have here on this post. I will be coming back to your weblog for additional soon.
Oh, I do hope you return. I don’t post too many tutorials but I strive to make them thorough and give the encouragement to try it. Thanks kindly
This is really interesting, You are a very skilled blogger. I’ve joined your rss feed and look forward to seeking more of your fantastic post. Also, I have shared your web site in my social networks!
Hello! I just would like to give a huge thumbs up for the terrific info you may have here on this post. I is going to be coming back to your weblog for a lot more soon.
Thanks kindly, do come back often and subscribe.
I simply want to say I’m very new to blogs and actually enjoyed this blog site. Very likely I’m going to bookmark your blog . You surely have really good writings. Thank you for sharing your webpage.
I appreciate the information on your site. Thank you so much!.
My brother suggested I might like this blog. He was totally right.
This post actually made my day. You cann’t imagine just how much time I had spent for this information! Thanks!
What a really cool way to make a mold out of anything. The sky is the limit! I see some fun concrete projects coming soon!
I’m still tossing some new ideas in my head; check back or subscribe…