Make your own Mold for Concrete – Part 1

If you like gardening as much as I do, you may enjoy having some little concrete critters to add some extra interest. I’ll show you how to make your own mold to cast concrete forms. Perhaps you’d like some sweet little concrete birds perched on a rock. ‘And they last winter and summer, look great with aging and moss growth as well. Here’s a way to cast your own! This easy mold material works great and is quite inexpensive!.

You will need:
- pure silicone caulking like this (make sure it isn’t latex)
- 1 box of corn starch
- rubber/latex gloves
- a ‘non-precious’ bowl
- vaseline (as a mold release)
- a ‘critter’ to use as the master form (or make your own)
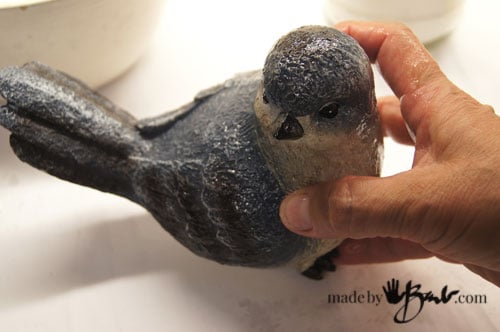
Since I have a weakness for birds, I was happy to find this fellow at a dollar store, not too large or too small. Also take a look at the shape, as it needs to be simple. In order for molds to release the form there have to be minimal ‘undercuts’. This means no areas that are very deep or complicated like holes or legs. A simple shape with surface details is best. This little guy has minimal details, short beak, and a rough texture which makes it forgiving in concrete.

Yes, he’s shiny, as he(she?) needs a coating of vaseline as a mold release. Smear him up good!
Making the Molding Compound:
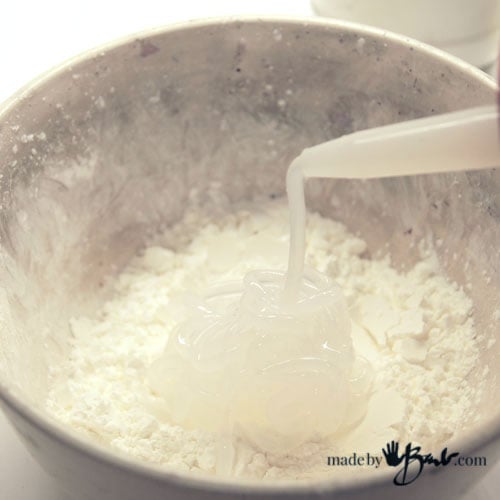
Now to make the molding compound. In a bowl that is not too precious (as this may not come off) put a pile of cornstarch at the bottom. It’s sort of like making pasta dough… Put the silicone in a caulking gun, cut the end AND poke a hole in the tube, then squirt it into the bowl (I used about half a tube).
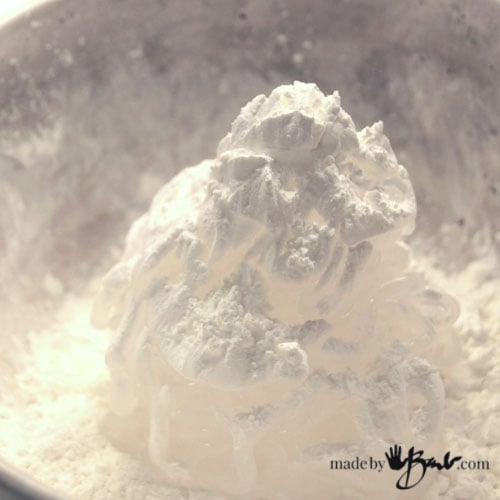
I put more cornstarch on top and started to stir with a paint stick ( disposable)
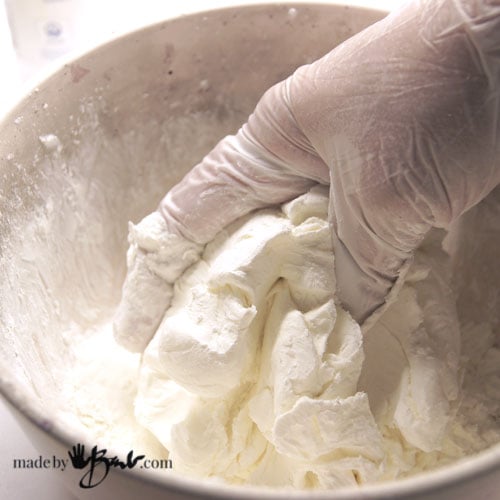
Once it starts to come together and become more like a pliable dough, you can get your fingers in there, trying to keep them covered in cornstarch
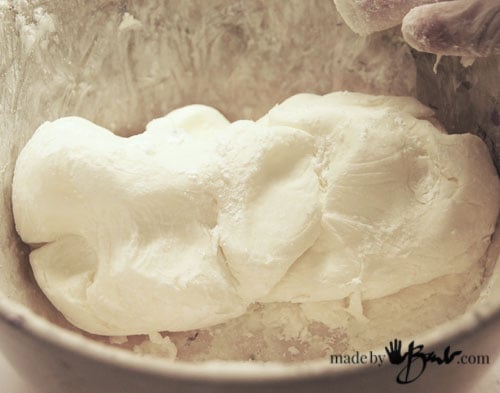
Work it til it feels like a modelling clay.
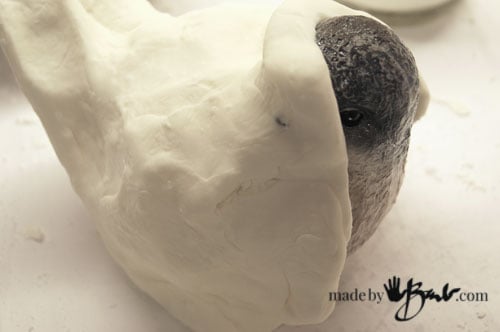
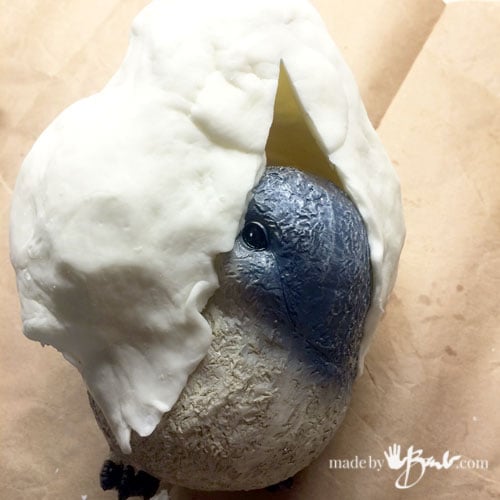
Knead it to have even texture and start to apply onto shape. You will need to flatten it and force it to wrap around the shape. You should try to get an even layer around all of the form. I find that about >1/8″ & <1/4″ is best. If it is too thick it will not allow flexibility to take out the master form. I planned that the bottom would be the opening for pouring (usually the case) so I left it empty
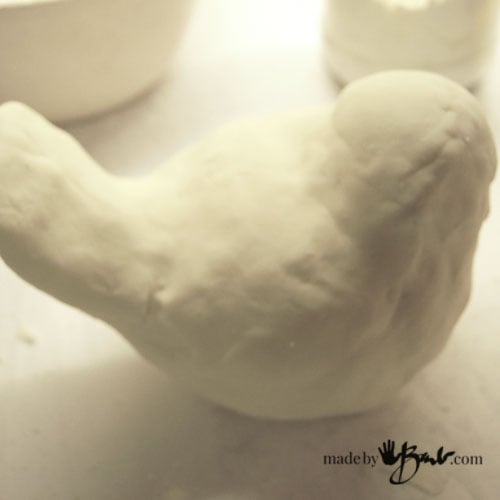
I brought the ‘dough’ around to completely envelope the shape. Make sure you press against the form to capture all the details. This mixture dries and stiffens quite quickly. Let set for a day once you have covered all.

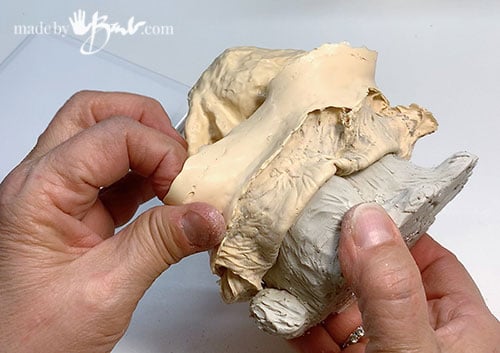
Once it’s set it’s obvious you won’t be able to pull the form out of this shape as it is. You will need to make seams that allow opening and closing, I cut up the middle and also up the bottom under tail. Sometimes you can see the evidence of where the original seams were in the original manufacture of it.
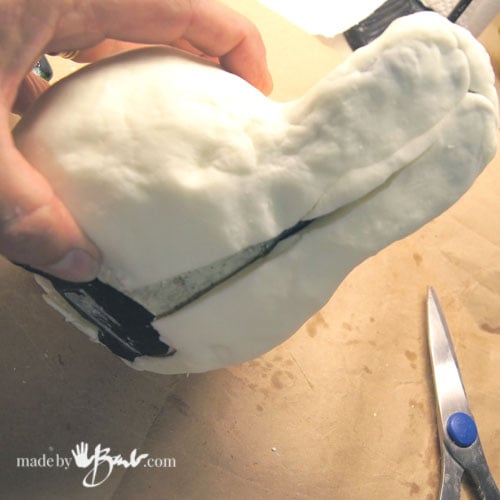
This allows the form to be pulled out. The silicone/cornstarch mix becomes quite stiff but still has some flexibility of silicone. I find it holds shape more that just pure silicone.
Here he comes out quite easily due to the vaseline.
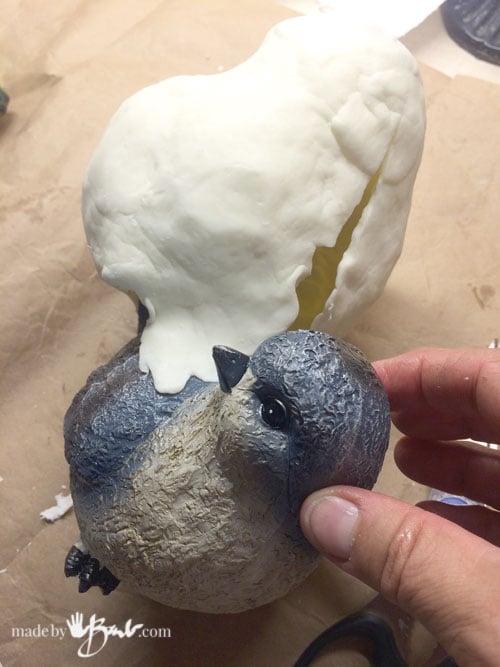
You have now created your mold! Congrats! You may have some favourite trinkets that you can now mold.
See Part 2 for Casting your Own Critter out of concrete.
Be proud, you made it yourself!
I have many other concrete projects that are quite easy…
Explore other uses of this Molding Material:

This molding material will work for a variety of projects only limited to your imagination. I have used this Face mold for concrete many times.
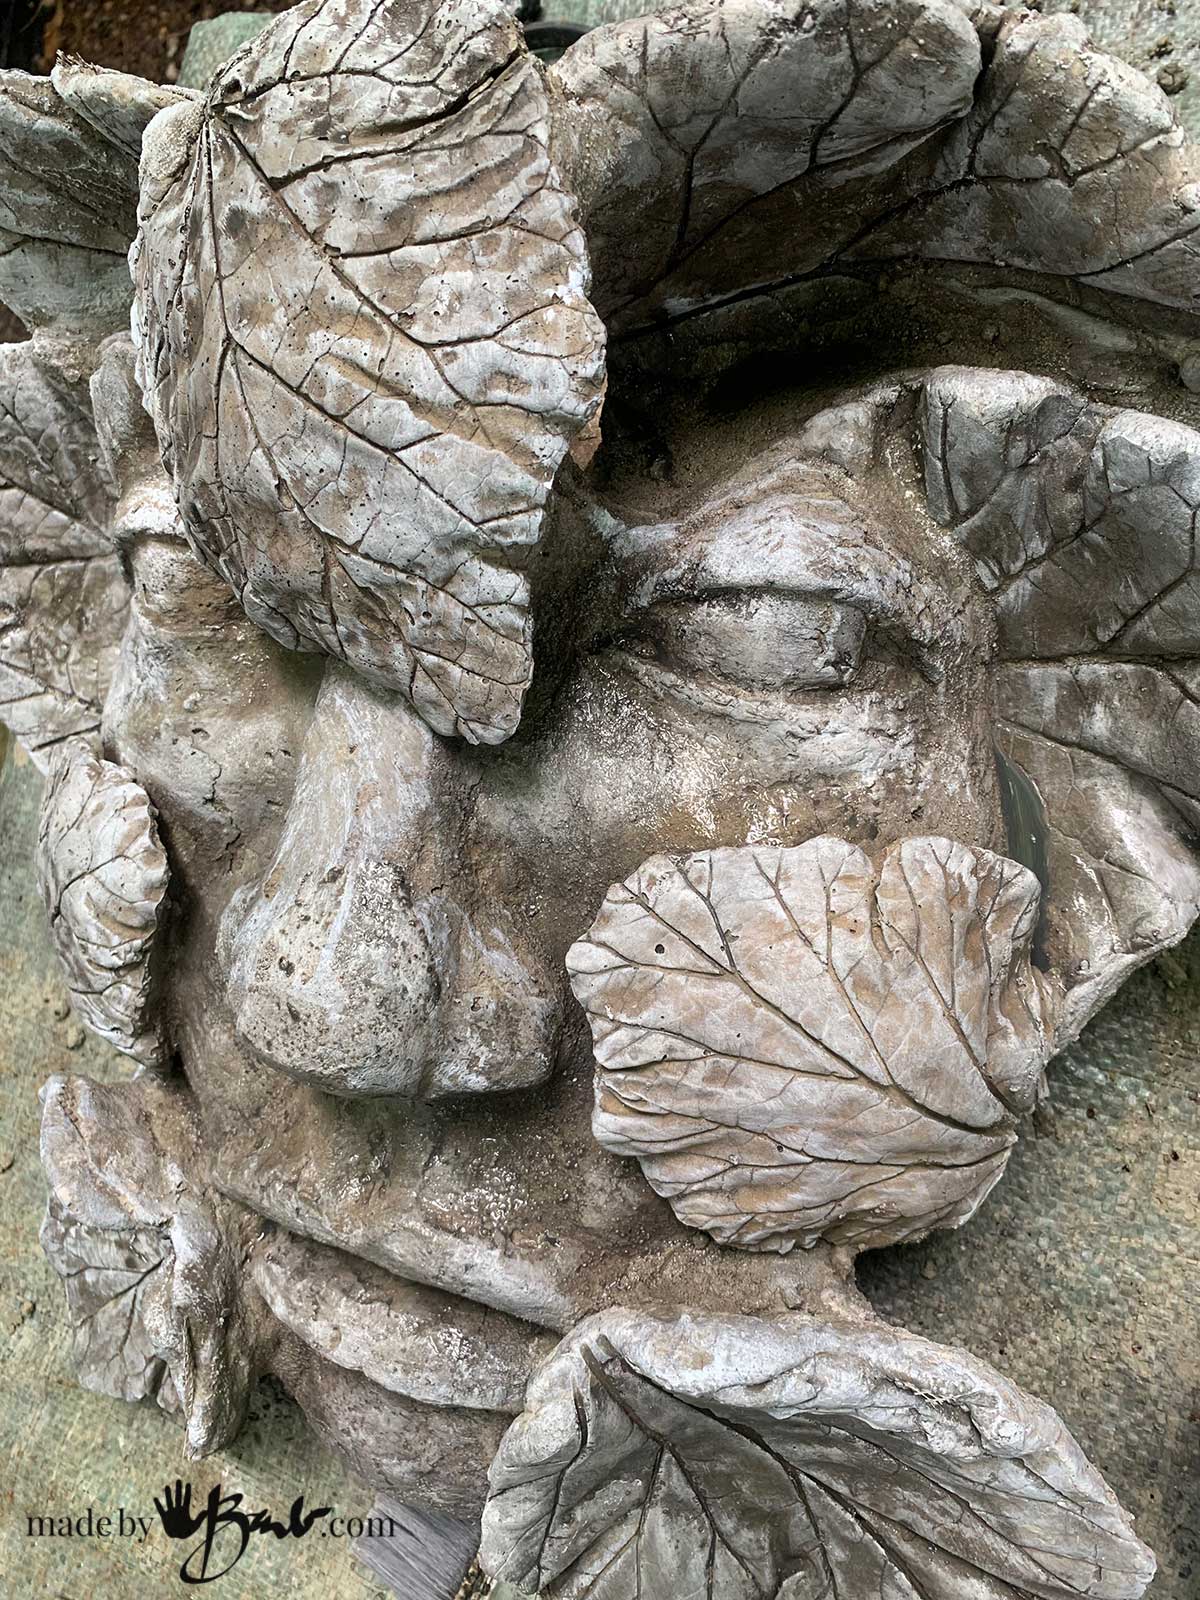
The face was molded with the silicone mold and then leaf-cast additions were added. Imagine what you can make molds of…
Another Option:
If you have a complex original sculpture you may also consider making a latex mold as it will be very very stretchy compared to this silicone mold.
Love this blog. Is there a blog on making a cement leaf birdbath?
I’ve seen them. Would love to try making one.
If you check out my post here you can just make a mound of some damp sand and form the leaf over it.
This tutorial is awesome! You really inspired me into trying to make a school of fish floating over my hosta garden. I was wondering, how many critters can you make with the same mold? Is it really resistant? – thanks! Jen
Hi Jennifer
I have used the bird mold probably a dozen times and it doesn’t seem to change at all. The only problem I could forsee is that if one part of the mold is too thin and you stress it too much to rip. I have made a few more lately and a quite complex one that is not posted yet. I keep marvelling how wonderful this end material turns out. The only challenge is to figure out where the openings and seams will be. Areas that will need more bending to release the concrete can be thinned (shaved off with a knife) if the mold is too thick. I always figure if it doesn’t work, I can make another since it’s so inexpensive. Before you know it… you’ll be looking at things all over the place in a different ‘can-I-mold-it’ way! That’s creativity! You can check out the sculpting tutorial to see how to make your own master form… Good Luck!
Could you please advice me on what kind of paint I can use on my cement products
spesialy the foutains
Friendly regards
Johanna
Johanna: I like to keep things simple so most of the time I keep my concrete natural. My love for concrete is the longevity it has so adding a lot of paint will change that. Paint and water tend to not like each other very well. A surface paint will not withstand the fact that there is water in the fountain. For that purpose I would look into the professional grade concrete pool paint. (but even those need regular maintenance) I would suggest a good quality sealer (if you really want to paint it), one that is safe for birds as well. As you can imagine, that may be difficult to find. There are countertop sealers that are meant to be food safe. Depending on your location, there are different manufacturers.
Over my many years of painting around the house I have found that paints that are in contact with water tend to fail, even though there are warranties etc. For colour you could also look into an acid stain as it penetrates the surface since it is a chemical reaction. I know I am not being very specific, but each region varies and I am still on the hunt for a good sealer (as Canada has even less choices)
When in doubt contact the manufacturer… Good luck
Don’t you have to reseal the mold where you cut it before you pour the concrete in it ??
Petra: The mold is fairly sturdy and the elastic bands around it hold the cut closed. I have also discovered in my other molds that pinning through the seams also helps keep them aligned. It has worked quite well. If it is a nice clean cut and well wrapped with elastics it will be fine. If there is any small amount of leaking, it can be cleaned off afterward. Also see: the bunnies and hands.
Hi Barb!
I make papermache sculptures that are pretty simple in terms of detail. Do you think paper mache would be strong enough to make a mold? Can the mold be reused for multiple “editions”?
Well, There are a few things to consider here. Papermache is not waterproof so you would need some way of keeping it dry (plastic layer or a good waterproof coating) If it is very stiff and there are ‘undercuts’ it may be really hard to get the concrete out. Even when I made the concrete bowls I used plastic that had some flex to it. Having said that, the Rapidset Cementall sets so quickly that it may be done before the papermache would deteriorate. Maybe there is a way to do a small test on a scrap of papermache. That’s how I learn most, by trying… good luck and let me know how its goes.
Wow! So glad I found your blog. You are so creative! Have you considered using talcum powder instead of cornstarch? I wonder if the cornstarch will decay or mold. Probably not LOL it’s hardly real food. I am really enjoying exploring your blog. Thank you for taking the time to post all this!!
Talcum is quite bad to breath in. I have some molds that were in the shed over the winter and they are still perfect. I am amazed how they don’t change or yellow etc. There are other starches like arrow root and tapioca that would probably act the same.
How do I make a concrete head that’s hollow so that I can put a plant as hair in top.?
Well, it can get complicated as you may need to make an inner void (the planter part) or try something like this head. They ended up quite cute!
HI Barb,
how many time can you use these before they get destroyed?
thank you!
So far I have not destroyed any. It becomes quite a strong material. I’m amazed at how it survives the winter in the shed too.
I tried your concrete mold idea on an 6 inch figurine. I ruined an entire package of 100 percent silicone caulking. The mixture, when mixed with the cornstarch, never formed into a ball and stuck to my rubber gloves during application. Without any measurements in your video, it’s very difficult to get the consistency to work. I love your video, but it didn’t work for me and was just a big mess.
Gee, that’s odd as I don’t have a video of that. That’s a shame. As I had stated in the tutorial the silicone is squirted into the bowl of cornstarch and I toss it carefully keeping the cornstarch between my fingers and the silicone as yes(!) it’s very sticky. It’s like working with dough keeping the fingers dry. The recipe depends on humidity etc so keep tossing and incorporating until mix becomes a homogenous ball of dough. I’ve done it dozens of times and no problem, but then I don’t stick my hands into the silicone. When I am in doubt of a new media I often do a tiny test run. Good luck
I read on another website that silicone will stick to latex gloves, I’m going to give this one more try using different blue nitrile medical gloves.
I am pretty sure silicone will stick to anything! Make a nice bowl of cornstarch and then carefully keep turning it IN the starch (thats what dough makers do with flour) and it will get less and less sticky as it absorbs the silicone. Keep gloved hands well coated with the cornstarch as well. Perhaps you can search youtube as well.
Did you use the whole box of cornstarch (how many ounces?) to a tube of silicone?
I don’t have a recipe as it would depend on humidity etc. Just keep mixing in the cornstarch until it makes the right workable consistency. I gauge it to the silicone and estimate how much I will need to cover. Having more is better than not enough.
As I have explained, keeping the silicone in a mass in the bowl of cornstarch (like eggs in flour) will make for less sticking to fingers. When in doubt do a tiny test. Good luck