Make your own Mold for Concrete – Part 1

If you like gardening as much as I do, you may enjoy having some little concrete critters to add some extra interest. I’ll show you how to make your own mold to cast concrete forms. Perhaps you’d like some sweet little concrete birds perched on a rock. ‘And they last winter and summer, look great with aging and moss growth as well. Here’s a way to cast your own! This easy mold material works great and is quite inexpensive!.

You will need:
- pure silicone caulking like this (make sure it isn’t latex)
- 1 box of corn starch
- rubber/latex gloves
- a ‘non-precious’ bowl
- vaseline (as a mold release)
- a ‘critter’ to use as the master form (or make your own)
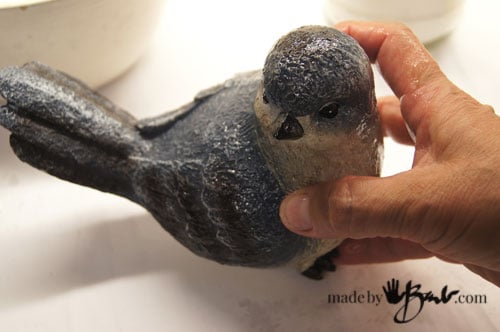
Since I have a weakness for birds, I was happy to find this fellow at a dollar store, not too large or too small. Also take a look at the shape, as it needs to be simple. In order for molds to release the form there have to be minimal ‘undercuts’. This means no areas that are very deep or complicated like holes or legs. A simple shape with surface details is best. This little guy has minimal details, short beak, and a rough texture which makes it forgiving in concrete.

Yes, he’s shiny, as he(she?) needs a coating of vaseline as a mold release. Smear him up good!
Making the Molding Compound:
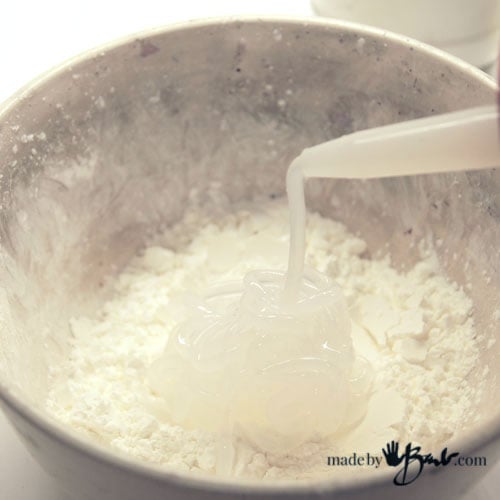
Now to make the molding compound. In a bowl that is not too precious (as this may not come off) put a pile of cornstarch at the bottom. It’s sort of like making pasta dough… Put the silicone in a caulking gun, cut the end AND poke a hole in the tube, then squirt it into the bowl (I used about half a tube).
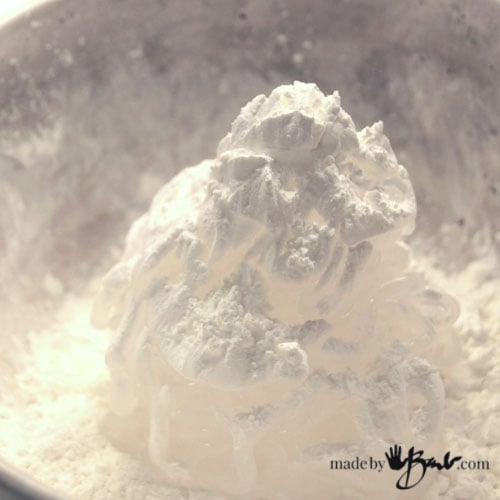
I put more cornstarch on top and started to stir with a paint stick ( disposable)
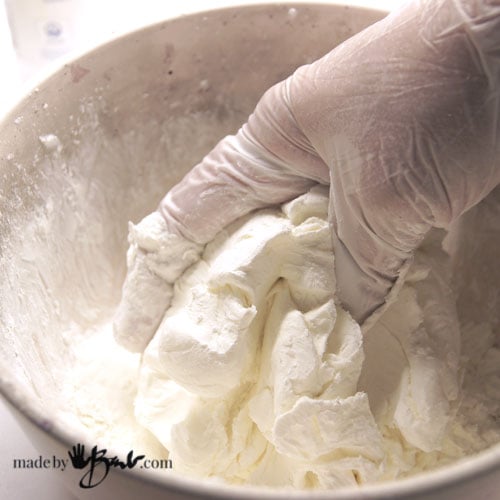
Once it starts to come together and become more like a pliable dough, you can get your fingers in there, trying to keep them covered in cornstarch
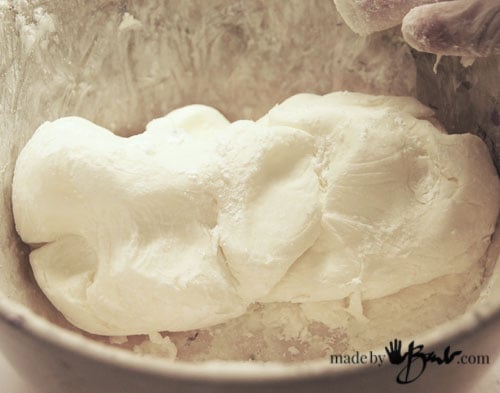
Work it til it feels like a modelling clay.
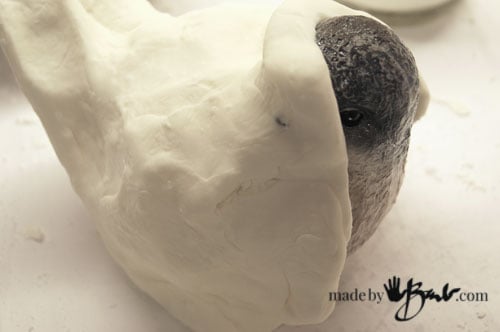
Knead it to have even texture and start to apply onto shape. You will need to flatten it and force it to wrap around the shape. You should try to get an even layer around all of the form. I find that about >1/8″ & <1/4″ is best. If it is too thick it will not allow flexibility to take out the master form. I planned that the bottom would be the opening for pouring (usually the case) so I left it empty
I brought the ‘dough’ around to completely envelope the shape. Make sure you press against the form to capture all the details. This mixture dries and stiffens quite quickly. Let set for a day once you have covered all.

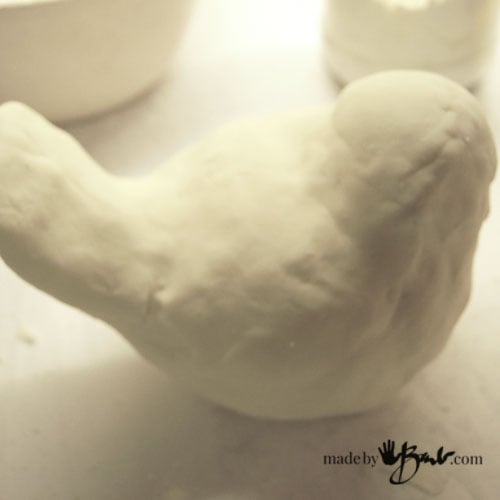
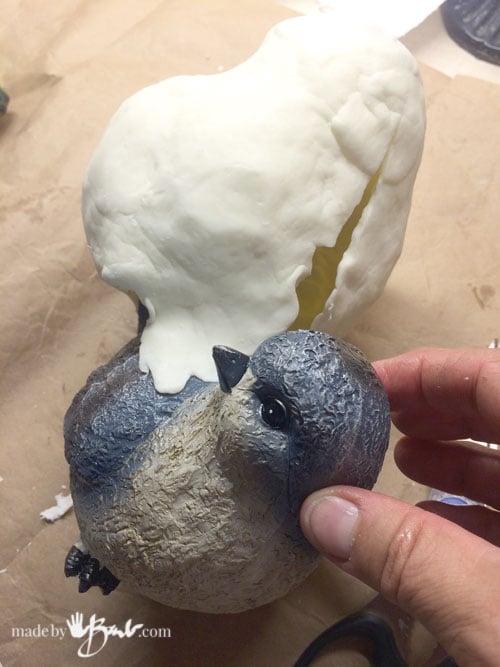
Once it’s set it’s obvious you won’t be able to pull the form out of this shape as it is. You will need to make seams that allow opening and closing, I cut up the middle and also up the bottom under tail. Sometimes you can see the evidence of where the original seams were in the original manufacture of it.
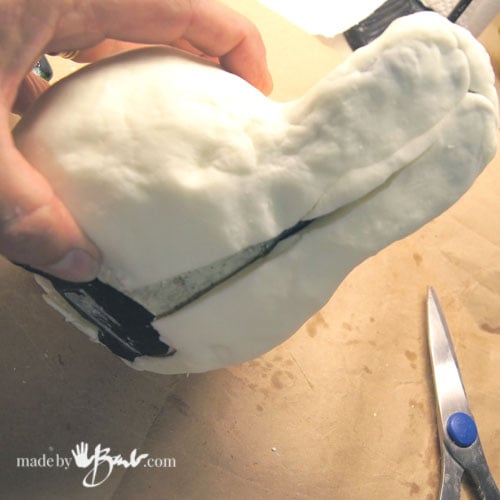
This allows the form to be pulled out. The silicone/cornstarch mix becomes quite stiff but still has some flexibility of silicone. I find it holds shape more that just pure silicone.
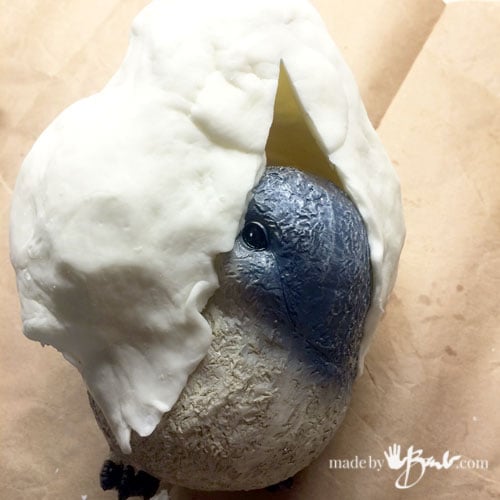
Here he comes out quite easily due to the vaseline.
You have now created your mold! Congrats! You may have some favourite trinkets that you can now mold.
See Part 2 for Casting your Own Critter out of concrete.
Be proud, you made it yourself!
I have many other concrete projects that are quite easy…
Explore other uses of this Molding Material:

This molding material will work for a variety of projects only limited to your imagination. I have used this Face mold for concrete many times.
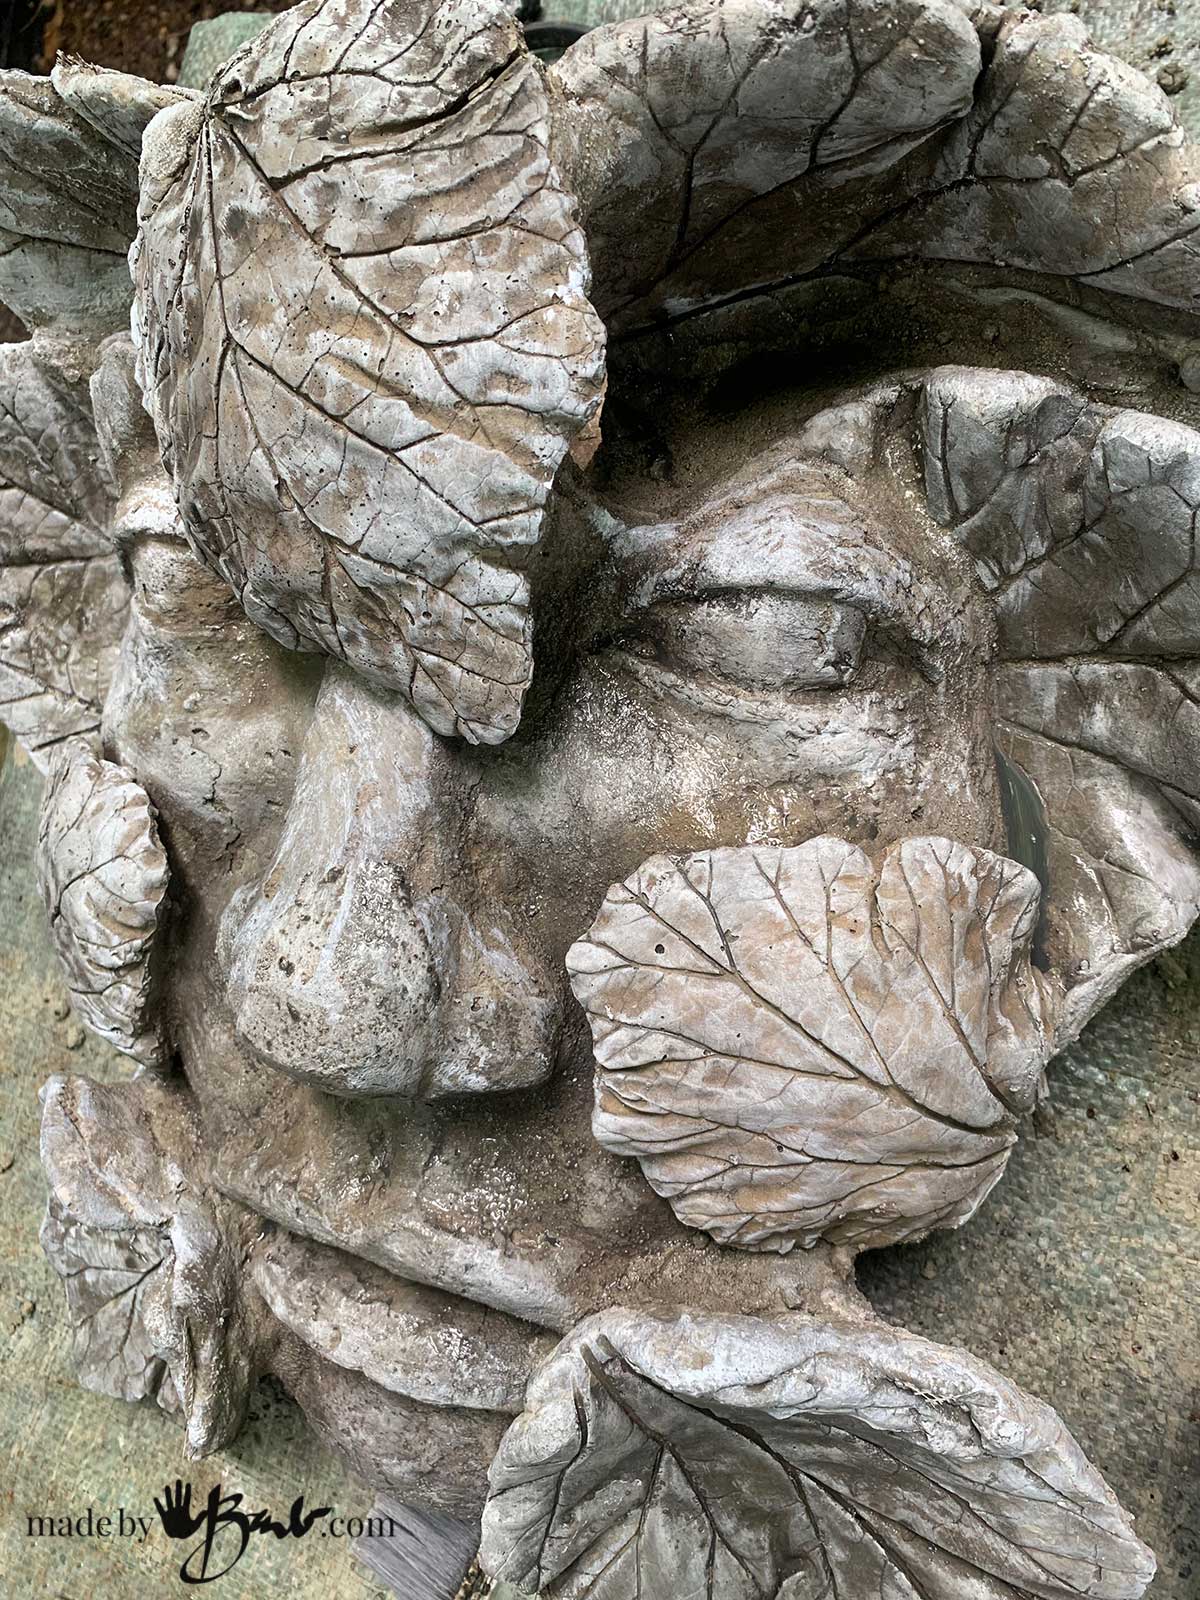
The face was molded with the silicone mold and then leaf-cast additions were added. Imagine what you can make molds of…
Another Option:
If you have a complex original sculpture you may also consider making a latex mold as it will be very very stretchy compared to this silicone mold.
Thank you for this information. Very well written. I can’t wait to try it.
I’m looking forward to the warmer months here also, as now I can only look out to see my sculptures with mounds of snow on them… but it’s still satisfying!
How do you get the mixture to be so smoothe? I have tried this, found it through you, and every time there are imperfections in the cast because the silicone and cornstarch mix wasn’t smoothe on the thing i was casting.
Do you mean the mix did not thoroughly mix or the mix did not get into the details? I know it sets pretty quickly and becomes stiff. Do push/force it onto the shape quite well and try for even thickness. It’s not a time to get interrupted… If the mold is too thick it can be cut quite easily to thin out I found too. I have not had a problem getting in the details as you see here I did have one person mention that they found that the clear silicone worked differently than the white, but I think it was a difference in setting time.
For some reason I cannot get the pictures to load. This is something I really want to try this summer. I have it pinned but really need visual aids. Thanks in advance!
I think it does not load the pictures when not viewing directly from my site. See the full post here Hope that helps!
I want to mold some large pieces of bark to later use as a texture for some outside garden pieces, in mixing a larger amount do you recommend mixing and applying the finished molding material in smaller amounts? Like a building up process? Will it bond with itself as I add or does it cure quickly? I am thinking about the time it will take to mix a batch and the time ir will take to apply and if it can be done this way.
Thank you for the great blog!
When I made the big Garden Face I had miscalculated and had to run out and get more after I used the first part. I found that the second addition did attach quite well (apply good pressure) There was a small section where it lifted so I used a bit of the pure silicone like a glue there. It worked nicely. The mix does cure quiet quickly once you have the amount of cornstarch incorporated when it’s no longer sticky. If it’s the first time, maybe get a ‘feel’ by doing a small test piece. I have had some people not realize the importance of mixing, keeping the cornstarch between your fingers and the silicone and getting enough mixed in. Happy casting!
I tried your corn starch and silicone caulk molding putty and the overwhelming chemical smell was extremely irritating to my respiratory system…so much, in fact, that I seriously considered a trip to the ER! It was almost as if I was inhaling pure ammonia fumes….outside, too! What happened?!
I’m not sure if they are all formulated the same but it is not odour-proof. You may be more sensitive than others. I do try to direct the fumes away with a fan or work outdoors. Which brand did you use? The amount used will also play into the amount of fumes. I have researched a bit and what you smell is the citric acid that is being released as it cures. Perhaps your sensitivity and the amount/location was just too much.
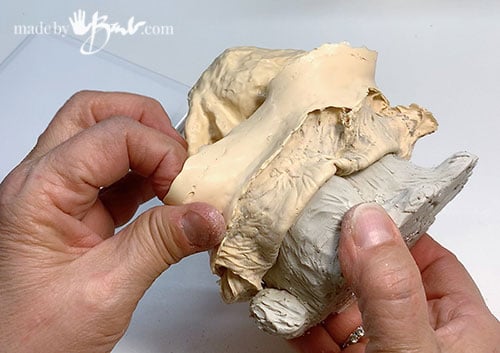
I made a clay head that has some good detail for making a cement sculpture. The clay is just sculpting clay so it doesn’t harden (although it might if I left it out) I’m wondering how hard I need to push to put the silicone and starch on it? I’m concerned it might “smash” the detail of the eye brows, mouth, eye brows etc.
Oh yes, the silicone needs to be forced into the details. That’s a tough one. I don’t even think the fluid pour one would like the moisture content in the clay. Is it air dry clay or the plastercine type? I have used the polymer clay to cast from but it can be baked. Tin foil can bulk up the inside to use less clay.
Hi I was wondering would this work for the holding hands art? I really want to do it myself, without a kit, but not sure where to start. Thanks in advance.
I think you mean this hand casting You would need a good casting of your hand(s) first… It can work!!
Great explanation and instructions/step order. The pictures make all the sense in the world. You should add that you are a great teacher. I learned from you today without struggling about this new topic. Thank you
I think I picked up on that from teaching young adults fresh out of highschool. Usually the first thing is to give them the confidence to just try. But don’t be discouraged, failures is how we learn… I didn’t take any course; I just observe what happens.