DIY Concrete Monster Eggs
Sometimes you just never know exactly what the outcome will be… These DIY Concrete Monster eggs are fun to make without fancy supplies, each being super unique!

Blind Casting Cement:
The element of surprise makes for some quite unique crafts. This method of casting DIY concrete monster eggs with balloons has some unpredictability to it and therefore creates different outcomes each time. I’m sharing some of my tricks and tips so you too can ‘lay’ some unique eggs…
You will need:
- 12″ Balloons
- Balloon pump
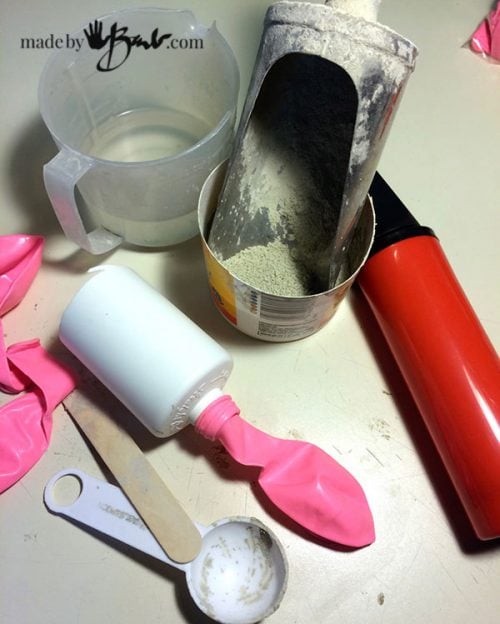
- RapidSet Cementall
- Container to mix cement in, water & stir stick
- Funnel or old plastic bottle with bottom cut off
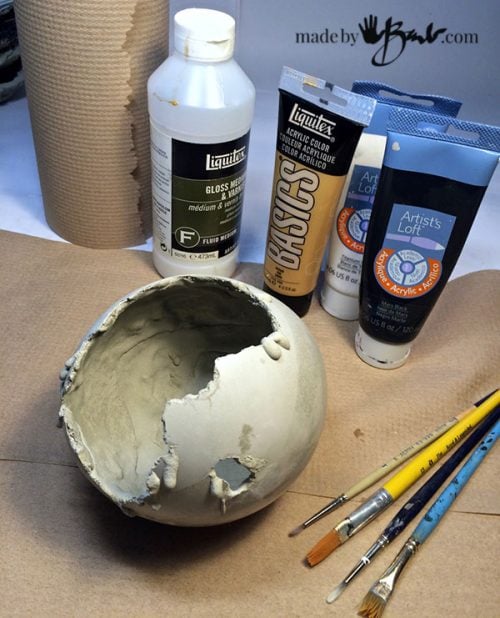
- acrylic paint (any kind) white, black, Gold,
- various paint brushes
- sharp tool to poke balloon
The First Pour:
Get the balloon ready by putting it onto the end of the funnel or bottle. This concrete mix is very quick setting so you want to be ready. ( Be safe when mixing cement and wear a good dust mask and gloves)
You will not need a huge amount of mix, just about enough to fill a balloon when it is not blown up. I would mix for one filling at a time. This mix incorporates the water fairly quickly so add slowly. Or add mix to water til you have a slurry that flows but isn’t too runny. The key is that it can pour like melted ice cream.
Notice how it is already changing as I pour it into my make-shift funnel. WORK FAST! (other regular concrete mixes do not work unless fast setting) Tap the funnel to make the mix flow into the balloon. The balloon should be full to the top.
Take it off of the end of funnel and hold over the end of pump. Blow up the balloon to about 8-9″ length. The one end of the balloon seems to stay pointier. Tie it off.
(Sorry, I was working too quickly to take pictures and juggle the tools and balloon.)
Now comes the part that is somewhat mysterious. You want to keep moving and tapping the balloon to get the mix to flow around inside ALL OVER. Tap and turn, and turn slowly but consistently for a while, 5 minutes or so. You can’t see through, but can feel the weight when it is in one section. The more coverage the better to coat the inside. You may have a fail until you get the hang of this fast setting type of concrete.
Once you feel it isn’t flowing any more, place it somewhere where it will not roll away.
Unmolding:
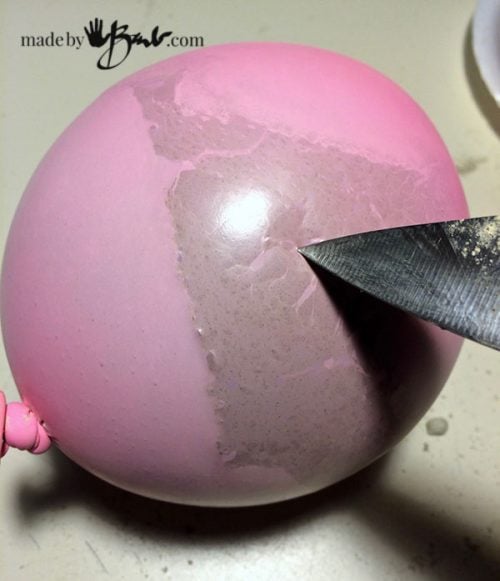
After about 1 hour it is ready to unmold. The heat has made the balloon change where there was no mix coating the inside. Poke the empty part CAREFULLY. It will start to pull away on it’s own.
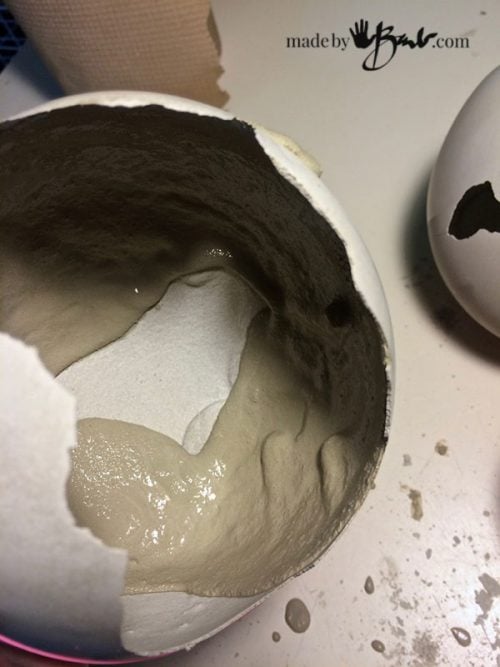
Here comes the surprise element; each one has a different shape of where the mix flowed. Some areas are so thin they may crumble. Don’t fret too much. It is such a little amount of mix and balloons are cheap, you can make more. Sometimes I leave some of the balloon on when I add some more mix.
Look at where you’d like the openings to be and carefully break away some pieces. If there are small holes you can put some packing tape to close them for the next pour. Cracks are great too! Sometimes the tied end will need sanding but leave that until it has been strengthened!
Subsequent Pours:
Once you are happy with the shape, mix some more concrete that flows quite well. It should be a bit thinner since the dried shape will suck some of the moisture out of it right away. The purpose is to strengthen if it is quite thin walls.
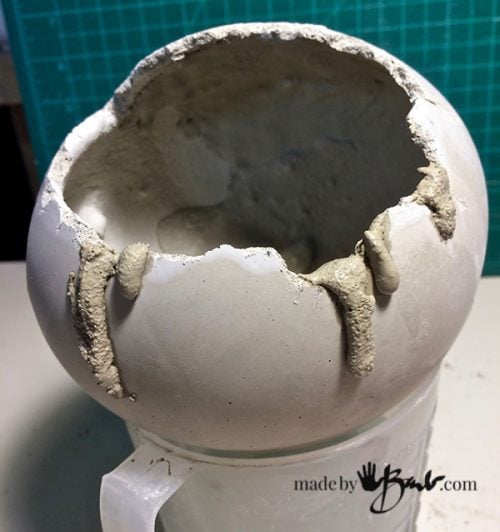
Swirl the mix around coating the thin walls. Let it flow right to the edges and even drip out. It gives a rustic look as if it had just hatched.
The concrete mix will stay put quite quickly inside the egg and you can add more. You will get the hang of it. If you’d like it really thick you can repeat these steps. You will also notice how it wants to roll. If you like, you can pour some more in to weigh down the part you’d like it to sit on (it’s little bottom)
Finishing Your Concrete Eggs:
Once it is set (one hour) it is ready to paint. I didn’t let it leach out the alkalinity in a water bath since I painted it. If you would like it plain, you could then soak it. Metallic paints are so opulent for the inside! The outside can remain quite natural since this mix is quite white when cured.
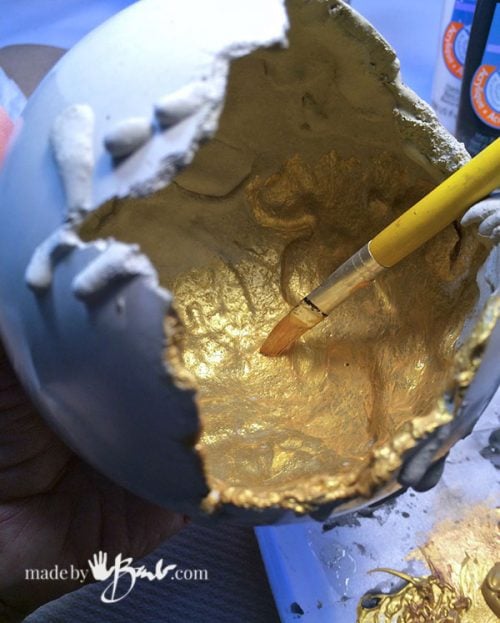
I like the metallic look so opted for the gold interior. Paint it on to cover the inside of the egg.
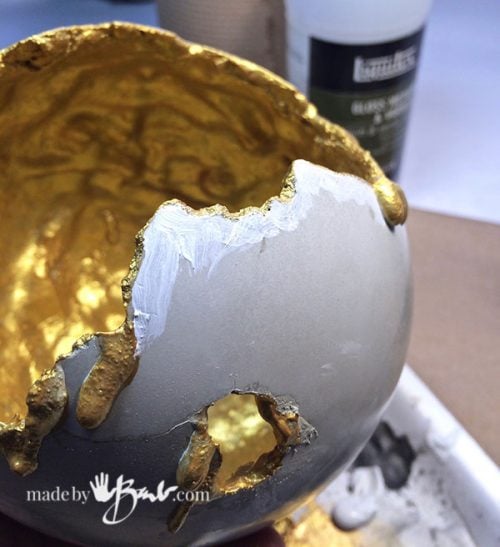
Paint the gold (or other metallic) To the edges. With a tiny brush paint the drips as well. To add more dimension I add a bit of white at the edges on the outside. It is really rough and ‘scrubby’ to look like a mottled egg. This concrete is very shiny when molded on smooth surfaces. The egg is shiny when cast.
There’s no rules here… Scrub it around, add a bit of black if you like. You could even dry-brush a tiny bit of metallics.
There were a few cracks that I enhanced with a fine black brush line. It adds the element of surprise, especially since they look so real! Squiggle away…
That was quite easy wasn’t it? The inside isn’t flat since I poured a few times but will be filled with something.
Fill as you like:
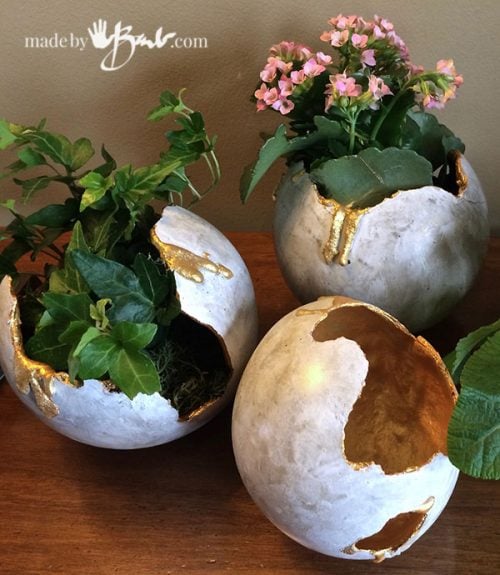
Each one ends up different with some having more openings than others. Perhaps it’s a table centrepiece, pile a few with mosses and greenery….
These became gifts with the small plants that I added. Make sure you set the plant deep enough to weigh down the bottom since they are still roly-poly and should not tip. I love that each one ends up different, and you can’t help but imagine what dragon had hatched…
They were quite a hit as hostess gifts at easter and spring!
I hope I have inspired you to ‘lay’ a few eggs yourself. If you are new to working with concrete this post can help. With proper care and preparation I have cast these indoors.
Plain and simple… and super easy! If you wonder what the heck you can make with all that concrete mix I do have quite a few projects that you can do. It is like having a instant concrete mix (cured in an hour) and super strong; one of my most favourite media.
Happy Concreting!









Love it when you create with concrete, Barb! Your eggs turned out great. What a fun, creative project. Did any balloons pop before you were ready :-)? Guess that wouldn’t matter too much since you’re using RapidSet.
Very cool! What’s next? Any more concrete projects planned for the summer?
Happy Creating!
Thanks! No, none of these popped, thankfully! I had some pop when I was doing the portland cement and yarn soaked ones. It’s un-nerving to be sprayed with concrete all of a sudden. I’m pretty sure it depends on the ‘sharpness’ of the ingredients!
Yes, there is a really cool project in the works…
I have been making these eggs as well. I have a suggestion. I had trouble with the funnel thing.
I’m a cake decorator and so I have decorator bags. I attach the decorator tip coupler to the decorator bag. This makes it easy to fill the bag with the cemental and then attach the balloon then squeeze the cement into the balloon. See mine on instagram.co./vennasnature/
Oh, of course! Thanks! I’ve even used that trick to grout tiles on the floor; worked great!!! Isn’t concrete fun!?
My daughter made Easter Eggs just about like that. They used balloons, colored crochet thread and glue. They were very cute and I still have it and my daughter is 31 years old!!!🤗
Oh yes! I made a light fixture in a similar way. My daughter enjoys it in her house. That’s what ‘making’ is just perfect for!
Hi, Barb ~
“It’s un-nerving to be sprayed with concrete all of a sudden.” — But isn’t that part of the surprise and fun of it :-)?
“Yes, there is a really cool project in the works…” — Exciting, Barb! We’ll all be waiting.
I like you web sight. The eggs are beautiful. I look forward to your next project.
Thanks, more in the works…
I absolutely love your projects, they are unique, fun and easy. Your tutorials are easily understood and complete making the whole process easy to follow. Thanks so much for sharing these marvelous ideas! You’re quite the inspiration!💡👍
If only I could keep up with all my new ideas…
WOW! What a fun project! Definitely going to make some of these😄. I have been wanting to make concrete spheres for years, after seeing the work created by Little & Lewis for their Bainbridge Island Home. Last year I found some of those giant balloon type balls with a handle made for kids to bounce on. In a couple of days I am heading to Arizona for a couple of months. I will bring one of these balls with me and give it a try. He he he how exciting!
This project is actually working inside a balloon. If you want to create more substantial spheres perhaps these would be better. There is also the lacy ones and the open ones
Just be aware of using the proper mix for the application. There is a HUGE difference in the ready made mixes out there. Good Luck
Hi Barb!
I have been trying a project similar to this and am having troubles. Each time i go to take the balloon off, the egg shatters to pieces from the balloon deflating and “crushing” it. I am wondering if it would be the material i am using? I am using a quickset concrete, do you think i should try cement? Is there a difference?
Thanks in advance!
Is your concrete the same as what I have used? This one has worked well for me and has always amazed me at it’s strength. The other problem could be that it is too thin. Cement is usually falsely referred to when meaning concrete. There is portland cement in most concrete mixes. I don’t think it would work as a sole ingredient. I have had to add layers after opening but have not had them shatter. The balloon usually does rip across slowly so I can be careful with the opening. Which mix are you using?
I have not tried that one yet. I am using Quikrete – quick setting concrete. It has lots of rocks and gravel in it, could this be part of the problem? Yours looks pretty smooth in the photos. Mine is more lumpy.
I love your eggs! Do you need to seal them for plants or to leave outside?
I find that rapidset concrete is more dense that the usual concrete so I don’t seal it. Just don;t let water collect or freeze in it.
I’m looking for your doll head planter DYI. Can’t find it. Please let me know.
Oh, it’s here Any of the concrete projects are under the ‘Home’ menu > ‘Concrete’. Have some concrete fun!
Today was the day I’ve been waiting to do this project all week and I’m sad to say it was a complete flop. I had to add more water than indicated because otherwise it was just a paste so I think I may have used the wrong cement. It never became hard. Can you please tell me which cement exactly I should use??? Thanks in advance, Addie
Yes, this project is very much dependant on the right concrete. (the link is in the post) RapidSet Cementall is a very unique fast-setting concrete that is quite strong at a thin consistency, I’m afraid I have not found another quite the same. You can also get it here If you can’t find it there are other similar orbs that are made ‘inside’ a mold. Maybe it would be better to start with another project if you are new to concrete… I hope that helps! Happy concreting! Fails are all part of the game and we learn from them 😉
Hi – I’d like to make some ‘eggs’ to put votive candles in. Is the gold latex paint you use inside the form ‘fire proof’ or should I use battery operated candles?
Thanks-
I have found that a votive has a small flame and tends to be far from an edge so I have not had any issues, but I’ve only used them outdoors. Concrete does not burn and probably disperses the heat as well. To be the safest, a battery light is best and can also be a flickering kind.
Are these durable enough for a cat to climb/play on??
I think they may get rolling and banging together and since they are poured from the inside tend to be thin. If you add layers and stabilize them from rolling/falling I think they would be fine. You could also make these in shapes that you like. Good luck!