Tips & Tricks for Concrete Crafting
For many the idea of being creative with concrete brings visions of huge metal mixers, shovels and mess. Let me show you some of my Tips and Tricks for Concrete Crafting so you too can make concrete art, like baking a cake.

It’s no mystery that I have quite the love for working in concrete. My fascination with casting things from molds started as a little kid and led me to this. Before I knew it I had used a bunch of different Concrete mixes, made my own and created quite the slue of original projects. I learned from ‘hands-on’ experimentation to create my own easy system that makes it all mess free and simple.
“What is concrete?”
The term ‘concrete’ is for a material that is created from a mix of aggregates with a cement that is activated with water. Once it goes through it’s reaction, which usually involves some heat production it ends up almost as hard as stone. Lime-based Portland cement is commonly used and mixed with gravel (crushed stone) to make the typical mix used for your sidewalks. But as a crafter I often use a finer mix but there are still a few to choose from.
Question: “What concrete mix should I use?”
I get many questions about this. If you get the wrong mix, it will usually not work. Many of my projects are designed with the character of the mix. This post will also help explain the pre-made mixes.
Portland Cement
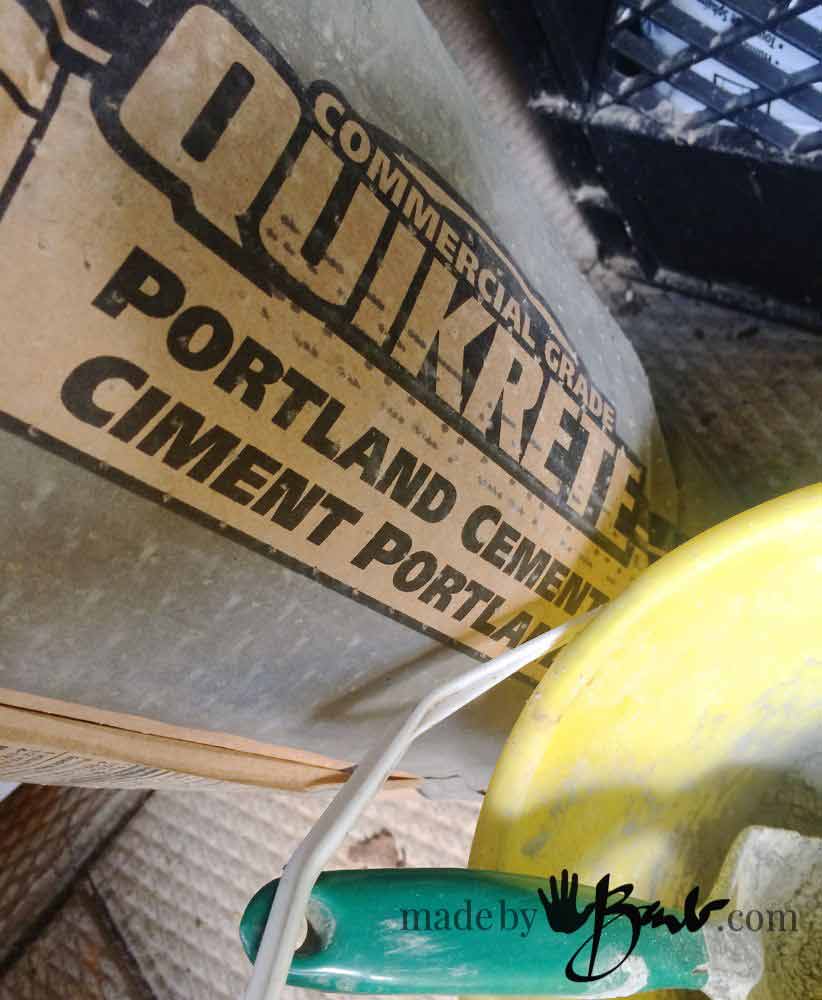
Portland Cement can be purchased as is so that you can make your own mix by adding other aggregates. It is also used when making ‘HyperTufa’. Depending what you mix into the portland cement will determine the final characteristics. It can range from just sand to perlite, peat, vermiculite, paper, styrofoam and probably more I’ve yet to discover.
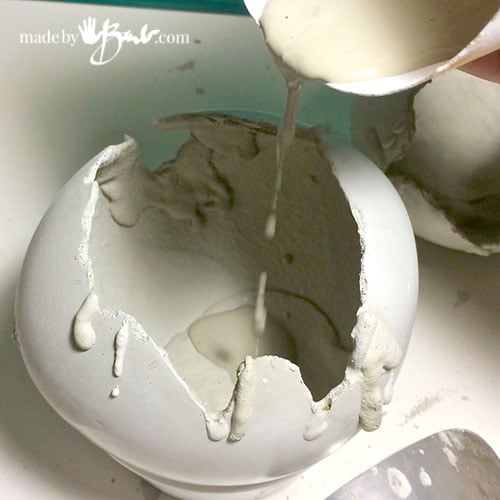
If you want total control, this would be your choice as you are starting from ‘scratch’. I use this when making the CONCRETE ORBS using some dipping of yarn, and also the STEP SPOOK. In those cases the fabric fibres are the ‘aggregate’. Paper can be used as an additive and works quite well as in my PAPERCRETE BIRD

Sand Topping Mix
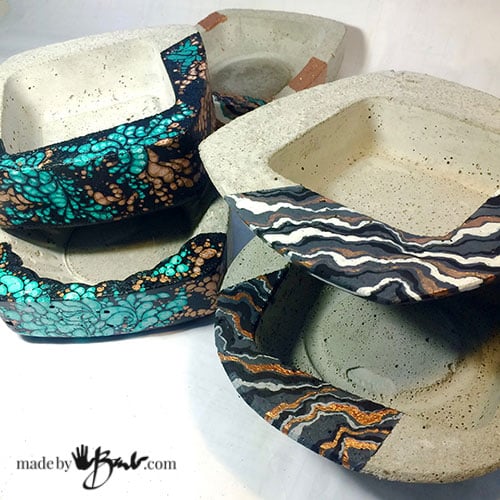
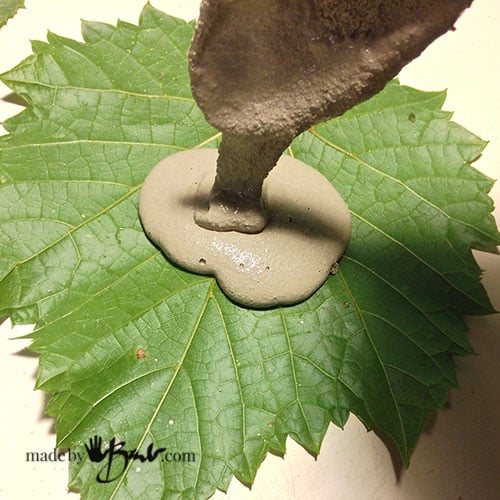
Sand Topping Mix is also one of my favourites. It is a simple mix of portland cement and sand. This inexpensive mix is meant to be used at less than 2″ thickness so it was perfect for the STEPPING STONES which were my first concrete adventure many years ago. They still grace my garden and are aging nicely. It has a fair strength when used at thicknesses over 3/8″ and worked well for the making of BOWLS and LIVE EDGE BOWLS and casting LEAF PLANTER. If you are new to concrete this is a good way to experiment. It can not be used at a very thin thickness.
Setting time is not accelerated and will need a good 24 hours before unmolding.

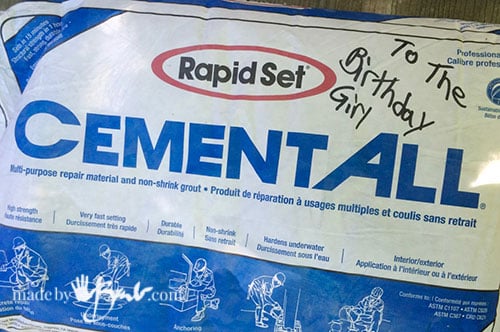
RapidSet Cementall
Rapidset Cementall is a brand name for a quickset concrete. This mix acts quite differently as it sets really quickly (5 minutes) and can be unmolded in 1 hour. I love this mix since I am impatient, but also because it is super strong! I experimented and have used it at 1/8″ thick with good strength (obviously not walking on) as it my LEAF COASTERS. This mix can be used at different consistencies such as pourable or thicker malleable concrete. This pourability has allowed the ‘slush pouring’ of the CUTE HEADS and the TIN CANS, and even the EGGS. Thicker use has allowed the sculpting of the LEAF CIRCLES and the hilarious SMILING STONES and LARGE FACE SCULPTURE. Even the GEODES and GEODE LAMP used this mix!
There is something about this mix that does make the end product much finer though, as there are many additives to set it quick and add that strength. If you like the more rough industrial look this concrete has less of that since the aggregates are very very (powdered sugar-like) fine. Those are decisions you have to make. It is also more expensive due to those ingredients.


If you would like to see side-by-side comparison of a few mixes visit my post about fast-set and extra strength mixes.

Top’n Bond
Sakrete Top’N Bond is a form of a patching concrete which makes it adhere to existing concrete. It is sometimes called vinyl patch as there are added polymers. It has a good strength at minimal thickness and also some has malleability. The final product does have the coarser texture since there is sand in the mix. It has a medium setting time so it worked well for the GIANT ORBS since they are worked in stages.
“What do I need to Work with concrete?”
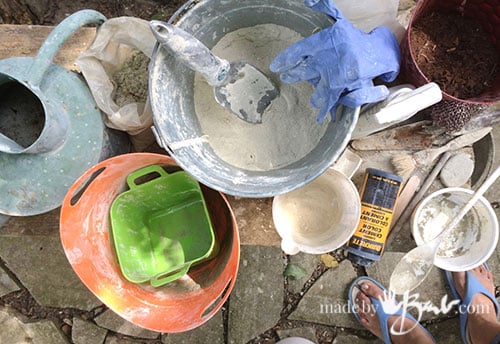
This is a what my collection of concrete ‘stuff’ looks like. It is really quite simple and I have quite the system now.
- Watering Can – is great as it just needs a bit of a tip to dispense, no fussing with a hose.
- Bucket of Concrete Mix and Scoop – keep this scoop dry and in the container to be able to add mix when needed.
- Plastic Mixing Containers – It is best if these are not too rigid (Yogurt containers work well). Wider containers are better for mixing than tall ones.
- Measuring Cup to dispense small amounts of water into the mixing container.
- Rubber or Nitrile Gloves – better quality makes them last longer.
- Dust Mask – rated for concrete silica dust I like my 3M8833 as it has an exhale valve.
- Spray Bottle with water – to mist when adding to existing dry concrete
- Mixing Spoons/Utensils – Plastic or wood
- Concrete Colour – if you would like a darker or tinted colour ( acrylic paints can work as well)
- Optional; Additives – if making a custom mix like Hypertufa or Papercrete; peat, sand, perlite, vermiculite, paper fibres, etc.
- Other Tools – like brushes, sticks, skewers, depending on project
“How To Work with Concrete and not make a big Mess?”

Step #1
Use the scoop and place some ‘mix’ into the mixing vessel
Step #2
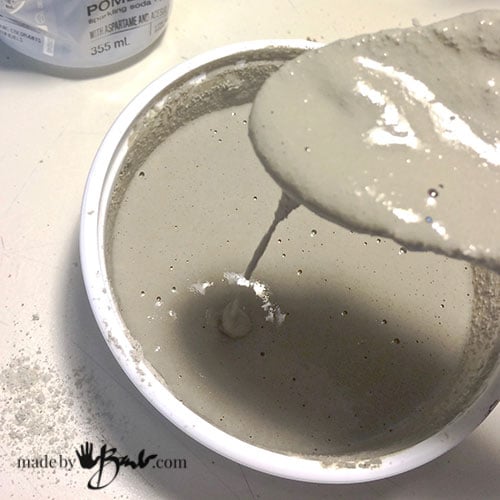
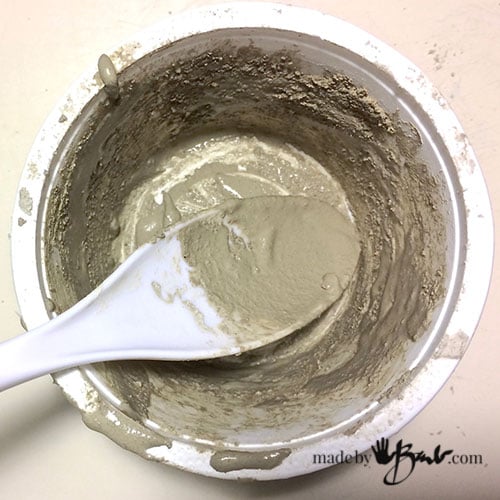
Use the measuring cup to add water slowly, mixing after each addition. The consistency that is needed will depend on the particular project and type of mix. The Rapidset Cementall works better if the water is added first. (each project tutorial also has details) Then follow the instructions to make your ‘great concrete project’.
Step #3
Do not wash anything, just let it set and dry. NEVER EVER wash it down the drain! It’s like NOT doing the dishes… We are not making a sidewalk here, usually just smaller craft objects.

Step #4
Once it is hard, just flex the container and the concrete will chip off. Bang it a bit and it will be clean enough for the next use. I like to use recyclable yogurt containers. Plastic buckets work well if you are working a bit larger scale.

Flex the spoon as well and it will become clean too.

Keep a bucket for all the cast off concrete. It can be used as aggregate later on or other planting uses. No mess or fuss!
“How do I make the concrete stronger?”
There may be times where you need a bit of assurance that your project won’t just crumble into pieces. In the big professional world they use steel rebar rods inside the concrete. We can use other methods of adding some reinforcement.
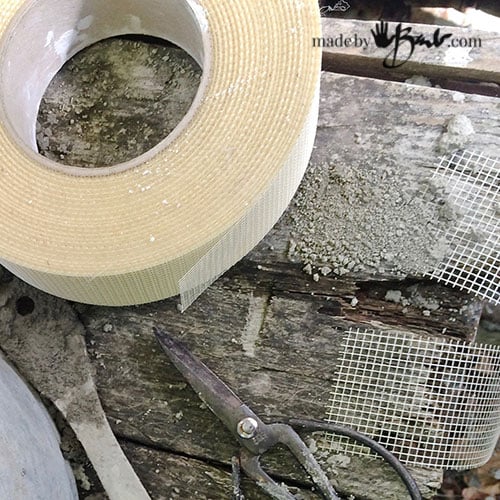
Drywall mesh acts as a reinforcement that can be cut and covered with concrete. If it is visible after curing it can be burnt away with a little torch.

You can also buy reinforcing fibres that are added to the mix. These work great as I have seen pieces that crack but hold together since there is the cross lacing of the fibres.
Anything that does not stretch can act as a reinforcement. Chicken wire, other metal mesh, yarn, wire, even fabric will add strength.
“How do I finish the rough edges?”
I admit, I hate sanding! I do not want to make a cloud of dust! So I design ways to keep that part to the minimum. That is why I like the rustic edges. There are times where you may have mixed a bit too much concrete, don’t throw it away! Make a ‘patty’ on some smooth surface (plastic is best) and let set.

This is now a great ‘sanding disc’, instead of using sandpaper or emery cloth. Also if you work with the pieces wet, there will be no dust and it will work well enough to take off the sharp corners.
I like to come up with projects where the rough edges are part of the design as in the LIVE EDGE CONCRETE BOWLS. That’s an artist’s trick; make any ‘mistake’ look intentional…
Simple Clean up:
Fill a very large bucket with water. If you need to get your hands or utensils clean use the bucket of water like a sink (I keep a rag nearby to dry). The particles will settle and you can use this for a while. When done, pour off the water and let the bottom sludge harden/dry to be knocked out.

So, there you have it! It isn’t as bad as you had imagined?! I hope I have taken away some of the fear of being covered in concrete. It is similar to working with plaster of paris but is much more durable. Go check out all the concrete projects I have and give it a shot! I know you can do it!
See this post before you go to the concrete store…
I love this site of yours Barb! Sadly don’t have the work space–I’ll stick to crocheting..
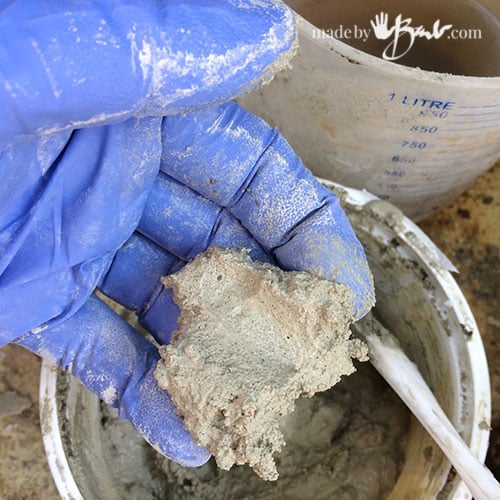
Question: Did you post the picture of a somewhat turgid male member on purpose?
(Top left corner)
Hoot!
Well, I have even resorted to small pouring of concrete in my basement when the weather does not cooperate! The coasters use so little mix that it’s easier than a cake. As for the member, yikes, it’s the thumb of the hand!
I’m looking for a recipe that will resemble cobblestone with the black speckled look.
Not quite sure as I thought cobblestone is just bricks installed as a road surface.
I am VERY new at this. To make the pots or whatever. Do I use sakkrete or make my own.
Also I have noticed they use a kind of slurry at times to cover. Is their a distinct recipe to the slurry. I’ve noticed they just put in concrete??? And sand mix it well ,add water and mix some more. Is this correct
Thank you
This post has links to all the different concrete things to make. Each one uses a specific mix. I don’t like to mix to make my own as buying a pre-made mix is easier and often cheaper. Read through and pick a project! Happy making!
Have you tried acid stains on any of your projects and I’d so do you have a how to?
No, so far I have not. I have been interested though so you may see that someday.
thank you so much
now i have more inspiration
I’ve got tons of ideas for you…
Your the best. Thanks so much.
kathleen
That’s so kind to say! ‘Just spreading the creative way…
Brab, I always love your site, always great ideas. I make concrete leaves using vinyl patch cement and certain leaves always have more “bug holes” in the concrete than others. I pat the wet cement a lot but still they show up. Any suggestions.
If you want really detailed prints maybe a layer of a quickset concrete like the rapidset cementall and then a layer of the other stuff. It is so fine it almost doesn’t even look like concrete. You could add the other layer within the hour. Or make sure it is a tad on the wetter side and really ‘slap-slap-slap’ the first layer. I use sand topping mix for my leaves.
I just found your wonderful site. I’m new at crafting with cement and I LOVE it. Soooo many wonderful ideas to try. Keep them coming please.
Sadly, it is getting close to the end of the season for outside ‘concreting’ here. I will be always thinking up new ‘concrete’ ideas!
Hi Barb,
I have always wanted to try crafting with concrete, but haven’t dared to take the plunge. You help take the mystery out of all the different types of concrete (& availability), best uses and final results. I am making plans for next summer’s project(s). Have you heard of Shape Crete? What are your thoughts on this type of concrete?
Martina (from Waterloo,ON)
Yes, I have heard about Shapecrete! I did want to try it but I was a bit surprised at the cost per amount. It would be well worth it if you are not making a lot. I always like to figure out a cheaper way of doing my arts/crafts (maybe I do too many) and I like the availability for everyone. Maybe the ShapeCrete guys should send me some to test (hint-hint) I used to sculpt with real clay that needed to be fired and that is what it seems like. Honestly. I can’t keep up making all the ideas that pop into this brain of mine… If you try it let me know.
I’ve used the Shapecrete, it’s ok…. My favorite is still the Rapid set, as it seems it is yours too…. the shapecrete isn’t like clay, which I was hoping it would be…. it works best if you have something to mold it onto, doesn’t work if your trying to “freehand”sculpt……
Oh, thanks for letting me know. Yes, I love the RapidSet, so little waiting! Sometimes I pop a load of laundry in and pour a bit of concrete… both done about same time!
You are the BEST Barb. I learn so much from you.👍👏👏👍
That’s so kind! Thanks
Barbmaker,
Thank you for all your great info. I would like your input on a project I haven’t the knowledge to do. I have two outdoor cement flamingos that are falling apart. How can I repair them ? Please advise
Thank You
Isela
Hmmm, sounds like a bit of a patch job? If it is a matter of filling in the cracks to hold it together I think the Rapidset Cementall would work for that. The only issue is that you get good adherence by wetting and perhaps using a bonding agent (buy at hardware/home depot) or sub some white glue. (I’ve heard) The key is not to have the old concrete ‘suck’ the water out of the new add. The beauty of this mix is that sets really fast and is workable. You could use a putty knife or artist palette knife and ‘butter it’ into the cracks. I usually have a spray bottle handy for the wetting. I did that to some cracks in the sidewalk a couple years ago and they have been holding and we drive over it… If you are not sure, do a tiny test on the bottom. It’s all about experimentation. Good luck
I have tried making orb’s by buying glass light balls then breaking the glass. But all the quick cement seems to harden so fast. And I struggle getting it to be level and air bubbles out.. What other type of cement product would you use.. Also do or have you used a vibrating table to help get the air bubbles out?? I have kinda drunk the cement loving cool aide… Thanks so much…. Off to play some more…
Hi There! I don’t make the solid orbs as they use a lot of concrete and need the glass. I make other orbs that are hollow. Then I also don’t need to worry about bubbles so much. Maybe you would like the large ones and you could the quick set concrete for them, and add the layers. They will end up more rough though. If you want to use the glass, then why not use the sandtopping mix. It is a general purpose mix and you can tap and use s tir stick to get the bubbles out. I personally like the bubbles so that it looks like concrete’ not plastic. Good luck!
Hi, I may not be understanding the orb making problem correctly. I made many different kinds and sizes by using old tennis balls, golf balls, etc. All sizes and not much concrete needed.
Yes by coating it? I do similar but take out the ball after use and then I can use again or leave a nice shape like these or like these for candles. The options are endless…
Do you use any kind of sealer?
Well, that is a good question… I personally like the look of aged old plain concrete. I find sealers change the whole nature of the concrete.
Even the neighbourhood driveways that had sealers seem to look worse and need refreshing more than the natural ones. I am always hoping that some moss will grow and make it look even older.
Sealing the inside is sometimes a good idea, but I have yet to find one that I can get in smaller quantities and feel that it would be safe for the plant. Even beeswax feels like it would be a good sealer (works for waxed cloth) and is natural
The Rapidset Cementall is so dense that the water I left in an untreated bowl stayed for days without leaching through. My ‘sandtopping mix’ bowls have been inside over a year and don’t leak, but do need a bit more watering due to leaching.
If you want to buy some, look for a food-safe counter sealer. It would probably make it darker and change the sheen…
I am a first-timer who would love to make a draped fabric “sculpture” out of concrete. I have an old shirt I would like to dip and then hang outside. I need guidance! Thanks!
Oh, sounds like fun! Have you seen this fellow? He is made with draping. When I have used fabric I try to find one that has some texture that will hold the concrete. Just as the orbs were a fuzzy type of yarn. The next thing to consider is what will hold the heavy shape til it is cured and will you be able to get it out? Or leave it in? If using a fuzzy fabric then I use the ‘Portland Cement” since the fabric is the ‘aggregate’. Not sure what shape you are hoping for…
Hi Barb,
I have been wanting to try my hands on concrete Crafting , making hypertufa first (glad I found your website) but couldn’t find Portland cement here in Queensland, Australia. Any substitute?
Thanks a lot!
Edita Walsh
I’m glad that you are starting some concreting. There must be a similar product in your country. I did a quick search and I think this is the same as portland cement. The brand may be different but it is the most important ingredient in concrete mixes. There are also hypertufa groups online that could possibly help you. It is a small world on the internet